Feeds:
Posts
Comments

Posts Tagged ‘history of chemistry’

Golden Apple cover-m

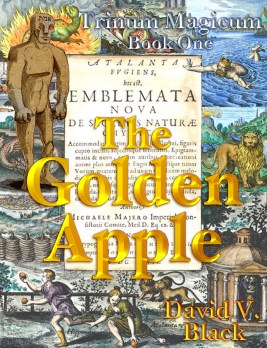
My own cover design for the book I am completing for NaNoWriMo this month (Nov. 2018). It is based on the cover page of Atalanta Fugiens by Michael Maier.

Today is Nov. 1, 2018 and it is time to begin another year of NaNoWriMo: the National Novel Writing Month program that encourages writers to complete at least 50,000 words during November. I will be splitting my writing over four major projects. The first is to catch up and maintain these blog posts here at Elements Unearthed and at my other post: www.spacedoutclassroom.com, where I have been writing about activities and lessons in astronomy education. My second project is to write a series of lesson plans on STEAM education projects for chemistry classes, which I will report on and share here as well. My hope is to create a collection of 20-30 lesson plans that incorporate the arts and history and publish them through the National Science Teachers Association (NSTA). My third project is to write and illustrate a series of young adult (8-14 year old) fact-based books on exploring the world (and beyond) written from the perspective of fictitious youngsters who experience these adventures. It will be largely based on my own travels. The final project is to complete the first novel in my Trinum Magicum series, which I started for NaNoWriMo last year. This blog will describe that project and other silver linings that came during my job hunt last year.

prague-castle-map

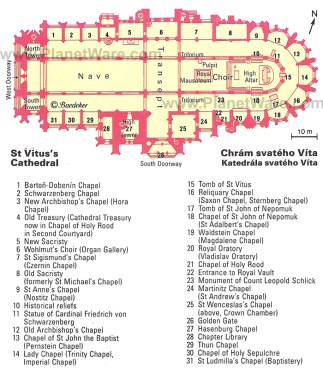
A map of the Hradcany, the castle hill in Prague with St. Vitus’ Cathedral. Most of my novel is based in Prague in 1609 during the time of Emperor Rudolf II.

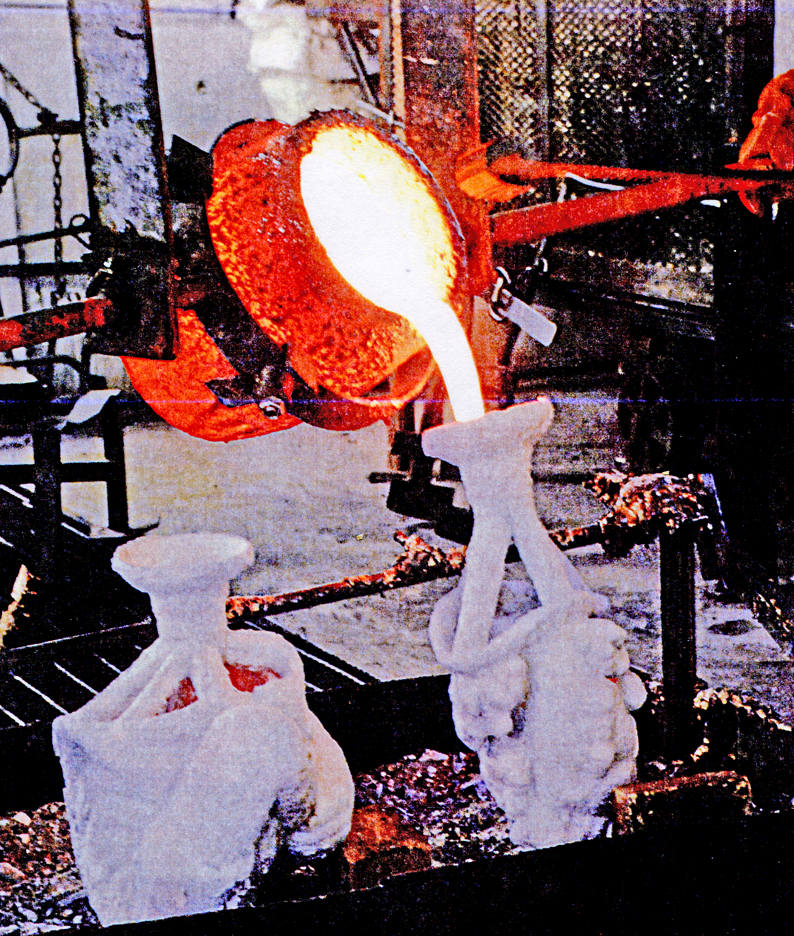
Upon my return from the Teacher Research Data Conference in Washington, D.C., I was faced again with the challenges of my situation. Just two weeks before, I had been laid off from my teaching position at American Academy of Innovation because of budget problems, and now I had to pick up the pieces and somehow find a new position for myself when the school year was already well underway. My situation seemed pretty cloudy and dreary, but for every cloud there are silver linings. Mine came in the shape of unexpected opportunities to fulfill two of my Bucket List items: to be in a community theater production (more on this in the next post) and to start my long-planned Trinum Magicum book series.

maier_emblem_6-s

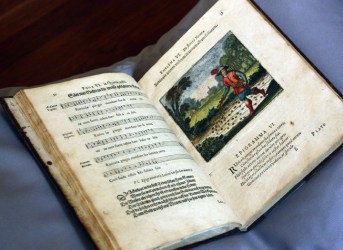
A photograph of Emblem 6 of Atalanta Fugiens, written by Michael Maier and illustrated with engravings by Mathias Merian. The book’s central mystery involves this book, which was perhaps one of the first attempts at multimedia, as it contains illustrations, poems, epigrams, and fugues.

For the first few weeks of October, my priority was to get all of my materials, books, filing cabinets, and papers from AAI put away into my house, as they were all stacked up in my carport exposed to the elements. I had to build a bookshelf, clean out rooms in my house and workshop, and do a lot of sorting and packing, but I finally found a spot for everything. Then I took some time to plan out my goals for the coming weeks as I looked for work. I had to make at least four contacts per week to maintain my unemployment benefits, so that was the top priority. I signed up for quite a few job seeking aggregate sites, went for interviews at Workforce Services, filled out a lot of paperwork, and started applying for jobs.

Prague castle

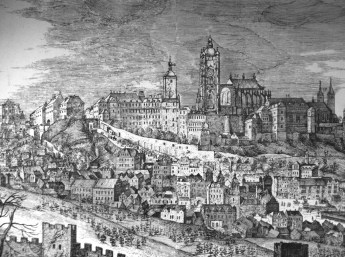
An illustration of what Prague looked like around 1609. The main Hradcany was on a hill with a steep wall in front. St. Vitus’ Cathedral had only been completed to the transept – the nave wasn’t completed until the 20th Century.

One job opening was for an informal science education director at Clark Planetarium in Salt Lake City, which I thought was an ideal job for me (and me for them). 35 people applied, and I was one of the five chosen for interviews. The interview went well, but I could tell that I didn’t have enough large-scale grant experience for what they wanted. They hired another person who had worked as an educator at a planetarium before and whom I had actually met before at The Leonardo museum in Salt Lake. It was disappointing on top of all the other disappointments, but at least I came close (although close only counts in hand grenades, atom bombs, and horseshoes).

st-vituss-cathedral-map

St. Vitus’ Cathedral in Prague as it exists today. At the time of my book, the Choir and Altar and Transept with towers were completed but the Nave was not (until 20th Century), so the cathedral had a truncated appearance.

Feeling down on myself for not getting this job that had seemed so right, I walked to a local bookstore to browse articles on job seeking and just to take my mind off my problems for a while. I picked up a copy of Writers Magazine, and it had an article about a program that encourages people to write novels, a kind of community tracking project called NaNoWriMo, or National Novel Writing Month. The goal is to write at least 50,000 words of a novel in the 30 days of November. It was the fourth week in October when I read this, and I checked out the website and decided to go for it. After all, I finally had the time to complete another item on my Bucket List.

Carbboard model of Prague

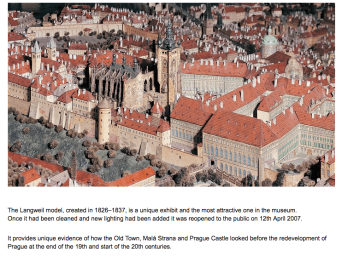
A cardboard model of Prague built in the 1820s-1830s by a man named Langwell. You can see that St. Vitus’ Cathedral is truncated and incomplete, and that the Hradcany castle complex overlooked the old city (Mala Stana) and Vltava River.

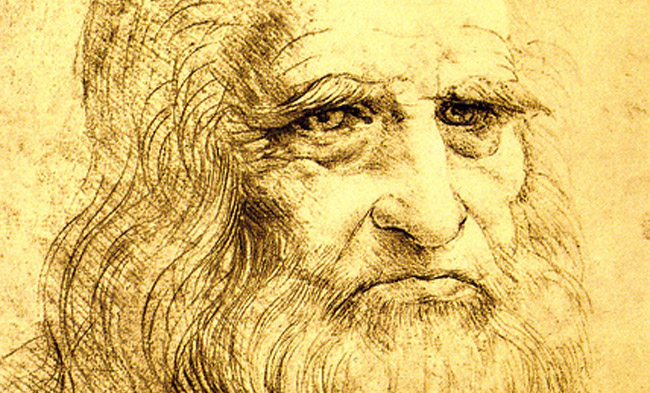
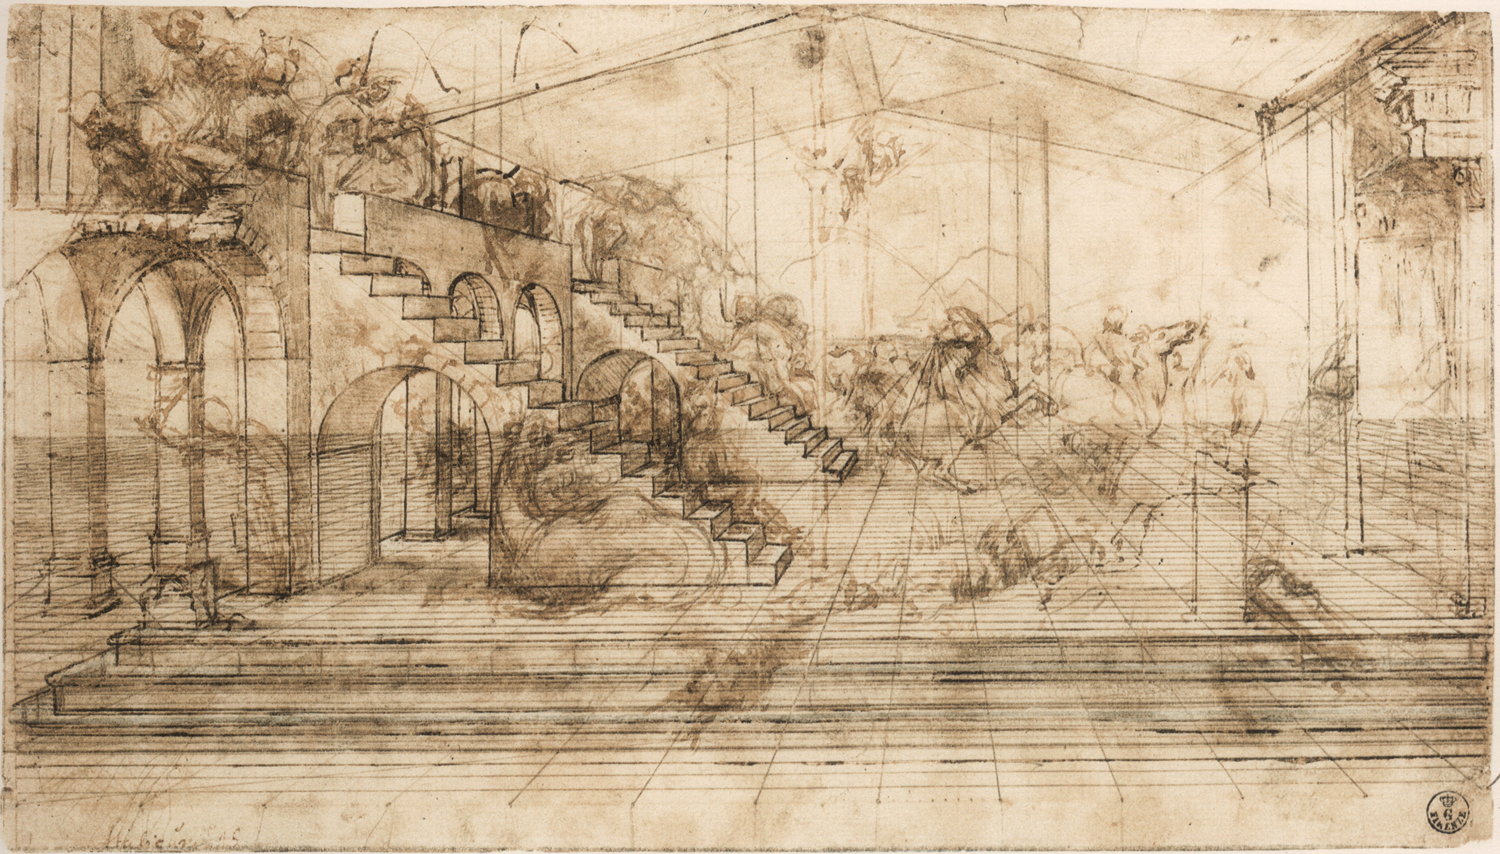
I had an idea for a novel that had been simmering in my head for eight years, ever since I spent the summer in Philadelphia at the Chemical Heritage Foundation. It would be a time travel adventure into the history of chemistry as the protagonists searched for clues to an ancient mystery involving that remarkable book by Michael Maier called Atalanta Fugiens. I started doing research into Maier and the history of the book, and found that he had written it shortly after leaving the service of the Emperor Rudolf II of Prague, so I started researching the Emperor as well. He was a remarkable person living in an incredible city and time, full of many story possibilities including the kunstkammer (Cabinet of Curiosities) he collected, the Voynich Manuscript, the Devil’s Bible, enough artists and alchemists and scientists (Tycho Brahe, Johannes Kepler, Anselmo de Boodt, John Dee, Elizabeth Weston, and many others) to provide a rich cast of characters, and backed up by the intrigue of the events leading up to the 30 Years War. And there was that whole business about the Golem of Prague, too. Great stuff!

Prague_Hoefnagel_

Prague as drawn by Hoefnagel from the early 17th Century.

So I built a plot up, the first book in a series (I hope), and on November 1st started in on writing the novel. This was my second such attempt, the first being a novella competition sponsored by Tor.com in 2015 where I wrote a 39,000 word novella called Dead Stone Lions in about two weeks. That experience was remarkable in that the story wrote itself – minor characters would take on a life of their own and show up as major story points, and ideas just popped into my head as I wrote it, a process that is often referred to as discovery writing. I barely finished in time and had no time for editing, so of course the novella was rejected. But at least I got a first draft done, and will edit it at some future time.

Prague in 1606

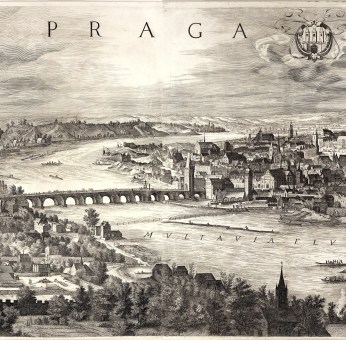
A drawing of Prague in 1606 showing the Charles Bridge across the Vltava River.

For the NaNoWriMo novel, which I titled The Golden Apple, the protagonists discover that Atalanta Fugiens is actually a time machine of sorts. By singing the fugues in the book in three voices (Atalanta, Hippomenes, and the Golden Apple) while holding a crystal, they are able to travel to Prague to the Court of Rudolf II and find themselves in the middle of the machinations of Matthias, the brother of Rudolf who is gradually taking control of the Holy Roman Empire and the Habsburg dynasty. Here is a synopsis I wrote for the book:


In the twisted streets of the Old City, a misshapen monster stomps its way through the fleeing crowd. Jeremy McGowan, science teacher and time traveler, is running for his life . . .

Golem_by_Philippe_Semeria

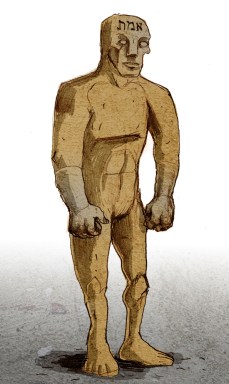
Since my novel is set in Prague in 1609, I have to include a Golem or two. Rabbi Loew, the supposed creator of the Golem of Prague, lived until October 1609.

His fellowship at the Nexus Foundation was supposed to be an escape from the constant reminders of his lost love, not an escape from the legendary Golem of Prague. When he stumbles upon a secret hidden in a remarkable book, Jeremy embarks on a journey with science historians Ankha Zalinski and Benjamin Johnson to the court of Emperor Rudolf II of Bohemia. They hope to solve an ancient puzzle: as a child, Ankha memorized a poem handed down through millennia from her ancestors. It speaks of a Golden Apple, which may be the key to unlocking incredible power.

Emblem 1 color

The first emblem of Atalanta Fugiens, showing Boreas, the God of Winds. In 50 emblems and epigrams, with essays and fugues, Michael Maier laid out the steps needed to achieve the Inner Transformation required to make the Philosophers’ Stone.

Using the legend of Atalanta as their guide, the explorers become the Trinum Magicum, the three alchemical emblems of Paracelsus, on a perilous quest to the past. Pursued by clandestine agents of the Emperor’s brother, Matthias, and hounded by a dark entity from beyond history, they must grapple with the limits of their own humanity. With the aid of Johannes Kepler, Elizabeth Weston, Rabbi Loeb, and other brilliant scholars, they hope to find the Golden Apple, decipher the symbols of a strange manuscript, and prevent a war that will rip Europe apart.

Fire salamander emblem

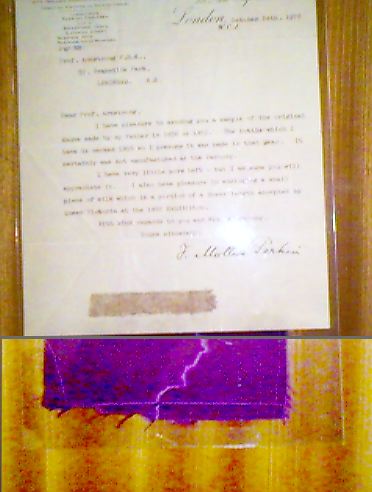
One of the emblems in Atalanta Fugiens, showing a fire salamander. In some books, such as the copy in the Chemical Heritage Foundation in Philadelphia, the first ten emblems have been hand colored to enhance the value of the book.

In this unique tale of historical science fiction, what appears to be magic may simply be a technology beyond comprehension, if only the travelers can find it in time.

I made my goal, barely, with 50,380 words by November 30, although I had to write 7000 words that last day. Since then, I have taken the book on to over 68,000 words and it is now about halfway done. It is a different experience than Dead Stone Lions, as I’ve had to plot it out much more carefully and think through the details of the whole book series in order to lay a good foundation. It even required writing a long poem full of chemical history references. But it is certainly coming along. Now I need to get back to it, with the goal of finishing it up during this 2018 NaNoWriMo so I can edit and submit it by the end of the year. My goal is to write one of these each year. If I do succeed in finishing it, then in December I will work editing and finding an agent or a publisher that wants to print and market it.

Golden Apple progress chart

This is my progress chart through the month of Nov. 2017. I made my goal of 50,000 words just barely (by 380 words). It required a major sprint of 7000 words on the last day!

We see many space operas, biological science fiction, future tech explorations, and so on but chemistry science fiction is rare. I can only think of Asimov’s The God’s Themselves, which has some chemistry in it (radioactive tungsten, anyone?) but is also about physics, entropy, multiple universes, and space colonization. So I hope my book finds an untapped market, with its references to real alchemists and history and some fascinating mysteries to solve in a remarkable time and place.

NaNo-2017-Winner-Badge

My badge for making my goal of 50,000 words.

So there are seldom any challenges we face that do not have some benefits for us, including silver linings and opportunities that we may never have accepted if we weren’t in dire straits. These changes in direction are never voluntary, but they can be for our good. Sometimes you have to look for the windows that open up when the doors are closed in your face. Sometimes they find you, like these two opportunities that dropped in my lap. I am glad I had the courage to accept them.

Emblem 50 color

Emblem 50 from Atalanta Fugiens, another enigmatic symbol. Reading through the translations of the Latin and German epigrams and discourses doesn’t help all that much for understanding the book. Maier wrote in symbolic language that used many of the ideas behind Rosicrucianism. It will take me years to write all the books; maybe by the time I’m done I’ll have a clearer idea of what he was trying to say. Or maybe not . . .

Read Full Post »

dyed-yarn-balls

Dyed merino wool yarn using natural dyes. Top left: Rabbitbrush. Top right: Cochineal treated with ammonia. Bottom right: Indigo. Bottom center: Cochineal treated with citric acid. Bottom left: Madder root.

As a follow up to our inquiry lab to develop the best formulas for dyeing cloth with natural dyestuffs, I ordered some Kona 100% merino wool yarn and several yards of untreated cotton fabric from Dharma Trading Company along with indigo, cochineal, sandalwood, and madder root dye powders, and some mordants and other chemicals needed for these dyes.

As we finished up before Winter Break, I started testing these dyes and experimenting with variables to get an initial feel for how well the yarn and cotton work. My first test was rabbitbrush, as I had collected boxes of flowers before the color completely faded in October. I simmered a skein of yarn in aluminum sulfate (alum) powder as a mordant for an hour while boiling the rabbitbrush blossoms, then transferred the hot yarn into the dye bath. It accepted the color nicely.

Next came madder root. I used the same mordant bath and prepared a dye bath by soaking the madder root bits directly in hot water and letting it simmer while the yarn was in the mordant bath, then filtered the madder solution through a sieve before dyeing the yarn. The color did transfer, but was lighter than I had expected but a very nice light salmon orange. I used the same solution for about two feet of the cotton, but it turned out even lighter. Increasing the concentration of the dye bath didn’t seem to help.

cochineal-dyeing

Dyeing With Cochineal: The dye bath is bottom left. I crushed the cochineal shells in a mortar and pestle, then placed them in the sieve (top center) and boiled in the hot water. The yarn is simmered in the mordant (alum powder – to the right), then simmered in the dye bath, then rinsed out (in the sink in center).

With some confidence that the wool yarn was working well, I crushed some cochineal shells in a mortar and pestle and placed them in a sieve and the sieve into boiling water to make the dye bath. This was to prevent the shells from sticking to the yarn, which would have been hard to get off. I wanted to make a multi-colored skein, so I dyed part of the skein in plain cochineal, then added citric acid to the dye bath which made it turn bright red – the citric acid worked much better than the vinegar or tartaric acids had. It made a skein that varied from deep red to burgundy color. The color stuck to the yarn extremely well.

orange-cochineal

Dyeing cotton cloth in cochineal treated with citric acid (orange) and ammonia (red to purple). Unfortunately, these colors were not colorfast. Upon rinsing, they changed back to neutral pink.

I then took the same cochineal bath (it was quite strong) and added ammonia to turn it from red to purple, again making a variegated skein. I divided the bath in two and had part of the skein simmer in the purple, part in a pot with more citric acid added back. I think I diluted it too much. Part of the skein between the two pots didn’t get much dye and remained a lavender color. The final skein varied nicely from lavender to burgundy to magenta to purple. The cotton swatch I tried was left in the citric acid side (which was now orange) over a weekend and it looked nicely orange when I took it out, but the differences in color washed out when I rinsed them – the pH neutralized. I need to figure out a way to set the color in cotton, maybe by not rinsing it before placing it in a drier. The wool yarn retained the varied colors nicely upon rinsing and washing in the laundry.

dyed-skeins-2

Skeins of dyed yarn before untangling. Some skeins were dyed a solid color, others were variegated.

Then I tried the tricky one – indigo. I had purchased the sodium hydrosulfite, used to reduce the blue indigo to the leuco state where it dissolves and penetrates the cloth. I followed the suggested steps from my research, but ran out of time to finish the process as a fire system sprinkler pipe burst outside the school and we had to evacuate while the fire department came to fix it. I turned off the hot plate quickly and grabbed my stuff, because it was the end of the day before Winter Break. I didn’t want to wait for the all clear, so I just went home. It took me a few days to get back to school, what with preparing for Christmas and shopping, cleaning, and cooking sugar cookies with my sons, etc. The yarn and cotton had been soaking for days. By the time I rinsed everything out, the cloth and yarn were a deep blue. I think I used to much indigo powder – this stuff is strong. The cloth washed out to a light blue and after washing the yarn, it faded as well but had a nice variegated color scheme.

After Winter Break and during the start of my second semester STEAM class, we tried out one more skein dyed with walnut shells and marigold flowers. I had some marigold blossoms I picked off my flower patch right after the first deep freeze in December and had dried them out. It died the wool a golden yellow, but I tried variegating the skein using walnut shells and hulls, but the brown color washed out to an ugly tan in both the cotton and the wool yarn. A student brought in black walnuts, but the result was the same after several attempts. I tried concentrated madder dye on part of the skein, but it didn’t work well, either. I think the marigold prevents other dyes from overdyeing. Perhaps other mordants would work for the walnut. It never got as dark as I expected. So the marigold skein is my least favorite – kind of a dirty yellow. More experimentation is needed here.

failed-experiment

Experimenting with marigold dye (middle), madder root (right), and walnut shells (left). If the colors had remained this intense, it would have been OK. But the walnut shell and madder rinsed out and were much lighter upon washing.

I met Katie Wirthin, an education specialist from the Natural History Museum of Utah, when I was presenting my STEAM session at the NSTA STEM Forum in Denver last summer, and she asked if I was interested in teaching a workshop at the museum this year. We had communicated back and forth all fall, and once I finally had my Teachers for Global Classrooms online class done (more on this in a later series of posts), I was able to teach a workshop at NHMU. The week I was scheduled to teach it to about 23 teachers, they had a power outage and had to postpone the class for a week. The next week only eight people came, but it turned out well. Katie had gotten all the materials and as usual I tried to do too much in the two hours. We did marbled paper, iron gall ink (except I forgot to bring the tea bags – they were able to scrounge some green tea in their cafeteria which actually worked far better than the regular brown tea – you could really see the black pigment form). The final activity was dyeing cloth – we used terry cloth swatches, and it worked well but we ran out of time. She still has much of the supplies left, as it was designed for more people. We will probably run the workshop again on a Saturday for three hours.

dyeing-with-sandalwod

A student dyeing a swatch with sandalwood dye using a tin (II) chloride mordant. Notice the dark orange color.

Now that I have six skeins of yarn dyed, my wife has untangled it all and rolled it into balls so she can crochet a sweater from it. I’m not sure if I want the marigold color or not, but experimentation is part of this process. It might be an epically ugly sweater, but I don’t care. I will wear it proudly.

spinach-dye

Some green dye extracted from spinach leaves.

My STEAM students are beginning the lab again, and one student is using sandalwood for the first time. She used tin (II) chloride as a mordant, and the color turned a deep orangish brown, so as soon as I get more skeins of merino wool yarn, I will dye one with sandalwood. Another one is using spinach leaves for a green dye, and we’ll see how that goes. We need to order elderberry plants or leaves for another green color (it might take a while to grow the trees), and logwood for purple to black. There is still so much to experiment on before I post the final recipes. We still have to figure out how to improve the walnut shell dye. But we’ve learned a great deal so far, and I’ll report on my second semester class in a few weeks as we continue to experiment. This is what inquiry is all about.

yarn-balls-2

The skeins untangled and rolled into balls for crochet. My wife will make me a sweater from these. The cotton swatches will be turned into a patchwork quilt of our school logo.

dyed-skeins-of-yarn

Skeins of dyed merino wool yarn. Clockwise from top left: Cochineal treated with citric acid (red), rabbitbrush (yellow), indigo (blue), cochineal treated with ammonia (purples), and madder root (orange).

Read Full Post »

Bronze horse on display at Adonis Bronze in Alpine, Utah

Bronze horse on display at Adonis Bronze in Alpine, Utah

As part of my unit on the history of chemistry, I wanted my students to experience an ancient art. I have written before that, in my opinion, there were three major threads that led to modern chemistry: Greek Matter theories (more on that in my next post), Alchemy, and Artisans. Some of the art forms and technologies invented during Roman and Medieval times are still practiced today in essentially the same fashion, such as stained and blown glass, ceramics, sword making and blacksmithing, jewelry, weaving and fabric dyeing, and some types of metallurgy.

Hoop Dancer, a bronze statue on display at Adonis Bronze

Hoop Dancer, a bronze statue on display at Adonis Bronze

We have some newer tools and a better understanding of how matter works, but in many cases the old techniques haven’t changed much. For example, a glass blower from the Middle Ages would have no problem working in a modern workshop. We have better heating sources for the glory hole and annealing oven, can use a blowtorch to keep areas hot, and have substituted wet newsprint for the smelly leather they used to use. But that’s about all that’s changed.

Blacksmith statue at Adonis Bronze, made with the lost wax technique.

Blacksmith statue at Adonis Bronze, made with the lost wax technique.

I did some searching and found there were several workshops in our area that do bronze casting using the lost wax technique known from antiquity, with a few modern additions. I arranged for my chemistry and 3D modeling students to tour Adonis Bronze in Alpine on Friday, Nov. 7, 2014.

Sketches of horses by Leonarda Da Vinci in preparation for creating the bronze horse.

Sketches of horses by Leonarda Da Vinci in preparation for creating the bronze horse.

Students were prepared by discussing how the lost wax technique works and giving examples, such as Leonardo Da Vinci’s huge bronze horse for the Duke of Milan, Ludovico Sforza, that was never finished. He had devised a method for making the horse in a single bronze pour, and he drew extensive sketches. He even made a full-scale clay model of the horse which stood 24 feet high. He was collecting the bronze for it when war broke out; the French invaded northern Italy and attacked Milan in 1499. The Duke was forced to melt the collected bronze down into cannons, but the French still won. They used the clay horse model for target practice.

Da Vinci's sketch for how he would pour the bronze.

Da Vinci’s sketch for how he would pour the bronze.

A 1977 National Geographic article on Da Vinci included sketches of the lost horse, and a retired American airline pilot named Charles Dent dedicated his art collection to the project. A foundation was created and an artist named Nina Akamu was hired. She used Da Vinci’s original sketches to create a new plan for the horse. Billionaire Frederik Meijer helped to fund the project, and two full-sized horses were cast in 1999, 500 years after the original was supposed to be done. One is at an outdoor museum in Grand Rapids, Michigan and the other stands outside the racetrack in Milan. A smaller scale version is located in Allentown, PA, the home of Charles Dent.

Completed horse statue in Grand Rapids, MI

Completed horse statue in Grand Rapids, MI

We carpooled up to the foundry and began in their main exhibit hall. We divided up into groups, and I handed out cameras to each group so we could record everything and eventually make a video.

Adonis Bronze foundry in Alpine, Utah

Adonis Bronze foundry in Alpine, Utah

The modern version of the lost wax technique has quite a few steps. First, an original model is built out of oil-based clay over the top of an armature, or wire frame. For larger sculptures, a smaller model is created then scanned digitally into 3D. It is scaled up on the computer, then a physical version is cut out of foam using a 3D milling machine.

Yours Truly being attacked by a dragon. It was modeled in 3D on a computer and cut out of foam with a milling machine at Adonis Bronze

Yours Truly being attacked by a dragon. It was modeled in 3D on a computer and cut out of foam with a milling machine at Adonis Bronze

Sometimes the foam model is all that is needed. For example, at last summer’s Fantasy Con in Salt Lake City, a 30-foot tall dragon was built out of foam pieces and assembled and painted. The dragon was designed and cut here at Adonis Bronze. They also made large swords and shields and other display pieces, some of which were in the hallways here.

Foam milling machine used to cut the pieces for the dragon.

Foam milling machine used to cut the pieces for the dragon.

Once the original model is done, it is coated in a silicon rubber gel to make a negative mold. That gel, colored blue, is coated in plaster to reinforce it.

Clay sculptures used as original molds for the bronze statues.

Clay sculptures used as original molds for the bronze statues.

A reddish-brown colored wax is melted and kept bubbling in vats. It is scooped up with metal pitchers and poured carefully into the silicon mold to coat the inside and make a thin layer. The final bronze statues are usually not solid, as that would take too much bronze. They are usually less than ½ inch thick.

Balboa Bars - vanilla ice cream dipped in melted chocolate and dipped in nuts or sprinkles.

Balboa Bars – vanilla ice cream dipped in melted chocolate and dipped in nuts or sprinkles.

The flexible silicon is then pulled away from the wax positive. Any imperfections are fixed and wax cups and sprues (spouts or channels) are added to direct the flow of the bronze to all parts of the mold. The silicon molds are stored for future use in case extra copies of the statue are needed.

Clay model for Wingless Victory statue.

Clay model for Wingless Victory statue.

To create another negative mold that will hold the hot bronze, the wax positive is dipped into a thin ceramic slurry which coats the outside and inside of the hollow pieces. The slurry-coated wax is then dipped in sand. The sand pot has air blown up through it so that the ceramic slurry can be quickly inserted and coated.

Silicon rubber mold for Wingless Victory

Silicon rubber mold for Wingless Victory

It’s kind of like making a Balboa ice cream bar at Balboa Beach in southern California. There, a chocolate or vanilla ice cream bar (like the wax positive) is dipped in a chocolate coating, then immediately dipped into nuts or sprinkles while the chocolate is still liquid. Here, the wet slurry is dipped into sand, then dipped into liquid cement and allowed to dry. This ceramic/cement negative mold is hard enough to withstand the hot bronze without cracking. Vents are also added so that air can escape as the bronze is poured in.

Vats of melted wax ready to pour into silicon molds.

Vats of melted wax ready to pour into silicon molds.

The molds are placing upside down in an oven and heated to melt out the wax, which is collected and re-used. This leaves a hollow area for the bronze. The molds are then placed into a kiln and heated to the temperature of the molten bronze, about 2100 ° F (1200 ° C). The bronze is melted in a blast furnace inside a balanced crucible. The bronze casters wear thermally insulated suits and carefully pour the bronze into the heated ceramic/cement molds.

Pouring hot wax into the silicon rubber mold.

Pouring hot wax into the silicon rubber mold.

Once the bronze and molds cool, the mold is broken off and the bronze pieces are “chased” – the cups and sprues are cut off along with any extra bronze that might have leaked around the edges of the mold.

Removing the silicon rubber from the wax positive.

Removing the silicon rubber from the wax positive.

If the statue is large and made from separate pieces, the pieces are then assembled together using welding torches and metal staples. Sandblasters are used to smooth the seams and staples so the surface appears continuous.

Wax mold after chasing, with the halves of the mold combined and cup and sprues (distribution channels) added.

Wax mold after chasing, with the halves of the mold combined and cup and sprues (distribution channels) added.

To get the right finish and colors in the bronze, the statue is sent to a room where chemicals (acids, bases, finishes, etc.) are added to create a desired color. Sometimes the color is created by heat treating – the bronze, which is an alloy of copper and tin, will take on a range of purple and red hues simply by heating areas to just the right temperature with a blow torch. The final coloration is called a patina. The surface is then waxed to preserve it from oxidizing.

Coating the wax with a ceramic slurry to make a negative mold.

Coating the wax with a ceramic slurry to make a negative mold.

The final step is to add a base, usually of wood or marble, then prepare the statue for shipping and display.

Coating the slurry in sand. Air blown up through the sand to make it easy to coat the slurry.

Coating the slurry in sand. Air is blown up through the sand to make it easier to coat the slurry quickly.

It was a fascinating tour. I asked many questions, and got some great things on tape. They were not doing a bronze pour today, so at some point I need to get back to videotape that. They were nice enough to give me a packet of photos showing a statue of a woman going through the entire process. I scanned the photos and created a Powerpoint slideshow, which I am linking to here: Adonis Bronze slideshow-s

Cement-sand-clay slurry casts with wax inside. Notice the sprues that distribute the bronze once the wax is melted out.

Cement-sand-clay slurry casts with wax inside. Notice the sprues that distribute the bronze once the wax is melted out.

I am amazed at how many of these steps haven’t really changed from Da Vinci’s time (or earlier – some examples have been found in Israel that date to 3700 BCE). He did not have silicon rubber to make the negative mold from the clay, and so a direct technique was used. A core of clay was dipped in wax and the wax carved into a final shape.

Melting the wax out of the mold. This is the

Melting the wax out of the mold. This is the “lost wax” step. It leaves a hollow for the bronze to fill.

Sprues were added and the whole thing buried in a compacted sand pit with drains in the bottom. The wax was melted out by heating the sand from the sides or underneath, leaving a clay core supported by rods and a hollow negative space surrounded by hot sand. The bronze was then poured in, allowed to cool, and the whole statue dug out and filed and polished to its final shape. How Da Vinci would have accomplished this with a 24-foot high horse is beyond me.

Pouring the molten bronze into the pre-heated ceramic/cement molds.

Pouring the molten bronze into the pre-heated ceramic/cement molds.

At some point I hope to find a way to duplicate this process on a small scale using pewter or another alloy with a low melting point. I know small heated crucibles are available to melt pewter. Now all we need is a way to re-create the lost wax technique to make the molds.

Assembly of the Wingless Victory statue. Large pieces are welded and stapled together, then smoothed and sandblasted to remove seams.

Assembly of the Wingless Victory statue. Large pieces are welded and stapled together, then smoothed and sandblasted to remove seams.

Perhaps we can carve the sculptures out of wax and coat them with plaster-of-Paris, then melt out the wax. We would have to be careful to not dehydrate the plaster. Or perhaps the molds could be made with wet clay and fired, then filled with metal. It would be a challenging project. If anyone has done something like this, please let me know.

Acids, bases, metal salts, and heat are used to create different colored patinas on the surface.

Acids, bases, metal salts, and heat are used to create different colored patinas on the surface.

Wingless Victory on display in the showroom at Adonis Bronze

Wingless Victory on display in the showroom at Adonis Bronze

Feather dancers, a statue on display in the showroom of Adonis Bronze.

Feather dancers, a statue on display in the showroom of Adonis Bronze.

An elk and Mark Twain. Notice the differences in the patina colors on the elk.

An elk and Mark Twain. Notice the differences in the patina colors on the elk.

Other clay statues. They are built around a wire and metal rod armature.

Other clay statues. They are built around a wire and metal rod armature.

Read Full Post »

Rabbitbrush, Ericameria nauseosa. The flowers make an excellent yellow dye.

Rabbitbrush, Ericameria nauseosa. The flowers make an excellent yellow dye.

Last September, in a conversation with our biology teacher, I learned that common rabbit brush makes an excellent yellow dye for natural fabrics. It was used by Native Americans and early pioneers to dye cotton, linen, and wool. I grew up thinking of rabbit brush as a useless scrub brush that grew in unused corners on our farm where the soil had high alkali or clay or low drainage. It is often seen along road cuts and other areas where the soil has been removed or disturbed, and is one of the first plants to colonize bare soil.

Rabbitbrush grows in poor soils and is one of the first plants to colonize disturbed areas.

Rabbitbrush grows in poor soils and is one of the first plants to colonize disturbed areas.

Intrigued by our conversation, I did some research. Its Latin name is Ericameria nauseosa for good reason: up close, the blossoms smell rather nauseating. In the early fall, it blooms with tight bundles of bright yellow flowers that can be steeped in boiling water and used for dye. I also found that it contains around 6% latex rubber in its stems and leaves to protect it from dehydrating. If a commercial method could be devised to extract the latex economically, it would be a valuable plant to grow and harvest. I had no idea.

Students prepare a dye bath of sunflower petals.

Students prepare a dye bath of sunflower petals.

I decided to try rabbit brush dye in my chemistry class. My course schedule for chemistry is already overflowing with more activities and labs than I can accommodate in our limited classroom time. To add a new activity would mean giving something else up. So adding a fabric dyeing lab would only be possible if I used the activity to fulfill more than one objective. I decided it would make a great inquiry lab to introduce the scientific method and meet Utah’s Intended Learning Outcome objectives. These ILOs include teaching the history and nature of science and the scientific method across all science courses.

Cloth soaking in a boiling dye bath made of rabbitbrush blossoms.

Cloth soaking in a boiling dye bath made of rabbitbrush blossoms.

I already had a number of large pieces of undyed fabric, including cotton, linen, silk, and polyester. I scrounged or ordered other types of dyestuffs, including walnut shells and cochineal. I cut the fabric into small swatches and purchased washing soda (sodium carbonate), cream of tartar, and other possible mordants. I also brought in a number of large pots from home.

Dye bath made from walnut shells. The original bath was the dark brown color seen with the shells, but it was accidentally thrown out. The second attempt was lighter.

Dye bath made from walnut shells. The original bath was the dark brown color seen with the shells, but it was accidentally thrown out. The second attempt was lighter.

On the first day of the activity, I introduced the process of science and the idea of variables and how to create an experimental design to control them. We then took a short field trip to a road embankment about ¼ mile from Walden School where a good stand of rabbit brush was growing. We collected several bags full of yellow blossoms. The students then divided into lab teams and designed their own experiments.

Samples of cochineal dye solutions. Cochineal is a sessile insect that lives on prickly pear cactus in Mexico and South America. It is collected, dried, and crushed to make carmine dye.

Samples of cochineal dye solutions. Cochineal is a sessile insect that lives on prickly pear cactus in Mexico and South America. It is collected, dried, and crushed to make carmine dye.

We boiled the rabbit brush blossoms, some black-eyed susan petals we collected along the way (commonly called sunflowers in Utah), and walnut shells in water. The cochineal shells were ground up in a mortar and pestle, releasing a deep burgundy liquid (carminic acid). The group that tested cochineal added varying amounts of tartaric acid to stabilize the color and create a brighter red. Each group tested both synthetic and natural fibers. Some groups tested mordants, which set the color by opening up the fabric fibers. Some groups tested different times in the dye bath, or different temperatures. In each case, they tried to test one variable and keep all the others constant.

Solutions of cochineal (carmine) dye. To create the different hues of red, tartaric acid was added.

Solutions of cochineal (carmine) dye. To create the different hues of red, tartaric acid was added.

The designing, preparation, boiling, and dyeing was done on our second day. It was a Friday before a long weekend, and we discovered an unanticipated variable. Leaving the cloth in the dye baths over the weekend resulted in mold growing in the water and on the cloth. One group testing the walnut shells accidentally dumped out their dye bath, which was a rich, deep brown. They had to start over using the same walnut shells, and the second time the color was much weaker. All of these problems and their effects were noted in the students’ lab notebooks.

The sunflower (Black-eyed Susan) dye bath turned brown when boiled. It also grew mold over the weekend.

The sunflower (Black-eyed Susan) dye bath turned brown when boiled. It also grew mold over the weekend.

After dyeing, we rinsed and dried the cloth swatches. One team took their swatches home and washed half of them several time in order to test the color fastness. In order to get numeric data that could be analyzed statistically, we compared the color by scanning the dried swatches into a computer and using the Eyedropper tool in Adobe Photoshop to click on three areas of each swatch, then record the RGB values and average them per swatch. The HSB values (Hue, Saturation, and Brightness) were also compared.

Finished swatches after dyeing and drying. The pink is cochineal, yellow is rabbitbrush, even tan is walnut, and uneven tan is sunflowers. Undyed cloth is also shown for a control.

Finished swatches after dyeing and drying. The pink is cochineal, yellow is rabbitbrush, even tan is walnut, and uneven tan is sunflowers. Undyed cloth is also shown for a control.

The students drew their own conclusions based on the variables they were controlling and wrote up the results in their lab books, answering a series of questions I gave them to help them consider what they had done. By the time we finished, we had spent about five days of class time, which was quite an investment but well worth it. We followed up by discussing how dyes are done commercially, other types of natural dyes such as indigo and madder root, and the invention of aniline dyes derived from coal tar such as Sir William Henry Perkin’s discovery of mauve dye in 1856.

William Henry Perkin, who discovered the first synthetic aniline dye (mauveine) at age 18 in 1856.

William Henry Perkin, who discovered the first synthetic aniline dye (mauveine) at age 18 in 1856.

Some notes for improving the lab for next time: I need to make sure we don’t leave the dyes over the weekend, and I want to use wool as a natural fiber in addition to cotton, linen, and silk. I tried looking for undyed and untreated wool, but the hobby stores only carry the mostly synthetic brands that are dyed white. Next time I will have to see if any of my students have access to natural wool yarn, or order it directly. I would like to dye untreated yarn in each color and crochet hats or scarves from it. I don’t want to mess with indigo, as that is quite a process, but I will order some madder root and other natural dyes.

A letter from William Henry Perkin, Jr. and  sample of silk cloth dyed with mauveine, the first aniline dye made from coal tar derivatives. It is a much brighter color than we usually associate with mauve today.

A letter from William Henry Perkin, Jr. and sample of silk cloth dyed with mauveine, the first aniline dye made from coal tar derivatives. It is a much brighter color than we usually associate with mauve today.

Finally, I would like to find a way to stabilize the dyes (perhaps by adding vinegar, etc.) so that mold won’t grow, then use the natural dyes for tie-dyed shirts. It would also be fun to make a dye out of purple cabbage juice, soak a cotton shirt in it, then treat it with squirt bottles containing mild acids and bases to change the color of the fabric like a pH strip, then set the colors by heat treating.

Read Full Post »

Self portrait of Leonardo da VInci

Self portrait of Leonardo da VInci

Ever wonder where ink comes from, how it was invented and how it is made? I do. Most of the ink we use today for printing newspapers or drawing is called “India” ink (although it was invented in China). It uses carbon black, or soot, for the pigment. But before this ink formula reached Europe, artists and scientists used a type of ink based on iron known as iron-gall ink.

Original drawing by Leonardo da Vinci using iron-gall ink

Original drawing by Leonardo da Vinci using iron-gall ink

In July, 1984, I had the opportunity to travel to Europe with my family. Among many works of Renaissance art, I saw a display of original drawings by Leonardo da Vinci in Florence. There were plans of statues he was commissioned to cast, sketches of human anatomy, and designs for fantastic devices. One thing that caught my eye was his artistic ability; how well he could draw directly using pen and ink. I remember wondering where he got his ink from, which had turned brown with age. Now I know the answer, and I’ve turned it into one of my favorite activities in chemistry.

Alchemical manuscript by Sir Isaac Newton, at the Chemical Heritage Foundation

Alchemical manuscript by Sir Isaac Newton, at the Chemical Heritage Foundation

Iron-gall ink was used for about 1400 years and only lost favor in the mid 1800s when India ink replaced it (because it was cheaper and easier to make and produced a more consistent, longer lasting black). But there’s something to be said for the artistic variety and richness of the shades of iron-gall ink and how it has oxidized with time. The manuscript shown here was written by Sir Isaac Newton with his own homemade ink. It is one page of 24 in the possession of the Chemical Heritage Foundation in Philadelphia and is a series of notes he made on his alchemical experiments (yes, Isaac Newton was an alchemist; in fact, he wrote far more pages on alchemy than he ever did on physics).

Isaac Newton's recipe for iron-gall ink

Isaac Newton’s recipe for iron-gall ink

Newton also left behind his own recipe for ink, as seen here. He started out by collecting galls off of oak trees. These galls are formed when a species of wasp lays an egg in an oak bud, which causes the oak to form a rounded ball or gall around the developing wasp larvae. As Newton’s recipe shows, he soaked the galls in strong ale or beer for a month along with solid gum Arabic. The rotting oak galls would produce tannic acid. The gum Arabic, which comes from the gum of acacia bushes in northern Africa, is used here as a binder to help the ink stick to the paper and keep the pigment in suspension, as well as make the ink have a better flow and consistency. Newton would then mix the tannic acid/gum solution with copperas. This is a chemical with a greenish-blue color that was mistakenly thought to contain copper (hence the name) but is really iron (II) sulfate. The mixture of the iron (II) ions with the tannic acid produced a rich dark brown-black suspension ideal as an ink pigment.

Chemistry students making ink

Chemistry students making ink

The question is how to make similar ink using modern equivalents. I’m not about to soak oak galls in ale for weeks; as it turns out, tannic acid is readily available from strong tea. The iron (II) ions can be produced from steel wool by boiling it in vinegar, filtering the solution through wet filter paper, then adding a small amount of 3% hydrogen peroxide. The trick is to not oxidize the iron too much, or you’ll get too much rust (iron (III) oxide) and your ink will be too brown. Getting a nice black color with just a hint of brown is ideal. If the ink is too thin, then it can be left out to evaporate and make it more viscous. A few drops of gum Arabic are added at the end. You can buy gum Arabic in most craft or art supply stores. If you add too much, the ink will be too glossy when it dries. I originally came across this procedure in ChemMatters magazine (“An Iron-Clad Recipe for Ancient Ink” ChemMatters, October, 2001) and have tinkered with it over the years.

Chemistry students drawing illustrations with their own homemade ink

Chemistry students drawing illustrations with their own homemade ink

So what is the ideal recipe to make the darkest ink? That’s the inquiry part of this lab. I have the students experiment with different formulations to see what the best ratios of steel wool, vinegar, hydrogen peroxide, and tea would be. They also change the time that the steel wool/vinegar mixture is allowed to boil. They begin by learning the old recipe using oak galls, then learn the modern equivalents. From that, they identify variables to test. These factors (or ingredients or procedures) can be listed on the board and divided into comparison groups. Small groups of 2-3 students are assigned to each possibility, such as one group testing the amount of steel wool and its gauge, another testing the strength and amount of the vinegar (kitchen strength or glacial acetic acid) and how long to cook it, another group can test the hydrogen peroxide amount, and another the strength and amount of the tea to add. All of these results can be compiled and compared to create the ideal recipe for making the darkest ink.

Using a traditional drawing pen with homemade ink

Using a traditional drawing pen with homemade ink

The procedure outlined in the ChemMatters article calls for students to boil 200 mL of water, then soak two tea bags in it for five minutes. Meanwhile, a steel wool pad is placed in a beaker with 100 mL of vinegar and boiled for seven minutes. The solution is filtered and cooled to room temperature, then 1 mL of 3% hydrogen peroxide is added. The grayish solution turns a reddish brown as the some of the iron (II) is converted to iron (III) ions (during our Intersession class, I had students use 10 mL of the hydrogen peroxide by mistake and their ink turned too brown). The iron solution and the tea are both added to small cups or vials in equal amounts and stirred together. A few drops of gum Arabic are added. My experience using this recipe produced rather anemic gray ink. As you can see from the illustration of Cai Lun (the inventor of paper) by Evan, with some experimentation you can achieve a very nice dark ink which compares favorably with India ink.

Cai Lun, the inventor of paper. Notice how rich and dark the ink is.

Cai Lun, the inventor of paper. Notice how rich and dark the ink is.

Of course, what my students have done deliberately in one class period took people during the Middle Ages centuries of trial and error to develop, and even by Newton’s time, everyone still had their own recipe. As you can see from the manuscript page, his was a good formula and made dark brown-black ink that has held up well for almost 400 years.

Zach practices daring Elvish calligraphy using homemade ink

Zach practices daring Elvish calligraphy using homemade ink

Once my students create good ink, they go farther and use traditional drawing pens to create illustrations related to the history of chemistry. They pick a material to research, such as glass or steel or armor or stained glass or paper, write up its history and manufacturing, and create their own illustrations with the iron-gall ink. I am showing some of these in this blog. We’ve tried different formulas. In the Intersession Science and Art class I taught in March, we cooked the steel wool for too long in the vinegar and got too much iron (III) ions, or added too much strong tea. The result was sepia colored ink instead of dark black, as shown in the ladybug drawing.

Illustration of armor by Sebastian using iron-gall ink

Illustration of armor by Sebastian using iron-gall ink

Try it out for yourselves! Make sure to use uncoated steel wool. You can get it easily at a hardware store. The other chemicals are household strength and readily found, except for the gum Arabic. Most art supply stores do have bottles of this. It is a bit pricey but a little bit is all that is needed. Two bottles should be enough for a class of 30 students. You will also need some bottles or phials to store the ink (it will last a long time and can be reconstituted with water if it dries out), drawing pens and Bristol board illustration paper, which will be the largest expense of your lab.

Illustrations from my Intersession class where the iron was overly oxidized and turned a sepia color.

Illustrations from my Intersession class where the iron was overly oxidized and turned a sepia color.

As an initial demonstration and “hook”, I use a traditional quill pen and some parchment paper to show how it used to be done. I also demonstrate writing Chinese characters (tsz) using ink sticks, inkwells, traditional maubi (drawing brushes), and rice paper. I’m not very good at drawing tsz, but at least I can show how to hold a maubi and use ink sticks (which are not iron-gall ink – they are “India” ink based on carbon black bound together in stick form, then rubbed with water in an ink well). The “love” character shown was drawn by Miyuki, a Japanese exchange student, on parchment.

Illustration of plate glass making by Nicole

Illustration of plate glass making by Nicole

Drawing of Aristotle using iron-gall ink. I did this as a demonstration project for the chemistry students.

Drawing of Aristotle using iron-gall ink. I did this as a demonstration project for the chemistry students.

Illustration of Chinese fireworks by Richard, made with iron-gall ink

Illustration of Chinese fireworks by Richard, made with iron-gall ink

Alec's Anime drawing. Behind it are pigments we made for watercolors. Stay tuned for that post!

Alec’s Anime drawing. Behind it are pigments we made for watercolors. Stay tuned for that post!

Read Full Post »

Nuremburg Chronicles Empedocles

Anaxagoras and Empedocles, from the Nuremburg Chronicles

In my last post, I showed the statistics of what this blog has accomplished so far. I feel very good about where we’ve been, but now it’s time to describe where I plan on going this coming year.

Given that I am not teaching chemistry this school year, my work on the Elements Unearthed project has slowed down a bit as my attention has been diverted elsewhere by the astrobiology projects (the podcasts and CLOE animations) and other projects that I’ll describe next week. I anticipate teaching chemistry again next year, and I am in the process of writing up a series of grant proposals (all of which have to be done by Feb. 1) that, if successful, will provide funds for purchasing some iPad tablets and probeware that will allow us to do some environmental field research.

fluorite and emerald

Fluorite and emerald crystals in the collection of Keith Proctor

In the meantime, I have a large backlog of videos that I have taped of various mine tours and interviews I’ve done across the country. I need to edit these into final videos and report on them in detail on this site. In order to keep myself on track, I’ve created a schedule for when I’d like to do each video and the topics I’ll cover here as I work on them.

This January, 2012, I am going to start at the beginning and look at ancient chemistry and our knowledge of the elements in prehistoric and early historic times. Then in February, I will start to work on my Greek Matter Theories videos. I have previously created all the script and narration and have even set up the video files and begun the graphics and animations. It’s high time I finished these. I’ll start with an overview of the Greek Ideal in philosophy and science, then talk about Thales and the Miletian School, then Parmenides and Zeno and the Eleatics. In March, I will talk about Heraclitus and Empedocles and the atomic theory and Plato. In April, I’ll move on to Aristotle, Epicurus, and the debate on elements versus atoms, ending in the theology of St. Thomas Aquinus and how atomic theory came down through the Middle Ages.

In May and June I’ll discuss the practical side of chemistry, with a look at ancient crafts, including metalworking, glass making, and other medieval technologies, including a detailed look at Agricola’s De Re Metallica (which I have many photos of).

Dalton molecules

Diagrams of molecules by John Dalton

By July I should have the funding I need in place to start the field research. My plan is to partner with another school, perhaps Tintic High School or Wendover High School, to travel out to nearby mining sites and use the probeware and iPads to collect and record data on soil and water environmental conditions, such as the pH of soil and runoff water near old mine dumps. I’m especially interested in seeing if the EPA efforts to mitigate contaminated soil in and around Eureka, Utah have been successful. I’ve talked about those efforts in previous posts (especially here: https://elementsunearthed.com/2010/06/09/the-legacy-of-the-tintic-mining-district/ ), so I won’t talk about them again now. We would use GPS coordinates and GoogleEarth to set up a grid of sample sites both in and out of the recovered area. We would sample the surface and two feet below ground. It would require several trips and coordination with local students to gather the data, but it is a project that would fit very nicely with the research I’ve already done. If I can get enough money together, I would like to rent a portable X-Ray Fluorescence Spectrometer which can read element abundances nondestructively on the site.

In preparation for all this, I need to make one more trip to the Tintic district in June to photograph and videotape the mines in the southwest area, which were the first mines discovered, including the Sunbeam and Diamond mines. One of my great grandfathers, Sidney Tanner Fullmer, died as a result of injuries suffered in an accident while working in the Diamond mine, leaving my grandmother an orphan to be raised by her aunt and uncle. So this history has a particular interest to me.

One thing I plan on doing, if we can work out a partnership, is to set up an evening in Eureka at Tintic High School where townspeople can come in with photographs and tell their stories of mining and life in Eureka before and after the EPA efforts. We’ll scan the photos and videotape the recollections, then combine all that with the video I’ve already done of the Tintic Mining Museum and local area. Ultimately, my students will help me script and edit a three-part video on the Tintic District, perhaps even done well enough that we could market it to KUED, the PBS station in Salt Lake City.

Tintic load site

Ore loading platform in the Tintic Mining District

The months July, August, and September will be dedicated to this effort and will result in the best documentation created so far on video of the history and present of the Tintic Mining District.

October will be dedicated to Zosimos of Panopolis and such Arabic alchemists as Jabir ibn Hayyan. November will begin a discussion of European alchemists, from Roger Bacon and Ramon Llull through the Middle Ages. I’ll draw on the many photos I’ve taken on alchemical texts at the Chemical Heritage Foundation. The history of alchemy will continue through December, 2012 and on into January, 2013. In February and March, 2013, we’ll discuss the emergence of modern chemistry through Boyle, Priestley, and Lavoisier through Dalton, Avogadro, Berzelius, and others.

In April through June of 2013 we will switch gears and talk about nucleogenesis and the origin of the elements, then the physicists and chemists that have helped us understand the structure of the atom and quantum mechanics. From there, I will probably begin to talk about individual elements and how they are mined and refined, with examples of the mining districts where they come from, such as the history of the Viburnum Trend in Missouri and the lead mines there, or the gold mines of Cripple Creek, Colorado. I really do have enough materials now to keep this blog going for at least two years. And I’ll be gathering more all the time. I will also dedicate occasional posts to my efforts as a chemistry teacher and to science education in general, including my experiences at conferences, etc.

Van Helmont

Portrait of Joannes Baptista van Helmont

Well, it is an ambitious schedule. I hope to do at least one post per week, probably on weekends. I hope to complete at least one video segment every two months or so. Next week, I’ll start us off with an overview of the history of chemistry.

Read Full Post »

Once each year I like to go over the statistics for this blog in detail to see what posts have been the most popular, which search terms are finding this blog, which videos are most watched, etc. I’m not doing this just for an ego trip, but to be able to report the impact this site is having. I have had some very generous sponsors over the three years this blog has been running, especially the American Section of the Société de Chimie Industrielle (which paid for my fellowship in 2009) and the Chemical Heritage Foundation, which provided such a wealth of resources in its collections on the history of chemistry. It was during the time of my fellowship that this blog really began to find an audience, and it has been growing ever since.

Stats for the Elements Unearthed

Monthly Stats for the Elements Unearthed Blog

So here is where this blog stands: As of today, there have been a total of 67,620 visits to this site. As seen by the histogram, the number of visits has shown a definite annual pattern consistent with the school year – visits are lower in the summer when school is not in session, rise in August and September, stay high in October and November, dip a bit in December due to Winter Vacation, then rise again in January and February and peak in March, then gradually decrease as the school year winds down in April and May. This same pattern has repeated for the last three school years, but has grown each year. Last year, in the 2010-2011 school year, my best months were slightly above 3000 visits. Now they are topping out above 4000 and I hope they will hit 5000 by March.

Granted, compared to some popular blogs with thousands of hits per day, 5000 per month doesn’t sound like much. However, I am pleased – this is a rather esoteric blog dedicated to the history of chemistry and chemistry education. The yearly pattern shows that I am reaching my intended audience of high school students and teachers. This is also shown by the types of searches that reach my blog.

Although there are always some unrelated search terms that somehow reach my blog (the biggest ones are “Ocean City, New Jersey” and “Punxsatawney Phil” because I visited both places in 2009 and showed some pictures), by far the majority of search terms are related to chemistry and its history or to science education in general. I’ve gone through the search terms and compiled them into categories, mostly so that I can make plans for the future. Here are the top searches that reach this blog: (1) Greek Matter Theories (3473 searches) with Aristotle, Democritus, and Thales being the biggest ones; (2) the Periodic Table of elements (2288); (3) beryllium (1600); (4) Alexandre Beguyer de Chancourtois (1397) – this is a bit surprising, but apparently my animation of his telluric screw periodic system and description of his work is one of the few sites out there about him; (5) the Tintic Mining District (1041); (6) the history of the periodic table (868); (7) science education (862), especially using iPads in science classes; (8) early modern chemistry (822), including Lavoisier, Boyle, Priestley, Dalton, and Newton; (9) alchemy (732), with love potions, Khunrath, Basil Valentine, Zosimos, and Maier the highest; (10) water and wind turbines (618); (11) strange attractors (586) – this is another odd one, since I only mentioned it once, but it was in my most popular post; (12) mercury (554); (13) early technology (514), such as Roman glass, Pliny the Elder, Agricola, Neri, and others; (14) mining in general (455) – such terms as overburden, open pit mine, ball mill, and headframe; and (15) Cripple Creek, Colorado (315).

Top Posts for this blog

Top Posts for the Elements Unearthed Blog

The videos that I have created for this project are posted on this blog (under the video tab) and on YouTube. The History of the Periodic Table, featuring Dr. Eric Scerri of UCLA, is my biggest hit so far. All parts of this video have been watched a total of 11,474 times as of 1/7/2012. There are even a few derivative works on YouTube that take parts of my video – a section on Henry Moseley, for example – and combine it with parts of other videos with Bill Nye, etc. I’ve had quite a few comments on how useful this video has been for chemistry teachers out there, and I am very pleased with the results so far. There is also a version with Portuguese subtitles done by a professor in Brazil; I’m not sure how many times that has been seen. My separate video that showed only some animations of the periodic table has been watched 416 times.

The second most popular videos have been the two parts on beryllium – its properties and uses, and how it is mined and refined. It has been watched a total of 3219 times, with the separate video on the geology of beryllium watched itself an additional 153 times. The Discovery of Synthetic Diamonds has been watched 745 times and the demonstration of Glass Blowing 754 times. These have been the most popular videos related to this project.

In conclusion, the most important question is: Have I succeeded in my attempt to bring the history of chemistry and chemistry education to the general public, and specifically to teachers and students? All indications, based on these statistics, are that I am succeeding and that that success is continuing to grow.

The last several posts have been about astronomy and space science education, and although some search terms have reached these posts, not many have. For various reasons, not the least of which is that I want to keep this blog focused on my original intent, I am starting a new blog which should be up and running by Wednesday night on space science education and resources for teachers to use now that we are in the golden age of astronomy. I will be doing quite a bit of education outreach on these topics over the next few years, if all goes well, and they deserve to have their own blog. I will include links here once that is ready to visit. I will post to this new blog once per week on Wednesdays.

The statistics also point out which topics have been most popular, and give me direction on what to post about in the future. In my next post, I will give you a schedule of what I intend to discuss over the next year and a half and when I will have the related videos completed. I will try to post once per week, probably on weekends. I have much more material from my fellowship at the Chemical Heritage Foundation that I haven’t shown or discussed here yet, and I look forward to digging into it all. I have also visited many sites related to mining and refining of the elements which I have only mentioned in passing. It’s time to edit all that footage and photos into videos for this site and YouTube. I expect the next few years to be busy, productive, and rewarding and to reach even more people than I already have.

Read Full Post »

Ramon Llull portrait

Portrait of Ramon Llull

As we have studied the history of chemistry for our recent unit in Honors Chemistry, I’ve had my students do a bit of research on what is known and supposed about various alchemists. For example, a student in each of my sections was assigned to research Ramon Llull, the Majorcan alchemist. We started by finding out what is known about the real person. He was born in Palma in 1232 AD, and was a courtier, poet, and womanizer at the court of King James of Aragon, then had a religious epiphany that converted him into a fervent missionary for Catholicism. After a nine-year hermitage and writing many religious tracts, he set off on a series of missionary journeys to North Africa. He was fluent in Arabic and was unusual for his time in that he believed in converting the Muslims through reasoned argument instead of Crusades and the sword. He wrote some of the first works in Catalan, his native language, and died after being stoned in Tunis.

Ramon Llull title page

Ramon Llull title pagae

I also had the students research what is attributed or credited to the person in tradition and later writings, such as Ramon Llull’s alchemical works and his having created the Philosopher’s Stone.

Uroboros from Michael Maier

Uroboros from Atalanta Fugiens

Each student also had to find an image of the person and include it, then take their short report and convert it to simple bullet points to summarize their findings. I’ve now taken those bullet points and turned them into a Keynote/Powerpoint slide show and added their images as well as photos I took last year at the Chemical Heritage Foundation as part of my fellowship sponsored by the Société de Chimie Industrielle (American Section). This is the first time, except for a few progress report blog posts, where I have started to use all the materials I assembled. I am attaching it here, and hope you enjoy going through it and using it in your own classes.

Alchemy_History (Powerpoint)

Alchemy_History (PDF)

Sorcerers Apprentice

A Sorcerer’s Apprentice Masters the Transmutation of Copper into Gold

It was my privilege last summer to dig into the very books these alchemists wrote, and I’m still digesting what I discovered. One result has been my own creation of the White and Red Elixirs and the formation of the Stone itself; in fact, I demonstrated my alchemical prowess for my students by converting copper into silver and then into gold. Several of my students had achieved the inner transmutation sufficiently to successfully direct the Stone’s powers as well, as shown in the photo. (Of course, we really aren’t making gold. This is the old “Alchemists Dream” activity where copper pennies are coated with sodium zincate [using a combination of 6.0 M sodium hydroxide and zinc powder], then heated gently in a Bunsen burner flame to alloy the zinc with the copper to form brass, which looks like gold).

Basil Valentine

Portrait of Basil Valentine

These student-created projects are part of my overall philosophy of science education and the main rational of this Elements Unearthed project: that students learn best when they are actively involved in sharing their knowledge with others. With modern tools for publishing on the Internet through blogs and PDF files, Powerpoints and videos, students now have an audience for their work that is much greater than simply their peers and teachers in class. Tomorrow is the unit test; we’ll see if my theory holds water then!

Read Full Post »

Finally, after months of waiting and effort, the two videos on the history of the periodic table are complete. Here they are:

The title of this video is:   The Periodic Table Part 1: Before Mendeleev

It’s YouTube links are: http://www.youtube.com/watch?v=tQghZkTyqP4 (Part 1-A) and  http://www.youtube.com/watch?v=v-SBTYQNAcM (Part 1-B)


The title of this video is: The Periodic Table Part 2: Mendeleev and Beyond

The YouTube links are: http://www.youtube.com/watch?v=a9tTcOnoNko (Part 2-A) and: http://www.youtube.com/watch?v=7msPp2QYrCk (Part 2-B)

They feature interviews with Dr. Eric Scerri of UCLA, to which I have added my own narration, animations, illustrations, photos, captions, etc. as well as publication artwork and notes by Edward G. Mazurs (see my previous Periodic Tables posts). I have edited the videos into two parts. Part 1 covers the events leading up to Mendeleev’s invention of the periodic table including the work of several precursors such as de Chancourtois, Newlands, Odling, Hinrichs, and Meyer. The second part covers Mendeleev’s working out of his periodic system and the work of his successors, as well as some interesting questions such as whether the periodic table can be entirely deduced from quantum mechanics and the mystery of the Knight’s Move pattern of properties. Part 1 is 17 minutes long and Part 2 is just under 20 minutes. I am very pleased with the results; I’ve been using every spare minute to complete the editing which is why I haven’t posted here for so long. I hope you feel it is worth the wait. Please let me know what you think!

Knights move image

The Knight's Move Pattern: Zn to Sn

In addition to placing them into this specific post, I will set up a separate page on this blog just for the completed videos. So far I’ve done the rationale video in two parts, now these two on the periodic table, and more will follow as soon as possible. The next will be on the mining and refining of beryllium ore, then on glass blowing, and so on. I have materials (video, photos, etc.) for about 30 episodes already and will get more as student teams begin to complete projects. I will also post these episodes to YouTube but will have to cut each part in two since you can only do ten minutes at a time on YouTube. I also plan on creating a completely separate website just for these videos so that I can place my own metadata on them and upload them to Apple iTunes as podcasts. As these steps are completed, I’ll post information here.

Next week I travel to Philadelphia to present this project at the National Science Teachers Association (NSTA) conference. My presentation will be on Saturday, March 20 at 9:30 in Room D-17 of the Pennsylvania Convention Center. I hope to do a few posts from the conference. Looking through the program, I see several names I recognize among the presenters from my years of facilitating educational workshops for NASA, so it will be fun to see them again. I also hope to work out corporate sponsorship of this project, including funding, so that I can finally begin Phase II to have teams of student in Utah, Colorado, and Nevada start to create their own episodes of the mining and chemical manufacturing in their communities. It will be a very busy week getting ready for the conference. I’ll post again in a few days once all the uploading and links have been created to these videos.

Read Full Post »

    This has been a busy week for me here at the Chemical Heritage Foundation. On Tuesday, June 23 I presented The Elements Unearthed project at a Brown Bag Lunch here. It’s pretty informal; people bring their lunches and eat while the speaker presents. I had 20 people attend, which was very nice. I would have been happy with five!. After a couple of technology glitches  I switched to Plan B and everything went well. In addition to talking about the purpose of the project (which is to document the history, uses, sources, mining, refining, and hazards of the chemical elements and industrial materials through student-created podcasts (whew!)), I showed some short samples of the student videos created this last semester for glass blowing and synthetic diamonds. I also showed some animations with narration of a podcast episode I’m working on this summer on the history of atomic theory. You saw a sample image on the last post of Aristote’s hylomorphism. That’s just one frame of a whole animation. But just so that you can have a sneak peak at what will be posted to iTunes and YouTube by the end of August, here is the first video clip of the students’ work:

This is a clip edited and narrated by Alex Anderson, who also took the photos of the rejects at the end of the clip. Videotaping was done by Sam Comstock, Megan Parish, and Bernardo Martinez. My only contribution was some final tweaking of the video color balance and lighting to match up the two cameras and smooth up some transitions; otherwise, the editing is all Alex’s work.  This is a representative sample of the kind of work you’ll see when these episodes are finally posted. I’ll post the samples for Synthetic Diamonds and Aristotle/Empedocles next time.

    Here is the PDF version of my presentation, sans video clips:   Elements_Unearthed_Presentation_6-23-09

    After my presentation, Ron Brashear, the Director of the Beckman Center here at CHF, took me out to lunch. As we talked, I was surprised to find that we knew some of the same people. He had worked at the Huntington Library in California, researching Edwin Hubble’s letters and personal papers. As part of his research, he visited Mt. Wilson Observatory where Hubble did most of his work. I’ve been up there several times with the NASA Explorer School workshops that I did for JPL, and so we’ve both met some of the astronomers and docents at Mt. Wilson and we’ve both visited the Lowell Observatory in Flagstaff, AZ. It is a small world, as they say.

Intersecting Bubbles

Intersecting Bubbles

    I find, however, that as I have these opportunities to work in the science education and science history fields, that I increasingly meet the same people, or at least find that we have the same aquaintances. Academic and scientific circles become increasingly rarefied and specialized, but sometimes they intersect in interesting ways. One of the great privileges of my life has been to meet some of the best minds in several scientific disciplines, including space exploration, astronomy, and now science history. I’m not going to drop names here, but when comparing them to so-called “celebrities” I’ve met, the scientists are the truly great ones, the ones we should be holding up as heroes. My fellowship here at CHF has already helped me to make contact with some of these personal heroes and to at least intersect their circles, and that may be the best part of all for a science groupie like me.

    The other activity I’ve worked on is a Preliminary Proposal for an Informal Science Education grant from the National Science Foundation, which was due yesterday at 5:00. After writing with blazing speed (I hope it makes sense), I wrestled with NSF’s Fastlane submission system and finally hit the submit button a few minutes after 5:00, only to realize that I forgot to justify one of my budget entries – to provide stipends for time and equipment to the mentor teachers/schools of the participating teams. Hopefully that won’t be enough to kill it.  I am submitting the Summary Page and the Project Description here for your evaluation. I would appreciate any feedback you can give.

Elements_Unearthed_Summary_6-25-09

Elements_Unearthed_Description_6-25-09

Read Full Post »

Older Posts »