Feeds:
Posts
Comments

Posts Tagged ‘cochineal’

dyed-yarn-balls

Dyed merino wool yarn using natural dyes. Top left: Rabbitbrush. Top right: Cochineal treated with ammonia. Bottom right: Indigo. Bottom center: Cochineal treated with citric acid. Bottom left: Madder root.

As a follow up to our inquiry lab to develop the best formulas for dyeing cloth with natural dyestuffs, I ordered some Kona 100% merino wool yarn and several yards of untreated cotton fabric from Dharma Trading Company along with indigo, cochineal, sandalwood, and madder root dye powders, and some mordants and other chemicals needed for these dyes.

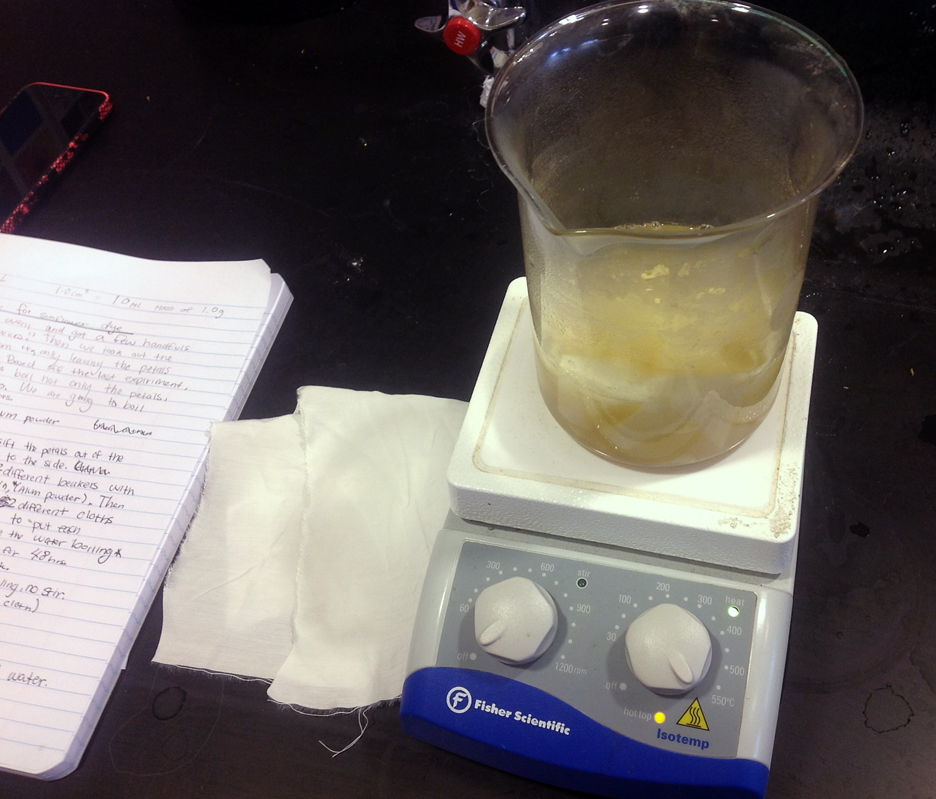
As we finished up before Winter Break, I started testing these dyes and experimenting with variables to get an initial feel for how well the yarn and cotton work. My first test was rabbitbrush, as I had collected boxes of flowers before the color completely faded in October. I simmered a skein of yarn in aluminum sulfate (alum) powder as a mordant for an hour while boiling the rabbitbrush blossoms, then transferred the hot yarn into the dye bath. It accepted the color nicely.

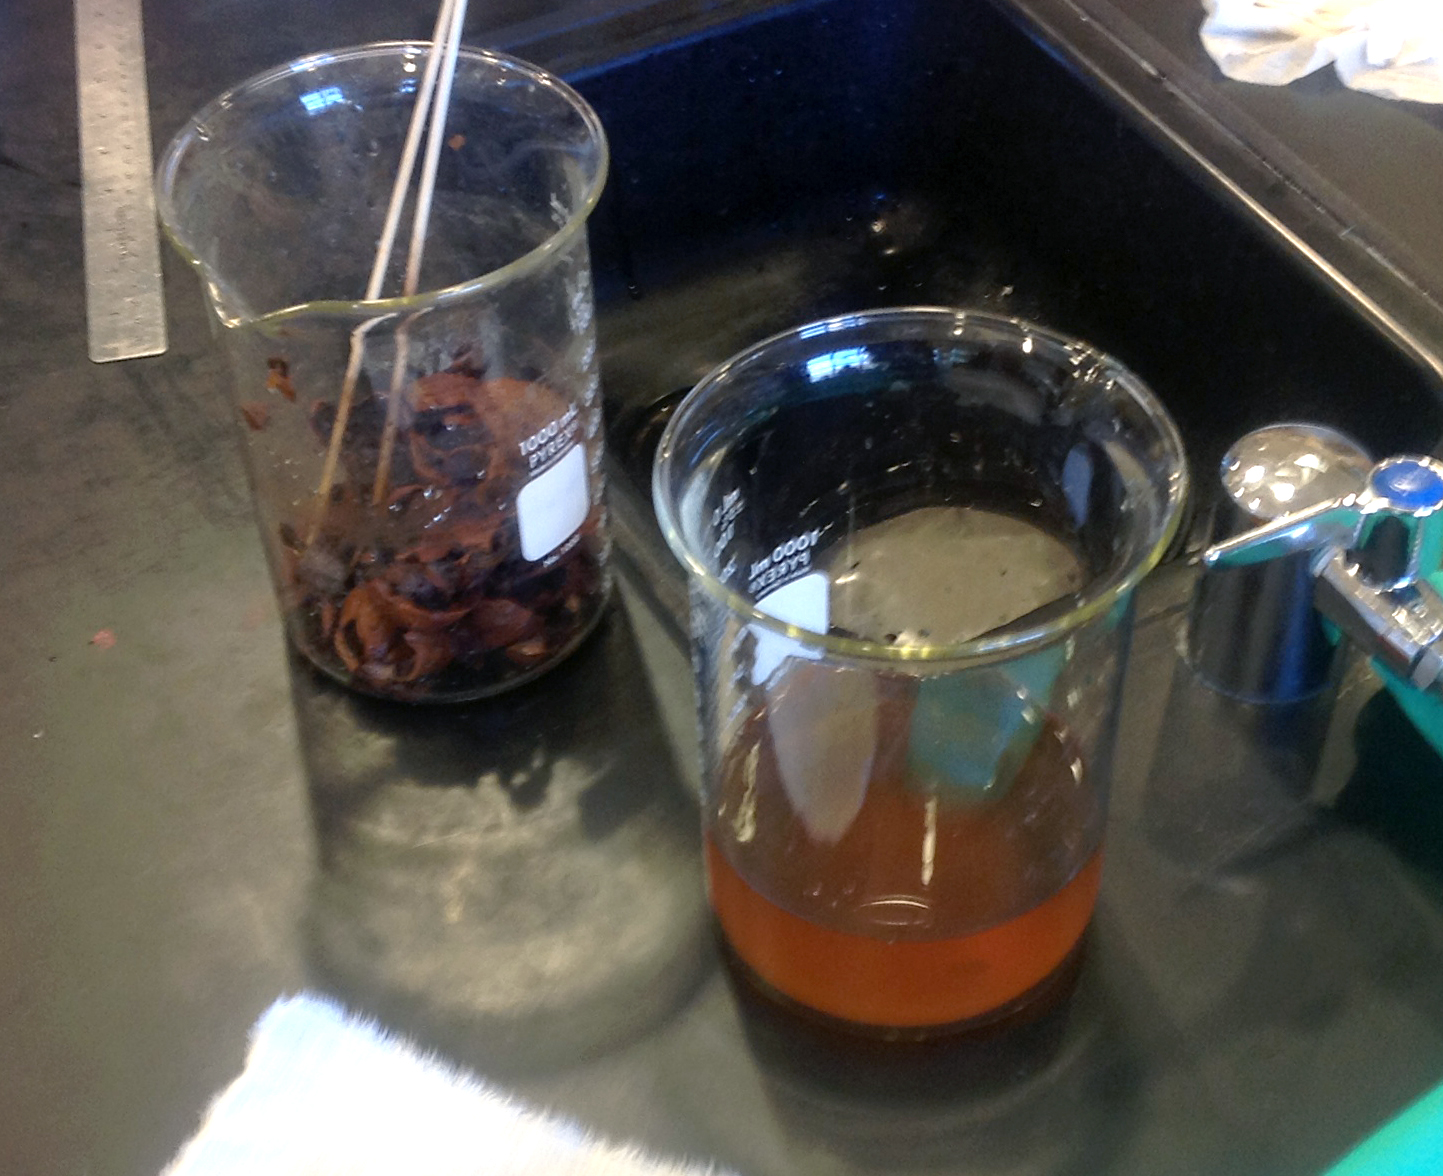
Next came madder root. I used the same mordant bath and prepared a dye bath by soaking the madder root bits directly in hot water and letting it simmer while the yarn was in the mordant bath, then filtered the madder solution through a sieve before dyeing the yarn. The color did transfer, but was lighter than I had expected but a very nice light salmon orange. I used the same solution for about two feet of the cotton, but it turned out even lighter. Increasing the concentration of the dye bath didn’t seem to help.

cochineal-dyeing

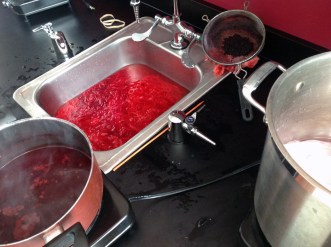
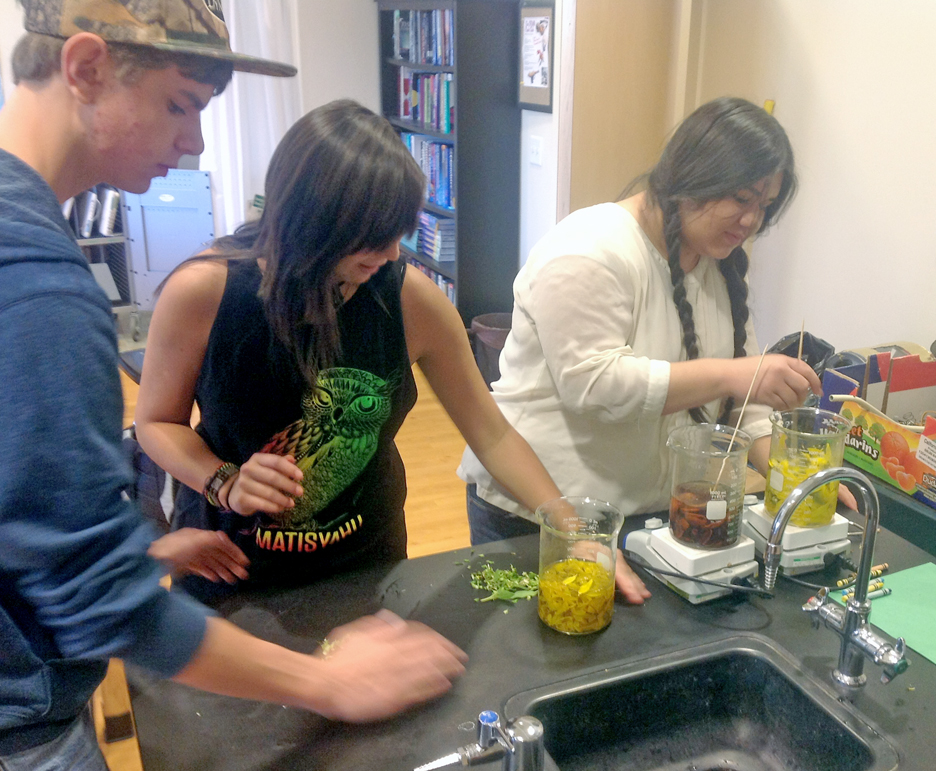
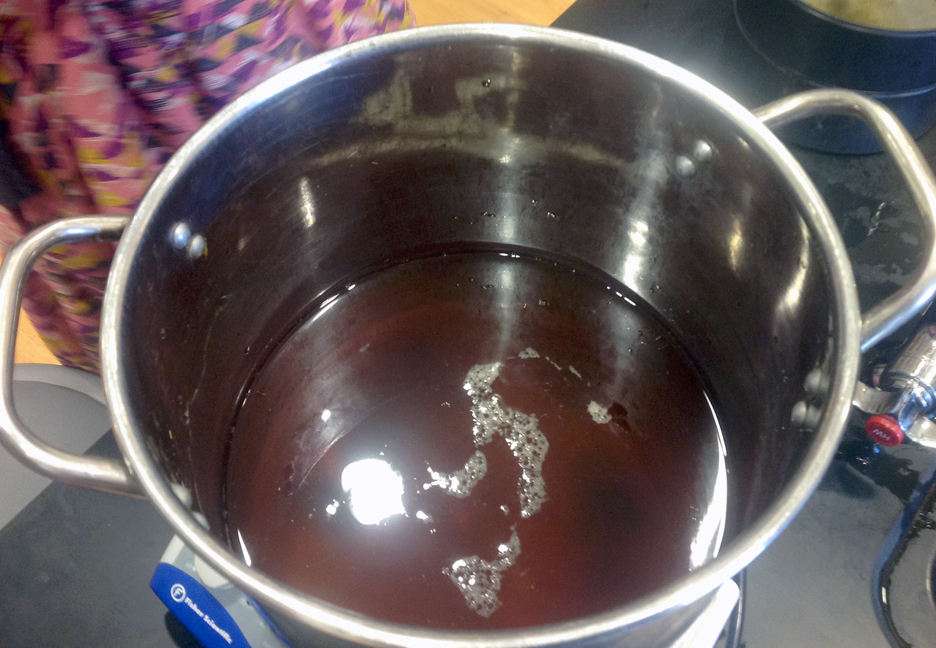
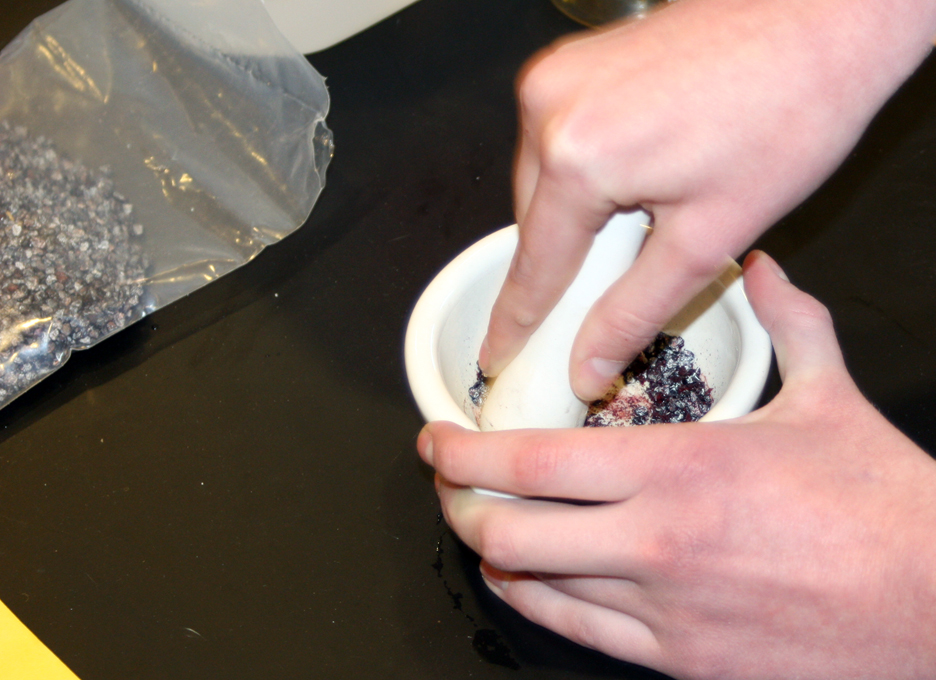
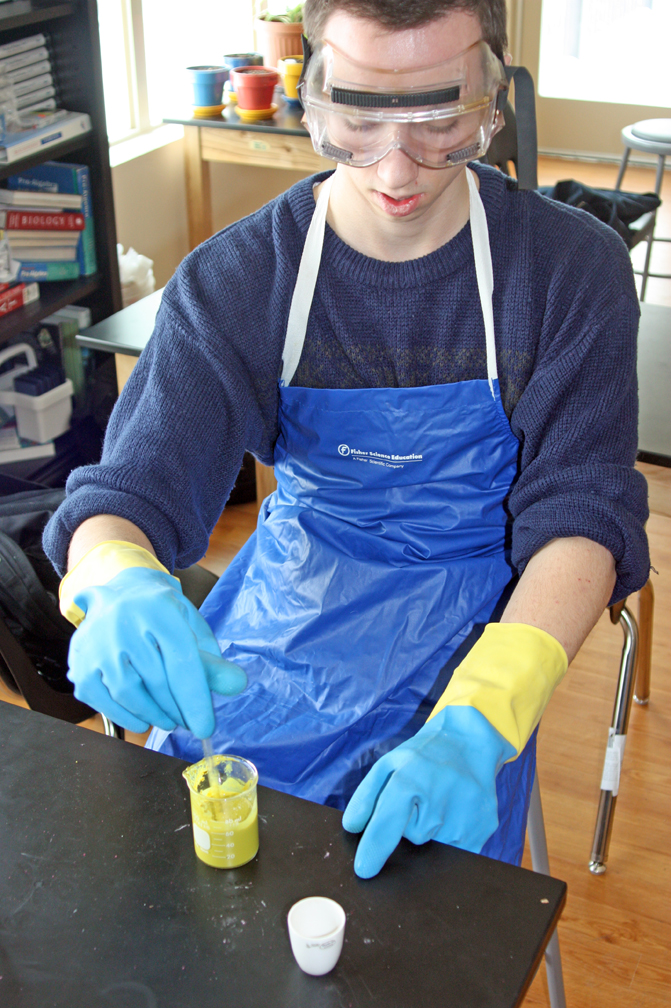
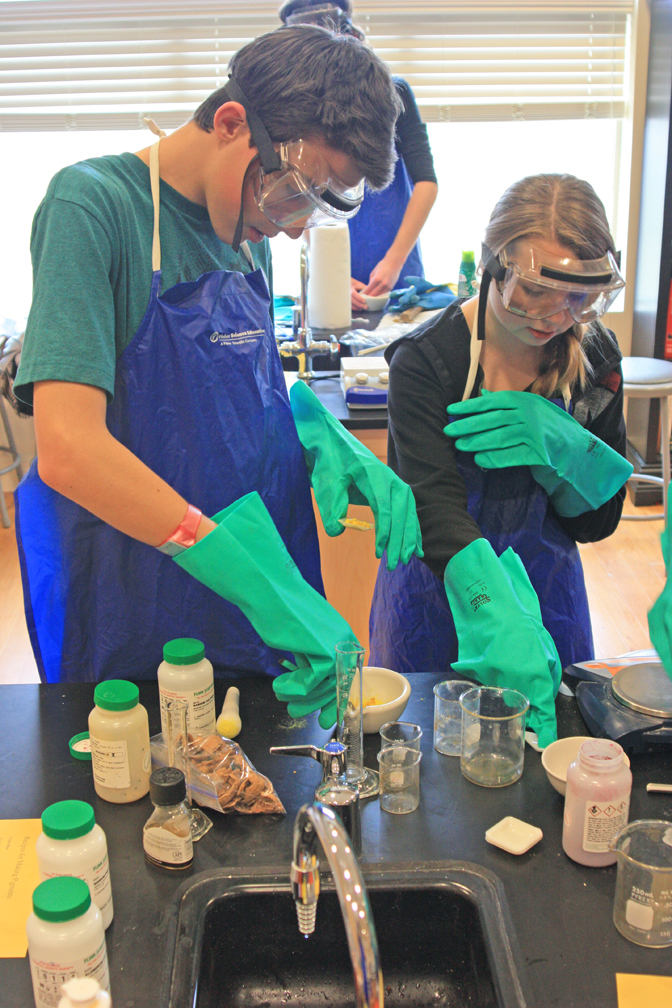
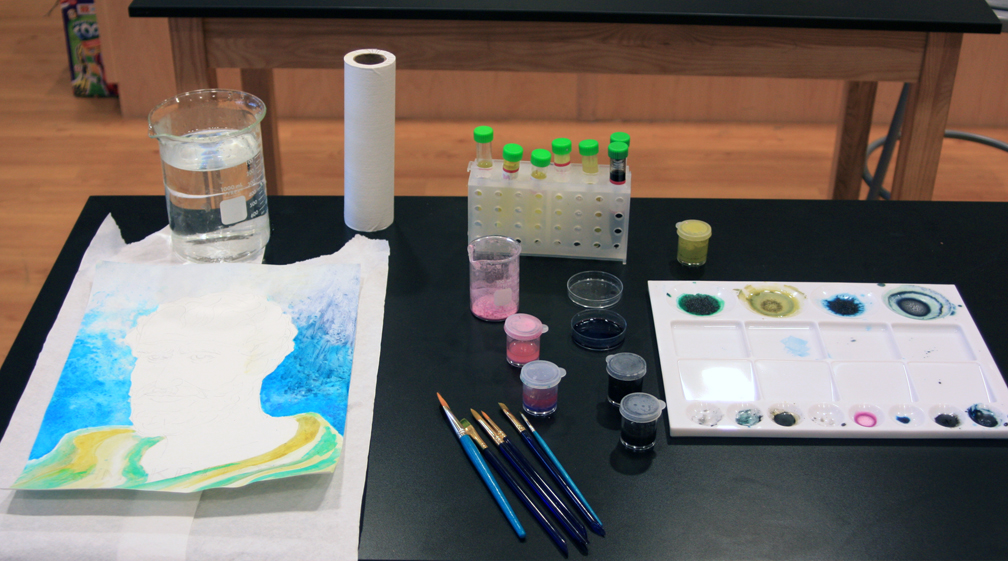
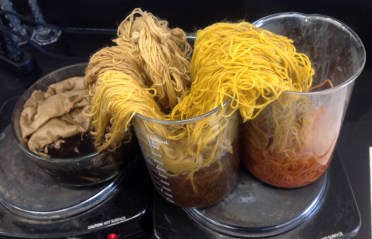
Dyeing With Cochineal: The dye bath is bottom left. I crushed the cochineal shells in a mortar and pestle, then placed them in the sieve (top center) and boiled in the hot water. The yarn is simmered in the mordant (alum powder – to the right), then simmered in the dye bath, then rinsed out (in the sink in center).

With some confidence that the wool yarn was working well, I crushed some cochineal shells in a mortar and pestle and placed them in a sieve and the sieve into boiling water to make the dye bath. This was to prevent the shells from sticking to the yarn, which would have been hard to get off. I wanted to make a multi-colored skein, so I dyed part of the skein in plain cochineal, then added citric acid to the dye bath which made it turn bright red – the citric acid worked much better than the vinegar or tartaric acids had. It made a skein that varied from deep red to burgundy color. The color stuck to the yarn extremely well.

orange-cochineal

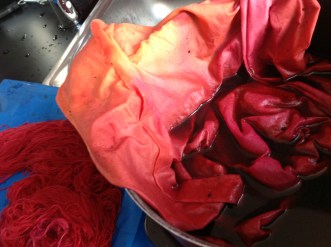
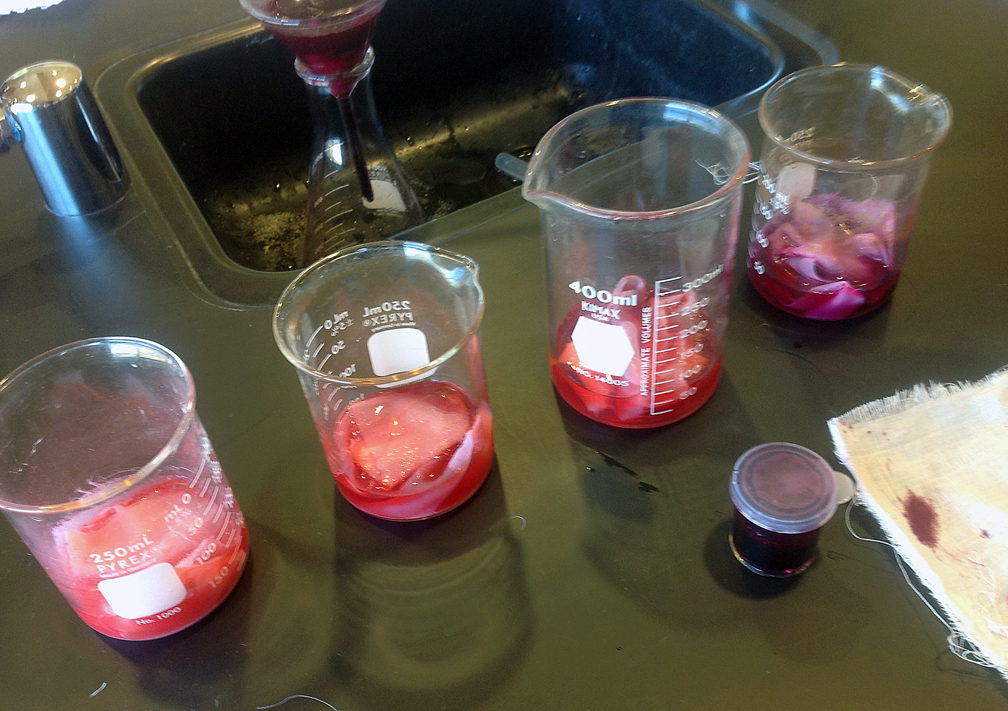
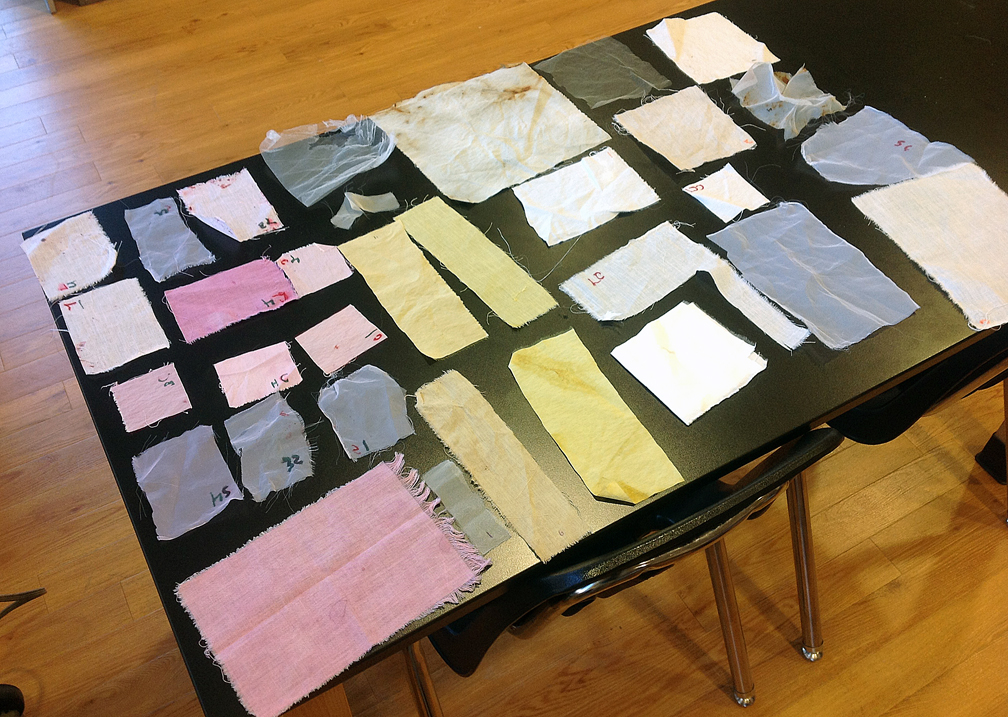
Dyeing cotton cloth in cochineal treated with citric acid (orange) and ammonia (red to purple). Unfortunately, these colors were not colorfast. Upon rinsing, they changed back to neutral pink.

I then took the same cochineal bath (it was quite strong) and added ammonia to turn it from red to purple, again making a variegated skein. I divided the bath in two and had part of the skein simmer in the purple, part in a pot with more citric acid added back. I think I diluted it too much. Part of the skein between the two pots didn’t get much dye and remained a lavender color. The final skein varied nicely from lavender to burgundy to magenta to purple. The cotton swatch I tried was left in the citric acid side (which was now orange) over a weekend and it looked nicely orange when I took it out, but the differences in color washed out when I rinsed them – the pH neutralized. I need to figure out a way to set the color in cotton, maybe by not rinsing it before placing it in a drier. The wool yarn retained the varied colors nicely upon rinsing and washing in the laundry.

dyed-skeins-2

Skeins of dyed yarn before untangling. Some skeins were dyed a solid color, others were variegated.

Then I tried the tricky one – indigo. I had purchased the sodium hydrosulfite, used to reduce the blue indigo to the leuco state where it dissolves and penetrates the cloth. I followed the suggested steps from my research, but ran out of time to finish the process as a fire system sprinkler pipe burst outside the school and we had to evacuate while the fire department came to fix it. I turned off the hot plate quickly and grabbed my stuff, because it was the end of the day before Winter Break. I didn’t want to wait for the all clear, so I just went home. It took me a few days to get back to school, what with preparing for Christmas and shopping, cleaning, and cooking sugar cookies with my sons, etc. The yarn and cotton had been soaking for days. By the time I rinsed everything out, the cloth and yarn were a deep blue. I think I used to much indigo powder – this stuff is strong. The cloth washed out to a light blue and after washing the yarn, it faded as well but had a nice variegated color scheme.

After Winter Break and during the start of my second semester STEAM class, we tried out one more skein dyed with walnut shells and marigold flowers. I had some marigold blossoms I picked off my flower patch right after the first deep freeze in December and had dried them out. It died the wool a golden yellow, but I tried variegating the skein using walnut shells and hulls, but the brown color washed out to an ugly tan in both the cotton and the wool yarn. A student brought in black walnuts, but the result was the same after several attempts. I tried concentrated madder dye on part of the skein, but it didn’t work well, either. I think the marigold prevents other dyes from overdyeing. Perhaps other mordants would work for the walnut. It never got as dark as I expected. So the marigold skein is my least favorite – kind of a dirty yellow. More experimentation is needed here.

failed-experiment

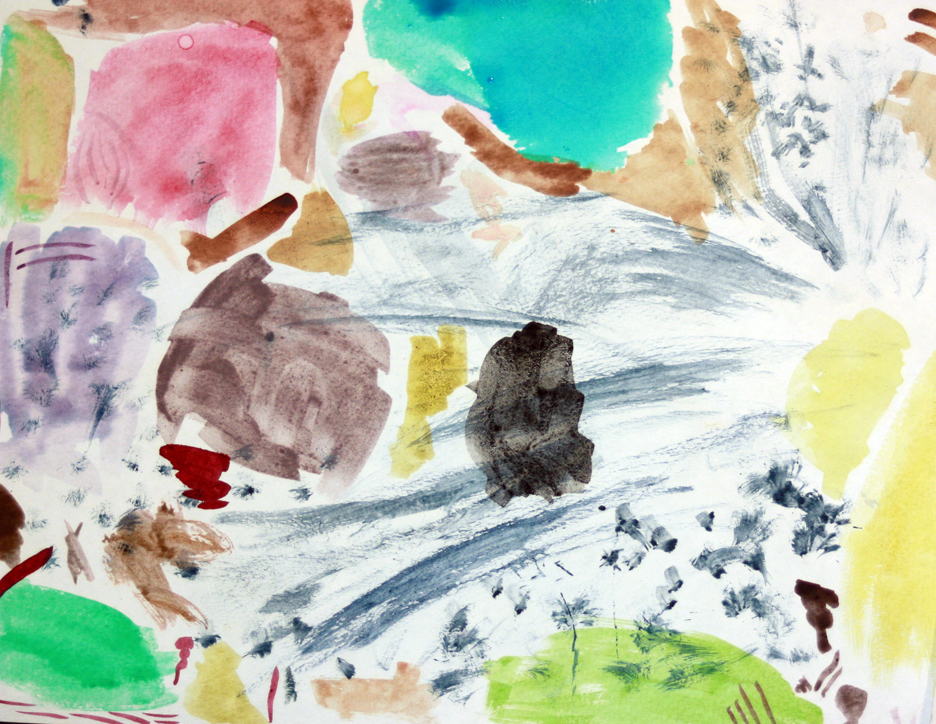
Experimenting with marigold dye (middle), madder root (right), and walnut shells (left). If the colors had remained this intense, it would have been OK. But the walnut shell and madder rinsed out and were much lighter upon washing.

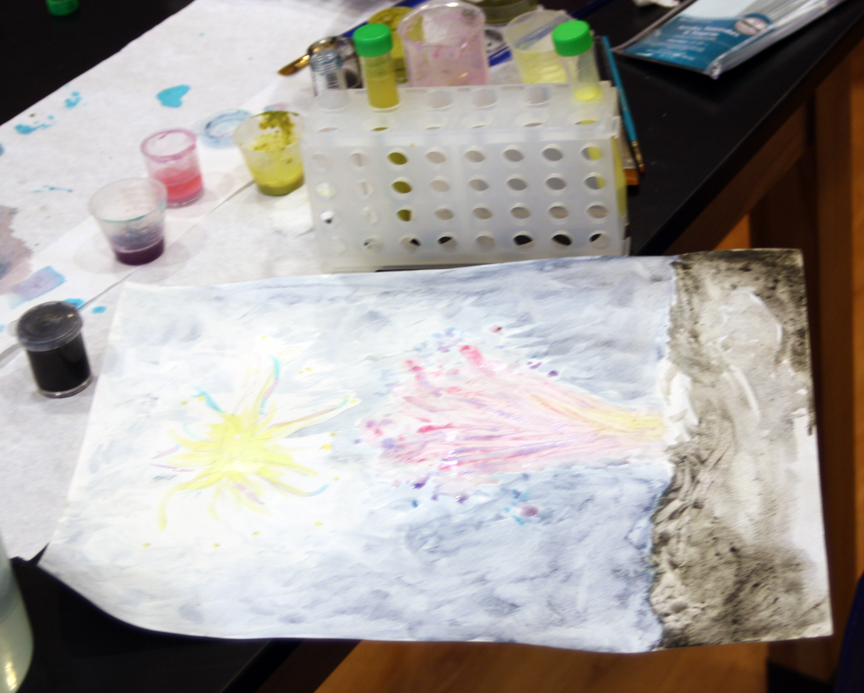
I met Katie Wirthin, an education specialist from the Natural History Museum of Utah, when I was presenting my STEAM session at the NSTA STEM Forum in Denver last summer, and she asked if I was interested in teaching a workshop at the museum this year. We had communicated back and forth all fall, and once I finally had my Teachers for Global Classrooms online class done (more on this in a later series of posts), I was able to teach a workshop at NHMU. The week I was scheduled to teach it to about 23 teachers, they had a power outage and had to postpone the class for a week. The next week only eight people came, but it turned out well. Katie had gotten all the materials and as usual I tried to do too much in the two hours. We did marbled paper, iron gall ink (except I forgot to bring the tea bags – they were able to scrounge some green tea in their cafeteria which actually worked far better than the regular brown tea – you could really see the black pigment form). The final activity was dyeing cloth – we used terry cloth swatches, and it worked well but we ran out of time. She still has much of the supplies left, as it was designed for more people. We will probably run the workshop again on a Saturday for three hours.

dyeing-with-sandalwod

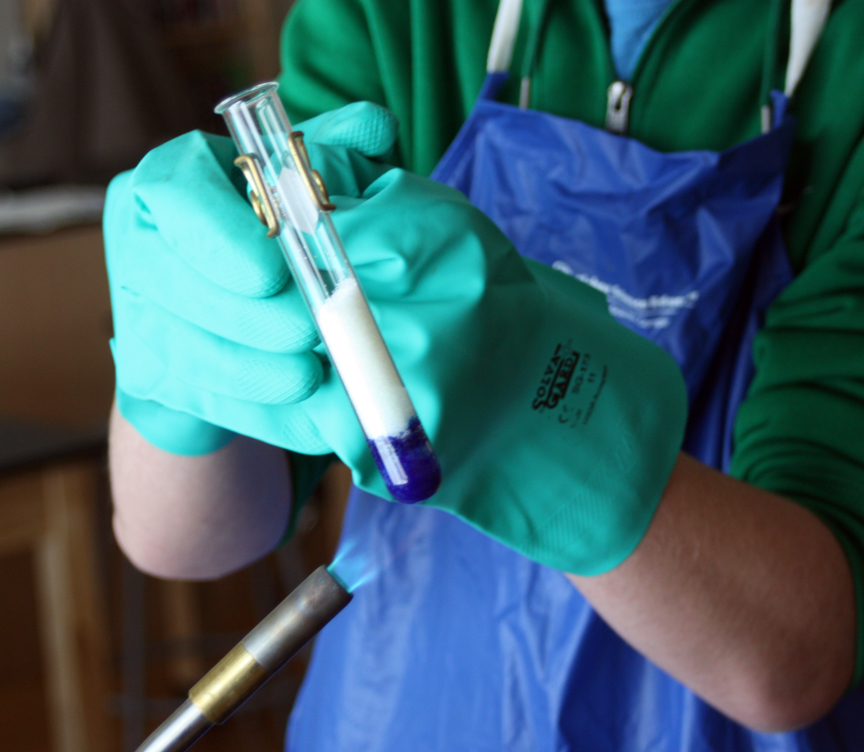
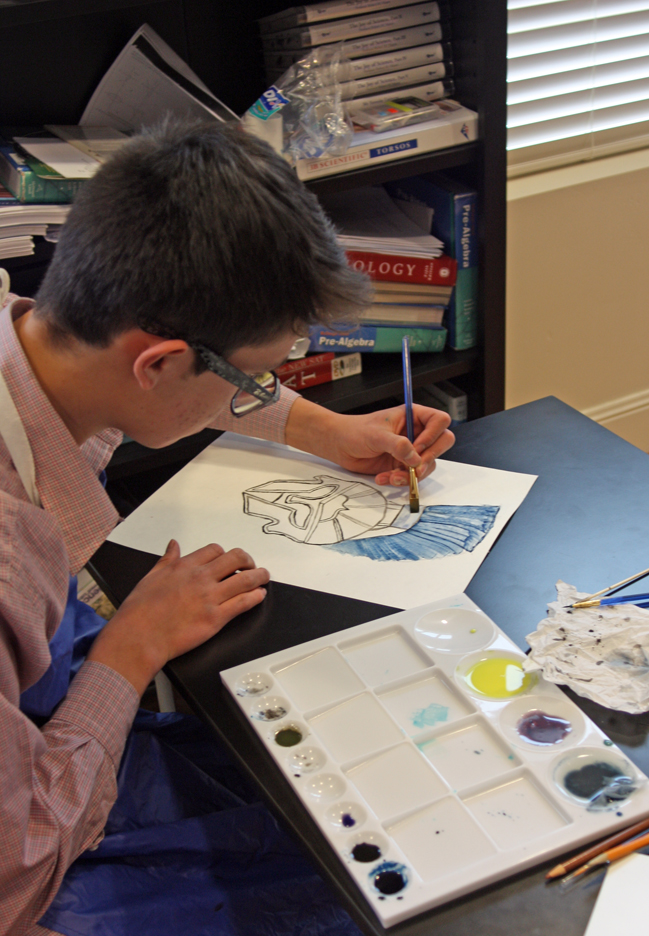
A student dyeing a swatch with sandalwood dye using a tin (II) chloride mordant. Notice the dark orange color.

Now that I have six skeins of yarn dyed, my wife has untangled it all and rolled it into balls so she can crochet a sweater from it. I’m not sure if I want the marigold color or not, but experimentation is part of this process. It might be an epically ugly sweater, but I don’t care. I will wear it proudly.

spinach-dye

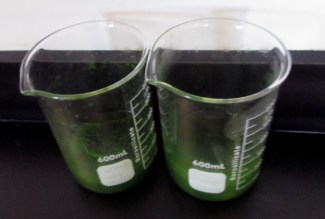
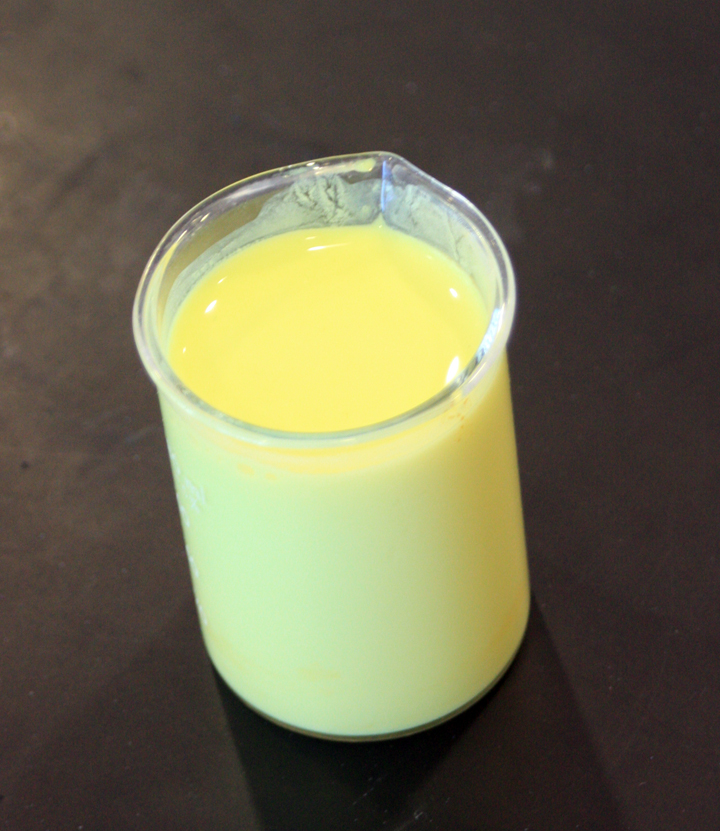
Some green dye extracted from spinach leaves.

My STEAM students are beginning the lab again, and one student is using sandalwood for the first time. She used tin (II) chloride as a mordant, and the color turned a deep orangish brown, so as soon as I get more skeins of merino wool yarn, I will dye one with sandalwood. Another one is using spinach leaves for a green dye, and we’ll see how that goes. We need to order elderberry plants or leaves for another green color (it might take a while to grow the trees), and logwood for purple to black. There is still so much to experiment on before I post the final recipes. We still have to figure out how to improve the walnut shell dye. But we’ve learned a great deal so far, and I’ll report on my second semester class in a few weeks as we continue to experiment. This is what inquiry is all about.

yarn-balls-2

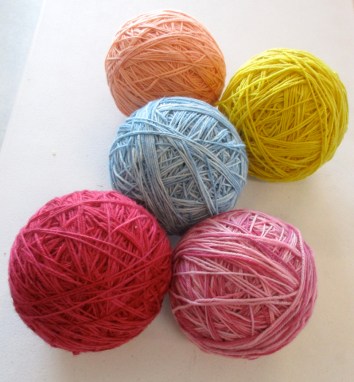
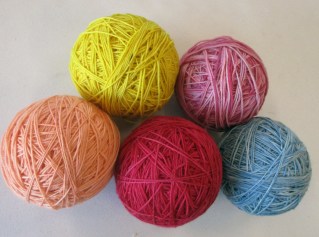
The skeins untangled and rolled into balls for crochet. My wife will make me a sweater from these. The cotton swatches will be turned into a patchwork quilt of our school logo.

dyed-skeins-of-yarn

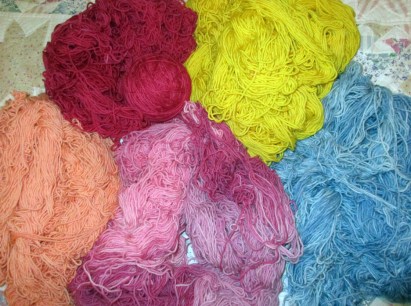
Skeins of dyed merino wool yarn. Clockwise from top left: Cochineal treated with citric acid (red), rabbitbrush (yellow), indigo (blue), cochineal treated with ammonia (purples), and madder root (orange).

Read Full Post »

rabbitbrush-with-mountain

Rabbitbrush blossoming in October in the southwest corner of Salt Lake Valley, Utah.

In my STEAM it Up class at American Academy of Innovation, my students have conducted an inquiry lab that combines chemistry and technology with history and an ancient art form: dyeing cloth. I reported on a similar lab two years ago, but we have taken it much further and created an investigation that would work well for all chemistry classes without requiring too much equipment or expense. This activity fits in well with the NGSS dimension of science and engineering practices, as it allows students to identify variables, create experimental procedures, collect data, and report results in a fun and engaging way that incorporates art and the history of chemistry. Since dyestuffs are found around the world, there is also a global education component.

collecting-rabbitbrush

My STEAM it Up students collecting rabbitbrush blossoms near American Academy of Innovation (the bright orange building in the background).

We live in Utah, and there are a number of dyestuffs available that were used by Native Americans. Some materials, such as cochineal, were imported and traded for from as far away as modern day Mexico. Others are native to Utah, such as rubber rabbitbrush or Ericameria nauseosa. Our new school was built in a grassland area in the west side of Salt Lake Valley that was formerly used by Kennicott Copper Corporation (now Rio Tinto) as a mine and waste dump. After millions of dollars in cleanups, the site is now the new planned community of Daybreak, and our school is on the west edge near the South Jordan Trax Station. Since it is a former prairie, rabbitbrush grows around us in the empty lots right next to our school.

cutting-rabbitbrush-blossoms

Preparing rabbitbrush blossoms for dyeing.

I had read that marigold blossoms make a good dyestuff, so on the day of our first attempt, I snipped half the blossoms off my marigold flowerbed (which grew up from last year’s seeds). My students and I took a mini field trip about 50 yards from the school where rabbitbrush was growing. It was the end of September and the brush was just beginning to bloom with bright yellow flowers in clusters. We collected several buckets. The species name of nauseosa is well earned, as the smell is a bit nauseating (some students are more sensitive to it and can get itchy eyes, so be careful of this). We also had walnut shells, cochineal, and the marigold blossoms as our dyestuffs.

rabbitbrush-blossoms

Rabbitbrush blossoms ready for boiling in the dye bath.

Students teams of two each decided on a variable to test, such as the type and concentration of dyestuff; the type and concentration of mordant (a mordant is a metal salt such as sodium carbonate [washing soda] or alum powder [hydrated potassium aluminum sulfate]) that helps the dye bind with the fabric threads); the temperature and duration of the dye bath; and colorfastness (if the dye holds its color upon washing). They determined a procedure for testing their one variable while holding the rest constant. We then dyed small swatches of white terrycloth washcloths. A further variable could be the type of fabric used, but I only had the terrycloth for now. I hope to order some untreated cotton and wool yarn and dye them as well.

rabbitbrush-and-marigolds

Rabbitbrush and marigold blossoms ready for dyeing.

Our basic procedure was to boil two Pyrex dishes half full with water. To one the mordant was added, to the other the dyestuff. The cloth swatches were first boiled for 10 minutes or so (depending on the group’s procedure) in the mordant, then the swatch was added to the dye bath.

cooking-rabbitbrush

We soaked white terricloth pieces in a boiling alum solution (the mordant), then boiled them in the rabbitbrush dyebath.

The results were excellent, and we were careful to label all the swatches with Sharpie permanent markers so that we could make comparisons after. We cut the dyed swatches in half and I washed one half at home in my washing machine. Each swatch was scanned into my computer and the eyedropper tool in Adobe Photoshop (you could use the Gimp as well) was used to sample three places on each swatch and record the RGB values. We averaged the values, and compared them to see which combinations of variables gave the best results.

dyeing-with-cochineal

We also dyed terricloth swatches with cochineal and an alum mordant.

We also tried adding more than one dyestuff to the same bath (doesn’t work well) and overdyeing, that is, dye a swatch with one color, then put it in a different color. We also tried an ornamental plant that was growing around our school, which I call firebrush; it has green to pink-red leaves (older interior leaves are more green). The firebrush provided great pigment upon boiling, and turned the cloth a nice pink color, but when rinsed out, the color gradually changed to a medium green. I suspected it might be a pH indicator, so I dipped part of one green swatch in vinegar and found it turned bright pink again. Only those two colors – green when neutral, pink in an acid. But it is apparently a good indicator and a fairly colorfast dye.

first-swatches-2016

Our first dyed swatches, labeled with permanent marker. The left swatch is rabbitbrush, the second is marigolds, the third is cochineal without any pH modification, the fourth from left is cochineal with Cream of Tartar added, the last (right) swatch is cochineal with vinegar added.

As a further experiment, we tried adding Cream of Tartar or vinegar to the cochineal to see if we could turn it from magenta-burgundy to more of a bright red color or even orange, with mixed success. We got a bit more reddish color with Cream of Tartar, but never got to orange. Reading websites and other sources, I found that we need a stronger organic acid that wouldn’t dilute the dyebath, such as citric acid. To turn the cochineal more purplish, ammonia can be used. We also tried cochineal with rabbitbrush but still did not get an acceptable orange – just a salmon pinkish color. We need orange because our school colors are Innovation Orange (you can see our building from miles away, as the photos show) and Titanium (we are the Titans). We could also some other dyestuff, such as madder root, sandalwood, or safflower.

swatches-2016

Swatches from our dye experiments. The ones on the bottom are pieces that have been washed to test colorfastness. The brown swatches are from walnut shells and hulls soaked in water over several days. Other swatches test different types of mordants (alum versus soda ash versus Cream of Tartar) or different concentrations of dye.

We experimented for several weeks with different combinations and the students wrote up their final conclusions. Here is what we learned: The best mordant for rabbitbrush, marigolds, and cochineal is alum powder. Cream of Tartar tends to gladden (or lighten) the colors, whereas soda ash (sodium carbonate) tends to darken or sadden the colors. Cochineal was less colorfast than we expected based on previous experiments, and tended to bleed all over the other colors when washed. Walnut shells seemed to do best with soda ash as a mordant. Overdyeing was only partially successful; we were trying to get a good orange and never did. The marigolds didn’t make a good orange either – but did do a nice golden brown color. Walnut shells with rabbitbrush made a nice golden tan, but cochineal with rabbitbrush depended greatly on which was dyed first; the overdye tended to eliminate most of the first dye.

fireweed-results

The results of our experiment with firebrush, an ornamental shrub with green inner leaves and scarlet outer leaves and wicked thorns. The dyebath was bright pink, as in the swatch second to left, but when rinsed out it turned green as in the swatch second from right. I took a rinsed green swatch and dipped it in vinegar and the bottom turned pink again. Firebrush is apparently a pH indicator.

A final variable is to test different fabrics. I ordered more dyes, including madder and indigo, from Dharma Trading Company in November as well as untreated merino wool yarn and cotton cloth, with more alum powder and citric acid. Adding the citric acid to the cochineal did indeed turn it red (and eventually orange). Adding ammonia turned it purple. It worked wonderfully on the untreated wool yarn; I dipped one end in the regular cochineal and the other end in the cochineal with citric acid and got a beautiful variegated red to burgundy-crimson skein that held its color well upon rinsing and washing. The cotton cloth didn’t hold as well; I make the cloth purple to orange and even let it set overnight in the dyebath, but upon rinsing all the cloth turned back to a light magenta. The rabbitbrush made a nice soft yellow for the merino wool yarn.

cochineal-dyed-yarn

Merino wool yarn dyed with cochineal. I varied the pH by adding citric acid to get the brighter red colors, and dyed one end of the skein with regular cochineal and the other end with citric acid treated cochineal to produce variegated yarn. Now to crochet it into a sweater . . .

My wife is amazing at crocheting, and my ultimate STEAM art product will be for her to use our naturally dyed merino yarn to create a sweater and a beanie. I also want use the dyed pieces of cotton to make a quilt in the shape of our school logo. I know several professional quilters who can do this for us. If the cotton isn’t accepting the dyes, then I must experiment further. Perhaps I didn’t soak the cloth in the mordant bath long enough. I am still experimenting with getting blue colors from woad and indigo, but more on this in a later post.

Read Full Post »

Rabbitbrush, Ericameria nauseosa. The flowers make an excellent yellow dye.

Rabbitbrush, Ericameria nauseosa. The flowers make an excellent yellow dye.

Last September, in a conversation with our biology teacher, I learned that common rabbit brush makes an excellent yellow dye for natural fabrics. It was used by Native Americans and early pioneers to dye cotton, linen, and wool. I grew up thinking of rabbit brush as a useless scrub brush that grew in unused corners on our farm where the soil had high alkali or clay or low drainage. It is often seen along road cuts and other areas where the soil has been removed or disturbed, and is one of the first plants to colonize bare soil.

Rabbitbrush grows in poor soils and is one of the first plants to colonize disturbed areas.

Rabbitbrush grows in poor soils and is one of the first plants to colonize disturbed areas.

Intrigued by our conversation, I did some research. Its Latin name is Ericameria nauseosa for good reason: up close, the blossoms smell rather nauseating. In the early fall, it blooms with tight bundles of bright yellow flowers that can be steeped in boiling water and used for dye. I also found that it contains around 6% latex rubber in its stems and leaves to protect it from dehydrating. If a commercial method could be devised to extract the latex economically, it would be a valuable plant to grow and harvest. I had no idea.

Students prepare a dye bath of sunflower petals.

Students prepare a dye bath of sunflower petals.

I decided to try rabbit brush dye in my chemistry class. My course schedule for chemistry is already overflowing with more activities and labs than I can accommodate in our limited classroom time. To add a new activity would mean giving something else up. So adding a fabric dyeing lab would only be possible if I used the activity to fulfill more than one objective. I decided it would make a great inquiry lab to introduce the scientific method and meet Utah’s Intended Learning Outcome objectives. These ILOs include teaching the history and nature of science and the scientific method across all science courses.

Cloth soaking in a boiling dye bath made of rabbitbrush blossoms.

Cloth soaking in a boiling dye bath made of rabbitbrush blossoms.

I already had a number of large pieces of undyed fabric, including cotton, linen, silk, and polyester. I scrounged or ordered other types of dyestuffs, including walnut shells and cochineal. I cut the fabric into small swatches and purchased washing soda (sodium carbonate), cream of tartar, and other possible mordants. I also brought in a number of large pots from home.

Dye bath made from walnut shells. The original bath was the dark brown color seen with the shells, but it was accidentally thrown out. The second attempt was lighter.

Dye bath made from walnut shells. The original bath was the dark brown color seen with the shells, but it was accidentally thrown out. The second attempt was lighter.

On the first day of the activity, I introduced the process of science and the idea of variables and how to create an experimental design to control them. We then took a short field trip to a road embankment about ¼ mile from Walden School where a good stand of rabbit brush was growing. We collected several bags full of yellow blossoms. The students then divided into lab teams and designed their own experiments.

Samples of cochineal dye solutions. Cochineal is a sessile insect that lives on prickly pear cactus in Mexico and South America. It is collected, dried, and crushed to make carmine dye.

Samples of cochineal dye solutions. Cochineal is a sessile insect that lives on prickly pear cactus in Mexico and South America. It is collected, dried, and crushed to make carmine dye.

We boiled the rabbit brush blossoms, some black-eyed susan petals we collected along the way (commonly called sunflowers in Utah), and walnut shells in water. The cochineal shells were ground up in a mortar and pestle, releasing a deep burgundy liquid (carminic acid). The group that tested cochineal added varying amounts of tartaric acid to stabilize the color and create a brighter red. Each group tested both synthetic and natural fibers. Some groups tested mordants, which set the color by opening up the fabric fibers. Some groups tested different times in the dye bath, or different temperatures. In each case, they tried to test one variable and keep all the others constant.

Solutions of cochineal (carmine) dye. To create the different hues of red, tartaric acid was added.

Solutions of cochineal (carmine) dye. To create the different hues of red, tartaric acid was added.

The designing, preparation, boiling, and dyeing was done on our second day. It was a Friday before a long weekend, and we discovered an unanticipated variable. Leaving the cloth in the dye baths over the weekend resulted in mold growing in the water and on the cloth. One group testing the walnut shells accidentally dumped out their dye bath, which was a rich, deep brown. They had to start over using the same walnut shells, and the second time the color was much weaker. All of these problems and their effects were noted in the students’ lab notebooks.

The sunflower (Black-eyed Susan) dye bath turned brown when boiled. It also grew mold over the weekend.

The sunflower (Black-eyed Susan) dye bath turned brown when boiled. It also grew mold over the weekend.

After dyeing, we rinsed and dried the cloth swatches. One team took their swatches home and washed half of them several time in order to test the color fastness. In order to get numeric data that could be analyzed statistically, we compared the color by scanning the dried swatches into a computer and using the Eyedropper tool in Adobe Photoshop to click on three areas of each swatch, then record the RGB values and average them per swatch. The HSB values (Hue, Saturation, and Brightness) were also compared.

Finished swatches after dyeing and drying. The pink is cochineal, yellow is rabbitbrush, even tan is walnut, and uneven tan is sunflowers. Undyed cloth is also shown for a control.

Finished swatches after dyeing and drying. The pink is cochineal, yellow is rabbitbrush, even tan is walnut, and uneven tan is sunflowers. Undyed cloth is also shown for a control.

The students drew their own conclusions based on the variables they were controlling and wrote up the results in their lab books, answering a series of questions I gave them to help them consider what they had done. By the time we finished, we had spent about five days of class time, which was quite an investment but well worth it. We followed up by discussing how dyes are done commercially, other types of natural dyes such as indigo and madder root, and the invention of aniline dyes derived from coal tar such as Sir William Henry Perkin’s discovery of mauve dye in 1856.

William Henry Perkin, who discovered the first synthetic aniline dye (mauveine) at age 18 in 1856.

William Henry Perkin, who discovered the first synthetic aniline dye (mauveine) at age 18 in 1856.

Some notes for improving the lab for next time: I need to make sure we don’t leave the dyes over the weekend, and I want to use wool as a natural fiber in addition to cotton, linen, and silk. I tried looking for undyed and untreated wool, but the hobby stores only carry the mostly synthetic brands that are dyed white. Next time I will have to see if any of my students have access to natural wool yarn, or order it directly. I would like to dye untreated yarn in each color and crochet hats or scarves from it. I don’t want to mess with indigo, as that is quite a process, but I will order some madder root and other natural dyes.

A letter from William Henry Perkin, Jr. and  sample of silk cloth dyed with mauveine, the first aniline dye made from coal tar derivatives. It is a much brighter color than we usually associate with mauve today.

A letter from William Henry Perkin, Jr. and sample of silk cloth dyed with mauveine, the first aniline dye made from coal tar derivatives. It is a much brighter color than we usually associate with mauve today.

Finally, I would like to find a way to stabilize the dyes (perhaps by adding vinegar, etc.) so that mold won’t grow, then use the natural dyes for tie-dyed shirts. It would also be fun to make a dye out of purple cabbage juice, soak a cotton shirt in it, then treat it with squirt bottles containing mild acids and bases to change the color of the fabric like a pH strip, then set the colors by heat treating.

Read Full Post »

Paintings made with homemade pigments for my Intersession Science and Art class

Paintings made with homemade pigments for my Intersession Science and Art class

As a follow up to our lab for making iron-gall ink, I wanted to find recipes online for turning a standard high school chemical inventory into paint pigments for watercolors, pastels, or oil paints. I found some websites that use natural ingredients such as berry juice or even walnut shells, but not much on how traditional paint colors were made or how to make them today so they are colorfast and lightfast.

Lemon yellow pigment made from a double replacement reaction of barium nitrate and potassium chromate.

Lemon yellow pigment made from a double replacement reaction of barium nitrate and potassium chromate.

To make an ideal pigment, it must have several properties. It must be suspendable in some sort of medium, such as water or linseed oil. This means it forms fairly large particles that are opaque to light yet small enough to not settle out of solution immediately. Once on paper or canvas they should resist re-dissolving (waterproof) in the case of watercolors but be re-workable in oil paints. Pigments must stay the same color under a wide range of circumstances, including minor changes in pH or humidity or under exposure to light.

The Villa of Mysteries in Pompeii. The red background color is vermilion, or mercury sulfide made from cinnabar. According to Pliny the Elder, the painters made a nice side profit by frequently washing their brushes and taking home the wash water.

The Villa of Mysteries in Pompeii. The red background color is vermilion, or mercury sulfide made from cinnabar. According to Pliny the Elder, the painters made a nice side profit by frequently washing their brushes and taking home the wash water.

Many paint pigments were originally made from colorful rocks or minerals, such as lapis lazuli, aquamarine, charcoal, orpiment, or cinnabar. Some of these minerals, such as cinnabar (mercury (II) sulfide) are toxic. Most of the red pigments tend to be this way, or else aren’t a very bright shade of red. Yes, iron oxide (rust) makes a reddish brown and madder root makes a dull burgundy, but only cinnabar (also known as vermilion or Chinese red, which is a bright orange red) or lead oxides (known as minium) could produce a good red until the Spanish Conquest of the Americas.

Chinese red lacquerware box colored with Chinese red, or cinnabar.

Chinese red lacquerware box colored with Chinese red, or cinnabar.

When Cortez conquered Mexico, he found an abundance of cloth dyed a bright red color and on investigation found that the dye was produced from a ground up insect called cochineal. It produced a range of bright reds from magenta through red-orange, depending on how it was treated. He brought samples of the cloth and the bug (along with samples of chocolate, but that’s another story) back to Spain with him. The insect grows on a particular species of prickly pear cactus in Central and South America, and the Spanish eventually found it could grow and prosper in some parts of southern Spain and on the Canary Islands. The dye it produces is called carmine. It is the red of a cardinal’s robes and the red of the British Redcoats. It is still used today, including in various types of red or pink-dyed foods, including strawberry milkshakes. In the food industry, it is known as Red Dye # 4.

Cochineal insects living on large cacti. The female insects are sessile, attaching themselves permanently to the cactus and extruding a waxy coating to prevent dehydration. The carminic acid helps to ward off predators.

Cochineal insects living on large cacti. The female insects are sessile, attaching themselves permanently to the cactus and extruding a waxy coating to prevent dehydration. The carminic acid helps to ward off predators.

The types of reds used for painting now are cadmium red (which is rather expensive to make) and alizarin crimson, a synthetic pigment made from coal tar derivatives. You can also get a pink color by using a hydrated form of cobalt chloride as a pigment, but it turns bright blue as it dries out.

Grinding dried cochineal insects to make carmine pigment. This dye is also used in foods. Yes, you are eating bug juice.

Grinding dried cochineal insects to make carmine pigment. This dye is also used in foods. Yes, you are eating bug juice.

After searching all this out, I finally came across a website that provided information on the history and production of various pigments. It is called Pigments Through the Ages and has a URL of: http://www.webexhibits.org/pigments/. It shows all the various colors made, gives the history and traditional methods for producing them, as well as modern equivalents. I determined to try these out in my chemistry and Intersession classes. We did some experimentation and here are the recipes we developed:

Pigment recipes

Once we got a viable pigment, we added a few drops of gum Arabic as a binder and to thicken the pigment. Then we tried it out by sketching and painting illustrations. My chemistry class had to paint something related to the history of chemistry or their own chemistry presentation topic.

Chemistry student Evan makes synthetic yellow ochre pigment.

Chemistry student Evan makes synthetic yellow ochre pigment.

Please feel free to experiment, adapt, and test these formulas. From our experiments we had some interesting results. The Cobalt blue recipe was a light purple/pink in solution (the hydrated cobalt chlorides) but dried a bright cyan blue color. This happened every time we made it in class, yet one student who wanted to test these pigments as a science fair project made her own cobalt blue which turned out staying a medium blue as the recipe said it should. I’m not sure what she did differently. When we made the cobalt purple, the student wanted to thicken the resulting solution by boiling off some of the water. This produced a bright pink pigment that was colorfast and was very useful combined with lemon yellow to make a flesh tone.

Making cobalt blue pigment.

Making cobalt blue pigment.

The lemon yellow and Prussian blue formulas are infallible. The yellow ochre recipe was interesting. It starts with the same cobalt chloride as two other pigments, but uses glacial acetic acid to convert it to yellow. It works to make a powder and then hydrate it once the process is done, producing a pigment that is a dull yellowish gray dry but makes an intense slightly grayish yellow when dissolved in water. The carbon black (India black) was easily made from finely ground charcoal, although I would use a charcoal without self-lighting fluid. It makes an oil slick on the pigment. You could probably use soot even more advantageously as it is already finely divided. Just build a small campfire and put a piece of metal over the flames to collect soot, then scrape it off for a pigment.

Making pigments in the lab at Walden School

Making pigments in the lab at Walden School

The colors we had trouble with were browns and reds. I have not tried making a pigment from walnut shells, although I have collected some for the purpose. I did try to make brown using a piece of yellow ochre mineral (iron sulfide and oxide) I had, but the powdered ochre would not mix with water and rubbed off the paper even when I tried using some gum Arabic to bind it.

Beginning to paint the background washes using cobalt blue (which looks pink when wet) and prussian blue.

Beginning to paint the background washes using cobalt blue (which looks pink when wet) and prussian blue.

As explained above, red is a problem. I didn’t want to make red using lead or mercury compounds (minium or vermilion) and I couldn’t afford the cadmium, so the last result was to use cochineal, which I ordered from the Dharma Trading Company. Our first attempt was only partially successful. We ground up the insect bodies in a mortar and pestle and a red fluid came out, mostly carminic acid. We tried using it directly as a pigment, but the paint turned black with exposure to air. We then tried adding natural chalk (calcium carbonate) to make a lake, and that started as an opaque burgundy but turned black within a few minutes. Finally, I tried using alum powder (aluminum hydrogen phosphate) as a mordant and it made a nice burgundy color that was permanent.

Adding green robes made from a mixture of lemon yellow with cobalt blue and yellow ochre with Prussian blue.

Adding green robes made from a mixture of lemon yellow with cobalt blue and yellow ochre with Prussian blue.

Further research into cochineal told me that the best way to use cochineal to make carmine pigment is to crush the dried bus in a mortar and pestle, then filter the solid parts out by running the bug juice through filter paper or cheesecloth. Then add alum powder to stabilize the deep burgundy color. By adding a little vinegar, the color can turn a bright transparent red to reddish orange that will stain and dye cloth and work well for a watercolor pigment. I will try adding some chalk to it at this point to make the pigment opaque for pastels or paint.

Flesh tones (lemon yellow with cobalt pink) and gray beard (carbon black).

Flesh tones (lemon yellow with cobalt pink) and gray beard (carbon black).

As for the brown colors, even to this day most browns come from a clay which is dug out of deposits near the towns of Sienna and Umbria in Italy, then ground fine and used as a pigment. Sometimes they are heated or “burnt” to darken the color. This produces the colors raw and burnt sienna and burnt umber. I can’t exactly take a trip to Italy just to dig up dirt, so I’m working on my own browns out of walnut shells and other organic and mineral sources. I’m a bit stumped on how to grind up the walnut shells to get a fine powder.

The finished Democritus with pen and ink details. It was painted entirely with homemade pigments and inks.

The finished Democritus with pen and ink details. It was painted entirely with homemade pigments and inks.

I’ve included some of the paintings we’ve done. I did the one on Democritus, but others were done by students. I added details at the end with iron-gall ink and Prussian blue ink and a Speedball drawing pen. I also have a piece of watercolor paper that I’ve been using to paint and test swatches of our homemade paints, and you can see we’ve had some interesting results. We can now create about any hue, shade, or tint we need.

Paper of color swatches, used to try out variations and mixtures of pigments. The stabilized carmine is the deep burgundy swatches. The bright cyan is cobalt blue.

Paper of color swatches, used to try out variations and mixtures of pigments. The stabilized carmine is the deep burgundy swatches. The bright cyan is cobalt blue.

This has been a fun and informative exercise in inquiry and experimentation. We’ve seen most of the types of chemical reactions, have seen a variety of physical and chemical changes, and have even practiced some stoichiometry as we work on the finding the best ratios of reactants for our pigments.

Sebastian painting Greek armor using Prussian blue and cobalt blue with carbon black pigment he made.

Sebastian painting Greek armor using Prussian blue and cobalt blue with carbon black pigment he made.

Painting of stained glass windows by Nicole.

Painting of stained glass windows by Nicole.

A painting of fireworks in progress.

A painting of fireworks in progress.

Read Full Post »