Feeds:
Posts
Comments

Archive for the ‘Uncategorized’ Category

woad-stained-pict-warriors-john-white-bm

Pict warriors painted blue with woad pigment. With their blue skin and red hair and mustaches, these warriors must have intimidated even the Romans.

While we were researching dyes for our dyeing lab, I came upon the history of woad, a plant that produces a blue dye used by Europeans for millennia before indigo was imported. It originated somewhere in the steppes north of Asia Minor and was grown, traded, and transplanted all across Europe until it reached Germany, France, and England. During the time of the Romans, warriors from one tribe of Britons would dye or tattoo themselves with woad in elaborate patterns to frighten their enemies. The Romans called them Picts because of the pictures they drew on themselves.

woadballs

Balls of woad. In England, woad leaves were crushed and rolled into balls, then allowed to ferment to precipitate the blue indigotin dye.

During the Renaissance, woad trading and dyeing made whole towns wealthy. In England, many acres were planted to woad. The leaves were harvested and mashed, then rolled into balls and allowed to ferment in a shed. The fermentation allowed the indigotin dye molecule to precipitate out of the plant leaves. The process smelled rather awful, and laws were passed banning any woad dyeworks within two miles of a town.

woad_mill_1752

An illustration of a woad mill in France. The leaves were gathered, crushed mechanically, formed into balls, and allowed to ferment. It was a smelly process, done in the country away from cities.

The other major source of blue dye before synthetics were invented was the indigo plant, which is native to warm and humid climates. Different cultures worldwide have invented their own methods of extracting the indigotin dye from the plants. Japanese dyers would allow the indigo leaves to ferment in a vat to remove oxygen. In India, the leaves were also soaked in vats then treaded by humans to mash the indigo and release the pigment, which was dried and pressed into cakes. Once indigo became known in Europe, it replaced woad as the choice for blue dye because the indigo plant has more indigotin and is therefore cheaper to produce. One wealthy indigo trader, Heinrich Schliemann, used his wealth to explore the ancient site of Troy. Another, Percival Lowell, used his family’s indigo wealth to build the Lowell Observatory in Flagstaff, Arizona to look for life on Mars. Levi Strauss used indigo to dye his original blue denim pants. As you can see, it’s had an impact on history.

woad-shades-031

Young woad plants, with yarn dyed using the extracted indigotin pigment.

As part of my research, I discovered something completely unexpected: dyers had imported woad to Utah in the early 1900s and tried to grow it here. Since it originated in a high desert environment, it did well in Utah’s climate. In fact, it did too well. It got away from the dyer’s fields and went wild, growing all over the western United States. It is now considered to be a Class 3 Invasive Weed, which means it is almost out of control. The only way to prevent it from spreading further is to pull up the plants before they go to seed.

woad-plant-2

A woad plant, growing in the southwest corner of Salt Lake Valley in Utah. Dyers brought woad to Utah in the early 1900s and it got away from them.

I memorized the characteristics of woad plants, knowing I would want to try to find some and take my students on a “Woad Twip.” Woad has dark green leaves with a white vein. These leaves are clustered at the base of the plant. It sends up tall flower spikes with yellow flower clusters in the late spring. By fall, the flowers become brownish-red pendular seed pods with many small black seeds.

woad-plant-3

More woad growing in Salt Lake Valley. I discovered this by accident while collecting late rabbitbrush blossoms. The seed pods can contain hundreds of thousands of seeds in a single clump of plants, and can spread quickly.

By mid October the rabbitbrush blossoms were beginning to fade. I needed to collect as much as I could for continued experiments, so I found a spot in the middle of Mountain View Corridor in southwestern Salt Lake Valley where the rabbitbrush blossoms were still bright, and I stopped there after school on a Friday. While I was out collecting the rabbitbrush blossoms, I noticed a plant I hadn’t seen before. It was woad! So I collected several bags full of leaves and some seed pods, with the idea of trying to grow some in my back yard.

woad-leaves

Cutting woad leaves to extract the indigotin dye.

My chemistry students cut the leaves into pieces and also separated out the seeds. We looked up the ancient process of woad extraction and found some websites that describe how it is still being done at small farms in England. The process involves quite a bit of chemistry. I am attaching a PDF file that describes the steps. Here it is:

woad-dyeing-process-s

whipping-woad

Whipping woad solution to add oxygen and precipitate the indigotin.

In summary, the indigotin dye in woad and indigo is a rather delicate molecule. Too much heat will destroy it, but some heat is needed to extract it from the leaves. The chopped leaves are steeped in water at 90° C for 10-15 minutes. The leaf fragments are strained out and the liquid has soda ash added to make the solution basic. To precipatate the indigotin, the solution must be whipped with an electric mixer for 15-20 minutes to add oxygen to the solution. The solution is poured into dishes and allowed to settle. The supernate is carefully poured or filtered off and the final pigment allowed to dry.

woad-settling-dishes

After adding soda ash and whipping the woad solution, we poured into dishes to allow the pigment to settle out. We then poured off the supernate.

We took it this far in chemistry class. Our next step will be to put the purified indigotin in a 50-60° bath and add some sodium hydrosulfite to the solution. This is a reducing agent that converts the blue indigotin into leuco (white) indigotin, which will dissolve in water and turn yellow-green. It takes about an hour of careful heating without stirring to do the conversion. While it is simmering (but not boiling), the fabric or yarn must be heated up in a bath with some soda ash. Once the solution turns yellow-green, the hot fabric or yarn can be carefully added without dripping or splashing. After about ten minutes, the dye has absorbed into the fabric but not yet bonded. When it is removed and exposed to the air, the fabric will turn from green to blue as the indigo converts from leuco back to blue indigo. As it precipitates out, it bonds with the fabric. Hopefully.

woad-pigment-settling

Woad dye pigment settling out on the bottom of our dishes. We poured off the supernate and dried out the final pigment.

I purchased some pure indigo from Dharma Trading Company and was in the middle of heating the dye bath with sodium hydrosulfite after school on Tuesday when our fire alarm went off – an exterior pipe in our fire suppression system had frozen and burst, so we had to evacuate the building. I quickly unplugged everything and left. It was the last day before Winter Break. I hope to return by tomorrow and continue the experiment. If it works with pure indigo, I will demonstrate the process in chemistry with our own woad pigment when we return from break. I’ll update this blog post then.

natural-dyes-andes

Andean people with naturally dyed alpaca yarn and clothing. The purples and reds come from cochineal, the oranges and yellows from tree bark, etc. All cultures have solved the problem of how to dye cloth; dyestuffs are found around the world.

All cultures around the world have found ways to solve the problem of how to dye fabrics. They’ve found dyestuffs in plants, minerals, and animals; through continual experimentation they’ve realized that certain salts (mordants) will help make the dyes colorfast. The process of oxidizing, then reducing indigo must have taken a long time to discover. It amazes me that such a complicated process could be developed in many countries and cultures, each with their own way of accomplishing the same thing, and all to get a permanent blue dye.


nilda-and-acopia-women

Alpaca wool yarn dyed with cochineal.

Read Full Post »

rabbitbrush-with-mountain

Rabbitbrush blossoming in October in the southwest corner of Salt Lake Valley, Utah.

In my STEAM it Up class at American Academy of Innovation, my students have conducted an inquiry lab that combines chemistry and technology with history and an ancient art form: dyeing cloth. I reported on a similar lab two years ago, but we have taken it much further and created an investigation that would work well for all chemistry classes without requiring too much equipment or expense. This activity fits in well with the NGSS dimension of science and engineering practices, as it allows students to identify variables, create experimental procedures, collect data, and report results in a fun and engaging way that incorporates art and the history of chemistry. Since dyestuffs are found around the world, there is also a global education component.

collecting-rabbitbrush

My STEAM it Up students collecting rabbitbrush blossoms near American Academy of Innovation (the bright orange building in the background).

We live in Utah, and there are a number of dyestuffs available that were used by Native Americans. Some materials, such as cochineal, were imported and traded for from as far away as modern day Mexico. Others are native to Utah, such as rubber rabbitbrush or Ericameria nauseosa. Our new school was built in a grassland area in the west side of Salt Lake Valley that was formerly used by Kennicott Copper Corporation (now Rio Tinto) as a mine and waste dump. After millions of dollars in cleanups, the site is now the new planned community of Daybreak, and our school is on the west edge near the South Jordan Trax Station. Since it is a former prairie, rabbitbrush grows around us in the empty lots right next to our school.

cutting-rabbitbrush-blossoms

Preparing rabbitbrush blossoms for dyeing.

I had read that marigold blossoms make a good dyestuff, so on the day of our first attempt, I snipped half the blossoms off my marigold flowerbed (which grew up from last year’s seeds). My students and I took a mini field trip about 50 yards from the school where rabbitbrush was growing. It was the end of September and the brush was just beginning to bloom with bright yellow flowers in clusters. We collected several buckets. The species name of nauseosa is well earned, as the smell is a bit nauseating (some students are more sensitive to it and can get itchy eyes, so be careful of this). We also had walnut shells, cochineal, and the marigold blossoms as our dyestuffs.

rabbitbrush-blossoms

Rabbitbrush blossoms ready for boiling in the dye bath.

Students teams of two each decided on a variable to test, such as the type and concentration of dyestuff; the type and concentration of mordant (a mordant is a metal salt such as sodium carbonate [washing soda] or alum powder [hydrated potassium aluminum sulfate]) that helps the dye bind with the fabric threads); the temperature and duration of the dye bath; and colorfastness (if the dye holds its color upon washing). They determined a procedure for testing their one variable while holding the rest constant. We then dyed small swatches of white terrycloth washcloths. A further variable could be the type of fabric used, but I only had the terrycloth for now. I hope to order some untreated cotton and wool yarn and dye them as well.

rabbitbrush-and-marigolds

Rabbitbrush and marigold blossoms ready for dyeing.

Our basic procedure was to boil two Pyrex dishes half full with water. To one the mordant was added, to the other the dyestuff. The cloth swatches were first boiled for 10 minutes or so (depending on the group’s procedure) in the mordant, then the swatch was added to the dye bath.

cooking-rabbitbrush

We soaked white terricloth pieces in a boiling alum solution (the mordant), then boiled them in the rabbitbrush dyebath.

The results were excellent, and we were careful to label all the swatches with Sharpie permanent markers so that we could make comparisons after. We cut the dyed swatches in half and I washed one half at home in my washing machine. Each swatch was scanned into my computer and the eyedropper tool in Adobe Photoshop (you could use the Gimp as well) was used to sample three places on each swatch and record the RGB values. We averaged the values, and compared them to see which combinations of variables gave the best results.

dyeing-with-cochineal

We also dyed terricloth swatches with cochineal and an alum mordant.

We also tried adding more than one dyestuff to the same bath (doesn’t work well) and overdyeing, that is, dye a swatch with one color, then put it in a different color. We also tried an ornamental plant that was growing around our school, which I call firebrush; it has green to pink-red leaves (older interior leaves are more green). The firebrush provided great pigment upon boiling, and turned the cloth a nice pink color, but when rinsed out, the color gradually changed to a medium green. I suspected it might be a pH indicator, so I dipped part of one green swatch in vinegar and found it turned bright pink again. Only those two colors – green when neutral, pink in an acid. But it is apparently a good indicator and a fairly colorfast dye.

first-swatches-2016

Our first dyed swatches, labeled with permanent marker. The left swatch is rabbitbrush, the second is marigolds, the third is cochineal without any pH modification, the fourth from left is cochineal with Cream of Tartar added, the last (right) swatch is cochineal with vinegar added.

As a further experiment, we tried adding Cream of Tartar or vinegar to the cochineal to see if we could turn it from magenta-burgundy to more of a bright red color or even orange, with mixed success. We got a bit more reddish color with Cream of Tartar, but never got to orange. Reading websites and other sources, I found that we need a stronger organic acid that wouldn’t dilute the dyebath, such as citric acid. To turn the cochineal more purplish, ammonia can be used. We also tried cochineal with rabbitbrush but still did not get an acceptable orange – just a salmon pinkish color. We need orange because our school colors are Innovation Orange (you can see our building from miles away, as the photos show) and Titanium (we are the Titans). We could also some other dyestuff, such as madder root, sandalwood, or safflower.

swatches-2016

Swatches from our dye experiments. The ones on the bottom are pieces that have been washed to test colorfastness. The brown swatches are from walnut shells and hulls soaked in water over several days. Other swatches test different types of mordants (alum versus soda ash versus Cream of Tartar) or different concentrations of dye.

We experimented for several weeks with different combinations and the students wrote up their final conclusions. Here is what we learned: The best mordant for rabbitbrush, marigolds, and cochineal is alum powder. Cream of Tartar tends to gladden (or lighten) the colors, whereas soda ash (sodium carbonate) tends to darken or sadden the colors. Cochineal was less colorfast than we expected based on previous experiments, and tended to bleed all over the other colors when washed. Walnut shells seemed to do best with soda ash as a mordant. Overdyeing was only partially successful; we were trying to get a good orange and never did. The marigolds didn’t make a good orange either – but did do a nice golden brown color. Walnut shells with rabbitbrush made a nice golden tan, but cochineal with rabbitbrush depended greatly on which was dyed first; the overdye tended to eliminate most of the first dye.

fireweed-results

The results of our experiment with firebrush, an ornamental shrub with green inner leaves and scarlet outer leaves and wicked thorns. The dyebath was bright pink, as in the swatch second to left, but when rinsed out it turned green as in the swatch second from right. I took a rinsed green swatch and dipped it in vinegar and the bottom turned pink again. Firebrush is apparently a pH indicator.

A final variable is to test different fabrics. I ordered more dyes, including madder and indigo, from Dharma Trading Company in November as well as untreated merino wool yarn and cotton cloth, with more alum powder and citric acid. Adding the citric acid to the cochineal did indeed turn it red (and eventually orange). Adding ammonia turned it purple. It worked wonderfully on the untreated wool yarn; I dipped one end in the regular cochineal and the other end in the cochineal with citric acid and got a beautiful variegated red to burgundy-crimson skein that held its color well upon rinsing and washing. The cotton cloth didn’t hold as well; I make the cloth purple to orange and even let it set overnight in the dyebath, but upon rinsing all the cloth turned back to a light magenta. The rabbitbrush made a nice soft yellow for the merino wool yarn.

cochineal-dyed-yarn

Merino wool yarn dyed with cochineal. I varied the pH by adding citric acid to get the brighter red colors, and dyed one end of the skein with regular cochineal and the other end with citric acid treated cochineal to produce variegated yarn. Now to crochet it into a sweater . . .

My wife is amazing at crocheting, and my ultimate STEAM art product will be for her to use our naturally dyed merino yarn to create a sweater and a beanie. I also want use the dyed pieces of cotton to make a quilt in the shape of our school logo. I know several professional quilters who can do this for us. If the cotton isn’t accepting the dyes, then I must experiment further. Perhaps I didn’t soak the cloth in the mordant bath long enough. I am still experimenting with getting blue colors from woad and indigo, but more on this in a later post.

Read Full Post »

aai-video-frameIn my last post, I said goodbye to Walden School of Liberal Arts after teaching there for six eventful years. My original plan was to spend a year in Washington, D.C. as an Einstein Fellow, but despite making it to the final round, I was not chosen. My Plan B was to go back to school for a PhD, but even though I was accepted to the STEM Education program at the University of Kentucky, I deferred for at least a year so that I could earn up more money for the move. I interviewed at four schools and received two offers, and accepted the offer at American Academy of Innovation.

aai-charter-school-rendering-s

Illustration of American Academy of Innovation

It is a brand new charter school with a mission for project-based learning, stem education, and international partnerships. They started building it in January and the contractors were still putting in finishing touches as we met for the first time as a faculty on August 15, 2016. Our Director is Scott Jones, who has a great deal of experience directing and working in charter school environments. The teachers have been hired from all around, some from Texas, the East and West Coasts, and several from Utah, Idaho, and Alaska. It appears to be a highly creative group of teachers.

aai-innovation-orange

Innovation Orange: American Academy of Innovation on my first day there.

We took a tour of the building and saw what it will look like in the next two weeks – except for my science room. It hasn’t been finished, partly because of last minute changes to the water and gas lines, partly so that they can get my input. I have since designed the lab, with four student stations, a fume hood and teacher demo desk, and lots of cupboards for storage. As I am writing this (November 14, 2016), the contractors are building in the lab stations – hooray! – and I am teaching out of the library.

faculty-touring-school

Faculty of American Academy of Innovation touring the school; August 2016.

For our first two weeks we met as faculty to prepare and plan. We revised the school’s vision and mission statements. Here are the new ones:

The Vision of American Academy of Innovation is to empower the individual mind to improve the world.

Our mission statement:innovation-defl-a

The American Academy of Innovation combines academic fundamentals; career, technology, and 21st Century skills with international and community partnerships through project-based learning to ignite an innovative mindset within the individual and society.

I most like that our overall goals are to ignite an innovative mindset and to empower the individual to improve the world. I have attended many educator conference sessions on Problem-Based Learning (PBL), so I volunteered to share what I’ve learned with the rest of the faculty and to go through the eight characteristics of PBL, working through a potential large-scale problem as an example. I chose an expedition to Mars (which I’ve used as an example all summer at meetings for potential parents and students). Other teachers volunteered to share their expertise, so we trained each other. Scott also brought in some experts from other charter schools to talk about how we will implement special education and organizational culture. We took time to plan out what our first few days would be like as we started training our new students toward project/problem-based learning.

aai-lobby-august-2016

Lobby of American Academy of Innovation; August 2016. We still had much work to do putting together tables, chairs, desks, and filing cabinets.

In addition to holding daily meetings, we helped to put together chairs, desks, filing cabinets, and other furniture. Parents and students came in to help, and by the time the first two weeks were over, the school was shaping up and ready for occupancy.

first-day-of-school

AAI students meeting in our gym for introductions on the first day of school; August 31, 2016.

On August 29, we held our first day with students at the school. These first two days were to be an orientation to get the students excited about being here and help them get to know us and each other. Some had come from neighborhood schools and knew each other before, but some had come from charter schools or homeschooling. We met in our new gymnasium, and discovered immediately that the acoustics in there are terrible. It is basically a hollow concrete shell, so sound bounces all over the place and the small portable PA system wasn’t up to the job. After introducing the staff, we divided the students into groups and had them rotate through four sessions each day for the first two days.

marble-roll-1

Marble rolling group activity. Students use the pool noodles as channels to roll marbles from a starting line into a bucket. It takes teamwork and problem-solving skills.

My groups were about problem solving. Our first day I did the activity of using swimming noodles cut in half to roll marbles from a starting point into a bucket. As the noodles were short, they had to develop teamwork to move the marble along without dropping it. It was interesting to see leadership beginning to emerge from some of the students. Most of the small groups were eventually successful. It was a lot of fun.

marble-roll-2

Rolling marbles into a bucket as a group problem-solving activity.

Our second day, I ran an activity to make a simple paper helicopter based on Da Vinci’s helix machine. Students were asked to use inquiry to vary the shape of the basic helicopter and try different things. After experimenting and testing in a classroom, I had them drop the helicopters off our balcony in the main lobby and tried to photograph and videotape the results.

helicopter-drop

Testing our paper helicopters. What you get depends on what you’re testing.

Other groups toured the school, took polls for what our new mascot and school colors would be, and many other things. Overall I think we managed to convey a sense of excitement, innovation, and inquiry to the students.

making-marbled-paper

Making marbled paper. Oil paints are diluted with mineral spirits, then dropped into a metal pan with an inch of water in them. The oil/spirits mixture floats on top and can be lifted off by lying a piece of sketch paper on top.

On Wednesday, August 31 we held our first regular classes. We have four periods per day on an A-B schedule; each class is 90 minutes long. I’m used to 70 minutes, so I have to pace myself. Our school day starts at 8:30 and ends at 3:30 with 50-minute lunches, so it is a longer day than I’m used to. My schedule for A days is to teach 3D Modeling during first period to about 25 students (good numbers – I’ve been talking this up all summer). We didn’t have computers to work with at first, so I had to do preparatory things such as going through Drawing on the Right Side of the Brain activities and teaching orthographic and perspective drawing skills. Second period I have STEAM it Up, with only eight students (students didn’t quite understand what this class would be about, but that’s OK – a smaller group will be more mobile and experimental). My third period class is chemistry, again a challenge to begin with since I had an empty room and no sinks or lab stations. I started with six demonstrations using household chemicals and had them make observations. I had 12 students but this has grown to 16. My 4th period class is 8th Grade Science to about 20 students. I decided since the new SEEd standards are being implemented fully next year, we might as well implement them now at AAI. We created marbled paper on the first day.

astro-levels-activity

Astronomy activity to determine the correct order of levels of magnitude in the universe. It starts with multiverse at the top and ends at quarks at the bottom.

On B days (Tuesdays, Thursdays, and alternating Fridays) I have the following schedule: First period (B1) is astronomy to 7-8 grades. I began with my scale of the universe activity to arrange strips of paper in the right order from largest to smallest scale. This helps me see what they already know visually while providing a setting for the class. Second period is Innovation Design, basically my MYP Design class again for 7-8 grade students. We began with the bridge building activity that I modified from Wendi Lawrence’s spaghetti tower design challenge. Even with 90-minute classes, the student groups didn’t get as far as I would have liked, with only one truly successful group. I can see we have some work here, partly because the students don’t know each other and aren’t used to working together. My B3 class is 8th grade science again, and then I had a prep period B4.

the-big-sit-down

The big sit down: all our students lined up, then sat down using the student behind as a chair. I kind of worked . . .

Part way into September, one of our teachers, who is from China, found out he had a conflict with his Visa (he had not renewed it), and so was unable to work for the rest of the semester. We found substitute math teachers for his math classes, but no one to fill in for his two computer science classes. I volunteered to give up my prep on B4 to teach the computer science class. It has been a challenge teaching straight through every day without a prep period, especially trying to stay up on grades. Because of our lack of computers, we had to have the students pair up. He started with Scratch, so I was able to transition the students over to my own way of doing things without totally replacing his structure. I also want to implement using AppLab after Scratch, then move on to Python.

building-bridges

Bridge building design challenge for my Innovation Design class. They must span 12 inches and make a bridge strong enough for a Matchbox car to be pushed across. They are given 30 pieces of spaghetti, 10 small gumdrops, and one sheet of paper.

When you add to this that I now have a 45-minute one way commute it can be exhausting. Much of my after school time has been spent in weekly faculty meetings or designing my science lab or putting together the order for initial equipment, lab supplies, and chemicals. We purchased 27 Dell laptop computers, so I’ve also needed to spend time getting software installed including Daz3D Bryce, Stellarium, Gimp, Sculptris, Blender, and others as well as getting the 3D printer up and running. I come home and crash each evening. But slowly, day-by-day, we are making progress and the students are beginning to develop 21st Century skills for collaboration, communication, and creativity. It was a rocky start, but we are almost ready to implement the Big Project.

pouring-sidewalk

Our school was still under construction during the teacher planning weeks in August, but by the time students started we were ready. Except for my science lab, which was completed in November.

We identified four possible Big Projects as a faculty and had the students vote on which one they preferred. My descriptions were as neutral as possible because I didn’t want to be accused of influencing the vote. Except, of course, I may have sweetened the well by using an example of a Mars expedition during our summer meetings. The vote was to do a Mars expedition or Mars exploration theme for our project. I will report on this more in my http://Spacedoutclassroom.com blog.

science-room-august-2016

My science lab at the beginning of the school year. A white board and projector, but that’s about all. It looks much nicer now!

I’ve never worked so hard, and my health is probably suffering as a result. I’m not as young as I once was, and some days I truly feel it, but it has been an incredible ride so far. Over Winter Break I will be reporting on all that we have done in my classes on my two blog sites, so stay tuned.

right-side-of-brain

My 3D students on the first day of school. By this time we had chairs, but no tables or desks. So we handed out clipboards to each student. Here they are doing an drawing lesson where they turn a photograph upside down and draw what they see instead of drawing a face. They do a better job this way.

Read Full Post »

Walden HS fall 2015

Walden School of Liberal Arts; Fall 2015.

In 2010, I was looking for a teaching job after taking a year off to work on business profile videos. The video projects had been fun and rewarding, but not lucrative, and I missed being in the classroom. I looked through the usual ads, and then the unusual ones, and found a teaching job description on Craig’s List for a local charter school. It was named Walden School of Liberal Arts, and I had passed it many times without realizing it was a school. I’d thought it was a retirement home.

I started teaching science and technology classes that fall. I decided to teach there for five years and give my best shot at implementing integrated STEAM education and project-based learning.

Walden Elem-MS fall 2015

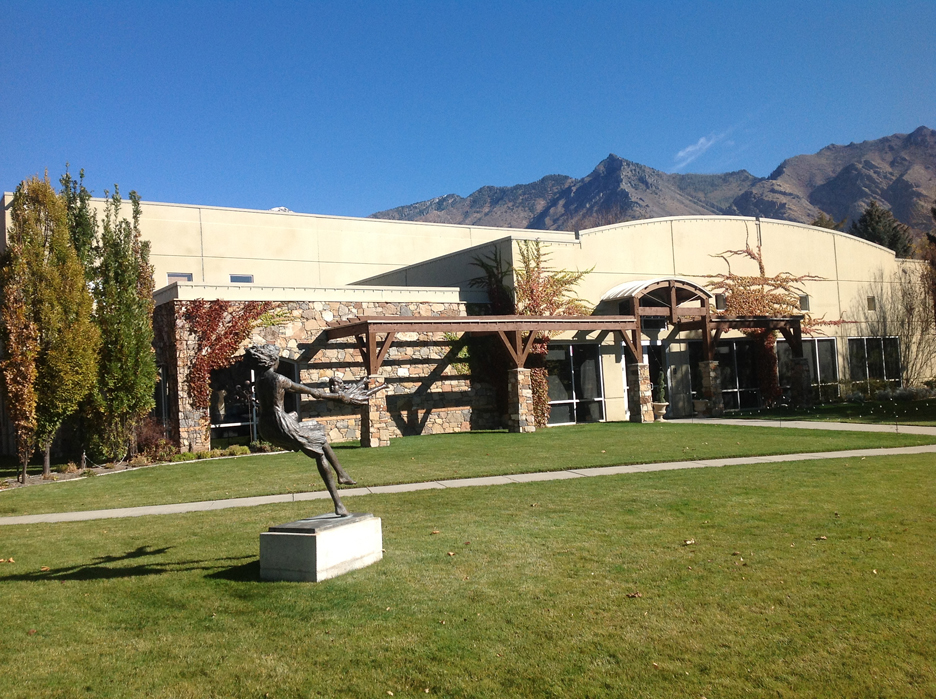
Walden School of Liberal Arts elementary and middle school building; Fall 2015.

Now, six years later and after many successful student projects, I am leaving Walden to teach at a new charter school in Salt Lake Valley. This hasn’t been an easy decision. I have come to truly appreciate the students and the other teachers at Walden and the freedom I’ve had to experiment. The projects I’ve described in this blog would never have happened at a more traditional public school. I’ve been able to train up a cadre of students who now have excellent STEAM skills and are capable of accomplishing great things. But I have to look at what my goals were for coming here, and I can honestly say I’ve done what I set out to do. There have been obstacles to overcome, but these limits have forced me to be more creative and have probably helped, not hindered.

South Fork

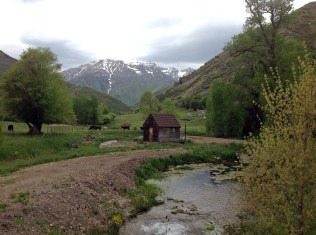
Walden School’s 2016 graduation was held at a ranch in South Fork of Provo Canyon.

I was invited to speak at our 2016 graduation, and I chose the topic of “Dare Mighty Things” based on the famous speak by Teddy Roosevelt entitled “The Man in the Arena.” It was definitely bittersweet to be saying goodbye to the school as well as to the students that I’ve worked with for six years.

Mighty things sign

A sign in the lobby of the Administration Building 180 at the Jet Propulsion Laboratory; March 2016.

My New School:

My new school, American Academy of Innovation, is built on the model of students as innovators, creators, makers, and inventors. It will follow a Problem-Based Learning (PBL) structure and include international and local business and university collaborations and career and technical education as well as STEAM (science, technology, engineering, arts, and math) education. It should be the ideal situation to implement and perfect the projects I already pioneered at Walden, in an environment that will be more suited to cross-curricular integration. I will also be receiving a substantial pay raise, which certainly helps. It is a brand new school, and I will get in on the ground floor of establishing a culture of innovation and creativity, of academic excellence, and scientific inquiry.

AAI 3D logo

Logo for American Academy of Innovation. I created this 3D animated version for a video I created in June to explain the school’s name.

For the last two weeks we have been meeting daily as a new faculty, deciding on the details of our vision, mission statement, principles and core values, policies, etc. I’ve gotten to know the other teachers, and they are as talented and creative a group of educators as I have ever worked with. We had an official open house in the new school on Aug. 18, and I met many of the parents and students I will be teaching. If this is any indication, it will be an amazing year.

AAI under construction

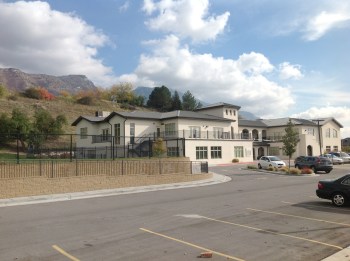
American Academy of Innovation under construction; July 2016.

I will be teaching chemistry again (which I did not teach this last year as I was asked to teach the new IB Design courses instead). I will also have an elective course called STEAM it Up, which will basically be to take all the fun stuff I’ve done in my Wintersession and Chemistry classes from the STEM-Arts Alliance grants and turn it into a full semester class to explore the integration of arts and history with STEM. It will be a creative, making, totally project-based class. I will recreate and improve several of the projects we did two years ago, including making homemade iron-gall ink, experimenting with natural dyes to make tie-dyed shirts, creating marbled end paper and Shrinky-dinks, designing jewelry from etched and corroded copper and brass, building Steampunk costumes and sculptures, etc. I hope to add a few more projects, such as making blueprint T-shirts; collecting, polishing, and setting minerals to make jewelry; and others. As I have done before (but not as often as I had hoped at Walden), I will establish an end-of-year STEAM Showcase where students will display their work, give mini-lessons, and this time even have a fashion show to let parents see the costumes, shirts, and jewelry they will make.

Since PBL requires students to present and demonstrate their learning to an audience as a summative assessment, it fits right in with my plans. And this time I anticipate getting other teachers involved, such as art, history, and English as my students also create posters, draw illustrations, program games, and write lessons, scripts, and blog posts. Because I haven’t been teaching chemistry actively this last year, I haven’t been keeping this blog site up to data; now you will see many more student contributions and more frequent posts.

I also plan to move ever more to a flipped classroom model. Our periods will be 80 minutes long, and we are expected to only use the first 20-30 minutes for direct instruction and content; the remaining 50-60 minutes are for students to collaborate and build projects that solve the problems we pose. As to how many problems we will present in a year and what those problems will be, we’ll decide that in the next two weeks.

Washington Monument

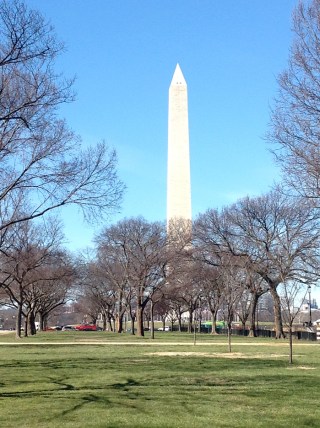
Washington Monument; March 2016.

Plans A Through E:

Going back to teaching this coming year wasn’t my first choice. I had several tiers of plans in place, and returning to teaching was Plan D. Plan A was to be chosen as an Einstein Distinguished Educator Fellow and spend this next year working for one of the Federal agencies in Washington, D.C. I applied this last fall and made it to the semi-finals round, which meant being flown to D.C. for three days of tours and interviews in early March. I interviewed with NASA, the National Science Foundation (a computer science initiative), and the Department of Energy. I was not selected, even though I thought two of the three interviews went very well. So scratch Plan A.

Me by Library of Congress

David Black in front of the Library of Congress in Washington, D.C.; March 2016.

Plan B was to go back to graduate school and fulfill a PhD in Science Education. I took the GRE in April and was accepted into the STEM Education PhD program at the University of Kentucky, but because of my late application, no more research/teaching fellowships were available. I am barely scraping by with my current teaching salary (combined with some awards and video projects on the side), so I do not have the money to move to Kentucky now. I have asked for a one-year deferment, and have accepted the job at American Academy of Innovation where I can save up enough money to move to Kentucky next summer. Or, if AAI works out well, I will simply stay there. It’s a matter of either doing Problem-Based Learning or learning about Problem-Based Learning; I’ve always preferred to actually do something.

Air and Space mural

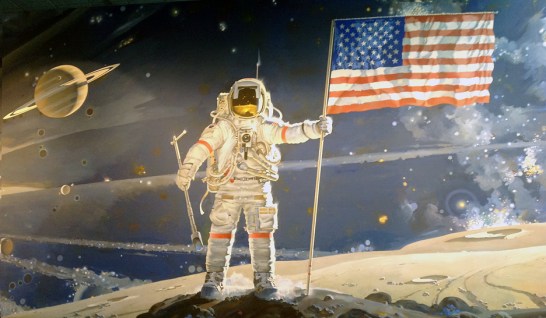
Mural inside the National Air and Space Museum in Washington, D.C.; March 2016. Our hotel was the Holiday Inn just one block south of this museum, so of course I spent some time there, as always.

The Return of The Elusive Atom:

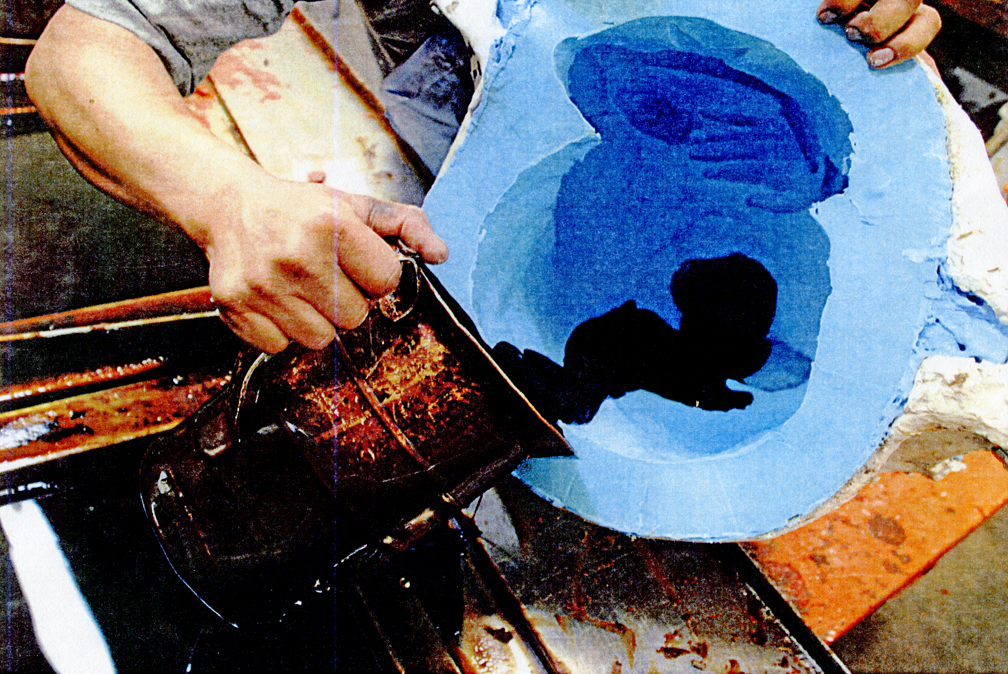
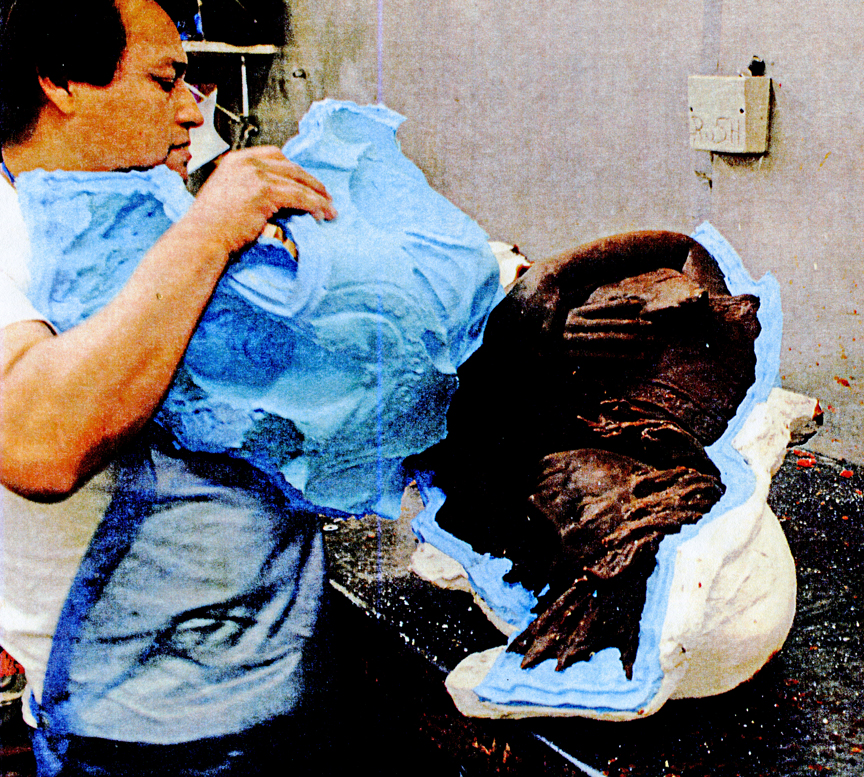
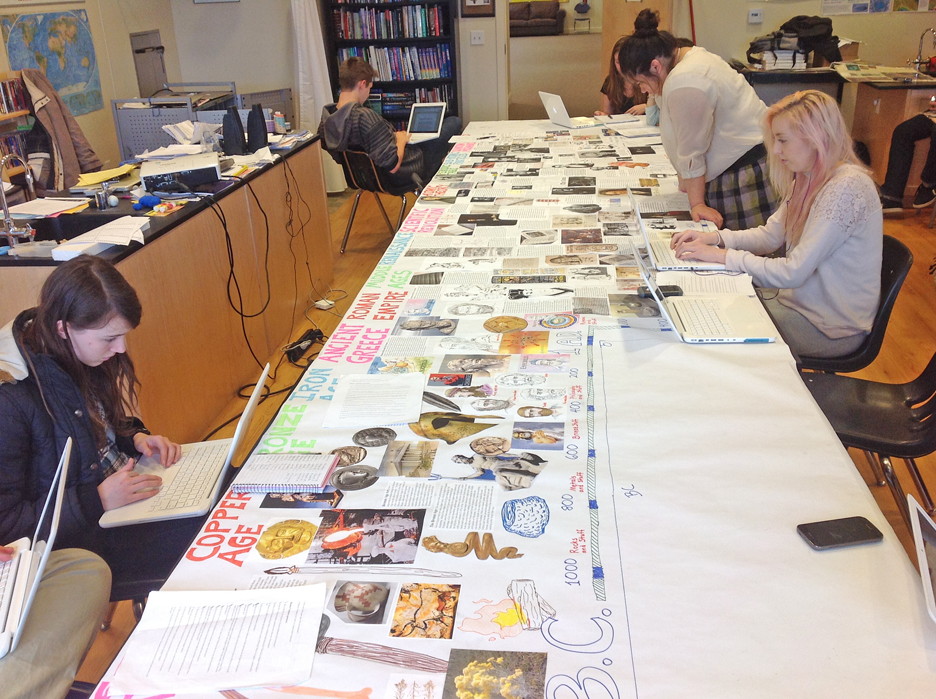
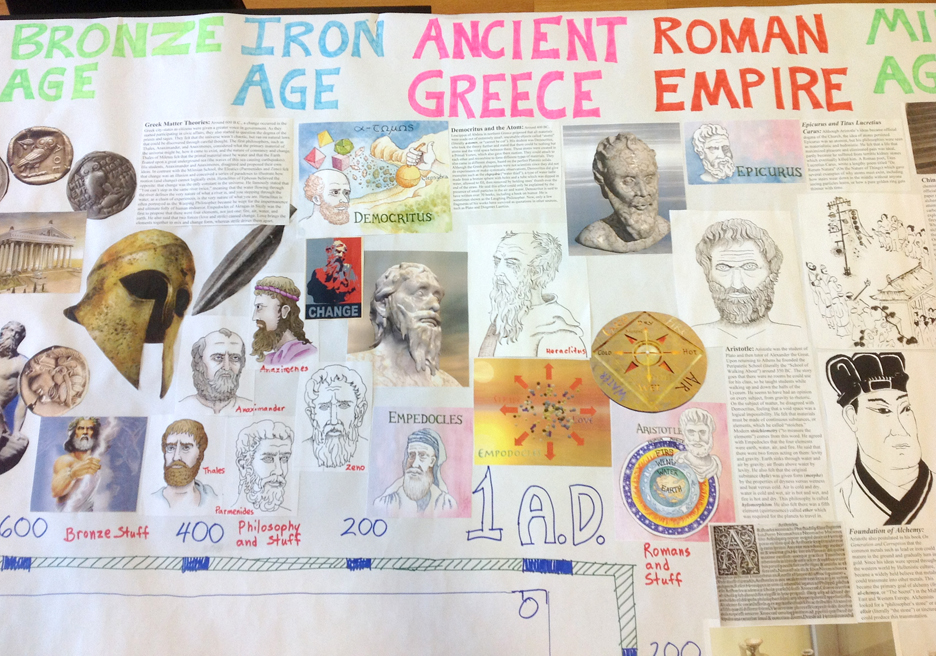
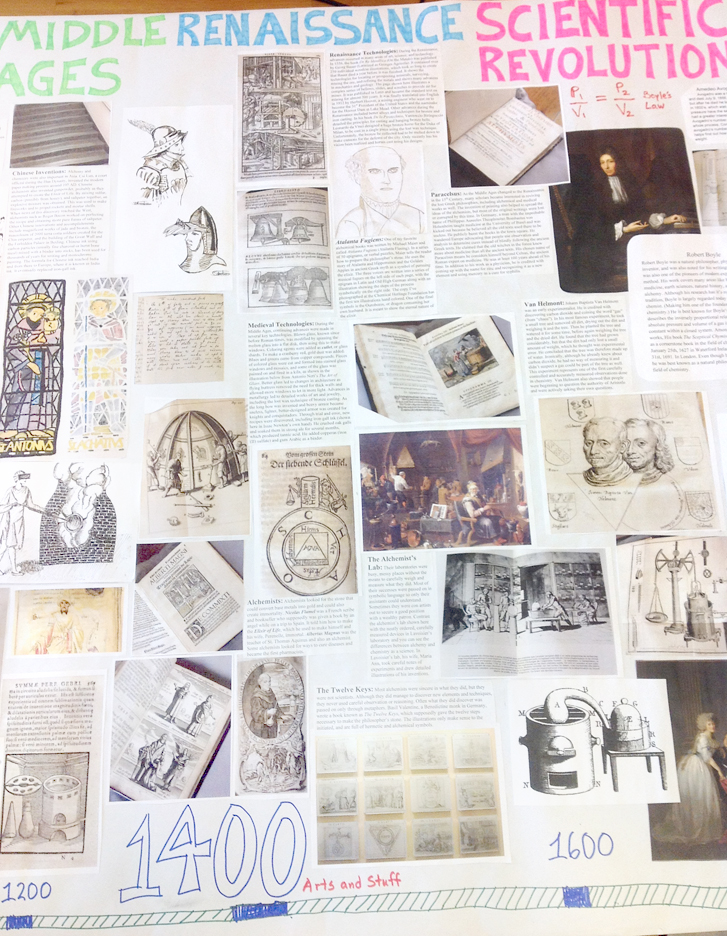
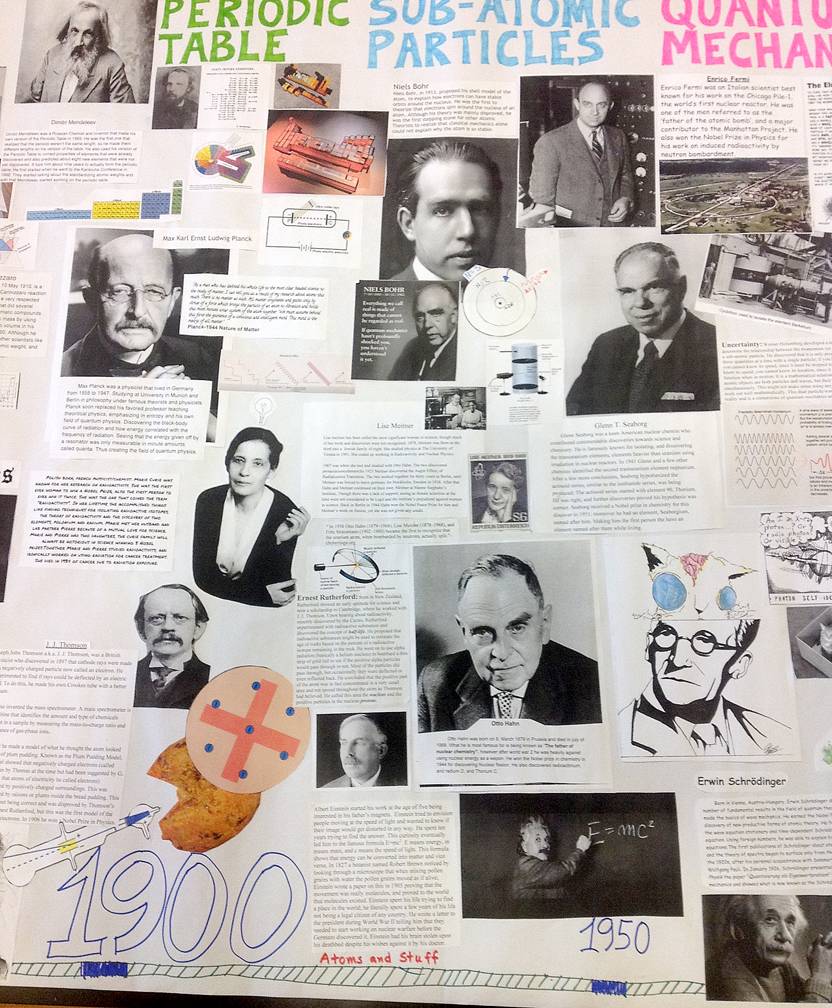
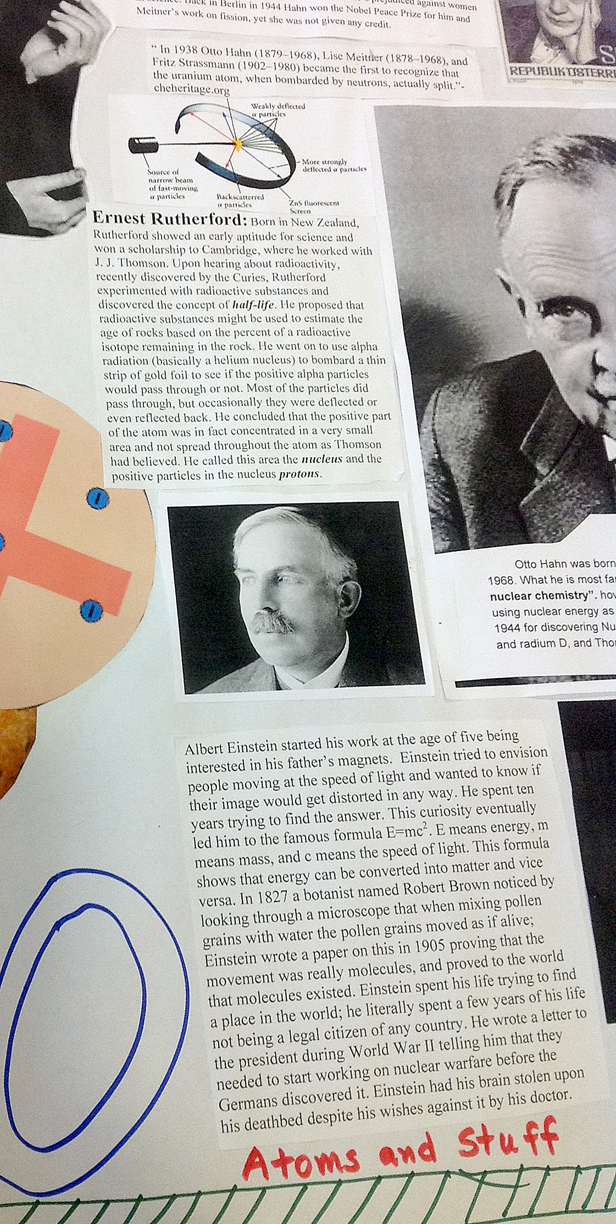
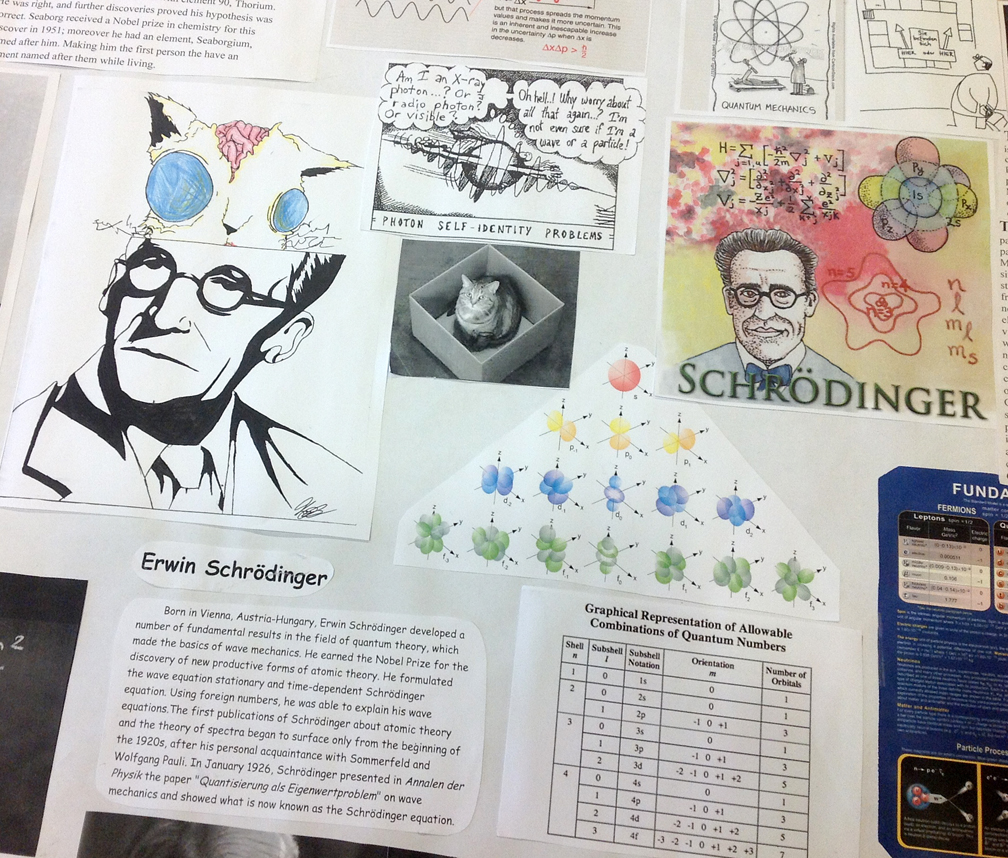
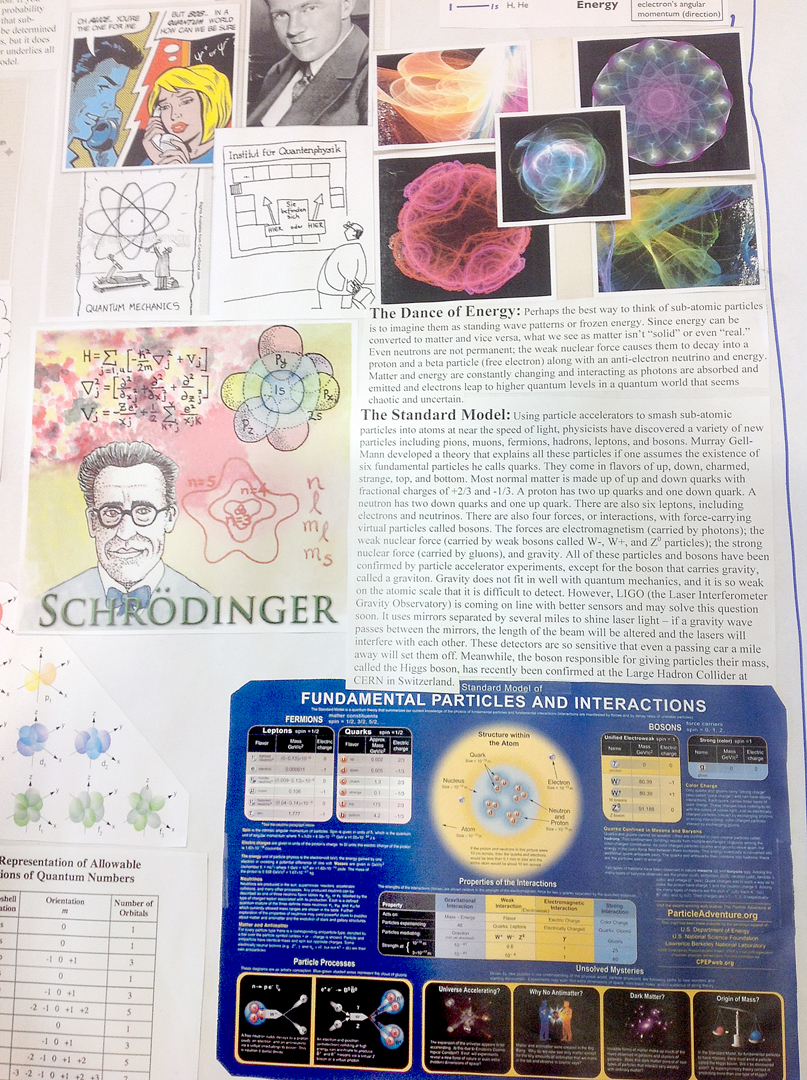
By the way, Plan C was to leave classroom teaching and start up an educational content design firm. I’ve wanted to do this for years, and even attempted it in 2009-2010 when I did business videos for clients. There are a series of Ed Tech start-up programs around the country called Accelerators, where chosen education companies are provided office space and seed money to get their product ready for marketing, then investors provide start-up venture capital to finance the new company in exchange for a piece of the action. One of these Accelerators is in Salt Lake City, and it looks promising. Certainly I have enough ideas. The problem is getting them into a finished enough form to apply to the Ed Tech Accelerator program, then finding the time for 12 weeks to solely focus on my products. I also need to have a partner or partners, which is another problem. So far, it’s just been me. But in anticipation of this possibility, I have finally completed editing the front of my old Elusive Atom poster that has sat in limbo on my computer for years. I started it in 1995. I finished the hand painted version in 2002. And this summer I finally completed fixing the digital version. It looks good. Now I need to do the backside text and line art, and I’m ready to print out sample copies to market.

EA poster small

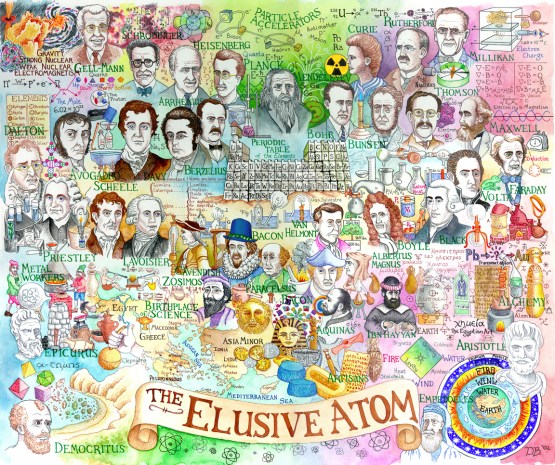
Finished front of the Elusive Atom poster. Now I need to work on the back side, mini-posters, and timeline, then print and market it.

While at the STEM Forum and Expo in Denver, I talked with the new product managers from both Flinn and Nasco, and will try to work with them to make the poster a reality. I also plan to repurpose the illustrations into a timeline and a series of mini-posters on each scientist from the poster, such as Mendeleev or Jabir Ibn Hayyan. I found it fun to get into Photoshop deeply again.

Writing a Novella:

Plan E is a long shot, but something I’m quite proud of. I’ve always wanted to try my hand at writing science fiction, and have several good (I think, anyway) ideas. I read last summer that Tor Publishing is starting an initiative to look for new authors to write novellas for their line of e-books. They announced in May that a new round of stories would be accepted, completely unsolicited, on the topics of cyber punk, future thriller, time travel, and other science fiction tropes (not fantasy this time). That’s my chance! So I spent two solid weeks in June working on writing up a book I’ve wanted to do since at least 1995. It’s called Dead Stone Lions, and I had thought about the plot for years. It hits about all of their possible subgenres. I took a couple of days to brainstorm and outline, then started writing. Once I got into it a chapter or two, the writing took on a life of its own. Weird things started happening – new characters appeared, or old characters did unexpected things, and I had no idea where these threads would lead. Then later in the book, these plot points somehow circled back around and became significant, when I hadn’t planned it that way at all. Like the self-aware computer called ISAAC (after Isaac Asimov, for two important reasons) or the protagonist’s brother’s subplot.

The deadline was the end of June, and I finished the first draft late in the evening of June 30th. It came in at 41,580 words, and I had to pare it down to under 40,000 to make Tor’s definition of a novella. So I pared and compressed and edited for several more hours, finally posting the story at about 5:00 am on July 1 at 39,979 words. I was worried that I might be too late, but the submission site was still up. I didn’t dare check for two months what the status of my submission was, because it was such an accomplishment to just get it done. I know it needs further editing but I’ve let it go for two months on purpose to let the ideas ferment a bit longer, then come back with fresh eyes. However, last Thursday (Aug. 25) I received a short e-mail from Tor.com saying that my novella “did not meet their needs.” Well, that’s not a surprise. So now I am a rejected first-time writer. I certainly am in good company.

I hope to announce some day that I am a published author, both for science fact and educational pedagogy, and for science fiction. Some day, once I’ve gotten a few sales under my belt, I hope to tackle a series of books called Trinum Magicum, about a science teacher who discovers the third use of the Philosopher’s Stone. It will bring in all the research I did at the Chemical Heritage Foundation in 2009, when the plot for this series first started percolating in my brain.

DOE seal

The seal of the Department of Energy. I spent two days in their building interviewing for three possible Einstein Fellowships, but didn’t get selected for any. So much for Plan A . . .

The End of a Dry Spell:

I had quite a dry spell this last year, applying for several STEM related awards but receiving none. The failure of Plan A was just the last in a long line of unsuccessful applications. But things have picked up since. In May, I found out I was selected by the U.S. Department of State as a Teacher for Global Classrooms fellow, and will complete an online course this fall, then attend a training workshop in Washington, D.C. in February. I will travel with 11-12 other teachers to one of six possible countries for a 2-3 week period, beginning in late February through August 2017. We will learn about the culture of the country and their educational system. I don’t know which country yet, but this year the teachers went to Morocco, Georgia, Brazil, Senegal, India, and the Philippines. My personal choice would be Morocco – I’ve always wanted to go there since seeing Casablanca and The Road to Morocco (OK, maybe not the best representation of actual Morocco, but it was fun). I would enjoy visiting any of them.

Me with beard 2016

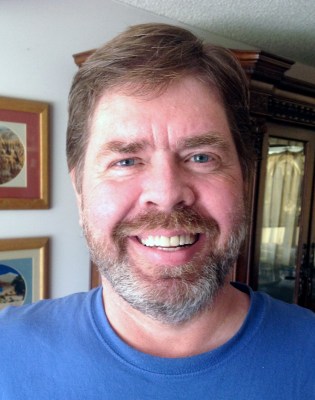
I decided to grow a beard over the summer. How did all the salt get into the pepper?

Half-beard

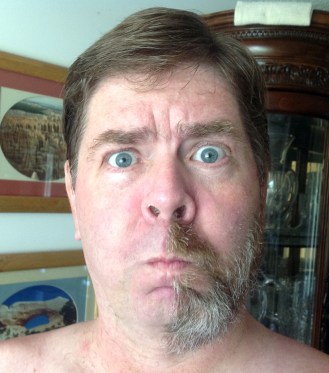
Then it got itchy and I decided to shave it off. Well, partially, anyway . . .

In July, I opened up a letter that had been sitting in my stack of mail and a check for $1200 fell out. Kind of a nice surprise! I have been selected as the Earth Science Teacher of the Year by the Utah Geological Association. I attended a nice luncheon several weeks ago to receive the official award, and also attended their annual picnic on August 13. The best part for me is the possible contacts this award will bring and how we can get some expert geologists involved at our school.

Awards

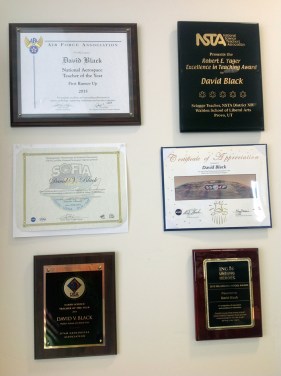
Some awards I have received. The Utah Geological Association Teacher of the Year Award is the one at bottom left.

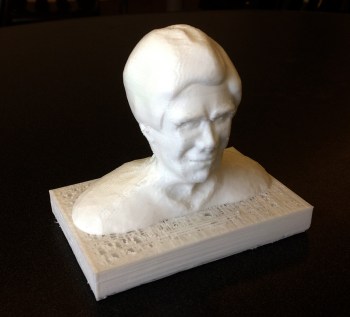
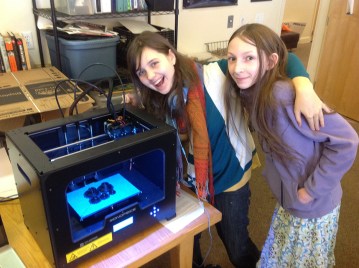
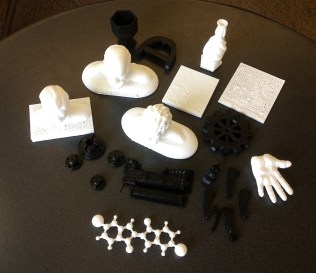
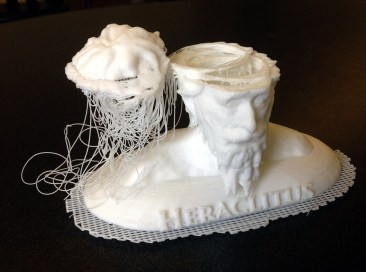
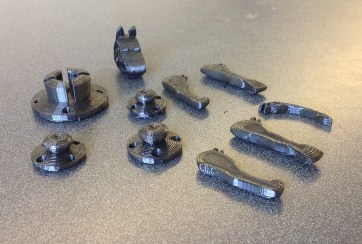
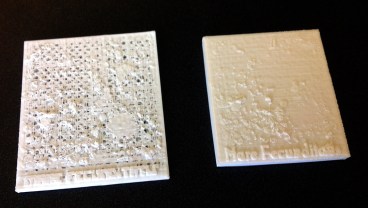
I attended some professional development opportunities in June and July, including the annual Utah IT Education Conference, where I presented on 3D printing. I also attended the STEM Best Practices conference sponsored by the Utah STEM Action Center. I was able to talk with Dr. Tami Goetz a few times – she remembered me from two years ago when I attended some STEM education workshops in Salt Lake. I hope to apply for a grant from them soon. I also ran into a friend who now runs STEM partnership programs for Utah Valley University.

Denver plaza

Civic Center plaza in downtown Denver; July 2016.

July 27-29 I traveled to Denver to present three sessions at the NSTA STEM Forum and Expo. I sent in three proposals hoping one would be selected, and all three were (compared with the annual NSTA conference, where I sent in three proposals and none of them were selected). The Denver forum was very busy for me, but very rewarding. I presented to about 90 people altogether, which is the best turnout I’ve ever had for sessions. My session on 3D printing tips had at least 45 people in it. I had supper with a group of STEAM educators, which I hope will pay off in contacts and future opportunities. I could truly say, as in the song Home and Dry by Gerry Rafferty:

Denver capitol

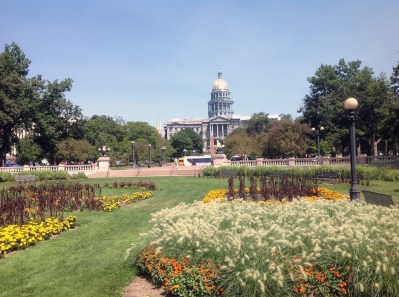
The Colorado State Capitol Building in Denver; July 2016.

I feel tired, but I feel good,
‘Cause I’ve done everything I said I would . . .

Frisco camp

I did my trip to Denver on the cheap, camping on the way there and back and staying in the least expensive hostel I could find while in Denver. We purchased a new tent this summer and this is my camp near Frisco, Colorado.

The first week in August I took my family on vacation to visit my wife’s sister and brother, who both live in Oregon. We stayed five days on the Oregon coast, in Rockaway Beach and in Waldport. Then we took several days to explore the Columbia River Gorge and the Oregon Trail. I took many photos, saw some amazing geology and even a few grey whales.

Me at Twin Rocks

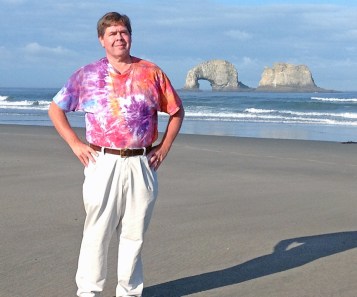
David Black at Twin Rocks near Rockaway Beach, Oregon; August 2016.

A Summary of Six Years:

Before I could start at AAI, I had to finish up and move out of Walden School of Liberal Arts. Since I had decided this would be my last year at Walden clear back in May 2015, and I wasn’t going to be teaching chemistry, I took the opportunity to move most of my chemistry materials and papers home at the start of the 2015-16 school year. I moved my astronomy materials over to the middle school since I was teaching 6th Grade Science second semester, which is mostly astronomy. I kept it all contained, so it was easy enough to take that home as well at the start of summer.

Me at Frisco Lake

David Black near Frisco, Colorado; July 2016.

Twin Rocks reflection

Twin Rocks at Rockaway Beach, Oregon; August 2016.

But my materials in the computer lab at the high school took some time. Since the building at AAI was not ready yet, and I didn’t want to have to move things home, then move them to AAI in two steps, I asked if I could wait until the very end of summer to clean out at Walden, which the director agreed to. Once I returned from my family vacation to Oregon, I spent the second week in August getting my materials cleaned out, my printouts and posters off the wall, and the iMac desktop computers cleaned off. I saved all the files I had made over six years onto a 3 TB portable hard drive.

Yaquina Lighthouse

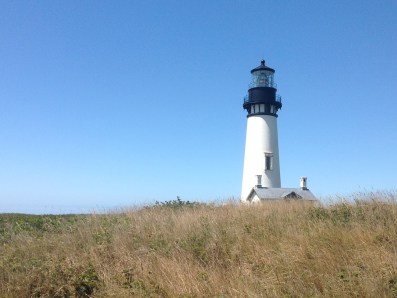
Yaquina Head lighthouse near Newport, Oregon; August 2016.

Over the rest of the summer (and since last fall, really) I have been working on putting together a printed binder of all the projects we’ve done at Walden (and others at MATC and before). It started as a supplemental file for the Allen Distinguished Educator Award and was expanded for my trip to Washington, D.C. for the Einstein Fellowship interviews. I’ve added pages for our Deep Space Expedition to southern California in March, and filled in more pages on other projects, trips, awards, and events. I added section caption pages and tabs. There is still much more I could add, but the binder is as full as I dare make it. It came in handy as I’ve presented at open houses for AAI. In the process of creating it, I organized all my Walden work and files onto the new hard drive. I’ve needed to do this for years.

Ecola State Park view

View south from Ecola State Park, Oregon; August 2016.

The Adventure Continues:

So there you have it – catching you up on where I am. I wanted to write this summary to explain what’s been happening, but I will write more detailed posts on each of these events as I have time. My commute to AAI will be 45 minutes if I drive and 90 minutes if I take the light rail system, which I hope to do most of the time. It will give me lots of time to write these blogs and stay up on grading.

Sunset seagull 1

I read Jonathan Livingston Seagull again while on our trip to the Oregon Coast.

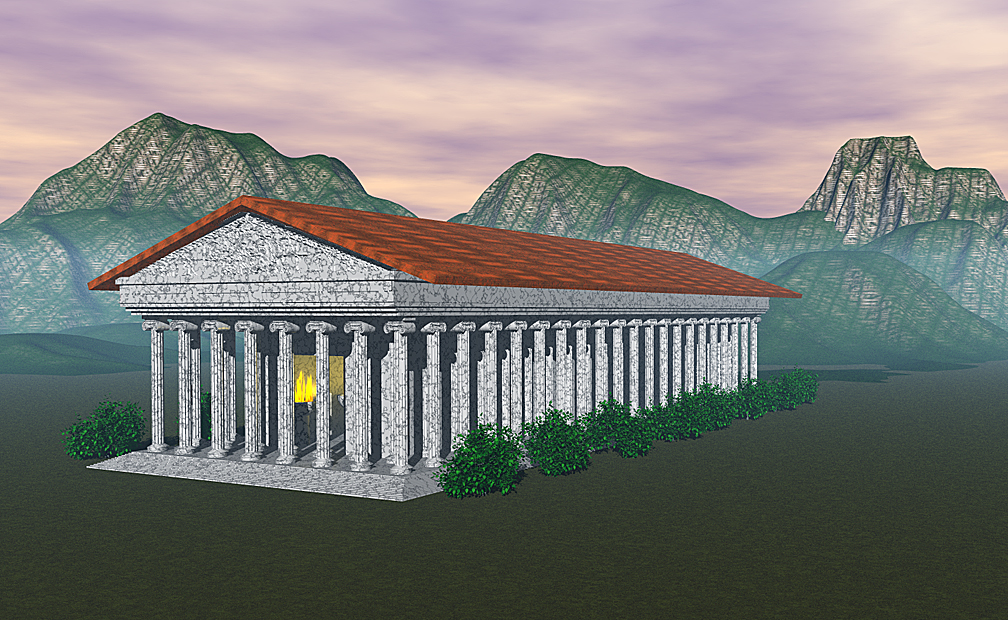
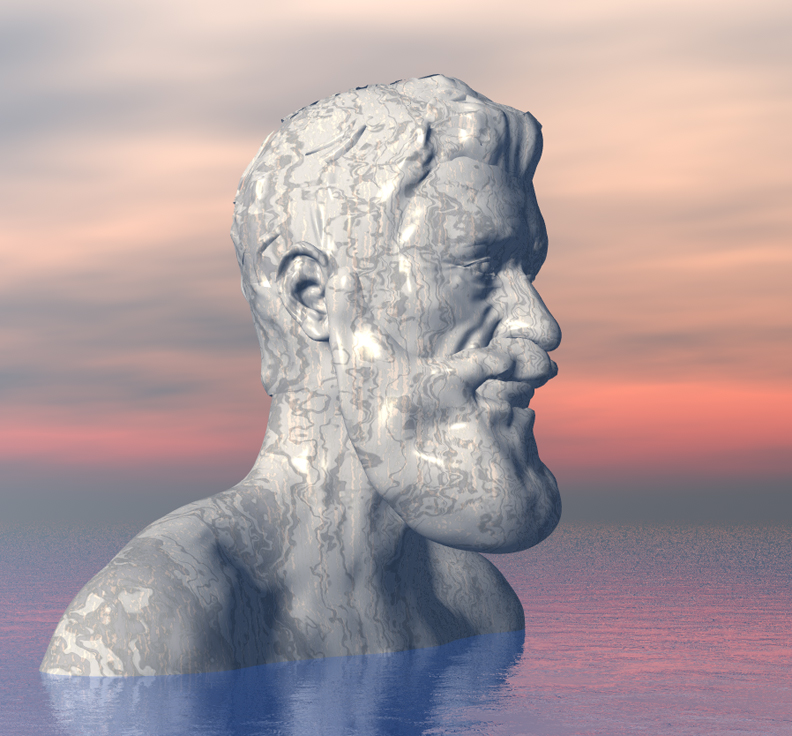
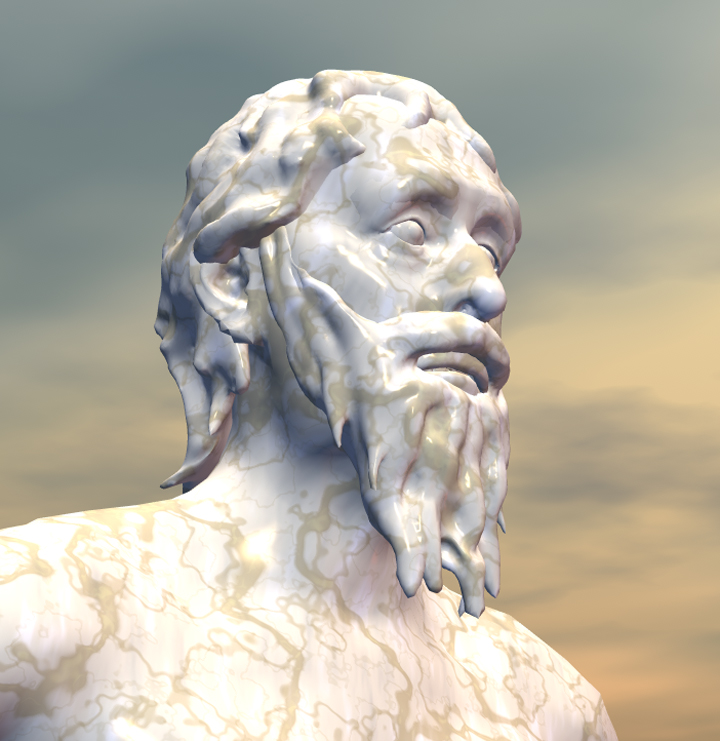
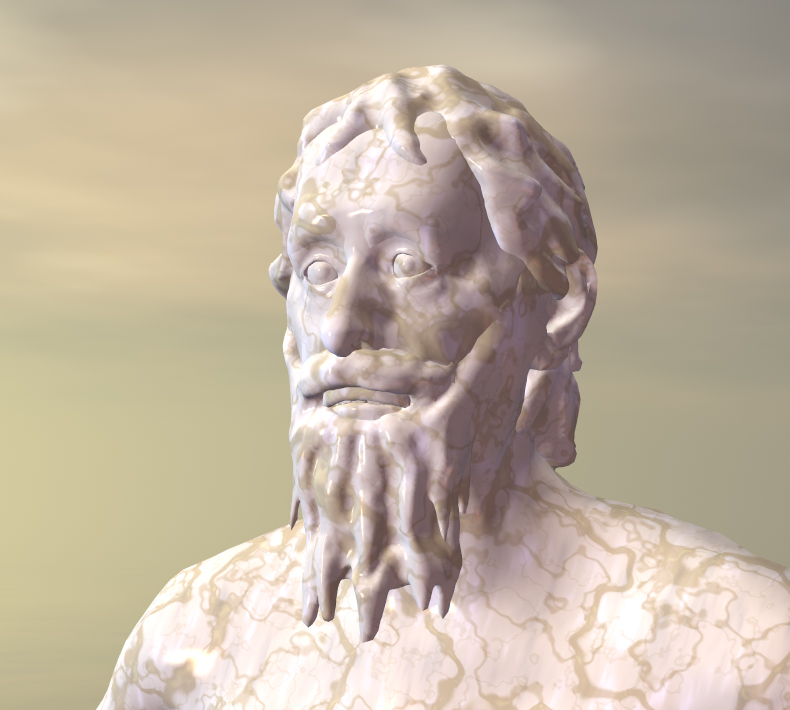
There is still so much to do. I need to complete the transcriptions of Dr. Graham’s interview on Greek philosophy, then revise the script and complete the movie. I have many videos from my Elements Unearthed explorations that need to be done, and educational products to design, books to write, computer programming languages to learn and computer games to create, and time gets ever shorter. This next year will be an amazing adventure. I hope you join me.

Crown Point lookout

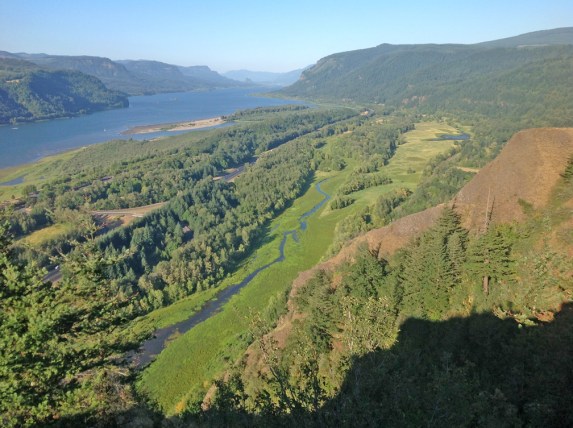
View from Crown Point overlooking the Columbia River Gorge; August 2016.

Multnomah Falls

Multnomah Falls on the Columbia River; August 2016. We got there just before sunset on a clear day with nice lighting.

Wakeena Falls

Wakeena Falls on the Columbia River; August 2016.

Heceta Head

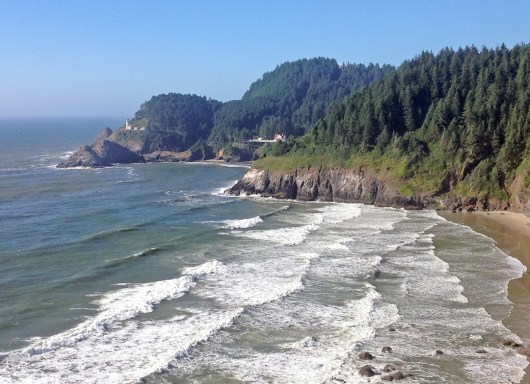
Heceta Head lighthouse on the Oregon Coast; August 2016.

Sunset Seagull 2

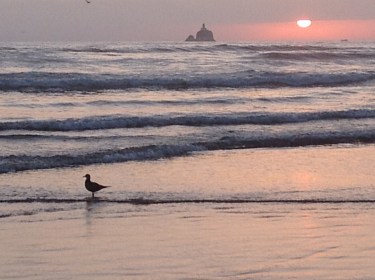
Another seagull at sunset, this one at the beach near Waldport, Oregon; August 2016.

Read Full Post »


Yours Truly in 3D

Yours truly in glorious 3D plastic. I modeled my head using Sculptris by Pixologic, then added the base in Daz3D Carrara. I had the printer set on the fastest speed and one shell, so the top of the base did not get covered very well.

3D printers have become all the rage in STEM classrooms. I’ve been salivating over them since they first became affordable for schools. We purchased one at Walden School just before Thanksgiving and I’ve kept it busy ever since. However, like any new technology, if I didn’t have a long-term plan for how to use it or a clear purpose in mind, it will be a new toy for a month or so and then sit idly in a corner gathering dust. They are great for someone who is willing to experiment to get print jobs to work consistently. I had quite a few failures at first, and still have them occasionally. The printers aren’t cheap and neither is the plastic. But with these caveats in mind, they can be truly useful additions to your STEM classes.

Lea - Camille with studs

Two of my MYP Design students printing out plastic snaps they designed.

I’ve taught 3D modeling classes for many years, and have incorporated 3D technologies into many of my science projects. I’ve written about several ways of doing this in previous blog posts, including the last post on modeling Greek philosophers in 3D. My students have become proficient at modeling any kind of object they need, so a 3D printer was the next logical step. Since I am teaching mostly engineering, computer science, and design classes this fall, we have need of a way for students to manufacture prototypes of their designs. For these reasons I convinced the powers that be to purchase a 3D printer.

All 3D prints

Some of the successful print jobs we’ve done so far. Most of the objects have been done as experiments to learn and test the workflow from 3D model to print.

After a lot of research, I decided to buy a Monoprice dual extruding printer – available for about $700. It came within three days of placing the order (woo-hoo!) and my IB Design Technology students had it assembled in about two minutes. Then came the process of learning how to use it to get consistently successful prints.

This isn’t as easy a process as some may think – if you have the notion that it’s like plugging in an ink jet printer and sending a print job from any software (in other words, plug and play) then you haven’t studied up enough on how these printers work.

Heraclitus failed

What happens when the model detaches from the print platform. It slid aside but continued to print, leaving the “spaghetti brains” hanging under the top of his head. The grid on the bottom is the raft. It also created scaffolding under the beard, which has been removed.

The process is called additive manufacturing and involves creating an object by extruding a thin plastic filament onto a flat print platform. The platform moves slowly downward (z-axis) as the extruder moves sideways and in and out (x and y-axes) to build one layer at a time. Think of using a hot glue gun to build up a contour map of a landform. For this all to happen, the 3D object must be split into layers by the printer’s software and a pathway generated for the extruding nozzle so that it lays down the filament without it getting tangled or dripping. This pathway/layer split is referred to as g-code.

Tyrian Purple 2

A model of a molecule of Tyrian Purple dye. This dye was extracted in the Phoenician city of Tyre on the coast of Palestine by crushing the shells of murex sea snails. One snail would produce only a drop of the dye. It was so expensive only the Roman nobility could afford to wear clothing dyed with this color, hence the phrase “born to the purple.” It is my favorite molecule. The large atoms on each end are bromine, which provides the burgundy/purple color.


To get the 3D model into a form that can be split into g-code, it must be saved or converted into an STL format. There are online converters for doing this. Of course, even before that, you have to know how to make the 3D objects in the first place unless you are content to simply print out someone else’s models, such as those found on Thingiverse or at the NASA 3D website. In that case, you aren’t realizing the potential of this device for modeling, engineering, and prototyping of student-created projects.

Sarah portrait

Student self-portrait. The head and hair were done in Sculptris, the base and text in Carrara. It then was exported as a 3DS file and converted to STL, then loaded in ReplicatorG to generate the g-code layers.

If this process sounds complicated, it is. But that’s not the half of it. If your models have overhanging parts, the printer will just create a lot of plastic “boogers” (see the failed print of Heraclitus and the “brains” hanging out of his disconnected skull to see what I mean). So the software creates supports or scaffolds to hold up the overhangs, which must then be removed and sanded down. The software also creates a raft or grid of plastic underneath the model to help it stick to the print plate. That is the grid you see under the failed Heraclitus.

Black plastic objects

Our printer allows objects to be printed with two colors at once. I haven’t attempted that yet, but here are some objects with black plastic. The D is part of my family’s cattle brand, the Lazy Bar D ranch.

There are many problems that can occur. If you print large, flat objects with square corners, then the plastic can cool too quickly with both sides exposed and the corners can peel up and curl. Although the print platforms are usually covered with a tacky tape such as Kaptan, you can still have print jobs come loose and start sliding around as the extruder nozzle moves. This is what happened with the failed Heraclitus – it did well up to his eyebrows, but the continued wiggling of the nozzle head caused the raft to break loose, so the printer continued the job off to the side as the model slid away in stages. Kind of cool looking, but the print wasted eight hours and some plastic. Now I have to start it over again and tape it down better.

Democritus and Aristotle prints

Printouts of Democritus and Aristotle. To provide better quality for the print, I created a sloped base with rounded edges to prevent curling. Both models were created using Make Human for the heads, then imported into Sculptris to add the hair, beards, and eyebrows. Finally, the models were brought into Carrara to add the bases and text before exporting as a 3DS file.

I have also had an issue with the workflow itself. To make Heraclitus (and Democritus and Aristotle) I started with a free program called Make Human, which allows one to set morph targets on a generic human figure to make the features look a particular way. I loaded in photos of the philosophers to use as referents. Then I exported the model as an OBJ and imported it into Sculptris, another free program done by Pixologic, the same company that does the leading character modeler Z-Brush. It works like a ball of clay that you push and pull into shape. I used it to add the hair, beards, and eyebrows. Then I exported it again as an OBJ and imported it into my full 3D modeler, called Carrara by Daz3D (but you could use Maya or Blender, etc.). In Carrara, I decapitated the head from the body using a Boolean command, then added the base and letters. I finally exported it as a 3DS model, converted it to STL using Online 3D Converter, then loaded it into the ReplicatorG software for generating the g-code. By the time I was done, this model had been through five different software packages.

Cow parts and snaps

Some student design projects printed out. The cow parts (head, legs, and tail) on the right are for a toy cow. The body of the cow had some issues printing, and the C-joints on the legs didn’t quite fit. The snaps on the left worked with the smallest positive size and the split hole configuration. The MYP Design students planned, created, modeled, and tested these prints. Now they need to make revisions. This is the engineering process.

This is a complicated process, and the model can fail anywhere along the way. I’ve had some trouble getting Carrara to export the models correctly – it says they are there, but have no data in them. I think these are models that have too many polygons, such as those where the entire head and hair are done from Sculptris. Using Make Human keeps the head model’s polygon count reasonable.

Mare Fecund printouts

Two printouts of Mare Fecunditatis on the Moon. I started with LOLA data from the Lunar Recon Orbiter mission, loaded it into Adobe Photoshop in Raw format, selected the section I wanted and loaded it into Daz3D Bryce as a grayscale height map, which turned it into a terrain object. I exported it as a 3DS file, added the base and letters in Carrara, and so on. The print on left was done at fastest print speed and didn’t fill in well. The one on right has two shells and reduced print speed, but still lacks detail. My next attempt will be at a 45° angle with supports underneath to gain the better resolution of the x and y-axes.

I’ve tried making 3D terrains of Mars and the Moon based on Mars Global Surveyor MOLA and Lunar Reconnaissance Orbiter LOLA data. I load the grayscale heightmaps into Bryce (another Daz3D program), then export a 3DS file into Carrara to build a base and text. The final results have had issues with holes in the bottoms of craters, text that doesn’t show up well, and insufficient vertical exaggeration to see any details. I also had trouble with the first attempt to print this terrain (of Mare Fecunditatis on the Moon) because I only had one shell and had the printer on fastest nozzle extrusion speed and travel rate, so the top was not solid enough.


But . . . with all these problems, I am succeeding now more often than failing. That is what engineering is all about, after all – you have to learn how to fail until you succeed. I’ve tried a variety of different print jobs, found out the trouble spots and (mostly) how to correct for them, and I am ready to start printing out student projects now that we are approaching the end of the semester.

Hackathon 3D 4

Students learning 3D modeling using Sculptris at the Utah County Hackathon on Dec. 12, 2015, sponsored by 4-H.


On Saturday, Dec. 12, 2015, I presented a session at the Utah County Hackathon sponsored by the local 4-H Club. I took the 3D printer along as well as some laptop computers from my school and taught about 24 kids how to use Sculptris and how to do 3D printing. The session was a great success. There was a man named Colby there who had quite a bit of experience with 3D printing. He gave some advice that I will try out soon: First, I can get better resolution by standing my terrain models on their side. These printers have better resolution in x and y-axes than in the vertical z-axis. I just need to build some buttress supports to hold it up that can be removed later. He suggested using PEI (polyetherimide) tape, which becomes tacky when heated on the print platform, then less sticky when cool, so jobs won’t slip while printing but still come off cleanly when cooled down. He gave me some ideas for better temperature settings – I might have my platform temperature too high. There are still many experiments to try.

Hackathon studs and printer

3D printer and students learning Sculptris at the Utah County Hackathon, Dec. 12, 2015.

So, to summarize the lessons learned:
1.) Don’t expect a 3D printer to work perfectly right out of the box. There are a lot of tweaks to do, including calibration, print platform leveling, temperature adjustment, feedrate adjustment, etc, etc. to do before you will be consistently successful. Read up on the forums and ask lots of questions before deciding which printer to buy, and be prepared to experiment.
2.) Unless you are content with printing pre-created models, you should be ready to teach (or facilitate) your students learning how to do 3D modeling in the first place, and how to convert their models into the STL format needed for 3D printing. There are many fairly easy to learn 3D programs out there, including Sculptris, Sketch-Up, Tinkercad, and Make Human. Maya is also free for students and teachers, but the learning curve is steep. Blender is open source and free, but the interface is hard to learn even for experienced modelers.

Hackathon 3D 2

Students learning Sculptris at the Utah County Hackathon on Dec. 12, 2015. They are building alien heads. They enjoyed learning the program and seeing how to do 3D printing.

3.) Try to get a printer with a heated print platform and variable temperatures and extrusion rates. One size does not fit all jobs here, especially if you want to print with more than one type of plastic. ABS expands more when heated than PLA plastic, so it tends to curl more as it cools down. It also requires a higher nozzle temperature to melt it.

4.) Keep an eye on print jobs. My failed Heraclitus started out well, so I taped the edges and left it overnight to print. Somewhere around six hours into the job, it detached from the print plate and caused the fatal print defects shown. Print jobs also sometimes stop for no reason. You won’t be able to start them up from where they left off. It will just be wasted plastic. You must keep trying, and be patient.

Electroneg and Tyrian purple

Final printout of the Tyrian purple molecule. The black model is of the periodic table of elements, showing the property of electronegativity for each element. This was done by typing the values into a TXT file, then importing it into ImageJ software using Import-Text Image, then converting the grayscale image into a height map for Daz3D Bryce. From there, we used the same process as the 3D Moon models.

5.) Have a plan and a purpose for why you need a 3D printer. Otherwise they can be frustrating and ultimately unsatisfactory for you. If you haven’t integrated 3D data analysis or modeling into your classes already then a 3D printer will be useless for you. If you want some ideas how to do this, look at some of my other posts, such as this one on creating 3D models of periodic properties of the elements: https://elementsunearthed.com/2014/05/10/visualizing-periodic-properties-of-the-elements/ . Here is a photo of a 3D print job done from one such model, showing electronegativity, as well as a model of the molecule for Tyrian Purple dye.

6.) Some supplemental materials will help. Buy some Aqua Net Super Hold odorless hair spray (purple can) and spray it onto a paper towel, then rub it onto the tape on the print platform to improve the stickiness. Even with that, the jobs might still work loose. Some people use glue sticks or a gel adhesive. You will need a roll of Kaptan or PEI or blue painters tape to put on the platform if the tape starts to peel up.

Indi portrait

Student self-portrait using Sculptris and Carrara.

7.) Avoid large flat objects with sharp corners. They tend to curl up when cooling. If you build in supports, you can print up to a 45° angle without scaffolding, and therefore take advantage of the better resolution of the x and y-axes.

Good luck. Let me know what types of projects you attempt, and we can swap ideas. As you can see from the photos here, there are many possibilities for chemistry classes alone.

Hackathon 3D 1

Students working with modeling clay to learn the concept of 3D modeling. This is at the Utah County Hackathon on Dec. 12, 2015 at the Provo Library. The image on the screen is of the ReplicatorG software. It is printing my family’s cattle brand, the Lazy Bar D. Unfortunately, the bar wasn’t quite level with the bottom of the D in Carrara, so a raft wasn’t printed under it and it went at bit wobbly and timey-wimey.

Read Full Post »

A 3D model of the Temple of Artemis at Ephesus, where Heraclitus lived. This image was modeled by Cameron Larson.

A 3D model of the Temple of Artemis at Ephesus, where Heraclitus lived. This image was modeled by Cameron Larson.

During the summer of 2009, I fulfilled a research fellowship at the Chemical Heritage Foundation in Philadelphia. I’ve previously written about my experiences there in this blog. One of the major areas I researched was the history of Greek philosophies regarding matter, fundamental materials, and the nature of reality. I wrote a script and created various animations to use for a three-part video about the philosophers and their theories. Over the next year, in between working on other projects, I recorded narration and put together timeline sequences in my video software for the three segments. But there the project stalled out, because all I had was my own voice talking with B-roll footage over the top. It was too boring, even for me. I needed to interview an expert to provide primary footage, using my narration only to stitch it all together. But I was back in Utah by then with no available experts around that I knew of.

3D model of Aristotle created using Make Human for the head, Sculptris for the hair and beard, and Bryce for the final render.

3D model of Aristotle created using Make Human for the head, Sculptris for the hair and beard, and Bryce for the final render.

During the summer of 2014, I fulfilled a Research Experience for Teachers in astronomy at Brigham Young University, as I have described in my other blog (http://spacedoutclass.com). While talking with Dr. Eric Hintz, my research advisor, he mentioned a paper he had written with a BYU philosophy professor named Daniel Graham. It regarded a Greek philosopher named Aristarchus, who calculated the size of the Moon based on the extent of a solar eclipse. I realized that I had found my expert literally right in my back yard.

I e-mailed Dr. Graham and he consented to talk with me, and we spent a fascinating 90 minutes discussing the various Greek matter theories and philosophers. He agreed to allow my students and I to videotape him answering our questions, and even gave me a book he had edited on the philosophies of the pre-Socratics.

3D image of Empedocles. Of course, we have no idea what they really looked like.

3D image of Empedocles. Of course, we have no idea what they really looked like.

In my next post, I’ll describe this interview and provide a transcript. Before he came to our school, my students needed to prepare for his interview. I introduced the Greek matter theories as the first of the three threads that led to modern chemistry (I’ve written about these threads before at this post: https://elementsunearthed.com/2009/07/31/three-threads-to-chemistry/ ). Students were assigned individual philosophers and asked to become familiar with their lives and theories, then create a series of questions that they could ask of Dr. Graham. I looked over their questions, made suggestions, and had students revise them so that they wouldn’t be redundant. I sent the list to Dr. Graham to review before his interview.

3D image of Heraclitus. He is often shown as the Weeping Philosopher, saddened by the folly and impermanence of the world.

3D image of Heraclitus. He is often shown as the Weeping Philosopher, saddened by the folly and impermanence of the world.

Meanwhile, my 3D modeling students were learning how to use basic character design software such as Sculptris by Pixologic. I had them use illustrations and sculptures of the philosophers to create torsos in 3D. We also used a new program I found called Make Human, which allowed a basic human figure to be morphed into whatever shape we wanted. The students used Make Human to create the basic head, then imported it into Sculptris to form the hair and beard around it, then took the pieces into Daz3D Bryce for final assembly, texturing, and rendering. Our purpose was to create a series of images and animations to use as B-roll in the final videos. We also hoped to add morph targets and bones and animate the heads talking through quotes of the philosophers. This would require modeling the inside of the mouths, including tongue and teeth, and wound up being too much of a challenge for my beginning 3D students.

Aristotle with a quote attributed to him.

Aristotle with a quote attributed to him.

In addition to the animated torsos, I had students use Bryce to build recreations of temples and other buildings found in the cities where the philosophers lived, such as Miletus, Abdera, Acragas, Ephesus, Athens, and Elea. We had to find diagrams or illustrations of these temples. The Temple of Artemis at Ephesus was one of the Seven Wonders of the Ancient World. Using only artists’ renditions and photos of a scale model found in Ephesus today, the students who did this temple had quite a challenge. Not all of the temples were completed, but many of them got at least the buildings done with excellent detail. It pushed our computers to the limit.

Empedocles with added Photoshop effects.

Empedocles with added Photoshop effects.

One of the many projects I’m trying to finish up this summer is to complete all these animations along with hand-drawn illustrations of the philosophers. I have a watercolor painting I did several years ago called The Elusive Atom that included many of these philosophers, and I’ve used Adobe Photoshop to isolate the philosophers from the background. I also have my pen-and-ink illustrations using homemade ink as well as homemade watercolors. I’ve gradually been building up these projects so that when I do the final editing of the video segments and include Dr. Graham’s interview footage, I will have enough materials.

I knew it would take some time to transcribe and edit the interviews, and that I would have to recreate my original animations (they were designed for SD video six years ago and I now want to do this video in HD) and revise and re-record the narrations. I wanted to start using all these materials now, so when my students created the large timeline banner on atomic theory, I made the banner cover all the history of chemistry and included many 3D images, illustrations, and photos of books from the Chemical Heritage Foundation.

Another view of Heraclitus. I set the models into Bryce, added a marble texture and skies, and created a simple camera orbit animation so that renders could be easily created from different sides.

Another view of Heraclitus. I set the models into Bryce, added a marble texture and skies, and created a simple camera orbit animation so that renders could be easily created from different sides.

I have not given up on creating a series of videos, posters, a book, and other materials for this Elements Unearthed project. My need to earn a living as a science and technology teacher has kept me too busy to do much more than write a few blog posts now and then. But I keep filling in pieces, such as the tour of Adonis Bronze I reported on in my last post, and research of other ancient art forms. I took a group of students on a tour of Nevada mining towns last year. I’m only halfway through blogging about my trip of Colorado mining towns in 2012. What I need is two years of free time and about $100,000 in grants to focus on this project, travel to the places I still need to visit (there are many), and put everything together. Have boxes of tapes I need to capture, but not enough money to purchase the hard drives needed. So if you know a rich patron who’s got money to spend on such a project, please let me know!

More Aristotle quotes.

More Aristotle quotes.

In the meantime, I’m still trying to keep this blog going despite having so much happening in other areas of my professional life. It’s been a crazy year. Mostly I’ve been involved in aerospace and STEM education activities, and I’m writing about some of them in my other blog.

Read Full Post »

Bronze horse on display at Adonis Bronze in Alpine, Utah

Bronze horse on display at Adonis Bronze in Alpine, Utah

As part of my unit on the history of chemistry, I wanted my students to experience an ancient art. I have written before that, in my opinion, there were three major threads that led to modern chemistry: Greek Matter theories (more on that in my next post), Alchemy, and Artisans. Some of the art forms and technologies invented during Roman and Medieval times are still practiced today in essentially the same fashion, such as stained and blown glass, ceramics, sword making and blacksmithing, jewelry, weaving and fabric dyeing, and some types of metallurgy.

Hoop Dancer, a bronze statue on display at Adonis Bronze

Hoop Dancer, a bronze statue on display at Adonis Bronze

We have some newer tools and a better understanding of how matter works, but in many cases the old techniques haven’t changed much. For example, a glass blower from the Middle Ages would have no problem working in a modern workshop. We have better heating sources for the glory hole and annealing oven, can use a blowtorch to keep areas hot, and have substituted wet newsprint for the smelly leather they used to use. But that’s about all that’s changed.

Blacksmith statue at Adonis Bronze, made with the lost wax technique.

Blacksmith statue at Adonis Bronze, made with the lost wax technique.

I did some searching and found there were several workshops in our area that do bronze casting using the lost wax technique known from antiquity, with a few modern additions. I arranged for my chemistry and 3D modeling students to tour Adonis Bronze in Alpine on Friday, Nov. 7, 2014.

Sketches of horses by Leonarda Da Vinci in preparation for creating the bronze horse.

Sketches of horses by Leonarda Da Vinci in preparation for creating the bronze horse.

Students were prepared by discussing how the lost wax technique works and giving examples, such as Leonardo Da Vinci’s huge bronze horse for the Duke of Milan, Ludovico Sforza, that was never finished. He had devised a method for making the horse in a single bronze pour, and he drew extensive sketches. He even made a full-scale clay model of the horse which stood 24 feet high. He was collecting the bronze for it when war broke out; the French invaded northern Italy and attacked Milan in 1499. The Duke was forced to melt the collected bronze down into cannons, but the French still won. They used the clay horse model for target practice.

Da Vinci's sketch for how he would pour the bronze.

Da Vinci’s sketch for how he would pour the bronze.

A 1977 National Geographic article on Da Vinci included sketches of the lost horse, and a retired American airline pilot named Charles Dent dedicated his art collection to the project. A foundation was created and an artist named Nina Akamu was hired. She used Da Vinci’s original sketches to create a new plan for the horse. Billionaire Frederik Meijer helped to fund the project, and two full-sized horses were cast in 1999, 500 years after the original was supposed to be done. One is at an outdoor museum in Grand Rapids, Michigan and the other stands outside the racetrack in Milan. A smaller scale version is located in Allentown, PA, the home of Charles Dent.

Completed horse statue in Grand Rapids, MI

Completed horse statue in Grand Rapids, MI

We carpooled up to the foundry and began in their main exhibit hall. We divided up into groups, and I handed out cameras to each group so we could record everything and eventually make a video.

Adonis Bronze foundry in Alpine, Utah

Adonis Bronze foundry in Alpine, Utah

The modern version of the lost wax technique has quite a few steps. First, an original model is built out of oil-based clay over the top of an armature, or wire frame. For larger sculptures, a smaller model is created then scanned digitally into 3D. It is scaled up on the computer, then a physical version is cut out of foam using a 3D milling machine.

Yours Truly being attacked by a dragon. It was modeled in 3D on a computer and cut out of foam with a milling machine at Adonis Bronze

Yours Truly being attacked by a dragon. It was modeled in 3D on a computer and cut out of foam with a milling machine at Adonis Bronze

Sometimes the foam model is all that is needed. For example, at last summer’s Fantasy Con in Salt Lake City, a 30-foot tall dragon was built out of foam pieces and assembled and painted. The dragon was designed and cut here at Adonis Bronze. They also made large swords and shields and other display pieces, some of which were in the hallways here.

Foam milling machine used to cut the pieces for the dragon.

Foam milling machine used to cut the pieces for the dragon.

Once the original model is done, it is coated in a silicon rubber gel to make a negative mold. That gel, colored blue, is coated in plaster to reinforce it.

Clay sculptures used as original molds for the bronze statues.

Clay sculptures used as original molds for the bronze statues.

A reddish-brown colored wax is melted and kept bubbling in vats. It is scooped up with metal pitchers and poured carefully into the silicon mold to coat the inside and make a thin layer. The final bronze statues are usually not solid, as that would take too much bronze. They are usually less than ½ inch thick.

Balboa Bars - vanilla ice cream dipped in melted chocolate and dipped in nuts or sprinkles.

Balboa Bars – vanilla ice cream dipped in melted chocolate and dipped in nuts or sprinkles.

The flexible silicon is then pulled away from the wax positive. Any imperfections are fixed and wax cups and sprues (spouts or channels) are added to direct the flow of the bronze to all parts of the mold. The silicon molds are stored for future use in case extra copies of the statue are needed.

Clay model for Wingless Victory statue.

Clay model for Wingless Victory statue.

To create another negative mold that will hold the hot bronze, the wax positive is dipped into a thin ceramic slurry which coats the outside and inside of the hollow pieces. The slurry-coated wax is then dipped in sand. The sand pot has air blown up through it so that the ceramic slurry can be quickly inserted and coated.

Silicon rubber mold for Wingless Victory

Silicon rubber mold for Wingless Victory

It’s kind of like making a Balboa ice cream bar at Balboa Beach in southern California. There, a chocolate or vanilla ice cream bar (like the wax positive) is dipped in a chocolate coating, then immediately dipped into nuts or sprinkles while the chocolate is still liquid. Here, the wet slurry is dipped into sand, then dipped into liquid cement and allowed to dry. This ceramic/cement negative mold is hard enough to withstand the hot bronze without cracking. Vents are also added so that air can escape as the bronze is poured in.

Vats of melted wax ready to pour into silicon molds.

Vats of melted wax ready to pour into silicon molds.

The molds are placing upside down in an oven and heated to melt out the wax, which is collected and re-used. This leaves a hollow area for the bronze. The molds are then placed into a kiln and heated to the temperature of the molten bronze, about 2100 ° F (1200 ° C). The bronze is melted in a blast furnace inside a balanced crucible. The bronze casters wear thermally insulated suits and carefully pour the bronze into the heated ceramic/cement molds.

Pouring hot wax into the silicon rubber mold.

Pouring hot wax into the silicon rubber mold.

Once the bronze and molds cool, the mold is broken off and the bronze pieces are “chased” – the cups and sprues are cut off along with any extra bronze that might have leaked around the edges of the mold.

Removing the silicon rubber from the wax positive.

Removing the silicon rubber from the wax positive.

If the statue is large and made from separate pieces, the pieces are then assembled together using welding torches and metal staples. Sandblasters are used to smooth the seams and staples so the surface appears continuous.

Wax mold after chasing, with the halves of the mold combined and cup and sprues (distribution channels) added.

Wax mold after chasing, with the halves of the mold combined and cup and sprues (distribution channels) added.

To get the right finish and colors in the bronze, the statue is sent to a room where chemicals (acids, bases, finishes, etc.) are added to create a desired color. Sometimes the color is created by heat treating – the bronze, which is an alloy of copper and tin, will take on a range of purple and red hues simply by heating areas to just the right temperature with a blow torch. The final coloration is called a patina. The surface is then waxed to preserve it from oxidizing.

Coating the wax with a ceramic slurry to make a negative mold.

Coating the wax with a ceramic slurry to make a negative mold.

The final step is to add a base, usually of wood or marble, then prepare the statue for shipping and display.

Coating the slurry in sand. Air blown up through the sand to make it easy to coat the slurry.

Coating the slurry in sand. Air is blown up through the sand to make it easier to coat the slurry quickly.

It was a fascinating tour. I asked many questions, and got some great things on tape. They were not doing a bronze pour today, so at some point I need to get back to videotape that. They were nice enough to give me a packet of photos showing a statue of a woman going through the entire process. I scanned the photos and created a Powerpoint slideshow, which I am linking to here: Adonis Bronze slideshow-s

Cement-sand-clay slurry casts with wax inside. Notice the sprues that distribute the bronze once the wax is melted out.

Cement-sand-clay slurry casts with wax inside. Notice the sprues that distribute the bronze once the wax is melted out.

I am amazed at how many of these steps haven’t really changed from Da Vinci’s time (or earlier – some examples have been found in Israel that date to 3700 BCE). He did not have silicon rubber to make the negative mold from the clay, and so a direct technique was used. A core of clay was dipped in wax and the wax carved into a final shape.

Melting the wax out of the mold. This is the

Melting the wax out of the mold. This is the “lost wax” step. It leaves a hollow for the bronze to fill.

Sprues were added and the whole thing buried in a compacted sand pit with drains in the bottom. The wax was melted out by heating the sand from the sides or underneath, leaving a clay core supported by rods and a hollow negative space surrounded by hot sand. The bronze was then poured in, allowed to cool, and the whole statue dug out and filed and polished to its final shape. How Da Vinci would have accomplished this with a 24-foot high horse is beyond me.

Pouring the molten bronze into the pre-heated ceramic/cement molds.

Pouring the molten bronze into the pre-heated ceramic/cement molds.

At some point I hope to find a way to duplicate this process on a small scale using pewter or another alloy with a low melting point. I know small heated crucibles are available to melt pewter. Now all we need is a way to re-create the lost wax technique to make the molds.

Assembly of the Wingless Victory statue. Large pieces are welded and stapled together, then smoothed and sandblasted to remove seams.

Assembly of the Wingless Victory statue. Large pieces are welded and stapled together, then smoothed and sandblasted to remove seams.

Perhaps we can carve the sculptures out of wax and coat them with plaster-of-Paris, then melt out the wax. We would have to be careful to not dehydrate the plaster. Or perhaps the molds could be made with wet clay and fired, then filled with metal. It would be a challenging project. If anyone has done something like this, please let me know.

Acids, bases, metal salts, and heat are used to create different colored patinas on the surface.

Acids, bases, metal salts, and heat are used to create different colored patinas on the surface.

Wingless Victory on display in the showroom at Adonis Bronze

Wingless Victory on display in the showroom at Adonis Bronze

Feather dancers, a statue on display in the showroom of Adonis Bronze.

Feather dancers, a statue on display in the showroom of Adonis Bronze.

An elk and Mark Twain. Notice the differences in the patina colors on the elk.

An elk and Mark Twain. Notice the differences in the patina colors on the elk.

Other clay statues. They are built around a wire and metal rod armature.

Other clay statues. They are built around a wire and metal rod armature.

Read Full Post »

Schrödinger's Undead Cat

Schrödinger’s Undead Cat

This post will be out of sequence compared with the subjects around it, but I need to post this today so my chemistry students can make use of the resources here during class.

As part of the STEM-Arts Alliance project I’ve implemented in my science classes over the last two years, I’ve tried out a number of different ways to help students learn STEM concepts through art and history. You’ve hopefully looked at some of the other projects we’ve done, such as making iron-gall ink and watercolor pigments, junk sculptures, element ornaments, stop motion animation, etc. For our recent project, my students and I have created a large banner, which is a timeline of the history of atomic theory.

Greek philosophers: Anaximander, Anaxemines, Heraclitus, and Parmenides. Illustrations by David Black.

Greek philosophers: Anaximander, Anaxemines, Heraclitus, and Parmenides. Illustrations by David Black.

I designed the banner to fit along one wall of my classroom. It is 15 feet long and four feet wide, except where a chunk had to be cut out to avoid the door. Each student selected an atomic theorist from a list and researched that person, writing up a long paragraph on who they were, what they did to advance our understanding of the atom, and why it was significant. In addition to this caption, the students also had to find a photo or illustration of the person and another of their theories or apparatus. Most of these were images found on the Internet, but a few were original drawings. One of my students, Katie, drew a picture of Erwin Schrödinger with a zombie cat emerging from his brain – well, the cat is both alive and dead, so it must be an undead cat . . .

Paracelsus, drawn by a student using homemade iron-gall ink.

Paracelsus, drawn by a student using homemade iron-gall ink.

My students then used my color printer to print their captions and illustrations out and glue them onto the banner paper at the approximately correct position for the timeline. We focused on the period from about 1700 through the present, and I included images from the Powerpoints I created to explain quantum numbers and atomic theory. I am posting those Powerpoints here as .pdf files so my students can download them:

Quantum_Numbers-small

Atomic Theory-s

The entire banner with students from my chemistry class.

The entire banner with students from my chemistry class.

In addition to the 1700-present section, I included images, photos, illustrations, and text from all of history as humanity has learned to work with materials, isolated the elements, and proposed theories to explain what they observed. I also included materials on alchemy in the Middle Ages, China, and Arabian countries. Some of these were photos I had taken of ancient texts while at the Chemical Heritage Foundation in Philadelphia during the summer of 2009; I’ve been meaning to put them in a format that students can use.

Students answering questions at the banner.

Students answering questions at the banner.

Once the banner was done, I wrote up a series of questions based on the students’ captions as well as my Powerpoints and the Periodic Table History video I made five years ago. Today my chemistry students are continuing to read the banner and write the answers to the questions as a take home test. Here are the questions:

Atomic Theory Banner Assignment

The Stone Age section of the banner

The Stone Age section of the banner

I am also posting photos of the major sections of the banner here as well so that they can access the banner online over the next several days.

Here are the sections of the banner:

The Bronze Age through Roman times

The Bronze Age through Roman times

Medieval and Renaissance sections of the banner.

Medieval and Renaissance sections of the banner.

The Scientific Revolution section of the banner

The Scientific Revolution section of the banner

Sub-Atomic particles

Sub-Atomic particles

Section on Rutherford and Einstein

Section on Rutherford and Einstein

Schrodinger section of the banner.

Schrodinger section of the banner.

The Standard Model section of the banner

The Standard Model section of the banner

Read Full Post »

Twilight in Boston as I walk the Freedom Trail.

Twilight in Boston as I walk the Freedom Trail.

On Saturday, April 7, 2014 I was in Boston attending the National Science Teachers Association conference. After the Aerospace Educators Luncheon featuring astronaut Joe Acaba was over, I decided to take the afternoon and explore the city. I had never been to Boston before, and this might be my only chance. I had always loved studying the Revolutionary War, but had never really known all the details of the events that led up to the War. I hope through this post to put the events and the places together for you and help clear up some the same misconceptions I’ve always had.

A pavilion on the Boston Commons

A pavilion on the Boston Commons

It was about 3:00 when I set out from my hostel at 40 Berkeley St. I had already walked around the area enough to know my way to Boston Common, where my exploration began. I crossed to a pavilion and on to the northeast corner of the Common, where the Massachusetts State House stands. It was finished in 1795 when Samuel Adams was governor of the state, and the dome was originally sheathed in copper by Paul Revere from his newly established copper sheeting business. It is now gilded in gold.

Massachusetts State House

Massachusetts State House

Speaking of Paul Revere and Sam Adams, they apparently laid down a time capsule as the state house was finished, which was just rediscovered about a week ago as I write this (Dec. 27, 2014). There was water leaking around part of the foundation, and workers discovered the box as they were making repairs. They plan to open it in a few days. Much of what I was about to see and explore was influenced by those two men, and a type of electronic time capsule about them and the city they walked in is what I want this blog post to be.

Monument to Robert Gould Shaw and the Massachusetts 54th Infantry Regiment

Monument to Robert Gould Shaw and the Massachusetts 54th Infantry Regiment

Just across the street on the edge of the Commons stands a memorial to Robert Gould Shaw, a Colonel in command of the Massachusetts 54th Infantry Regiment during the Civil War. This was the all black regiment that led the assault on Ft. Wagner in July, 1863. Many lost their lives in that charge, including Colonel Shaw. Their experiences training and gaining equal pay and treatment were immortalized in the movie “Glory.” This is the original monument – I have seen a gilded plaster copy of it in the National Museum of Art in Washington, D.C.

Robert Gould Shaw

Robert Gould Shaw

The Freedom Trail basically starts here; to walk it, one must follow a red line of bricks laid into the sidewalks. It zigzags across the city, over the Charles River, and ends at the Bunker Hill Memorial. From the State House it crosses the Commons to the southeast corner and the North Park Church. It turns past the church and passes the Granary Burial Grounds, where Paul Revere and Sam Adams are buried. The victims of the Boston Massacre are buried here as well. More on this later.

The Granary Burying Ground, where Paul Revere and Sam Adams are buried

The Granary Burying Ground, where Paul Revere and Sam Adams are buried

I followed the line of red bricks past one of the first schools in America and past the Old City Hall. I turned a corner where the route looped back on itself, and bought a hot dog from a street vender’s cart. There was a bookstore there called the Old Corner Bookstore that I poked around in for a moment before continuing. It wasn’t until later, researching the route, that I discovered it was frequented by Thoreau and Emerson. Since I couldn’t get out to Concord to see Walden Pond (I teach at Walden School, after all), it was good that I at least got to browse where he used to browse.

A marker on the Freedom Trail

A marker on the Freedom Trail

I passed a Potbelly Sandwich Works and I was still hungry (the hot dog had only whetted my appetite), so I stopped in and got a Wreck. It was tasty. Had I known what I was about to find, I might have waited. I walked on past the Old State House, a red brick building with a spire trimmed in gilded edges. There were so many things to see, and so many historic plaques to read that I didn’t notice a plain circle of cobblestones inset into the walkway. It was the site of the Boston Massacre.

Old State House. The square near where I took this photograph is the site of the Boston Massacre.

Old State House. The square near where I took this photograph is the site of the Boston Massacre.

The Seven Years War (known in America as the French and Indian War) had cost the British a great deal, and new sources of revenue were explored. Parliament thought it only natural that the Colonies should pay back the cost of protecting them during the war, and a series of taxes were levied on Colonial goods, including molasses, sugar, paper, etc. During the late 1760s, the colonists began to protest, for both economic and political reasons. Sam Adams wrote instructions for the delegates of the Massachusetts Assembly that pointed out a leading concern for the colonists: did the Parliament in England have the right to levy taxes against the Colonies without their permission or representation?

Paul Revere's colored engraving of the Boston Massacre

Paul Revere’s colored engraving of the Boston Massacre

As the protests grew, mobs destroyed customs houses, hung public officials in effigy, and became increasingly vocal and agitated. Charles Townshend, Chancellor of the Exchequer for Great Britain, proposed a series of acts that would also raise revenue to directly pay governors and other public officials (instead of them being paid by the colonial assemblies), thereby removing them from colonial control. More protests broke out, and the situation spiraled downhill.

Detailed map of the Freedom Trail in Boston. At this point in my journey, I was in the Quincy Market area.

Detailed map of the Freedom Trail in Boston. At this point in my journey, I was in the Quincy Market area.

The Crown appointed governor, fearing what he saw as lawlessness in Boston, asked for British soldiers to be posted in the city. Instead of ensuring the peace, the soldiers’ presence only fanned the flames. In 1770, a group of British regulars was harassed by a mob of angry Bostonians. No one is entirely sure what happened, but the soldiers opened fire and five men were killed outright or died from wounds and another six were wounded. Sam Adam’s second cousin, John Adams, made himself a name as a lawyer by defending six of the British soldiers, getting them acquitted on the grounds that they were only following orders.

A simplified map of the Freedom Trail in Boston.

A simplified map of the Freedom Trail in Boston.

This incident became the rallying point for an escalating series of protests against the British government’s policies. Paul Revere created a famous engraving of the massacre, which was printed and colored by hand. Most of the Townshend Acts were repealed, but one remained: the tax on tea. This law was strengthened and enforced, giving the East India Company a monopoly on the tea trade and cutting out the middlemen tea merchants in the colonies. It also undercut the price of tea, thereby killing the profit of tea merchants who were smuggling in Dutch tea. Several ships loaded with tea were stuck in Boston Harbor unable to unload their cargo. The governor refused to let them leave, thereby supporting the Crown’s policies. When a fresh wave of protests broke out, Governor Thomas Hutchinson disbanded the Boston Town Meeting, which was the local city government. Sam Adams called for a town meeting anyway, and thousands showed up on the evening of Dec. 16, 1773.

Faneuil Hall in Boston. At a meeting led by Sam Adams on Dec. 16, 1773, a group of men initiated the Boston Tea Party.

Faneuil Hall in Boston. At a meeting led by Sam Adams on Dec. 16, 1773, a group of men initiated the Boston Tea Party.

I passed Faneuil Hall, where this meeting was held. Emotions ran high, and a group of about 100 men left the meeting and headed down to the harbor, where they proceeded to dump the tea into the water.

Quincy Market in Boston

Quincy Market in Boston

The British government overreacted again, passing a series of laws called the Coercive Acts (known as the Intolerable Acts in America), which closed Boston Harbor and repealed the Charter from King Charles that allowed Boston to have self-government. British soldiers were quartered in prominent citizens’ homes, partly to act as spies. They were allowed to search and seize any properties that might be used to support the growing rebellion without a warrant. No public meetings were allowed and arms were confiscated; basically, Boston was under siege.

One of the many food stalls inside Quincy's Market.

One of the many food stalls inside Quincy’s Market.

I crossed the square by Faneuil Hall to the Quincy Market, then and now a gathering place and market in what was then central Boston. There are three long buildings side by side, much like shopping malls today with individual businesses lining the hallway in each building. There was a street band playing in the square, and I couldn’t help contrasting this with the civil unrest and anxiety that marked those days in the early 1770s. When I saw the different food venders in Quincy Market, I wished I had left some room for chowda or crab cakes or other local fare. I will remember next time. I ran into Coral Clark with some other SOFIA Airborne Astronomy Ambassadors there.

A recreation of the Green Dragon Tavern, where the Sons of Liberty planned the rebellion.

A recreation of the Green Dragon Tavern, where the Sons of Liberty planned the rebellion.

I followed the red line beyond Quincy Market. It led further north into an alleyway past the Green Dragon Pub. This is not the original pub, which was located nearby on Union Street, but it gives a feeling of what it might have been like.

The Haymarket area and Durty Nellie's Tavern at sunset

The Haymarket area and Durty Nellie’s Tavern at sunset

Even before the Boston Tea Party, the leaders of the protests had to go into hiding. A group of men called the Sons of Liberty met in the basement of the Green Dragon to plan their next moves. They organized Committees of Correspondence to carry the news of the British crackdown on Boston to the other colonies and to convince them that common action was needed. Governor Hutchinson was recalled, and a new governor appointed by the Crown: General Thomas Gage. He had previously served alongside George Washington in the French and Indian War and was promoted to be the commander in chief of all the armed forces in the colonies. As governor he enforced the Coercive Acts and cracked down on dissent. He dissolved the Massachusetts Assembly, partly because they had sent delegates (including Sam Adams) to the first Continental Congress in Philadelphia.

Mike's Pastry in the North End of Boston

Mike’s Pastry in the North End of Boston

I crossed over into the old North End of Boston, continuing to follow the red line. I missed a turn at an intersection and continued along Hanover Street. I noticed a crowd of people lined up to enter a shop on the street. It was called Mike’s Pastry, so I took some photos. I had seen people carrying boxes from Mike’s already as I walked through the city, so I figured this must be a well-known place. The signs inside show they serve many types of cannoli, as well as Boston cream pie. I didn’t take the time to stand in line, but decided I must visit here if I ever get back to Boston. When I returned home to Utah, I asked one of our part-time teachers, Grady, about Mike’s and he confirmed it is considered the best place for pastries in Boston. Grady had taken a year out from college to work on Mitt Romney’s presidential campaign and had come to know Boston well.

The crowd at Mike's Pastry on a Saturday night. Cannoli, anyone?

The crowd at Mike’s Pastry on a Saturday night. Cannoli, anyone?

I retraced my steps and found the red line again, which had made a zig to pass Paul Revere’s house. It zagged back to Hanover and on to the Old North Church. In the courtyard leading to the church is a large statute of Paul Revere on horseback. I could hear Longfellow’s words reflecting in my mind:

The statue of Paul Revere in near the Old North Church in Boston

The statue of Paul Revere in near the Old North Church in Boston

Listen, my children, and you shall hear
Of the midnight ride of Paul Revere,
On the eighteenth of April in Seventy-Five:
Hardly a man is now alive
Who remembers that famous day and year.

Old North Church at sunset

Old North Church at sunset

Sam Adams and John Hancock were considered public enemies, and left Boston to stay at a friends’ house in Lexington. The Minutemen militias in the communities around Boston started stockpiling arms in case of hostilities. The situation had become explosive. To prevent further provocation, the British soldiers were removed from the city and stationed on boats in the harbor and on Castle William, an island in the harbor.

Spire of the Old North Church. as seen from the direction of Charlestown. "One if by land, two if by sea."

Spire of the Old North Church. as seen from the direction of Charlestown. “One if by land, two if by sea.”

Hearing of the caches of arms in Middlesex County, Gov. Gage ordered troops to march on Concord and seize the cache there. Although not in the official orders, he also wanted to apprehend Adams and Hancock. What he didn’t know was that his own personal physician, Dr. Joseph Warren, was a Son of Liberty and passing on the Governor’s every move. The group was warned of Gage’s intent to seize the arms, but they didn’t know one thing: how would the British Regulars move – by land from Charlestown or by water up the Charles River? Lookouts saw the British moving up the river, embarking near the north end of the Commons, so Revere hung two lanterns in the North Church belfry to signal a rider across the river, then decided to ride out himself. He asked friends to row him across the river to Charlestown. Even though the river was guarded at that time of night, he was able to slip past the British ships and reach the north shore of the river without incident.

Over the hill past Cobb's Hill Burial Ground. A pylon of the new Zakim-Bunker Hill bridge is visible.

Over the hill past Copp’s Hill Burial Ground. A pylon of the new Zakim-Bunker Hill bridge is visible. It was built ten years ago as part of the Big Dig, which restructured I-93 through Boston, among other changes.

William Dawes was also dispatched by Dr. Warren to give the alarm. They took separate routes through Middlesex County, and at each stop more riders spread in every direction, until dozens of men and one woman were rousing the countryside that the British soldiers were on the march. Revere took a northerly route from Charlestown; Dawes traveled south across Boston Neck and around to Lexington.

It’s unlikely Revere or the others said, “The British are coming!” since all of the Americans considered themselves to be British. They probably would have cried something like, “The Regulars are coming out!”

Paul Revere: Midnight rider, silversmith, patriot, and copper magnate.

Paul Revere: Midnight rider, silversmith, patriot, and copper magnate.

Revere made it to the Hancock-Clarke home in Lexington first, followed shortly by Dawes. They warned Adams and Hancock that the Regulars intended to arrest them and helped them pack up and leave. Then they decided to ride on to Concord in case the arms cache was the real target. Dawes had been instrumental in smuggling several cannon out of Boston, which were hidden in Concord, and he wanted to ensure their safety. They met Dr. Samuel Prescott on the way, who agreed to ride with them. They were waylaid by British sentries on the road to Concord and decided to make a break for it, each scattering in separate directions. Dawes rode into a local house’s courtyard and yelled that the Regulars were coming. Fearing the house’s occupants would turn on them, the soldiers turned back. But then Dawes’ horse bucked him off and he had to walk back to Lexington. Revere was apprehended and held captive. Only Prescott made it to Concord to warn the militia there.

Routes taken by Revere, Dawes, and the British Regulars on April 18-19, 1775.

Routes taken by Revere, Dawes, and the British Regulars on April 18-19, 1775.

I walked up over the hill past Copp’s Burial Ground and down to the walking trail along the river. It was too late for me to walk across the bridge and climb Bunker Hill, but I could look across to the monument there and the masts of the U.S.S. Constitution in the naval yard. As I watched, a canon boomed out and the United States flag was lowered from the yardarm of the Constitution. I imagined what this area looked like back then, as Revere, Dawes, and others rode out to warn the countryside.

The masts of the U.S.S. Constitution, looking across the Charles River and Boston Harbor to Charlestown.

The masts of the U.S.S. Constitution, looking across the Charles River and Boston Harbor to Charlestown.

The British expedition was poorly organized and they didn’t get all their men and supplies over the river to Cambridge until after midnight. The men had to unload the barges in knee high mud and water, and then faced a 17-mile march to Concord. As they marched toward Lexington, they heard the sounds of alarm being raised all around and knew they had lost the element of surprise.

The column of about 500 British regulars could see militiamen running toward the commons in Lexington as they marched up the road. The colonial militia was beginning to form up in the square as others were running behind the fence lines along the road toward the green. The colonial leader, John Parker, ordered his men to hold their fire unless they were fired upon, but he was suffering from tuberculosis and his voice was not well heard.

Engraving of the Battle of Lexington Green, April 19, 1775.

Engraving of the Battle of Lexington Green, April 19, 1775.

The redcoats saw the militia forming on Lexington Green and the commanding officer, Lt. Col. Francis Smith, ordered Major John Pitcairn ahead. Just at sunrise on April 19, Pitcairn marched his men rapidly into the square yelling “Huzzah!” He hoped to surround and confuse the colonists. At this moment a shot or two rang out. It is not known for certain who fired it. I’ve read eyewitness accounts and sworn affidavits from both sides, including colonials and Regulars. The colonials swear that Pitcairn gave the order to fire. The British all swear that they first heard several shots coming from the colonials (probably from the militiamen hiding behind fences), and that Pitcairn was merely trying to defend his men. This was the “Shot heard round the world.” In the confusion, no one knows for sure. It wasn’t much of a battle – merely a skirmish. Eight colonists were killed and the rest withdrew.

The British marched on to Concord. But the intentions of the British had been known days in advance, and the most of the arms were already moved away. The Regulars searched through the town but found only a few buried cannon, some ammunition, and some food stores. Prescott’s warning gave the militia time to form up properly, and they stayed on a hill overlooking the town as the regulars searched. More militia were arriving continuously from outlying farms until they outnumbered the Regulars. The British captain in charge of defending the North Bridge was inexperienced and became spooked by the nearby militia units. He retreated back across the bridge and set up a formation more appropriate for street fighting than for fighting on open ground. One of the Regulars fired a warning shot as the militia advanced, and several other regulars joined in. The colonials fired back and several British were killed.

The Bunker Hill Memorial

The Bunker Hill Memorial

Seeing that his mission to Concord was useless and fearing an organized attack, Lt. Col. Smith ordered a withdrawal from Concord. More militia arrived and harried the British; they fought a running battle all the way back to Lexington, where they received reinforcements. They rested briefly, then withdrew back toward Charlestown, fighting all the way, and trying to maintain disciplined columns while the colonists ran a shifting engagement. They would ambush the British from every defensive position, including groves of trees, bends in the road, and houses. The 1700 British Regulars marched in a military square with flanking parties sent out to drive the Americans from their positions, but the colonials simply faded back and around the British to harass them again. The British were exhausted and short on ammunition whereas the Americans were now almost 4000 strong. By the time they made it to Charlestown, the British had suffered far more casualties than the Americans.

Sign to Boston's North End

Sign to Boston’s North End

That’s how the Revolutionary War began. It might not be what you read in Longfellow’s poem, but there it is. As a history teacher, I’m fascinated by the first-person accounts of what happened and the decisions that led to revolution. It seems the British government completely misunderstood the needs of the colonists, and botched the whole thing. Of course, the Sons of Liberty were definitely radical hot heads who forced the issue through protests and outright rebellion. What was the Crown to do but make an example of them? But everything they did only made the situation worse.

This street marker sums it all up.

This street marker sums it all up.

As night came on I walked back through Boston to the Commons. A bitterly cold wind began to blow off the harbor, and I was glad to get back to the warmth of my room at 40 Berkeley. I’ve learned so much more about events that led to the Revolution by walking through the very streets where it happened. I must return some day and also visit Lexington and Concord and see the places where it all started. I hear a new miniseries called The Sons of Liberty will air on the History Channel in January. I hope they get it right.

Read Full Post »

Arriving at Logan International Airport in Boston

Arriving at Logan International Airport in Boston

I’m trying to catch up on topics I haven’t written about this year before the year ends. This post will cover my trip to Boston in April to attend the National Science Teachers Association annual conference, where I presented on my experiences flying on SOFIA (the Stratospheric Observatory for Infrared Astronomy). I wrote notes during the sessions I attended, but have never reported on them here. It’s about eight months overdue.

40 Berkeley, a hostel in the Copley Square area of Boston

40 Berkeley, a hostel in the Copley Square area of Boston

I hope you don’t mind that this comes across as a travelogue; my intent is to show what it’s like to attend an NSTA conference and the kinds of activities you can expect if you are thinking of attending. There are so many sessions, tours, and activities to choose from that you can focus your schedule to learn specific things, as I did.

The sign for 40 Berkeley, where I stayed on my trip to NSTA in Boston.

The sign for 40 Berkeley, where I stayed on my trip to NSTA in Boston.

The conference was held on April 4-7, 2014 at the Boston Convention Center. I had received a professional development grant from the American Chemical Society that paid most of my way there. I had $750 to spend on this conference. That meant airfare, hotel, and meals. I couldn’t save too much on airfare (it is what it is), so I had to save on hotel costs. I did a thorough search of all possibilities and found a place that was barely affordable in a decent location near where I could catch a conference shuttle bus. It is called 40 Berkeley, and is a hostel with individual rooms and a nice hot breakfast served daily.

My room at 40 Berkeley. It was rather spartan, with only a bed, dresser, small closet, radiator, and window (with broken blinds). They give you one towel to use in a common bathroom. But they do serve good hot breakfasts downstairs.

My room at 40 Berkeley. It was rather spartan, with only a bed, dresser, small closet, radiator, and window (with broken blinds). They give you one towel to use in a common bathroom. But they do serve good hot breakfasts downstairs.

I flew to Boston on Wednesday afternoon, April 3, right after school and arrived at Logan Airport around 11:00 pm (I lost two hours going east). I had to wait a while for my shuttle van, and enjoyed the drive through Boston. This was my first time here, and when I saw Boston listed as the site of a future NSTA conference several years ago, I decided I would get here somehow. Now I’m here, although not in the fall.

Dining room at 40 Berkeley. They serve an excellent hot breakfast cafeteria style.

Dining room at 40 Berkeley. They serve an excellent hot breakfast cafeteria style.

I got to 40 Berkeley about midnight. They have a 24-hour desk, so I got my room and headed upstairs to the sixth floor. It is a bare bones room – just a single bed and a small dresser and a closet. The blinds were damaged and couldn’t shut in places, and I had trouble figuring out the radiator. The room was too hot, so I had to open the window to be able to sleep. But I did sleep.

My walking route from 40 Berkeley to the shuttle bus at the Marriott Copley Place.

My walking route from 40 Berkeley to the shuttle bus at the Marriott Copley Place.

After showering in the common bathroom, I got dressed and headed down to the basement for breakfast, which was served cafeteria style and was actually quite good, with choices of eggs, bacon, sausages, waffles or pancakes, juice, and more.

The view from my route along Appleton St. in Boston, April 4, 2014.

The view from my route along Appleton St. in Boston, April 4, 2014.

I then walked southwest down Appleton St., crossed over Columbus Ave. to Canton St., across the biking path to Harcourt St. and picked up the conference shuttle bus in front of the Boston Marriott Copley Place. By the time the bus arrived at the convention center, it was already past 8:00 and the first session was already going. I decided to wait in line to get my registration packet, nametag, and presenter ribbon. I did make it in to the very tail end of a session on a model racecar activity. I mostly wanted a place to sit down and look through the conference book to plan out my day.

Designing a helmet to protect a "brain" (egg) while being wearable.

Designing a helmet to protect a “brain” (egg) while being wearable.

This was the only day I would not have any responsibilities, so I packed lightly with just my camera bag and computer bag with my smaller computer and no notebook. I decided I could take notes on the computer just as easily, and it would save having this huge weight hanging from my shoulder all day, which had killed me in San Antonio last year. I knew it would grow heavier as I added the conference booklet and materials from vendor booths.

I walked around the edges of the conference center and at 10:00 attended a session about eCybermission, an engineering design challenge program that I have thought about having my students compete in. We worked as teams to design a “helmet” that would prevent “brains” (an egg) from getting splattered on impact while being relatively easy to wear. Our design did not do its job. The brains splattered. But it was fun to see some of the designs that did work. We had been given a tabletop full of materials, ranging from paper and tape to pieces of egg cartons, but when we went to drop our design, it flipped sideways and landed right on the egg.

A Wascally Wabbit on the dealers' floor at the NSTA conference in Boston, 2014.

A Wascally Wabbit on the dealers’ floor at the NSTA conference in Boston, 2014.

The presenters did mention a recent book on teaching engineering by some guy named Eric Brunsell. I’ve known Eric since 2000 when we were all part of the Solar System Educator Program at JPL. I didn’t know he’d written a book for NSTA, but up until recently he and Martin Horejsi have been writing a monthly column on using Web 2.0 in the science classroom for The Science Teacher.

I had half an hour to the next session, so I hit the dealer’s room, which was centrally located. I didn’t stop for anything, just headed straight to the SOFIA booth and checked in. They had things covered pretty well, and told of plans for dinner tonight. While I was there, Martin Horejsi stopped by to say hi. The Solar System Educator Program is always well-represented here.

A dark matter halo around a cluster of galaxies distorts the light due to gravitational lensing.

A dark matter halo around a cluster of galaxies distorts the light due to gravitational lensing.

I was a bit late for an interesting session on Dark Matter. They did the old gravity simulator activity, but then went into a great discussion of potential dark mater candidates, including MACHOs, WIMPs, black holes, brown dwarfs, and neutrinos. Apparently all of these fail as an explanation for some reason or other. I had thought neutrinos were the leading candidate; if they have even a minute amount of mass, there are so many of them that they would really add up. But I learned that even at their highest possible mass, neutrinos could only account for about 20% of the dark matter known to exist. As I tell my students, whoever solves this problem will win a Nobel Prize or two.

They also described how we know that dark matter exists, through measuring the rotation rate of stars in galaxies and seeing that if luminous matter (baryonic matter) is the only mass in galaxies, then the stars are moving too fast and would fly right out of the galaxies. Something that doesn’t interact with light, yet has mass, is keeping all of the baryonic matter contained. It also creates the filamental structure of galactic clusters in the universe and the voids between.

Danger Shield sensor board mounted onto an Arduino controller (underneath). Our setups were similar. Notice the three manual sliders and LED readout. Various types of sensors can be attached.

Danger Shield sensor board mounted onto an Arduino controller (underneath). Our setups were similar. Notice the three manual sliders and LED readout. Various types of sensors can be attached.

I attended a session on Maker Science with Arduinos. These are microprocessor controllers or mini-computers similar to Raspberry Pi computers, only about $35 each, which can be programmed with Python. I had seen these in action controlling an off-the shelf RC car, turning it into a remotely operated robot for acquiring 3D data on soil crusts in the Mojave Desert by Geoff Chu and a group of roboticists from NASA Ames Research Center back in 2012. Since I was teaching computer programming classes that semester, I wanted to learn more about them. We learned how to control an LED light on the board and change the timing for a loop to make the light blink. The presenters also showed how to hook up and initialize a Danger Shield from SparkFun Science, a $20 electronics board that attaches directly to an Arduino and provides inputs for USB based sensors. I need to get one and try it out.

I went to a session next on Project-Based Learning Using Technology, but it was disappointing. They didn’t use any technology to actually teach the class – not even a powerpoint – and their handouts had typos and poor layout and what was listed showed me fairly quickly that I was much further along than they were in using tech in my classrooms.

I skipped out and headed back to the dealer’s room to go through the exhibits more thoroughly. I have seen many of these displays before but gathered what I could from them – I wanted to travel light, so I didn’t collect many handouts. There were a few things of interest, such as a new magazine by the ACS for high school chemistry teachers that I might want to submit articles for.

Downtown Boston in the evening, as seen from the shuttle bus.

Downtown Boston in the evening, as seen from the shuttle bus.

On my way out I ran into Cheryl Sotelo from the NASA Educator Workshops days. She was the Educator Facilitator for NASA Ames and I was the Facilitator for JPL from 2002-2004. I had last seen her when we said goodbye and had a praline toast at the casino on the coast of Gulfport, Mississippi back in 2004 as we finished up the NEW planning workshop. So much has changed – the NEW program is essentially gone, with only a ghost of an online presence anymore. The casino itself was wiped out by Hurricane Katrina a year later. She is in Washington, D.C. this year as an Einstein Fellow, a program I hope to participate in a year or two from now.

I went to one final session on Making as Learning, and how this ties in to STEM, but found it was fairly basic stuff. I am trying to get grant money to purchase a 3D printer for my school so that my 3D students can begin to print out what they have created, and we can begin to teach engineering design and prototyping. What we have been doing already in my STEM-Arts Alliance program surpasses much of what I am seeing here today.

As you can see, this first day at NSTA I focused on technology, engineering, and the maker movement and how I can bring these ideas to my own classes. There have been some very valuable ideas, and more than one presenter has mentioned a book by Stager and Martinez that I need to check out.

Boston buildings in twilight as I walk back to 40 Berkeley. Do you notice the anomaly?

Boston buildings in twilight as I walk back to 40 Berkeley. Do you notice the anomaly?

I caught the shuttle bus back to the Marriott and walked back to 40 Berkeley to drop off my stuff and rest a bit, then walked back to the Marriott for dinner. The SOFIA group met upstairs in the attached shopping mall at Legal Seafood. It was good to see Dana Backman and Coral Clark again; Pamela Harman couldn’t make it. There were a few of us Cycle 1 ambassadors there and a few of the new Cycle 2s that were announced in January. The food wasn’t as good as I would have expected for the price, but we did have a good conversation. I walked one of the Cycle 2 ambassadors back to her hotel, which was only a few blocks away. I’m afraid I talked her ears off, and probably came across as completely full of myself. I just get too excited about the projects my students are working on and what we’ve accomplished this year and want to share. After dropping her off at the front door of her hotel, I walked on around to 40 Berkeley, which was just a few blocks away. I had a quiet remainder of my evening watching Star Trek on Netflix on my computer.

Most of my other activities focused on aerospace education, so I will eventually report them in my other blog: http://spacedoutclass.com after I catch up what I need to in preparation of my AAS trip in January. I will do one other NSTA blog here on the walking tour I did across Boston on Saturday evening. It’s not really about chemistry education, but it probably works here best.

Read Full Post »

« Newer Posts - Older Posts »