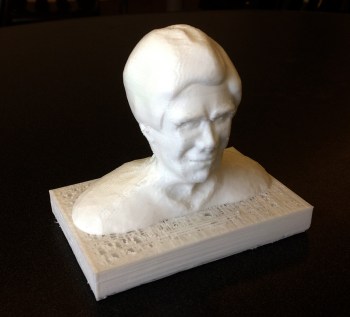
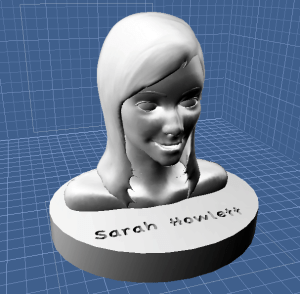
Yours truly in glorious 3D plastic. I modeled my head using Sculptris by Pixologic, then added the base in Daz3D Carrara. I had the printer set on the fastest speed and one shell, so the top of the base did not get covered very well.
3D printers have become all the rage in STEM classrooms. I’ve been salivating over them since they first became affordable for schools. We purchased one at Walden School just before Thanksgiving and I’ve kept it busy ever since. However, like any new technology, if I didn’t have a long-term plan for how to use it or a clear purpose in mind, it will be a new toy for a month or so and then sit idly in a corner gathering dust. They are great for someone who is willing to experiment to get print jobs to work consistently. I had quite a few failures at first, and still have them occasionally. The printers aren’t cheap and neither is the plastic. But with these caveats in mind, they can be truly useful additions to your STEM classes.
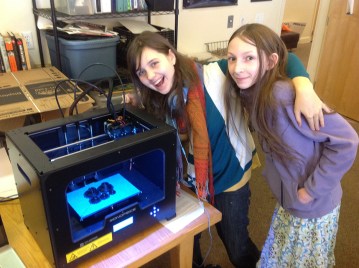
Two of my MYP Design students printing out plastic snaps they designed.
I’ve taught 3D modeling classes for many years, and have incorporated 3D technologies into many of my science projects. I’ve written about several ways of doing this in previous blog posts, including the last post on modeling Greek philosophers in 3D. My students have become proficient at modeling any kind of object they need, so a 3D printer was the next logical step. Since I am teaching mostly engineering, computer science, and design classes this fall, we have need of a way for students to manufacture prototypes of their designs. For these reasons I convinced the powers that be to purchase a 3D printer.
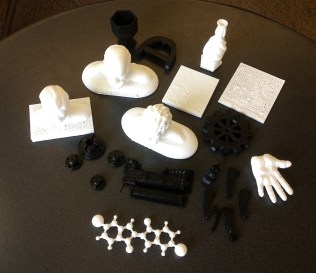
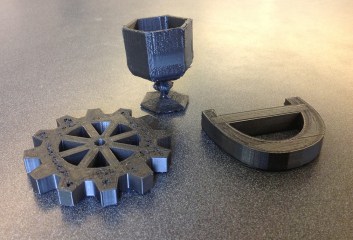
Some of the successful print jobs we’ve done so far. Most of the objects have been done as experiments to learn and test the workflow from 3D model to print.
After a lot of research, I decided to buy a Monoprice dual extruding printer – available for about $700. It came within three days of placing the order (woo-hoo!) and my IB Design Technology students had it assembled in about two minutes. Then came the process of learning how to use it to get consistently successful prints.
This isn’t as easy a process as some may think – if you have the notion that it’s like plugging in an ink jet printer and sending a print job from any software (in other words, plug and play) then you haven’t studied up enough on how these printers work.
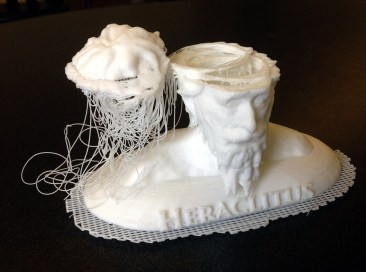
What happens when the model detaches from the print platform. It slid aside but continued to print, leaving the “spaghetti brains” hanging under the top of his head. The grid on the bottom is the raft. It also created scaffolding under the beard, which has been removed.
The process is called additive manufacturing and involves creating an object by extruding a thin plastic filament onto a flat print platform. The platform moves slowly downward (z-axis) as the extruder moves sideways and in and out (x and y-axes) to build one layer at a time. Think of using a hot glue gun to build up a contour map of a landform. For this all to happen, the 3D object must be split into layers by the printer’s software and a pathway generated for the extruding nozzle so that it lays down the filament without it getting tangled or dripping. This pathway/layer split is referred to as g-code.
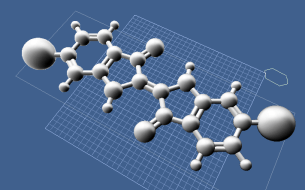
A model of a molecule of Tyrian Purple dye. This dye was extracted in the Phoenician city of Tyre on the coast of Palestine by crushing the shells of murex sea snails. One snail would produce only a drop of the dye. It was so expensive only the Roman nobility could afford to wear clothing dyed with this color, hence the phrase “born to the purple.” It is my favorite molecule. The large atoms on each end are bromine, which provides the burgundy/purple color.
To get the 3D model into a form that can be split into g-code, it must be saved or converted into an STL format. There are online converters for doing this. Of course, even before that, you have to know how to make the 3D objects in the first place unless you are content to simply print out someone else’s models, such as those found on Thingiverse or at the NASA 3D website. In that case, you aren’t realizing the potential of this device for modeling, engineering, and prototyping of student-created projects.
Student self-portrait. The head and hair were done in Sculptris, the base and text in Carrara. It then was exported as a 3DS file and converted to STL, then loaded in ReplicatorG to generate the g-code layers.
If this process sounds complicated, it is. But that’s not the half of it. If your models have overhanging parts, the printer will just create a lot of plastic “boogers” (see the failed print of Heraclitus and the “brains” hanging out of his disconnected skull to see what I mean). So the software creates supports or scaffolds to hold up the overhangs, which must then be removed and sanded down. The software also creates a raft or grid of plastic underneath the model to help it stick to the print plate. That is the grid you see under the failed Heraclitus.
Our printer allows objects to be printed with two colors at once. I haven’t attempted that yet, but here are some objects with black plastic. The D is part of my family’s cattle brand, the Lazy Bar D ranch.
There are many problems that can occur. If you print large, flat objects with square corners, then the plastic can cool too quickly with both sides exposed and the corners can peel up and curl. Although the print platforms are usually covered with a tacky tape such as Kaptan, you can still have print jobs come loose and start sliding around as the extruder nozzle moves. This is what happened with the failed Heraclitus – it did well up to his eyebrows, but the continued wiggling of the nozzle head caused the raft to break loose, so the printer continued the job off to the side as the model slid away in stages. Kind of cool looking, but the print wasted eight hours and some plastic. Now I have to start it over again and tape it down better.
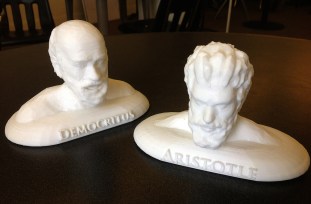
Printouts of Democritus and Aristotle. To provide better quality for the print, I created a sloped base with rounded edges to prevent curling. Both models were created using Make Human for the heads, then imported into Sculptris to add the hair, beards, and eyebrows. Finally, the models were brought into Carrara to add the bases and text before exporting as a 3DS file.
I have also had an issue with the workflow itself. To make Heraclitus (and Democritus and Aristotle) I started with a free program called Make Human, which allows one to set morph targets on a generic human figure to make the features look a particular way. I loaded in photos of the philosophers to use as referents. Then I exported the model as an OBJ and imported it into Sculptris, another free program done by Pixologic, the same company that does the leading character modeler Z-Brush. It works like a ball of clay that you push and pull into shape. I used it to add the hair, beards, and eyebrows. Then I exported it again as an OBJ and imported it into my full 3D modeler, called Carrara by Daz3D (but you could use Maya or Blender, etc.). In Carrara, I decapitated the head from the body using a Boolean command, then added the base and letters. I finally exported it as a 3DS model, converted it to STL using Online 3D Converter, then loaded it into the ReplicatorG software for generating the g-code. By the time I was done, this model had been through five different software packages.
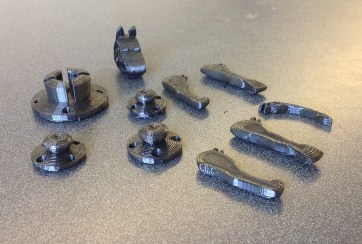
Some student design projects printed out. The cow parts (head, legs, and tail) on the right are for a toy cow. The body of the cow had some issues printing, and the C-joints on the legs didn’t quite fit. The snaps on the left worked with the smallest positive size and the split hole configuration. The MYP Design students planned, created, modeled, and tested these prints. Now they need to make revisions. This is the engineering process.
This is a complicated process, and the model can fail anywhere along the way. I’ve had some trouble getting Carrara to export the models correctly – it says they are there, but have no data in them. I think these are models that have too many polygons, such as those where the entire head and hair are done from Sculptris. Using Make Human keeps the head model’s polygon count reasonable.
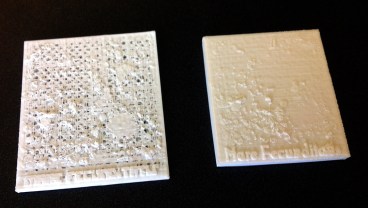
Two printouts of Mare Fecunditatis on the Moon. I started with LOLA data from the Lunar Recon Orbiter mission, loaded it into Adobe Photoshop in Raw format, selected the section I wanted and loaded it into Daz3D Bryce as a grayscale height map, which turned it into a terrain object. I exported it as a 3DS file, added the base and letters in Carrara, and so on. The print on left was done at fastest print speed and didn’t fill in well. The one on right has two shells and reduced print speed, but still lacks detail. My next attempt will be at a 45° angle with supports underneath to gain the better resolution of the x and y-axes.
I’ve tried making 3D terrains of Mars and the Moon based on Mars Global Surveyor MOLA and Lunar Reconnaissance Orbiter LOLA data. I load the grayscale heightmaps into Bryce (another Daz3D program), then export a 3DS file into Carrara to build a base and text. The final results have had issues with holes in the bottoms of craters, text that doesn’t show up well, and insufficient vertical exaggeration to see any details. I also had trouble with the first attempt to print this terrain (of Mare Fecunditatis on the Moon) because I only had one shell and had the printer on fastest nozzle extrusion speed and travel rate, so the top was not solid enough.
But . . . with all these problems, I am succeeding now more often than failing. That is what engineering is all about, after all – you have to learn how to fail until you succeed. I’ve tried a variety of different print jobs, found out the trouble spots and (mostly) how to correct for them, and I am ready to start printing out student projects now that we are approaching the end of the semester.
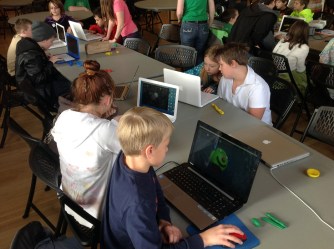
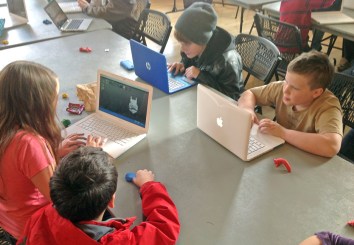
Students learning 3D modeling using Sculptris at the Utah County Hackathon on Dec. 12, 2015, sponsored by 4-H.
On Saturday, Dec. 12, 2015, I presented a session at the Utah County Hackathon sponsored by the local 4-H Club. I took the 3D printer along as well as some laptop computers from my school and taught about 24 kids how to use Sculptris and how to do 3D printing. The session was a great success. There was a man named Colby there who had quite a bit of experience with 3D printing. He gave some advice that I will try out soon: First, I can get better resolution by standing my terrain models on their side. These printers have better resolution in x and y-axes than in the vertical z-axis. I just need to build some buttress supports to hold it up that can be removed later. He suggested using PEI (polyetherimide) tape, which becomes tacky when heated on the print platform, then less sticky when cool, so jobs won’t slip while printing but still come off cleanly when cooled down. He gave me some ideas for better temperature settings – I might have my platform temperature too high. There are still many experiments to try.
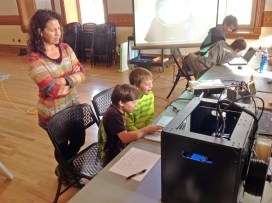
3D printer and students learning Sculptris at the Utah County Hackathon, Dec. 12, 2015.
So, to summarize the lessons learned:
1.) Don’t expect a 3D printer to work perfectly right out of the box. There are a lot of tweaks to do, including calibration, print platform leveling, temperature adjustment, feedrate adjustment, etc, etc. to do before you will be consistently successful. Read up on the forums and ask lots of questions before deciding which printer to buy, and be prepared to experiment.
2.) Unless you are content with printing pre-created models, you should be ready to teach (or facilitate) your students learning how to do 3D modeling in the first place, and how to convert their models into the STL format needed for 3D printing. There are many fairly easy to learn 3D programs out there, including Sculptris, Sketch-Up, Tinkercad, and Make Human. Maya is also free for students and teachers, but the learning curve is steep. Blender is open source and free, but the interface is hard to learn even for experienced modelers.
Students learning Sculptris at the Utah County Hackathon on Dec. 12, 2015. They are building alien heads. They enjoyed learning the program and seeing how to do 3D printing.
3.) Try to get a printer with a heated print platform and variable temperatures and extrusion rates. One size does not fit all jobs here, especially if you want to print with more than one type of plastic. ABS expands more when heated than PLA plastic, so it tends to curl more as it cools down. It also requires a higher nozzle temperature to melt it.
4.) Keep an eye on print jobs. My failed Heraclitus started out well, so I taped the edges and left it overnight to print. Somewhere around six hours into the job, it detached from the print plate and caused the fatal print defects shown. Print jobs also sometimes stop for no reason. You won’t be able to start them up from where they left off. It will just be wasted plastic. You must keep trying, and be patient.
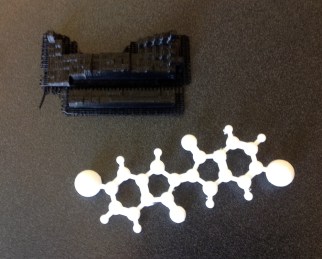
Final printout of the Tyrian purple molecule. The black model is of the periodic table of elements, showing the property of electronegativity for each element. This was done by typing the values into a TXT file, then importing it into ImageJ software using Import-Text Image, then converting the grayscale image into a height map for Daz3D Bryce. From there, we used the same process as the 3D Moon models.
5.) Have a plan and a purpose for why you need a 3D printer. Otherwise they can be frustrating and ultimately unsatisfactory for you. If you haven’t integrated 3D data analysis or modeling into your classes already then a 3D printer will be useless for you. If you want some ideas how to do this, look at some of my other posts, such as this one on creating 3D models of periodic properties of the elements: https://elementsunearthed.com/2014/05/10/visualizing-periodic-properties-of-the-elements/ . Here is a photo of a 3D print job done from one such model, showing electronegativity, as well as a model of the molecule for Tyrian Purple dye.
6.) Some supplemental materials will help. Buy some Aqua Net Super Hold odorless hair spray (purple can) and spray it onto a paper towel, then rub it onto the tape on the print platform to improve the stickiness. Even with that, the jobs might still work loose. Some people use glue sticks or a gel adhesive. You will need a roll of Kaptan or PEI or blue painters tape to put on the platform if the tape starts to peel up.
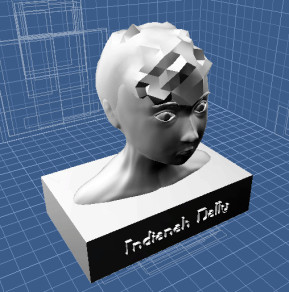
Student self-portrait using Sculptris and Carrara.
7.) Avoid large flat objects with sharp corners. They tend to curl up when cooling. If you build in supports, you can print up to a 45° angle without scaffolding, and therefore take advantage of the better resolution of the x and y-axes.
Good luck. Let me know what types of projects you attempt, and we can swap ideas. As you can see from the photos here, there are many possibilities for chemistry classes alone.
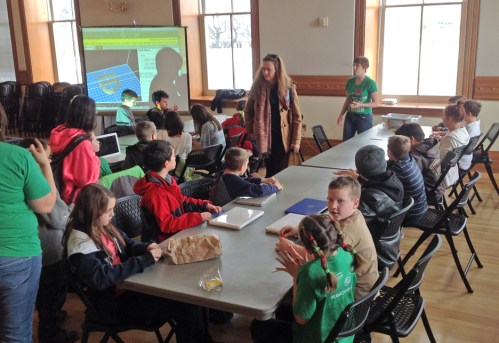
Students working with modeling clay to learn the concept of 3D modeling. This is at the Utah County Hackathon on Dec. 12, 2015 at the Provo Library. The image on the screen is of the ReplicatorG software. It is printing my family’s cattle brand, the Lazy Bar D. Unfortunately, the bar wasn’t quite level with the bottom of the D in Carrara, so a raft wasn’t printed under it and it went at bit wobbly and timey-wimey.
