Feeds:
Posts
Comments

Posts Tagged ‘stem education’


Me with Neil suit

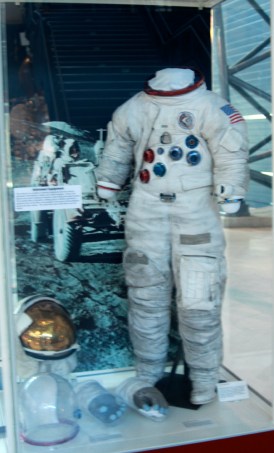
David Black with Neil Armstrong’s space suit, July 20, 2019.

As I write this blog post, I am in Washington, D.C. attending a Teacher Innovator Institute sponsored by the National Air and Space Museum (NASM). It is July 21, 2019 and I’m a bit exhausted after helping out as part of the NASM Crew for last night’s celebration of the 50th Anniversary of the Apollo 11 landing.

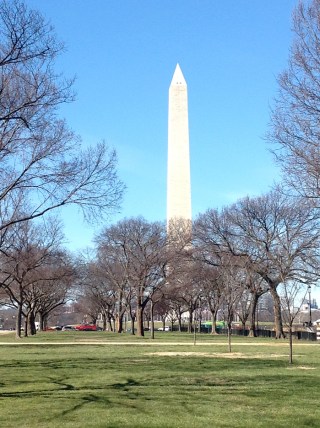
It was quite the party, and NASM has been in the middle of all the planning and organization as the sponsoring institution. They have tents set up along the National Mall in front of the museum with booths by aerospace companies and NASA explaining why we went to the Moon and why we need to return. There are hands-on activities, models, virtual reality tours, simulators, and experts on hand to explain everything and the crowds are thick. On Friday night we were invited to the VIP area to view the Go For The Moon multimedia presentation, which they projected onto the Washington Monument and large screens on either side. They have been setting up large speaker systems around the Mall all week, and the presentation did not disappoint. It was fantastic, and you could really feel the rumble as the Saturn V rocket blasted off as if the Washington Monument itself were being launched into space. It was like being there.

Air and Space 50th

The Air and Space Museum celebrating the 50th anniversary of Apollo 11.

Then, from 8:00 pm until 2:00 am NASM hosted a celebration for tens of thousands of people. As part of the small army of volunteers helping out, my job was to judge some question responses for a series of scavenger hunts throughout the museum on the Mercury, Gemini, and Apollo programs. There were hundreds of teams racing throughout the museum looking for answers to questions that involved artifacts of the space race and the moon landing. Contestants sent in text responses, photos, and short videos of themselves completing challenges. We awarded bonus points or took points away from the automated scoring system. Other volunteers managed the lines to view Neil Armstrong’s spacesuit, count visitors, and be on hand to answer questions.

Capitol July 20

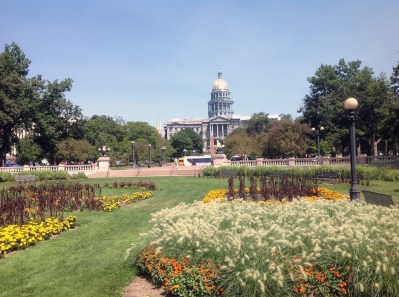
The Capitol Building during the 50th anniversary celebration of the Apollo 11 landing.

It was an amazingly well coordinated production that has been in planning for over a year. They had to get a Joint Resolution of Congress to be able to project onto the Washington Monument, which took time. They had live bands, showings of the HBO miniseries From the Earth to the Moon, and even a viewing of 2001: A Space Odyssey. The Mall was packed with people watching the multimedia show, and all of this in the most brutal heat and humidity I’ve ever experienced in Washington, D.C. I am proud to have been a small part of this celebration.

Rover rollover

Rover rolling over human subjects on the National Mall during the Apollo 11 celebration.

The Teacher Innovator Institute is in its second year and each year 30 STEM educators are selected for a two-week program at NASM. We have been out at the Steven F. Udvar-Hazy Center near Dulles International Airport and at museums along the Mall. The Hazy Center is an annex of the main museum on the Mall, and houses the Space Shuttle Discovery and an SR-71 Blackbird, among many other historic aircraft. They also have a large curatorial area for restoring donated aircraft, such as the Flak Bait bomber currently being restored. We got to hear a panel discussion with two World War II airmen, including Colonel McGee of the Tuskegee Airmen. We’ve heard presentations from last year’s cohort and practiced STEM education activities, such as building a giant geodesic dome out of PVC behind the space shuttle.

Lego astronaut with girl

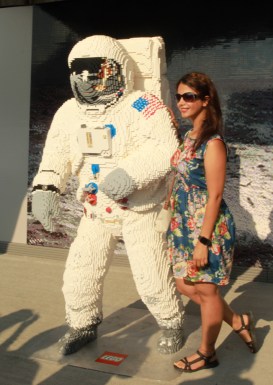
A LEGO spacesuit (complete with Buzz’s reflection and a Moon Maid).

The purpose of the Institute is to take teachers who are already innovators and train them in best practices for STEM education through informal education experiences. By informal, we mean educational programs that are not part of the public K-16 education system, such as museums and educational foundations. I’ve been fortunate to work with planetarium directors, museum educators, and NASA Education and Public Outreach personnel on many occasions and this is a great opportunity to finally learn more of how they approach education through objects.

Giant Moon map

A giant map of the moon

Museums are largely about objects, or artifacts. It could be a life-sized model of a giant shark hanging up in the Natural History Museum, the Hope Diamond, Lunar Module 2 in the Air and Space Museum, or Neil Armstrong’s spacesuit. These objects are valuable partly because of their intrinsic value (such as the rare blue color of the Hope Diamond) but mostly because of their provenance, or the human lives and events that these objects have touched. What makes Neil Armstrong’s suit more intrinsically valuable than Jim Irwin’s suit, which is in a case at the Udvar-Hazy Center? Neil’s suit had thousands of visitors last night, whereas Jim’s suit is largely unvisited. Both are made of the same materials and have been carefully preserved and displayed. Personally, I am more in awe of the Apollo 15 suits than the Apollo 11 suits, because their owners stayed longer on the Moon, did more science, and made more fundamental discoveries including the Genesis Rock, a piece of lunar anorthosite that Dave Scott and Jim Irwin brought back and which determined the age of the Moon. But Neil’s suit was the first on the Moon, and that gives it a greater significance to most people.

Jim Irwin suit

Jim Irwin’s space suit from Apollo 15

Teaching in informal settings such as a museum is very different. Here, educators do not have a captive audience. People wander around, and some just wander through whereas others will stop and engage with an exhibit. If we want learning to occur, then engagement is crucial, as I have discussed in a previous post. What are the factors that encourage people to linger longer? How should the exhibits be displayed, and what holds people’s interest? How do you draw people in, get them hooked, and activate their curiosity? These are critical questions in informal education.

Mars 2020 sample collector

Mars 2020 rover’s sample collection device, with a model of the rover.

The Air and Space Museum was first opened in the mid 1970s and has not had a major complete overhaul since. Individual areas have been upgraded, but some have not and it shows. One of our tasks has been to visit exhibits and evaluate their effectiveness for engaging middle school students. I helped review the Space Race gallery, where the displays are static with no interactivity and no multimedia unless you count the single video screen playing an eight-minute long movie of talking heads that you couldn’t see because it was angled to perfectly catch the glare of the sun through the afternoon windows. Oh, there was one standalone pylon with instructions for going online to listen to John Grunsfeld describe what it was like to repair the Hubble Telescope (an obvious recent addition), but no one was doing it. The gallery had no flow to it, no sense of a hierarchy of events, no relevance to the students’ lives. A middle school student might walk in because of the Hubble Telescope display, but they will wander out again in under three minutes. The best things here – Dave Scott’s spacesuit, for example – are tucked away into almost hidden corners.

Painting Apollo

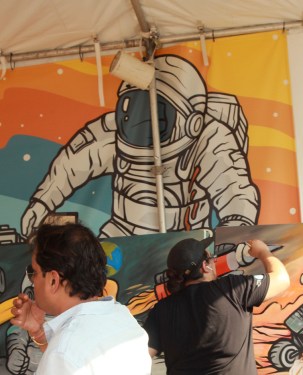
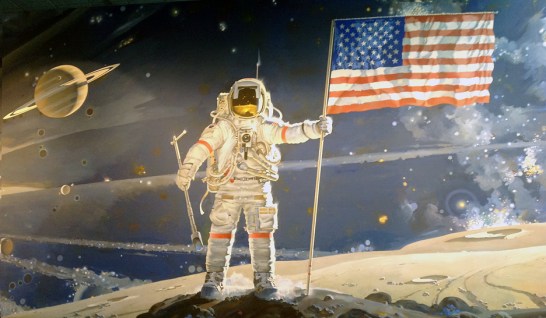
Painting Apollo in a tent on the National Mall

The limestone facing of the museum was supposed to be four inches thick when the museum was constructed, but budget cuts reduced that thickness to only one inch and they are beginning to buckle and crack. They must be replaced, so while construction is going on, the museum is re-inventing itself inside as well. So I am thinking of how Air and Space might change to better engage students and the general public.

LM 2

Lunar Module 2, on display in the National Air and Space Museum. This was the LM that was supposed to be first to test in space, but problems with its construction led to slipping the test to LM 3, which became the Apollo 9 mission.

We have received training on how to introduce and extend the learning that artifacts can provide. We have had the chance to examine some rare artifacts indeed, some of which the Smithsonian preserves but do not display because of their priceless scientific value. On Thursday we went to the Natural History Museum and were asked to find an object that represented us. I found some trilobite fossils that were collected in the House Range of western Millard County, Utah. I grew up in that area and my grandfather had a mining claim for collecting trilobites near where these specimens were collected, in the Wheeler Shale formation. He would take me out to his claim when I was a boy and we would dig into the dark gray shale beds and split them open with a chisel and hammer. We had buckets of them. So they represented me through memories of my grandfather whereas they would just be interesting fossils to someone else. The trilobites have a personal connection. Visitors to museums must make personal connections to the artifacts in order to engage with them.

Me holding Mars

David Black holding a piece of Mars. This meteorite was found in Antarctica and was identified by the oxygen isotopes found in small bubbles inside it as matching those on Mars. There is an extra hand helping me (thanks, Marc) because I don’t want to drop it. Like I would do a thing like that . . .

I had been through the meteorite, mineral, and gem galleries there several times in my life, so when they took us back past the meteorites and the moon rock displays, I was wondering if there was anything new for me to learn. Then they opened an almost hidden side door and took us through a security corridor to the meteorite vault, where meteorites from all over the world are kept. Our expert guide, Dr. Cari Corrigan, explained her trips to Antarctica to collect meteorites, and brought out some truly historic finds – valuable because of their rarity and their histories. We got to hold (wearing gloves, of course) pieces of the Allende meteorite, which fell in Mexico in 1969; the Peekskill meteorite, which famously dented a car; the only meteorite to injure a person (it went through a ceiling in Alabama and smacked a lady named Ann Hodges on the hip); and the Chelyabinsk meteorite that exploded over Russia in 2013.

Ann Hodges and her meteorite

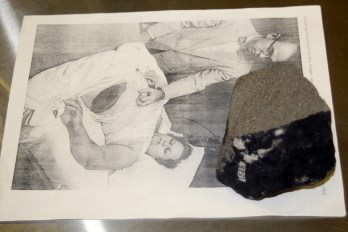
Ann Hodges of Alabama and a piece of the meteorite that hit her and caused the bruise in this photo.

Then Dr. Corrigan pulled out some other meteorites and let us pass them around and take photos. A lunar meteorite, blasted off the Moon. A martian meteorite (we know it is from Mars because of the oxygen isotope ratio in the small pockets of air trapped in the meteorite). These are valuable because of their rarity and scientific value. And they’re from other planets!

Me with Allende meteorite

David Black holding a piece of the Allende meteorite that fell in Mexico in 1969. This meteorite is the oldest object on Earth at 4.65 billion years old. The white fluffy patches are probably solar system dust bunnies, and there are even pre-solar grains in this rock that are older, perhaps 5 billion years old.

And then, as I was holding the lunar meteorite, it slipped out of my gloved hand and dropped to the floor. Yes, I dropped the Moon. It was unharmed, fortunately, and Dr. Corrigan didn’t see me drop it. Thinking about my klutziness afterward, I realized that this rock was blasted off the surface of the moon, the heat of the impacting object melting and fusing it. It traveled through the vacuum of space for 250,000 miles, then came screaming through Earth’s atmosphere at supersonic speeds, heating to incandescence until it slammed into the ice of Antarctica. Then glacial forces ground it up into the margin of a mountain range where a scientist found it. I don’t think a three-foot drop to the floor is going to do much to it. I would not, however, recommend this as a way to have students engage with a meteorite.

Hope Diamond

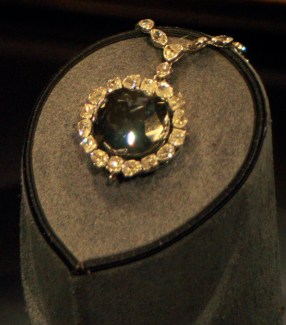
The Hope Diamond in the National Museum of Natural History.

We are learning all the time how to be more effective at informal education; how to engage those middle school students. Take the Hope Diamond. I first saw it in 1982 when I was fulfilling a Congressional Internship here in Washington, D.C. It was rather randomly stuck in a static display case without much signage or anything else in a small gallery of gemstones. The glass on the case was smudgy with fingerprints and it was surrounded by people, so I didn’t get much of a chance to see it. Now, it is in its own space in a rotating stand so that people can see it from all sides for a much better view. But the glass was still smudgy and there were still lines of people when I saw it in the afternoon. On Thursday, we were there at the opening of the museum and few people were around and the glass had been cleaned. There are some signs on the wall, but no interactivity. The gem and mineral collection was redesigned over ten years ago and so there isn’t much interactivity or multimedia throughout. The display is still not very engaging, although improved.

Meteorite group

A group of Teacher Innovators in the meteorite room at the Natural History Museum. Dr. Cari Corrigan is fourth from the right on the back row.

What can be done to improve it still? A good example is the International Spy Museum, which has recently been rebuilt near the L’Enfant Plaza south of the Mall. You are given the name of a real spy encoded on a magnetic card. You start at the top learning about some real spies throughout history, such as Mata Hari, with video pylons and screens playing short videos, with interactive stations that read your card and allow you to progress in your mission to be outfitted with devices, given a disguise, breaking the codes, traveling incognito, etc., with real examples of each aspect on display along the way. The museum is built to flow you through the process in one direction, winding around through but with plenty of choices for things to do and see. After two hours, which was all the time we had to be ahead of the general public (we got in there early), I had only made it through half of the museum. My card is good for a month; if I have time tomorrow, I will return. It is that good.

Big Boot about to drop

A balloon replica of Neil Armstrong’s boot about to be planted on the moon. Or at least in the Air and Space Museum.

The objects in the museum have not changed. Their intrinsic value has not changed. What has changed is the human dimension – the personalization of the experience and making it relevant, the stories behind the objects and how the visitors fit into those stories. At the end of your mission, you find out if your spy was successful at their mission or not and if you made the right choices. You become the spy and immerse yourself in the experience.

How could we do this with the Hope Diamond, or Neil Armstrong’s spacesuit? With the personal history behind these objects, you could take the role of one of the owners of the Hope Diamond and find if the “curse” claims you or not. Or you could become a gem yourself – you must be dug up in the Golconda diamond fields or the Cempaka diamond mine in Borneo (which isn’t even mentioned in the Smithsonian), be smuggled out of the Mogul’s collection, sold to traders, cut and polished, sold and traded, set in a necklace, worn by a ill-fated rich daughter from a famous family, etc. You could become an astronaut and go through training and fitting and a mission and find if you make it back alive. Along the way, you’ll learn the history and the science because you are invested and engaged. It is personal. It has the human dimension that too many museums fail to capture.

NASM Crew

Some of the NASM Crew, a group of volunteers and science teachers who helped with the 50th anniversary Apollo celebration at the Air and Space Museum in Washington, D.C.

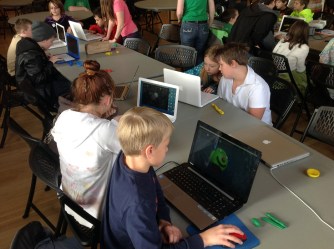
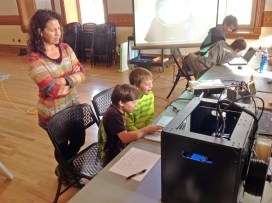
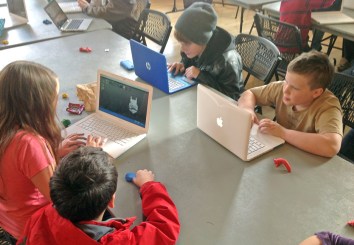
Last night, tens of thousands of people engaged with space science and history. They had fun and it was crazy but there was so much learning going on. I saw the GooseChase participants learning as their responses came in. They were actively, creatively engaged.

Engagement, innovation, and creativity must come first in any educational setting be it formal or informal, a museum or a classroom. Then learning will follow.

Apollo Soyuz

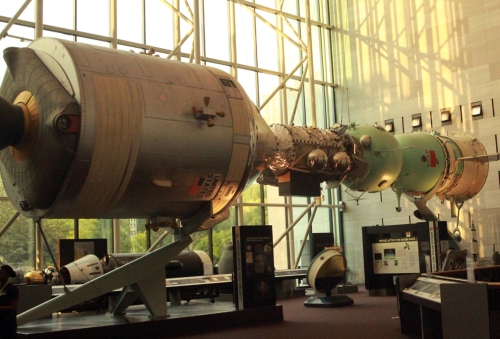
The Apollo-Soyuz display in the Space Race Gallery at the Air and Space Museum. When we arrived to begin our volunteer efforts, the museum was closed (it was cool to walk right in through the staff entrance with our badges). There was no one there. Then, when the doors opened at 8:00, there were large crowds of people wanting to engage in space science education.

Read Full Post »

Borneo Day 6: Wednesday, July 26

Physics class

The physics class at SMAN 1 Mandastana. I gave all the students a MAVEN postcard. I taught two astronomy activities on this day. The teacher is standing next to me with the NASA sticker.

Today Craig and I taught lessons in our subject areas. He taught the spaghetti tower engineering project and the DaVinci helicopter activity. I taught two astronomy lessons: the human orrery and the parallax activity.

Martapura River at dawn

The Martapura River at dawn, taken from the entrance to our hotel.

We had worked out what we would be teaching with the physics teacher the day before. When we first met the teachers on Monday, I noticed that she was the only female teacher not wearing a hijab, for whatever reason, and that she didn’t seem as carried away in the general hoopla about having us here. I could see that I needed to convince her that this would be a good experience for her students, so I asked Nazar if we could meet with her and discuss what we wanted to do. She warmed to the idea of teaching engineering and astronomy, and that we would trade off with another class so that both would get the lessons. We decided on the details and were good to go.

Laying down planets

Laying out the planet rings for the human orrery activity.

I set up in her classroom this morning, preparing the materials I had brought with me all the way from America in my blue suitcase. I had the string orbits and space probe for the orrery and the materials for making sextants. I also had my final presents for students, the remaining NASA stickers, postcards, and bookmarks. My suitcase will be much lighter after today.

As the first class started, I introduced the idea of the planets and how they were called the Wanderers by the Greeks. I asked them for the Indonesian words: Earth is Bumi and the other planets are essentially the same words as English and Latin. Then I asked for the name of the sun and this one surprised me: it is Mata Hari. I asked if it was the same name as the infamous World War I spy that lived in Paris, and they said yes. She was a Dutch woman who had lived in Indonesia with her husband and studied dance here when her marriage fell apart. She took the name of the Sun as her stage name.

Space ship arrives at Mars

The spaceship arrives at Mars after a six month journey. Now it has to wait there until Earth comes back around, and then a six month return voyage. We simulated all of this through our human orrery.

I described how Ptolemy worked out the motions of the solar system based on a geocentric model with deferent and epicycle circles like a spirograph. They understood the translations given by Nazar, but no one has seen a spirograph before. No matter. I plunged onward. I explained that Ptolemy had been brilliant but wrong, and that Arabic astronomers had gotten better observations and that Copernicus created a heliocentric model based on them. I certainly put Nazar to the test. I asked for volunteers to be the planets and Mata Hari, and then we went outside into the courtyard.

We laid out the string orbits in as circular a pattern as possible, then I ran the simulation calling out “Two weeks.” They certainly know what that means now. I pointed out how Mercury is fastest and Mars slowest. Then I showed how a space probe or human mission would take 6-8 months to reach Mars, starting when Earth is 90° from Mars and overtaking it, then arriving at Mars on the opposite side of the Sun. Astronauts would have to wait until Earth came back around to the same position before starting back, a 30 month round trip. At the end, I had students stand around the circles as zodiac constellations and demonstrated how retrograde motion works as Earth overtakes Mars.

Measuring stars

Students at SMAN 1 Mandastana measuring the angles from planets to stars in our parallax activity.

It was a hot activity out in the sun in the courtyard and we were all grateful to get back inside, even if the classroom isn’t air conditioned. I handed out Mars MAVEN postcards (I still had quite a stack) and the students insisted that I sign them as an autograph. That took a few minutes. Then we took photos again.

Mata Hari in 2010

Mata Hari in 2010. She was born from Dutch parents but moved with her husband to Indonesia, where she learned Javanese dancing. After divorcing and moving to France, she started a career as an exotic dancer and took her stage name from the Bahasa Indonesia word for sun, literally “eye in the sky.” She was accused of being a German spy and was executed in 1917 by the French.

After we traded classrooms, I was in a math teacher’s class and I taught a second astronomy lesson, this one a bit more challenging. This is the lesson I developed on how we calculate the distance to nearby stars using trigonometric parallax. I introduced the idea of using the tangent function to find the distance to the star based on the parallax angle created by the star’s apparent wiggling back and forth compared to the background stars because of the Earth’s revolution around the Sun. I had to ask the Indonesian word for star, which is bintang. There is a beer in Indonesia (popular on Bali but not so much elsewhere, because Muslims don’t drink alcohol) called Bintang or Star Beer.

Measuring stars 2

Helping students measure the angles to simulated stars in our parallax activity.

I divided the students into groups and handed out the wooden dowels, protractors, tape, string, and beads I had brought. The built the sextants, and then they drew up stars and planets on the cardstock with the markers I brought. Then we headed outside to the courtyard again. I used two meter sticks we had borrowed from the physics teacher (kept in the teacher’s lounge because they are very valuable and she doesn’t want them broken) and laid out and measured the planets on one line and the stars on another perpendicular line. I explained how to measure the angles with the sextants, and the math teacher helped her students figure out the process. The girls jumped in a lot more willingly than the boys (no surprise there), who were more willing to stand in as stars. Once we had at least two measurements from each planet to each star, even though not all groups had all measurements, we headed back inside as we were all getting heat stroke. I hadn’t thought of the problem with the heat, and the poor girls were roasting in their hijabs.

Measuring stars 3

Measuring the angles to stars from simulated planets using a sextant. It was a hot day, so once we got a few measures for each planet to each star, we headed back inside to do the calculations.

The students pulled out calculators (I hadn’t needed to bring the ones I had) and set to work on the tangent calculations once I had explained the formula. They seemed to all understand it, and had obviously worked with trig functions before. I drew up a table on the white board and we added their measurements, then their calculations. They results were exactly as expected, fitting the pattern much better than any class I’ve ever tried this with. The further out the planet, the better the results compared with the actual answers. The further out the star, the less accurate the results. We talked about why and how the tangent function reaches infinity the closer you get to 90°, so being off by even a degree for the further stars means great differences in the tangent function.

As you can imagine, this lesson took a bit longer than 90 minutes, but the teachers said to go ahead and continue because the students were really getting into it. I don’t know how many hands-on physics activities they normally do – I didn’t get to see the Fisika lab room or any equipment, but if they only have two worn out meter sticks, it can’t be that well equipped. Considering that astronomy isn’t regularly taught in high school, they seemed to have a pretty good grasp of basic astronomy, which leads me to think it is taught in junior high or elementary school. I saw some mechanical orreries in one of the elementary classrooms we visited in Jakarta, so it must be taught at some point.

Calculating answers

Students calculating the tangent function to find the distances to the simulated stars.

It was audacious of me to try to teach these lessons, which are hard to teach even in America. That they were so successful was beyond anything I could have hoped for. I saw some real comprehension in the students’ eyes; I actually taught them something new. I knew the language barrier would be a challenge, but Nazar’s English is good and we managed to communicate. It helped that I learned a few Indonesian words, enough to show my desire to reach them. The students reciprocated by listening and following instructions well, and they seemed to truly appreciate seeing how trigonometry really can be useful, or how simulations and kinesthetic activities can help to demonstrate science concepts.

Calculating star distances

Students calculating the distances to stars using the tangent function for the parallax activity. Their answers were the best I’ve ever seen in this activity, and showed the expected pattern that the more distant a planet, the more accurate the answer. The more distant the star, the less accurate the answer.

It also helped that science really is a universal language. Its concepts remain the same throughout the world; only the specific words change, but because many of them are based on Latin, they are fairly easy to understand and interpret across our two cultures. I have great gratitude to Nazar and the other English teacher for helping to translate the words, and to the science and math teachers for having already laid the foundation of math and science concepts. None of this would have worked otherwise.

Calculating star distances 2

Finding the distances to simulated stars using trigonometric parallax. These students at SMAN 1 Mandastana in Borneo did a great job with the parallax activity. It was a great honor to teach one of my own lesson plans here.

Craig’s engineering exercises also went well, although he did not see the level of creativity and divergent thinking one might expect of American students. Whether or not these types of activities will be used by the science teachers remains to be seen. One day of demonstration is not enough to overcome a lifetime of teaching habits. We won’t be here long enough to follow through, but at least we provided lessons that were unforgettable and truly lived up to our hype as master teachers.

Craig and David with teachers

Craig Hendrick and David Black with teachers at SMAN 1 Mandastana.

I don’t consider myself to be a great educator compared to many teachers I have met, but there are moments when I do well and this was one of them. As my message came through across barriers of culture and language, using concepts that are hard for even English native speakers to understand, I realized that I can be an excellent teacher, after all. We all rose to the challenge, partly because we dared to do what should have been impossible. At least at that moment, I felt deserving of the accolades and respect I have been shown here.

Physics class 2

The second class of the day. I did the parallax activity with them, and they did a fantastic job. I’ve decided that science is truly the universal language.

Read Full Post »

I’m taking a break from reporting on my preparations for my Teachers for Global Classrooms trip to Indonesia to bring you up to date on activities in my STEAM it Up and Chemistry classes, so that I can maintain some semblance of chronologic continuity.

Ice dye shirts 1

Ice dyeing creates intense, random colors.

Once we finished our unit on steampunk sculpture and cosplay costume creation, we began ramping up for the concluding section of our dyeing cloth lab in the STEAM it Up class. To get the students back in the mood, I introduced them to tie-dye and all of its STEAM applications. I’ve reported on how to do tie-dye in previous posts, so I won’t describe what we did again here. We did add a new wrinkle to the process by trying out a different type of dyeing using ice to randomize the colors. This is called ice dyeing, and you can find many beautiful examples online. The colors tend to be much more intense (because the dye powder is less diluted by the ice).

Here’s how to do it:

Adding dye powder

My STEAM it Up students adding tie-dye powder over the ice layer. The T-shirts and other cloth items are scrunched up on a tray under the ice.

First, you find a tray or grate or sieve of some kind that can fit inside a waterproof container, such as a plastic storage box. The grate must have holes to let water through and be raised a few inches above the bottom of the container so that the cloth won’t be sitting in the melted ice water.

Second, you need white or near-white cloth such as T-shirts or aprons or socks. These need to be pre-soaked in washing soda (sodium carbonate) dissolved in warm water. I use about a cup (250 mL) of washing soda to a sink full of warm water. Soak the cloth for at least 15 minutes, then wring out most of the water so that the cloth is wet but not dripping The cloth pieces or T-shirts then need to be wadded or scrunched up randomly and laid in the tray next to each other tightly enough so that they will remain somewhat folded up.

Ice with dye powder

The ice with a completed layer of dye powder. I demonstrated the process at the bottom with a spectrum of colors (and two shirts underneath). Students die the middle and top. Where complimentary colors are mixed, as in the top right, the results were more muddy. Yellow needs to be given more room since any other color will mix in and darken it.

Third, ice or snow is layered on top of the cloth or shirts. We simply raided the faculty lounge refrigerator’s icemaker and poured the ice on top of the cloth. It needs to make a fairly complete and even layer with no holes. We did this in May or we would have gone outside and gathered snow for a finer, more complete layer.

Fourth, tie-dye powder (we used Procion MX dye powder ordered from Dharma Trading Company) is spooned onto the ice or snow. This will use a lot of dye powder, so go sparingly and try to make a rainbow or spectrum pattern, with analogous colors next to each other instead of complimentary colors. Otherwise, the opposite colors will mix and you’ll get muddy results. There is some good color theory that can be taught here.

After the ice melts

To keep the T-shirts from sitting in the muddy melt water, the tray they are sitting in must be raised out of the water. I placed this tray on top of some funnels I use for tie dyeing. This is what the shirts look like after the ice melts. The shirts must sit for 24 hours with a lid on the container before rinsing. By scrunching up the cloth, and by the mixing of colors as the ice or snow melts, the final shirts have bright, random colors.

Finally, put a cover on the container and let it sit overnight undisturbed. It must be airproof, as the dyes need wet cloth and about 24 hours to set in. The colors will mix in the melt water to make a dark olive or brown color that can be saved for other dyeing. The shirts are then rinsed out in a sink with running cool water until no more color rinses out of them. They can then be washed with non-bleach detergent on gentle cycle and dried normally.

Ice Dye shirts 2

Ice dyed shirts.

Here is a photo of the results. Since some of my students forgot to bring their own T-shirts, I brought in all the old T-shirts I could find. Some of them had paint on them or were buried at the bottom of my drawer and hadn’t been worn in years. Now they have a new lease on life and are my favorite tie-dye shirts. Over the years, I’ve built up quite a collection, but these have the most intense colors.

Me in ice dye shirt

Here I am wearing my favorite ice dyed shirt. Notice how bright the colors are, but it does use up a lot of dye powder.


Read Full Post »

Walden HS fall 2015

Walden School of Liberal Arts; Fall 2015.

In 2010, I was looking for a teaching job after taking a year off to work on business profile videos. The video projects had been fun and rewarding, but not lucrative, and I missed being in the classroom. I looked through the usual ads, and then the unusual ones, and found a teaching job description on Craig’s List for a local charter school. It was named Walden School of Liberal Arts, and I had passed it many times without realizing it was a school. I’d thought it was a retirement home.

I started teaching science and technology classes that fall. I decided to teach there for five years and give my best shot at implementing integrated STEAM education and project-based learning.

Walden Elem-MS fall 2015

Walden School of Liberal Arts elementary and middle school building; Fall 2015.

Now, six years later and after many successful student projects, I am leaving Walden to teach at a new charter school in Salt Lake Valley. This hasn’t been an easy decision. I have come to truly appreciate the students and the other teachers at Walden and the freedom I’ve had to experiment. The projects I’ve described in this blog would never have happened at a more traditional public school. I’ve been able to train up a cadre of students who now have excellent STEAM skills and are capable of accomplishing great things. But I have to look at what my goals were for coming here, and I can honestly say I’ve done what I set out to do. There have been obstacles to overcome, but these limits have forced me to be more creative and have probably helped, not hindered.

South Fork

Walden School’s 2016 graduation was held at a ranch in South Fork of Provo Canyon.

I was invited to speak at our 2016 graduation, and I chose the topic of “Dare Mighty Things” based on the famous speak by Teddy Roosevelt entitled “The Man in the Arena.” It was definitely bittersweet to be saying goodbye to the school as well as to the students that I’ve worked with for six years.

Mighty things sign

A sign in the lobby of the Administration Building 180 at the Jet Propulsion Laboratory; March 2016.

My New School:

My new school, American Academy of Innovation, is built on the model of students as innovators, creators, makers, and inventors. It will follow a Problem-Based Learning (PBL) structure and include international and local business and university collaborations and career and technical education as well as STEAM (science, technology, engineering, arts, and math) education. It should be the ideal situation to implement and perfect the projects I already pioneered at Walden, in an environment that will be more suited to cross-curricular integration. I will also be receiving a substantial pay raise, which certainly helps. It is a brand new school, and I will get in on the ground floor of establishing a culture of innovation and creativity, of academic excellence, and scientific inquiry.

AAI 3D logo

Logo for American Academy of Innovation. I created this 3D animated version for a video I created in June to explain the school’s name.

For the last two weeks we have been meeting daily as a new faculty, deciding on the details of our vision, mission statement, principles and core values, policies, etc. I’ve gotten to know the other teachers, and they are as talented and creative a group of educators as I have ever worked with. We had an official open house in the new school on Aug. 18, and I met many of the parents and students I will be teaching. If this is any indication, it will be an amazing year.

AAI under construction

American Academy of Innovation under construction; July 2016.

I will be teaching chemistry again (which I did not teach this last year as I was asked to teach the new IB Design courses instead). I will also have an elective course called STEAM it Up, which will basically be to take all the fun stuff I’ve done in my Wintersession and Chemistry classes from the STEM-Arts Alliance grants and turn it into a full semester class to explore the integration of arts and history with STEM. It will be a creative, making, totally project-based class. I will recreate and improve several of the projects we did two years ago, including making homemade iron-gall ink, experimenting with natural dyes to make tie-dyed shirts, creating marbled end paper and Shrinky-dinks, designing jewelry from etched and corroded copper and brass, building Steampunk costumes and sculptures, etc. I hope to add a few more projects, such as making blueprint T-shirts; collecting, polishing, and setting minerals to make jewelry; and others. As I have done before (but not as often as I had hoped at Walden), I will establish an end-of-year STEAM Showcase where students will display their work, give mini-lessons, and this time even have a fashion show to let parents see the costumes, shirts, and jewelry they will make.

Since PBL requires students to present and demonstrate their learning to an audience as a summative assessment, it fits right in with my plans. And this time I anticipate getting other teachers involved, such as art, history, and English as my students also create posters, draw illustrations, program games, and write lessons, scripts, and blog posts. Because I haven’t been teaching chemistry actively this last year, I haven’t been keeping this blog site up to data; now you will see many more student contributions and more frequent posts.

I also plan to move ever more to a flipped classroom model. Our periods will be 80 minutes long, and we are expected to only use the first 20-30 minutes for direct instruction and content; the remaining 50-60 minutes are for students to collaborate and build projects that solve the problems we pose. As to how many problems we will present in a year and what those problems will be, we’ll decide that in the next two weeks.

Washington Monument

Washington Monument; March 2016.

Plans A Through E:

Going back to teaching this coming year wasn’t my first choice. I had several tiers of plans in place, and returning to teaching was Plan D. Plan A was to be chosen as an Einstein Distinguished Educator Fellow and spend this next year working for one of the Federal agencies in Washington, D.C. I applied this last fall and made it to the semi-finals round, which meant being flown to D.C. for three days of tours and interviews in early March. I interviewed with NASA, the National Science Foundation (a computer science initiative), and the Department of Energy. I was not selected, even though I thought two of the three interviews went very well. So scratch Plan A.

Me by Library of Congress

David Black in front of the Library of Congress in Washington, D.C.; March 2016.

Plan B was to go back to graduate school and fulfill a PhD in Science Education. I took the GRE in April and was accepted into the STEM Education PhD program at the University of Kentucky, but because of my late application, no more research/teaching fellowships were available. I am barely scraping by with my current teaching salary (combined with some awards and video projects on the side), so I do not have the money to move to Kentucky now. I have asked for a one-year deferment, and have accepted the job at American Academy of Innovation where I can save up enough money to move to Kentucky next summer. Or, if AAI works out well, I will simply stay there. It’s a matter of either doing Problem-Based Learning or learning about Problem-Based Learning; I’ve always preferred to actually do something.

Air and Space mural

Mural inside the National Air and Space Museum in Washington, D.C.; March 2016. Our hotel was the Holiday Inn just one block south of this museum, so of course I spent some time there, as always.

The Return of The Elusive Atom:

By the way, Plan C was to leave classroom teaching and start up an educational content design firm. I’ve wanted to do this for years, and even attempted it in 2009-2010 when I did business videos for clients. There are a series of Ed Tech start-up programs around the country called Accelerators, where chosen education companies are provided office space and seed money to get their product ready for marketing, then investors provide start-up venture capital to finance the new company in exchange for a piece of the action. One of these Accelerators is in Salt Lake City, and it looks promising. Certainly I have enough ideas. The problem is getting them into a finished enough form to apply to the Ed Tech Accelerator program, then finding the time for 12 weeks to solely focus on my products. I also need to have a partner or partners, which is another problem. So far, it’s just been me. But in anticipation of this possibility, I have finally completed editing the front of my old Elusive Atom poster that has sat in limbo on my computer for years. I started it in 1995. I finished the hand painted version in 2002. And this summer I finally completed fixing the digital version. It looks good. Now I need to do the backside text and line art, and I’m ready to print out sample copies to market.

EA poster small

Finished front of the Elusive Atom poster. Now I need to work on the back side, mini-posters, and timeline, then print and market it.

While at the STEM Forum and Expo in Denver, I talked with the new product managers from both Flinn and Nasco, and will try to work with them to make the poster a reality. I also plan to repurpose the illustrations into a timeline and a series of mini-posters on each scientist from the poster, such as Mendeleev or Jabir Ibn Hayyan. I found it fun to get into Photoshop deeply again.

Writing a Novella:

Plan E is a long shot, but something I’m quite proud of. I’ve always wanted to try my hand at writing science fiction, and have several good (I think, anyway) ideas. I read last summer that Tor Publishing is starting an initiative to look for new authors to write novellas for their line of e-books. They announced in May that a new round of stories would be accepted, completely unsolicited, on the topics of cyber punk, future thriller, time travel, and other science fiction tropes (not fantasy this time). That’s my chance! So I spent two solid weeks in June working on writing up a book I’ve wanted to do since at least 1995. It’s called Dead Stone Lions, and I had thought about the plot for years. It hits about all of their possible subgenres. I took a couple of days to brainstorm and outline, then started writing. Once I got into it a chapter or two, the writing took on a life of its own. Weird things started happening – new characters appeared, or old characters did unexpected things, and I had no idea where these threads would lead. Then later in the book, these plot points somehow circled back around and became significant, when I hadn’t planned it that way at all. Like the self-aware computer called ISAAC (after Isaac Asimov, for two important reasons) or the protagonist’s brother’s subplot.

The deadline was the end of June, and I finished the first draft late in the evening of June 30th. It came in at 41,580 words, and I had to pare it down to under 40,000 to make Tor’s definition of a novella. So I pared and compressed and edited for several more hours, finally posting the story at about 5:00 am on July 1 at 39,979 words. I was worried that I might be too late, but the submission site was still up. I didn’t dare check for two months what the status of my submission was, because it was such an accomplishment to just get it done. I know it needs further editing but I’ve let it go for two months on purpose to let the ideas ferment a bit longer, then come back with fresh eyes. However, last Thursday (Aug. 25) I received a short e-mail from Tor.com saying that my novella “did not meet their needs.” Well, that’s not a surprise. So now I am a rejected first-time writer. I certainly am in good company.

I hope to announce some day that I am a published author, both for science fact and educational pedagogy, and for science fiction. Some day, once I’ve gotten a few sales under my belt, I hope to tackle a series of books called Trinum Magicum, about a science teacher who discovers the third use of the Philosopher’s Stone. It will bring in all the research I did at the Chemical Heritage Foundation in 2009, when the plot for this series first started percolating in my brain.

DOE seal

The seal of the Department of Energy. I spent two days in their building interviewing for three possible Einstein Fellowships, but didn’t get selected for any. So much for Plan A . . .

The End of a Dry Spell:

I had quite a dry spell this last year, applying for several STEM related awards but receiving none. The failure of Plan A was just the last in a long line of unsuccessful applications. But things have picked up since. In May, I found out I was selected by the U.S. Department of State as a Teacher for Global Classrooms fellow, and will complete an online course this fall, then attend a training workshop in Washington, D.C. in February. I will travel with 11-12 other teachers to one of six possible countries for a 2-3 week period, beginning in late February through August 2017. We will learn about the culture of the country and their educational system. I don’t know which country yet, but this year the teachers went to Morocco, Georgia, Brazil, Senegal, India, and the Philippines. My personal choice would be Morocco – I’ve always wanted to go there since seeing Casablanca and The Road to Morocco (OK, maybe not the best representation of actual Morocco, but it was fun). I would enjoy visiting any of them.

Me with beard 2016

I decided to grow a beard over the summer. How did all the salt get into the pepper?

Half-beard

Then it got itchy and I decided to shave it off. Well, partially, anyway . . .

In July, I opened up a letter that had been sitting in my stack of mail and a check for $1200 fell out. Kind of a nice surprise! I have been selected as the Earth Science Teacher of the Year by the Utah Geological Association. I attended a nice luncheon several weeks ago to receive the official award, and also attended their annual picnic on August 13. The best part for me is the possible contacts this award will bring and how we can get some expert geologists involved at our school.

Awards

Some awards I have received. The Utah Geological Association Teacher of the Year Award is the one at bottom left.

I attended some professional development opportunities in June and July, including the annual Utah IT Education Conference, where I presented on 3D printing. I also attended the STEM Best Practices conference sponsored by the Utah STEM Action Center. I was able to talk with Dr. Tami Goetz a few times – she remembered me from two years ago when I attended some STEM education workshops in Salt Lake. I hope to apply for a grant from them soon. I also ran into a friend who now runs STEM partnership programs for Utah Valley University.

Denver plaza

Civic Center plaza in downtown Denver; July 2016.

July 27-29 I traveled to Denver to present three sessions at the NSTA STEM Forum and Expo. I sent in three proposals hoping one would be selected, and all three were (compared with the annual NSTA conference, where I sent in three proposals and none of them were selected). The Denver forum was very busy for me, but very rewarding. I presented to about 90 people altogether, which is the best turnout I’ve ever had for sessions. My session on 3D printing tips had at least 45 people in it. I had supper with a group of STEAM educators, which I hope will pay off in contacts and future opportunities. I could truly say, as in the song Home and Dry by Gerry Rafferty:

Denver capitol

The Colorado State Capitol Building in Denver; July 2016.

I feel tired, but I feel good,
‘Cause I’ve done everything I said I would . . .

Frisco camp

I did my trip to Denver on the cheap, camping on the way there and back and staying in the least expensive hostel I could find while in Denver. We purchased a new tent this summer and this is my camp near Frisco, Colorado.

The first week in August I took my family on vacation to visit my wife’s sister and brother, who both live in Oregon. We stayed five days on the Oregon coast, in Rockaway Beach and in Waldport. Then we took several days to explore the Columbia River Gorge and the Oregon Trail. I took many photos, saw some amazing geology and even a few grey whales.

Me at Twin Rocks

David Black at Twin Rocks near Rockaway Beach, Oregon; August 2016.

A Summary of Six Years:

Before I could start at AAI, I had to finish up and move out of Walden School of Liberal Arts. Since I had decided this would be my last year at Walden clear back in May 2015, and I wasn’t going to be teaching chemistry, I took the opportunity to move most of my chemistry materials and papers home at the start of the 2015-16 school year. I moved my astronomy materials over to the middle school since I was teaching 6th Grade Science second semester, which is mostly astronomy. I kept it all contained, so it was easy enough to take that home as well at the start of summer.

Me at Frisco Lake

David Black near Frisco, Colorado; July 2016.

Twin Rocks reflection

Twin Rocks at Rockaway Beach, Oregon; August 2016.

But my materials in the computer lab at the high school took some time. Since the building at AAI was not ready yet, and I didn’t want to have to move things home, then move them to AAI in two steps, I asked if I could wait until the very end of summer to clean out at Walden, which the director agreed to. Once I returned from my family vacation to Oregon, I spent the second week in August getting my materials cleaned out, my printouts and posters off the wall, and the iMac desktop computers cleaned off. I saved all the files I had made over six years onto a 3 TB portable hard drive.

Yaquina Lighthouse

Yaquina Head lighthouse near Newport, Oregon; August 2016.

Over the rest of the summer (and since last fall, really) I have been working on putting together a printed binder of all the projects we’ve done at Walden (and others at MATC and before). It started as a supplemental file for the Allen Distinguished Educator Award and was expanded for my trip to Washington, D.C. for the Einstein Fellowship interviews. I’ve added pages for our Deep Space Expedition to southern California in March, and filled in more pages on other projects, trips, awards, and events. I added section caption pages and tabs. There is still much more I could add, but the binder is as full as I dare make it. It came in handy as I’ve presented at open houses for AAI. In the process of creating it, I organized all my Walden work and files onto the new hard drive. I’ve needed to do this for years.

Ecola State Park view

View south from Ecola State Park, Oregon; August 2016.

The Adventure Continues:

So there you have it – catching you up on where I am. I wanted to write this summary to explain what’s been happening, but I will write more detailed posts on each of these events as I have time. My commute to AAI will be 45 minutes if I drive and 90 minutes if I take the light rail system, which I hope to do most of the time. It will give me lots of time to write these blogs and stay up on grading.

Sunset seagull 1

I read Jonathan Livingston Seagull again while on our trip to the Oregon Coast.

There is still so much to do. I need to complete the transcriptions of Dr. Graham’s interview on Greek philosophy, then revise the script and complete the movie. I have many videos from my Elements Unearthed explorations that need to be done, and educational products to design, books to write, computer programming languages to learn and computer games to create, and time gets ever shorter. This next year will be an amazing adventure. I hope you join me.

Crown Point lookout

View from Crown Point overlooking the Columbia River Gorge; August 2016.

Multnomah Falls

Multnomah Falls on the Columbia River; August 2016. We got there just before sunset on a clear day with nice lighting.

Wakeena Falls

Wakeena Falls on the Columbia River; August 2016.

Heceta Head

Heceta Head lighthouse on the Oregon Coast; August 2016.

Sunset Seagull 2

Another seagull at sunset, this one at the beach near Waldport, Oregon; August 2016.

Read Full Post »


Yours Truly in 3D

Yours truly in glorious 3D plastic. I modeled my head using Sculptris by Pixologic, then added the base in Daz3D Carrara. I had the printer set on the fastest speed and one shell, so the top of the base did not get covered very well.

3D printers have become all the rage in STEM classrooms. I’ve been salivating over them since they first became affordable for schools. We purchased one at Walden School just before Thanksgiving and I’ve kept it busy ever since. However, like any new technology, if I didn’t have a long-term plan for how to use it or a clear purpose in mind, it will be a new toy for a month or so and then sit idly in a corner gathering dust. They are great for someone who is willing to experiment to get print jobs to work consistently. I had quite a few failures at first, and still have them occasionally. The printers aren’t cheap and neither is the plastic. But with these caveats in mind, they can be truly useful additions to your STEM classes.

Lea - Camille with studs

Two of my MYP Design students printing out plastic snaps they designed.

I’ve taught 3D modeling classes for many years, and have incorporated 3D technologies into many of my science projects. I’ve written about several ways of doing this in previous blog posts, including the last post on modeling Greek philosophers in 3D. My students have become proficient at modeling any kind of object they need, so a 3D printer was the next logical step. Since I am teaching mostly engineering, computer science, and design classes this fall, we have need of a way for students to manufacture prototypes of their designs. For these reasons I convinced the powers that be to purchase a 3D printer.

All 3D prints

Some of the successful print jobs we’ve done so far. Most of the objects have been done as experiments to learn and test the workflow from 3D model to print.

After a lot of research, I decided to buy a Monoprice dual extruding printer – available for about $700. It came within three days of placing the order (woo-hoo!) and my IB Design Technology students had it assembled in about two minutes. Then came the process of learning how to use it to get consistently successful prints.

This isn’t as easy a process as some may think – if you have the notion that it’s like plugging in an ink jet printer and sending a print job from any software (in other words, plug and play) then you haven’t studied up enough on how these printers work.

Heraclitus failed

What happens when the model detaches from the print platform. It slid aside but continued to print, leaving the “spaghetti brains” hanging under the top of his head. The grid on the bottom is the raft. It also created scaffolding under the beard, which has been removed.

The process is called additive manufacturing and involves creating an object by extruding a thin plastic filament onto a flat print platform. The platform moves slowly downward (z-axis) as the extruder moves sideways and in and out (x and y-axes) to build one layer at a time. Think of using a hot glue gun to build up a contour map of a landform. For this all to happen, the 3D object must be split into layers by the printer’s software and a pathway generated for the extruding nozzle so that it lays down the filament without it getting tangled or dripping. This pathway/layer split is referred to as g-code.

Tyrian Purple 2

A model of a molecule of Tyrian Purple dye. This dye was extracted in the Phoenician city of Tyre on the coast of Palestine by crushing the shells of murex sea snails. One snail would produce only a drop of the dye. It was so expensive only the Roman nobility could afford to wear clothing dyed with this color, hence the phrase “born to the purple.” It is my favorite molecule. The large atoms on each end are bromine, which provides the burgundy/purple color.


To get the 3D model into a form that can be split into g-code, it must be saved or converted into an STL format. There are online converters for doing this. Of course, even before that, you have to know how to make the 3D objects in the first place unless you are content to simply print out someone else’s models, such as those found on Thingiverse or at the NASA 3D website. In that case, you aren’t realizing the potential of this device for modeling, engineering, and prototyping of student-created projects.

Sarah portrait

Student self-portrait. The head and hair were done in Sculptris, the base and text in Carrara. It then was exported as a 3DS file and converted to STL, then loaded in ReplicatorG to generate the g-code layers.

If this process sounds complicated, it is. But that’s not the half of it. If your models have overhanging parts, the printer will just create a lot of plastic “boogers” (see the failed print of Heraclitus and the “brains” hanging out of his disconnected skull to see what I mean). So the software creates supports or scaffolds to hold up the overhangs, which must then be removed and sanded down. The software also creates a raft or grid of plastic underneath the model to help it stick to the print plate. That is the grid you see under the failed Heraclitus.

Black plastic objects

Our printer allows objects to be printed with two colors at once. I haven’t attempted that yet, but here are some objects with black plastic. The D is part of my family’s cattle brand, the Lazy Bar D ranch.

There are many problems that can occur. If you print large, flat objects with square corners, then the plastic can cool too quickly with both sides exposed and the corners can peel up and curl. Although the print platforms are usually covered with a tacky tape such as Kaptan, you can still have print jobs come loose and start sliding around as the extruder nozzle moves. This is what happened with the failed Heraclitus – it did well up to his eyebrows, but the continued wiggling of the nozzle head caused the raft to break loose, so the printer continued the job off to the side as the model slid away in stages. Kind of cool looking, but the print wasted eight hours and some plastic. Now I have to start it over again and tape it down better.

Democritus and Aristotle prints

Printouts of Democritus and Aristotle. To provide better quality for the print, I created a sloped base with rounded edges to prevent curling. Both models were created using Make Human for the heads, then imported into Sculptris to add the hair, beards, and eyebrows. Finally, the models were brought into Carrara to add the bases and text before exporting as a 3DS file.

I have also had an issue with the workflow itself. To make Heraclitus (and Democritus and Aristotle) I started with a free program called Make Human, which allows one to set morph targets on a generic human figure to make the features look a particular way. I loaded in photos of the philosophers to use as referents. Then I exported the model as an OBJ and imported it into Sculptris, another free program done by Pixologic, the same company that does the leading character modeler Z-Brush. It works like a ball of clay that you push and pull into shape. I used it to add the hair, beards, and eyebrows. Then I exported it again as an OBJ and imported it into my full 3D modeler, called Carrara by Daz3D (but you could use Maya or Blender, etc.). In Carrara, I decapitated the head from the body using a Boolean command, then added the base and letters. I finally exported it as a 3DS model, converted it to STL using Online 3D Converter, then loaded it into the ReplicatorG software for generating the g-code. By the time I was done, this model had been through five different software packages.

Cow parts and snaps

Some student design projects printed out. The cow parts (head, legs, and tail) on the right are for a toy cow. The body of the cow had some issues printing, and the C-joints on the legs didn’t quite fit. The snaps on the left worked with the smallest positive size and the split hole configuration. The MYP Design students planned, created, modeled, and tested these prints. Now they need to make revisions. This is the engineering process.

This is a complicated process, and the model can fail anywhere along the way. I’ve had some trouble getting Carrara to export the models correctly – it says they are there, but have no data in them. I think these are models that have too many polygons, such as those where the entire head and hair are done from Sculptris. Using Make Human keeps the head model’s polygon count reasonable.

Mare Fecund printouts

Two printouts of Mare Fecunditatis on the Moon. I started with LOLA data from the Lunar Recon Orbiter mission, loaded it into Adobe Photoshop in Raw format, selected the section I wanted and loaded it into Daz3D Bryce as a grayscale height map, which turned it into a terrain object. I exported it as a 3DS file, added the base and letters in Carrara, and so on. The print on left was done at fastest print speed and didn’t fill in well. The one on right has two shells and reduced print speed, but still lacks detail. My next attempt will be at a 45° angle with supports underneath to gain the better resolution of the x and y-axes.

I’ve tried making 3D terrains of Mars and the Moon based on Mars Global Surveyor MOLA and Lunar Reconnaissance Orbiter LOLA data. I load the grayscale heightmaps into Bryce (another Daz3D program), then export a 3DS file into Carrara to build a base and text. The final results have had issues with holes in the bottoms of craters, text that doesn’t show up well, and insufficient vertical exaggeration to see any details. I also had trouble with the first attempt to print this terrain (of Mare Fecunditatis on the Moon) because I only had one shell and had the printer on fastest nozzle extrusion speed and travel rate, so the top was not solid enough.


But . . . with all these problems, I am succeeding now more often than failing. That is what engineering is all about, after all – you have to learn how to fail until you succeed. I’ve tried a variety of different print jobs, found out the trouble spots and (mostly) how to correct for them, and I am ready to start printing out student projects now that we are approaching the end of the semester.

Hackathon 3D 4

Students learning 3D modeling using Sculptris at the Utah County Hackathon on Dec. 12, 2015, sponsored by 4-H.


On Saturday, Dec. 12, 2015, I presented a session at the Utah County Hackathon sponsored by the local 4-H Club. I took the 3D printer along as well as some laptop computers from my school and taught about 24 kids how to use Sculptris and how to do 3D printing. The session was a great success. There was a man named Colby there who had quite a bit of experience with 3D printing. He gave some advice that I will try out soon: First, I can get better resolution by standing my terrain models on their side. These printers have better resolution in x and y-axes than in the vertical z-axis. I just need to build some buttress supports to hold it up that can be removed later. He suggested using PEI (polyetherimide) tape, which becomes tacky when heated on the print platform, then less sticky when cool, so jobs won’t slip while printing but still come off cleanly when cooled down. He gave me some ideas for better temperature settings – I might have my platform temperature too high. There are still many experiments to try.

Hackathon studs and printer

3D printer and students learning Sculptris at the Utah County Hackathon, Dec. 12, 2015.

So, to summarize the lessons learned:
1.) Don’t expect a 3D printer to work perfectly right out of the box. There are a lot of tweaks to do, including calibration, print platform leveling, temperature adjustment, feedrate adjustment, etc, etc. to do before you will be consistently successful. Read up on the forums and ask lots of questions before deciding which printer to buy, and be prepared to experiment.
2.) Unless you are content with printing pre-created models, you should be ready to teach (or facilitate) your students learning how to do 3D modeling in the first place, and how to convert their models into the STL format needed for 3D printing. There are many fairly easy to learn 3D programs out there, including Sculptris, Sketch-Up, Tinkercad, and Make Human. Maya is also free for students and teachers, but the learning curve is steep. Blender is open source and free, but the interface is hard to learn even for experienced modelers.

Hackathon 3D 2

Students learning Sculptris at the Utah County Hackathon on Dec. 12, 2015. They are building alien heads. They enjoyed learning the program and seeing how to do 3D printing.

3.) Try to get a printer with a heated print platform and variable temperatures and extrusion rates. One size does not fit all jobs here, especially if you want to print with more than one type of plastic. ABS expands more when heated than PLA plastic, so it tends to curl more as it cools down. It also requires a higher nozzle temperature to melt it.

4.) Keep an eye on print jobs. My failed Heraclitus started out well, so I taped the edges and left it overnight to print. Somewhere around six hours into the job, it detached from the print plate and caused the fatal print defects shown. Print jobs also sometimes stop for no reason. You won’t be able to start them up from where they left off. It will just be wasted plastic. You must keep trying, and be patient.

Electroneg and Tyrian purple

Final printout of the Tyrian purple molecule. The black model is of the periodic table of elements, showing the property of electronegativity for each element. This was done by typing the values into a TXT file, then importing it into ImageJ software using Import-Text Image, then converting the grayscale image into a height map for Daz3D Bryce. From there, we used the same process as the 3D Moon models.

5.) Have a plan and a purpose for why you need a 3D printer. Otherwise they can be frustrating and ultimately unsatisfactory for you. If you haven’t integrated 3D data analysis or modeling into your classes already then a 3D printer will be useless for you. If you want some ideas how to do this, look at some of my other posts, such as this one on creating 3D models of periodic properties of the elements: https://elementsunearthed.com/2014/05/10/visualizing-periodic-properties-of-the-elements/ . Here is a photo of a 3D print job done from one such model, showing electronegativity, as well as a model of the molecule for Tyrian Purple dye.

6.) Some supplemental materials will help. Buy some Aqua Net Super Hold odorless hair spray (purple can) and spray it onto a paper towel, then rub it onto the tape on the print platform to improve the stickiness. Even with that, the jobs might still work loose. Some people use glue sticks or a gel adhesive. You will need a roll of Kaptan or PEI or blue painters tape to put on the platform if the tape starts to peel up.

Indi portrait

Student self-portrait using Sculptris and Carrara.

7.) Avoid large flat objects with sharp corners. They tend to curl up when cooling. If you build in supports, you can print up to a 45° angle without scaffolding, and therefore take advantage of the better resolution of the x and y-axes.

Good luck. Let me know what types of projects you attempt, and we can swap ideas. As you can see from the photos here, there are many possibilities for chemistry classes alone.

Hackathon 3D 1

Students working with modeling clay to learn the concept of 3D modeling. This is at the Utah County Hackathon on Dec. 12, 2015 at the Provo Library. The image on the screen is of the ReplicatorG software. It is printing my family’s cattle brand, the Lazy Bar D. Unfortunately, the bar wasn’t quite level with the bottom of the D in Carrara, so a raft wasn’t printed under it and it went at bit wobbly and timey-wimey.

Read Full Post »

A Project in Engineering Design and Materials Science

The STEAMpunk Club at Walden School of Liberal Arts

The STEAMpunk Club at Walden School of Liberal Arts

I am a pack rat. I grew up with my grandparents living next door in my hometown of Deseret, Utah. Both my parents and grandparents lived through the Great Depression and never wanted to throw anything away. Anything that could be salvaged and re-tasked or reused was kept in case it might come in handy later.

This is Herbie the Head, my first junk sculpture. It's a bit the worse for time. The frame is made of welded plastic girders. The neck and support are the rocket nozzle and heat shield of an Apollo space capsule.

This is Herbie the Head, my first junk sculpture. It’s a bit the worse for time. The frame is made of welded plastic girders. The neck and support are the rocket nozzle and heat shield of an Apollo space capsule.

I have the same compulsion, only in my case I collect objects that are clearly past being useful for their original purpose. In other words, I collect junk. But I’ve done some things with it, including making sculptures from the junk. This started during the summer after I graduated from high school. I went on a long wilderness trek wearing old boots. The trek included a 25-mile hike during a single day and night, and by the time I finally got to camp I had 16 blisters on my feet and toes. By the time I got home again, I had to take a few days off from walking or wearing shoes to let all of these blisters heal.

Philo the Robot, named for Philo T. Farnsworth, the inventor of television. He needs some repairs.

Philo the Robot, named for Philo T. Farnsworth, the inventor of television. He needs some repairs.

I decided to spend the time making something fun out of my old model kits that had all fallen apart but which I hadn’t thrown away. These included everything from a funky bathtub car to a five-foot model of a Saturn V rocket. I took the girders that held the plastic parts and used a candle to melt them together to form the frame of a head, then glued in parts and other interesting objects. The end result was rather fun, and I called the junk head “Herbie” after the Love Bug in the old Disney movies. I decided (over my mom’s protests) to enter the sculpture in the county fair. It won a sweepstakes prize!

Looking through junk, coming up with ideas.

Looking through junk, coming up with ideas.

(I met one of the judges several years later who admitted to me that they didn’t have any idea what category this sculpture was supposed to be in, so they figured it had to be the best in whatever category it was. Hence the sweepstakes ribbon. So much for my artistic ego!)

Demolishing used electronics, including old VCRs, DVD players, phones, remote controls, and calculators.

Demolishing used electronics, including old VCRs, DVD players, phones, remote controls, and calculators.

With that bit of undeserved encouragement, I continued to build other sculptures, including a robot (Philo), a three-legged dog, even a working lamp which tripped the circuit breaker the first time I turned it on. I’ve kept the robot in repair, mostly, but the others have fallen apart due to the deterioration of the glue from UV light. Yet I’ve kept all the parts.

Assembling the junk using engineering and material science knowledge.

Assembling the junk using engineering and material science knowledge.

It occurred to me last fall, as I was starting up the STEM-Arts Alliance project at Walden School, that it might be fun to teach a junk sculpture class for our Intersession program. We take two weeks between third and fourth terms to teach specialty classes. So I got approval and wrote up a description and had about ten students sign up. I bought some tools and various glues, nuts, bolts, screws, etc. and carried all my boxes of junk into school. It was quite the collection by now.

Soldering pieces together

Soldering pieces together

Although this is essentially an art project, I knew that it also tested one’s ability to attach and adapt different objects made from widely different materials. In other words, this was really a material science and engineering project. The students looked through the junk, came up with ideas, and were required to plan and sketch out their designs, including how they planned to attach the parts together. They had to use secure fasteners such as nuts and bolts for any load bearing members.

Small sculptures created by students at Walden School.

Small sculptures created by students at Walden School.

The end results were well done, and those that did the most planning were the most successful. We used drills, saws, Dremmel tools, soldering irons, hot glue guns, epoxy, and other materials to cut and adapt parts, then fasten them together.

A robot created by a student from found and re-tasked objects.

A robot created by a student from found and re-tasked objects.

Even after having ten students built projects, I still had junk left. In fact, it seemed I had more than when I started. I had kept all my old broken VCRs and DVDs, telephones and calculators, and other electronic junk, which the students tore apart. There is some fascinating stuff in there. So I decided to try the class again as a fall after school club. I named it the STEAMpunk Club, which I thought was a nice play on words.

Some of the final sculptures by the Junk Art class at Walden School.

Some of the final sculptures by the Junk Art class at Walden School.

Our objective was to build steampunk goggles and other costume items for Halloween. I went to dollar stores and hardware stores looking for possibilities for objects that could be re-tasked. Princess tiaras and canning jar rings became telephoto lenses, and old softballs became leather eyepieces. We added gear decorations and plastic parts that had been spray painted silver and gold. I also found a black derby hat for cheap in a discount store and tied my elaborate goggles to it with safety pins. I also made a second, less ornate set of goggles. I wore these with my old black coat and completed a pretty good steampunk costume. The next time ComicCon comes to town, I’ll be ready. The students came up with interesting goggles and props of their own, and even a few more junk sculptures.

Steampunk goggles I made for the STEAMpunk Club

Steampunk goggles I made for the STEAMpunk Club

I have planned out a larger sculpture for my classroom, another robot that will stand about three feet tall and have a framework or core of glued, spray-painted PVC pipe for strength and structure. I have collected all the parts, and hope to complete him sometime in the spring when my workshop warms up again.

My Halloween steampunk costume, plus a monster.

My Halloween steampunk costume, plus a monster.

Maybe by next summer I will have exorcised this current drive to make junk sculptures. I seem to vibrate between several modes or interests, including science, history, and art. Lately, I’ve been in an art mode, which is why I decided to initiate the STEM-Arts Alliance in the first place; it would give me a chance to do all the things I love. It’s been fun so far, and I think my students have responded well and enjoyed the crossover opportunities. I know these projects are a bit idiosyncratic and won’t generalize to most teacher’s classrooms, but then again, maybe someone out there can use this idea to their own advantage. I’d love to hear what you come up with.

Read Full Post »

With the beginning of the 2013-14 school year, I’m pleased to announce the start of a new program in my classes at Walden School of Liberal Arts. I call it the STEM-Arts Alliance, and it’s an attempt to bring artistic expression and creativity into my STEM (science, technology, engineering, and math) courses.

Receiving the award from CenturyLink Foundation.

Receiving the award from CenturyLink Foundation.

I have several reasons for doing this. First, I hope to broaden our students’ participation in upper-level science and technology courses. Given the size of our school, we could have more students taking courses such as chemistry, physics, astronomy, anatomy, and environmental science. We are a public charter school with a liberal arts emphasis, which means we get a high percentage of creative, passionate, out-of-the-box-thinking students. We need people like this to choose careers (or at least become more literate) in the sciences. My solution is to broaden the appeal of our science and technology courses by integrating the students’ strengths and interests. This is not to say I’m making my courses any less academic; it just means we’re using the arts as a continuing theme, by looking at the art of science, the science of art, and the history of both.

Second, I happen to love drawing and painting and rarely have time to do it. My artistic passion is somewhat satisfied by 3D animation and video production projects, but there’s just something about holding a paintbrush or an ink pen and seeing a project emerge from paper. I’ve been pulled in four different directions all my life; I seem to keep swinging between science, media design, history, and fine art. So I’m creating lesson plans and projects that incorporate all four of these areas, projects that are based around my own passions.

Award letter for the ING Unsung Heroes Award. It's always a good day when you receive one of these!

Award letter for the ING Unsung Heroes Award. It’s always a good day when you receive one of these!

Third, I hope to enhance the stories of science we’re telling by bringing my students’ artistic skills to bear on science topics. When I did some line drawings of Greek matter theorists (such as Thales, Parmenides, etc.) I found that they were frequently downloaded. Apparently, people are tired of finding only the few standard photos showing busts of Aristotle and his colleagues in some museum. Why not put myself (and my students) to work, creating new images in the cause of science education and fine art? I soon hope to complete the Greek Matter Theories videos I began four years ago, and I need more materials and images. Now I can do two things at once. I can draw illustrations of Aristotle or Democritus for the Greek videos while simultaneously teaching the chemistry of ink or paint pigments.

Fourth, our school is building up to become an International Baccalaureate (IB) school with a Middle Years Programme starting this year and growing to encompass 7-10 grades, with an additional Diploma Programme in our upper grades. The chemistry and technology courses are very much based on design projects and inquiry experiments while maintaining high academic standards. This is very much the model I have been working toward anyway, and my STEM-Arts Alliance should help my students transition into the IB chemistry and technology classes.

But to successfully implement my ideas, I needed funds and so I’ve been applying to every grant I can find. During this spring, I applied for five different programs, grants, or competitions, with three being due within two days of each other. True, it was made easier because all my proposals were similar, hoping that some would succeed. And they did! Two grants have come in. The first was $1250 from the CenturyLink Foundation. I received one of those large fake checks in May. I began purchasing equipment and supplies during the summer, including a GoPro camera, an audio recorder, a green screen, and a digitizing Bamboo tablet. These technologies will add to our ability to record video and audio, create digital images, and document what we’re doing in chemistry and astronomy in our two blog sites. We also purchased a new LEGO Mindstorms EV3 kit so we could start an afterschool robotics club. Here is a link to the CenturyLink Award: http://www.centurylink.com/static/Pages/AboutUs/Community/Foundation/teachers.html.

Receiving the award from Steve Platt of ING Foundation.

Receiving the award from Steve Platt of ING Foundation.

My second success was $2000 for the ING Unsung Heroes Award. They provide two such awards per state, and I thought I had a pretty good chance of winning one. I’ve purchased a new color laser printer (so much better than using the ink jet) as well as chemicals and supplies for the various lessons and projects we’ll be doing this year. I received a second large fake check from Steve Platt of ING this fall, as well as a nice plaque. I am still purchasing materials through this grant. Here is a link to the awards page in case you want to apply yourself: http://ing.us/about-ing/responsibility/childrens-education/ing-unsung-heroes.

So far my students have worked on a number of different projects in several different classes and at Timp Lodge. They’ve accomplished the following:
1. We set up a summer media design class that culminated in organizing the video clips and recording green screen narration for the SOFIA video I’m putting together.
2. We made tie-dye shirts at Timp Lodge.
3. We made marbled paper using dilute oil paints floated on water (also at Timp Lodge). 4. Students edited the SOFIA videos and built 3D objects from SOFIA’s interior in the middle school Creative Computing classes.
5. Students created iron-gall ink in chemistry and used it to draw pen and ink illustrations of science history concepts.
6. We started the robotics club after school, and students have built a rover capable of picking up small objects and moving them to new locations.
7. Students turned periodic properties of the elements into 3D models.
8. They built paper Christmas tree ornaments representing chemical elements.
9. Students created homemade watercolor pigments and used them to make paintings of science history.
10. They wrote and narrated podcast scripts on astrobiology topics.

I’ll report in more detail on each of these in future posts. It seems that we’re still just getting started, but in reality we’ve been very busy and very successful already. All projects have a fine arts component, a technology component (all paintings are scanned and cleaned up in Photoshop), and a history component. We are literally creating modern versions of old formulas used in making art for thousands of years. And it feels great to have all my passions pulling in the same direction.

Most of these activities have been in chemistry class. I am starting there as an initial run through, testing the recipes I’ve found online so that I can perfect the processes for future classes. The chemistry students have done exceptionally, and they’ve proven to have excellent art skills on top of learning chemistry and experimenting with different formulas. I hope to set up a dedicated Science and Art class during our Intersession that will incorporate all these activities and hopefully more besides. I’ve written another grant to the Moss Foundation just to get an electric kiln to do Raku pottery. So far I haven’t received word, but should soon. I might do a second class for making junk sculpture out of found objects. It will be a combination of materials science, design, and engineering.

I’m having a lot of fun researching and designing these projects, and I hope you’ll have fun reading about them and trying them out yourselves.

Read Full Post »