Feeds:
Posts
Comments

Posts Tagged ‘ngss’

As educators we don’t often question the need for standards. After all, without standards, teachers would teach whatever they want to. Yes. Exactly.

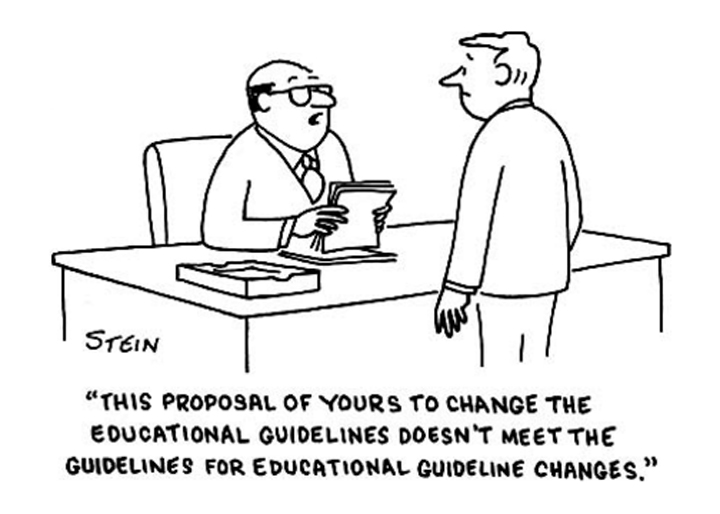
What I am about to say will be considered as educational blasphemy. I have to say it anyway. Here goes: Education standards do more harm than good.

There, I’ve said it. Now I need to defend my claim logically.

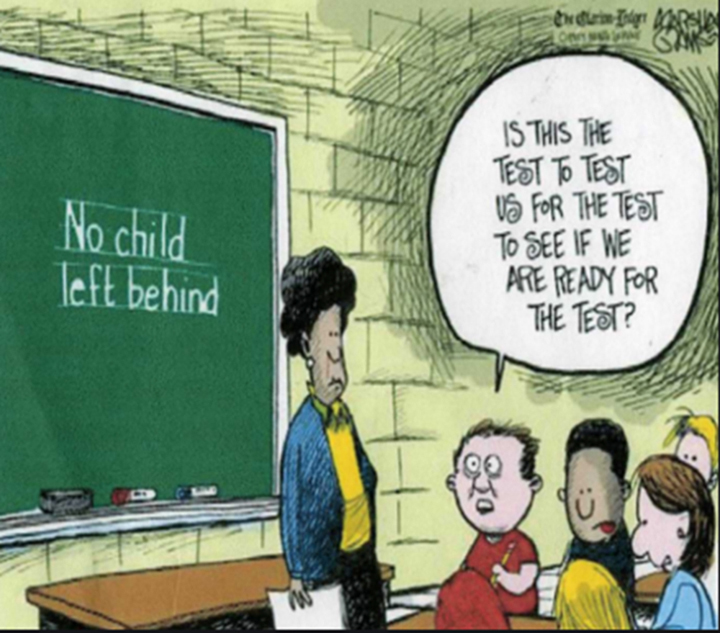
When state boards of education and national committees get together to write new standards, they are doing so with the intention of improving learning outcomes in a subject area such as history or math or science. But I argue that higher standards have not and will not lead to improved student outcomes for several reasons: first, standards become an end unto themselves instead of being a means to the end of improved outcomes. This means-ends inversion leads to a myopic focus on meeting standards, as evaluated by high-stakes tests, above all else and to teachers being pressured to teach to the tests in a misguided effort to increase scores. Even if schools are able to increase scores, it does not mean that students are learning more in any long-term fashion. When school funding is tied to meeting standards, district leaders and principals put emphasis on test scores and encourage teachers to do what is needed to improve them. Shifting time and focus toward passing tests moves students away from inquiry experiments, creative projects, and other activities that make learning fun and meaningful, leading to lower motivation. As classes become boring and meaningless, student learning actually decreases and creativity is stifled. The student outcome that society needs the most is creativity. Education standards therefore hurt society.

Second, standards are meant to be minimal guidelines. Any competent teacher should be able to meet standards and go beyond them to teach with the passion that leads to extraordinary education. Yet teachers who do so and step beyond the bounds of the state standards are often censured and cautioned to stick to the approved curriculum. Teachers are forced to play it safe in order to keep their jobs. Extraordinary education entails risk; playing it safe will never lead to students caring deeply about a subject or learning how to be creative innovators within it.

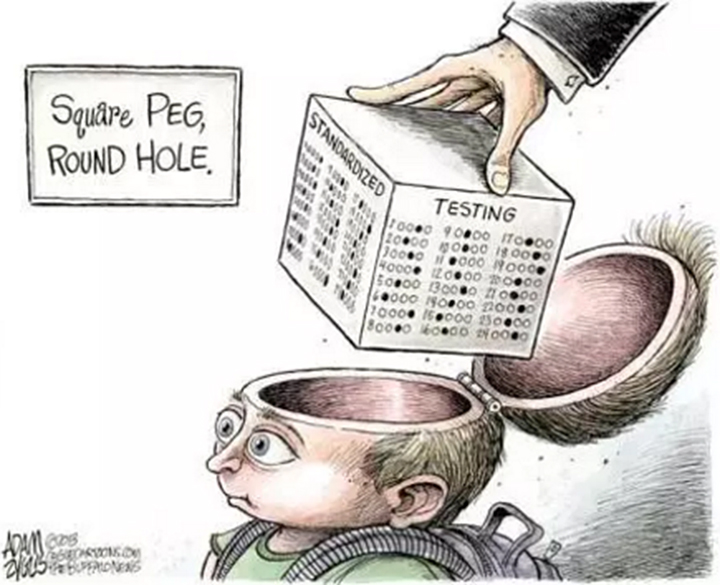
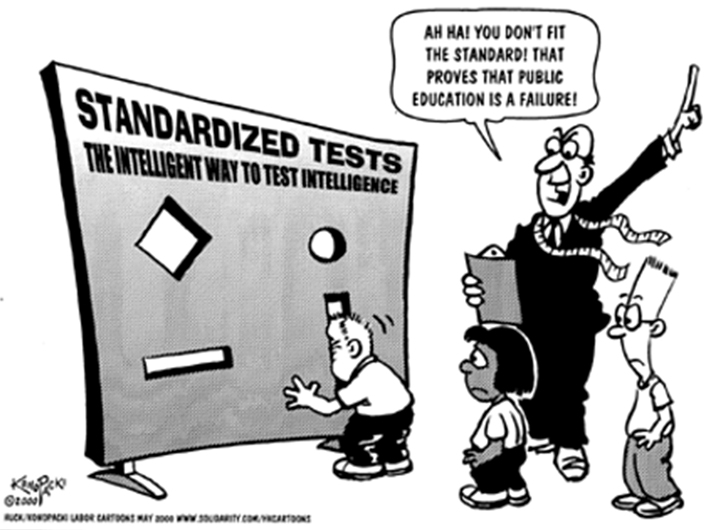
Third, the very notion of standards is based on the idea of standardization of education, to make all education everywhere the same experience for all students for a particular subject. It is saying that all students are like the Model T Ford, which Henry Ford said one could buy in any color as long as it was black. Our educational system has been based for far too long on an obsolete assembly line model, with students as raw materials entering the factory floor, moving through standard classes taught by standard teachers and emerging as standard models of some outdated ideal of an educated high school graduate, fit only to fill standardized roles in standardized jobs. Businesses complain that they can’t find enough graduates who can think for themselves, develop creative innovations, communicate and collaborate effectively, or even complete basic tasks like reading directions or doing basic math problems that come up. The graduates might have passed a standard Common Core math class and know how to do standard rote problems, but when they face anything in the real world that deviates from the narrowly specific problem sets they are used to, they cannot solve the problem. Since life is one big story problem, they are ill equipped to develop creative solutions to even small challenges.

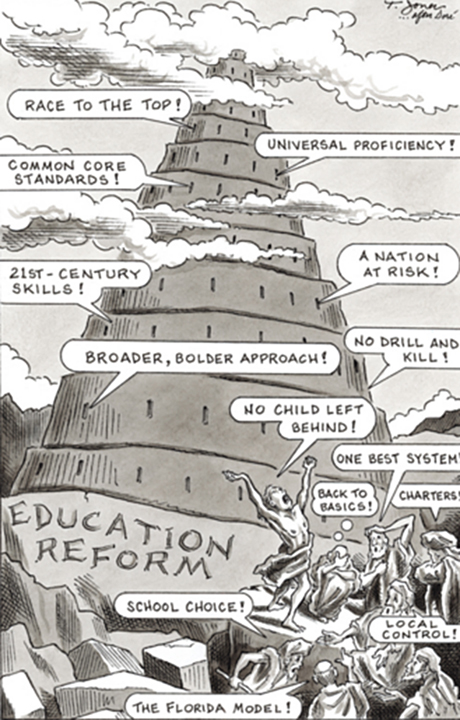
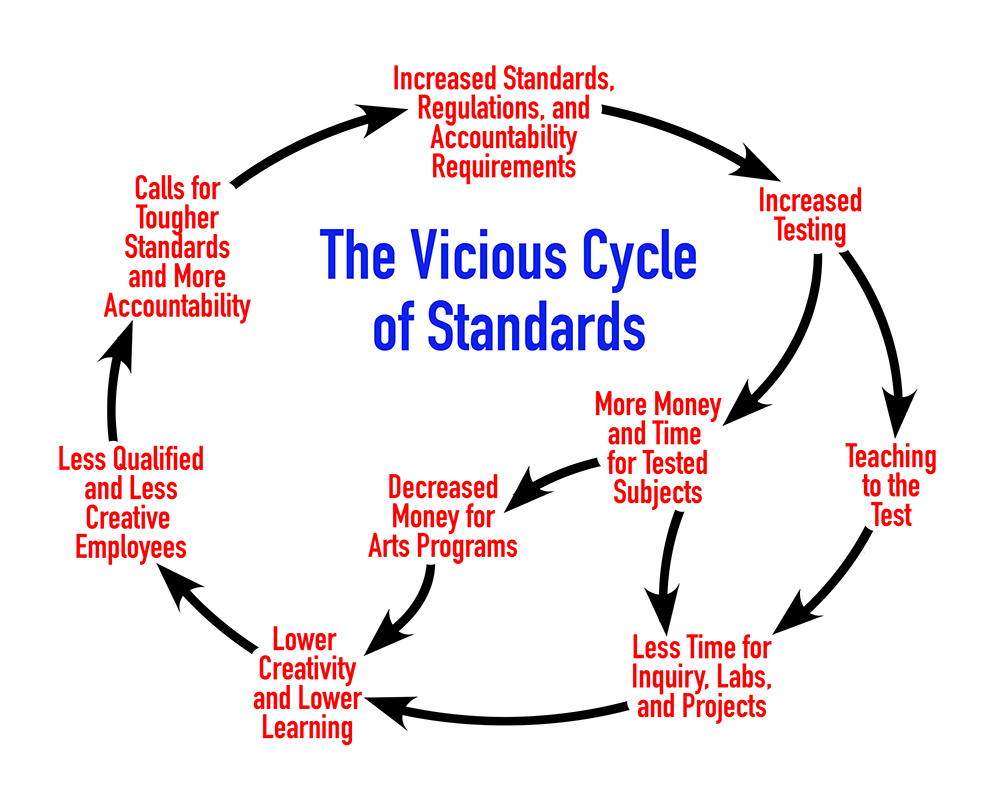
As world problems increase and deepen in complexity, we don’t need standardized graduates. We need graduates who are out-of-the-box thinkers, creative innovators, and problem-solvers who can communicate and collaborate globally. We think that by increasing educational standards we will somehow get the types of graduates we need, but that is simply not happening. No Child Left Behind and its successor, the Every Student Succeeds Act, have attempted to raise national standards with the goal of improving student learning outcomes. They have failed miserably. Students are less equipped for life now than they were 20 years ago before these laws were passed. This is because standards do not, by themselves, raise educational quality. In fact, they can lead to a vicious cycle of diminishing educational quality as shown by the diagram at the top of this post and again here:

Although education standards are created with the best of intentions, they often do more harm than good.

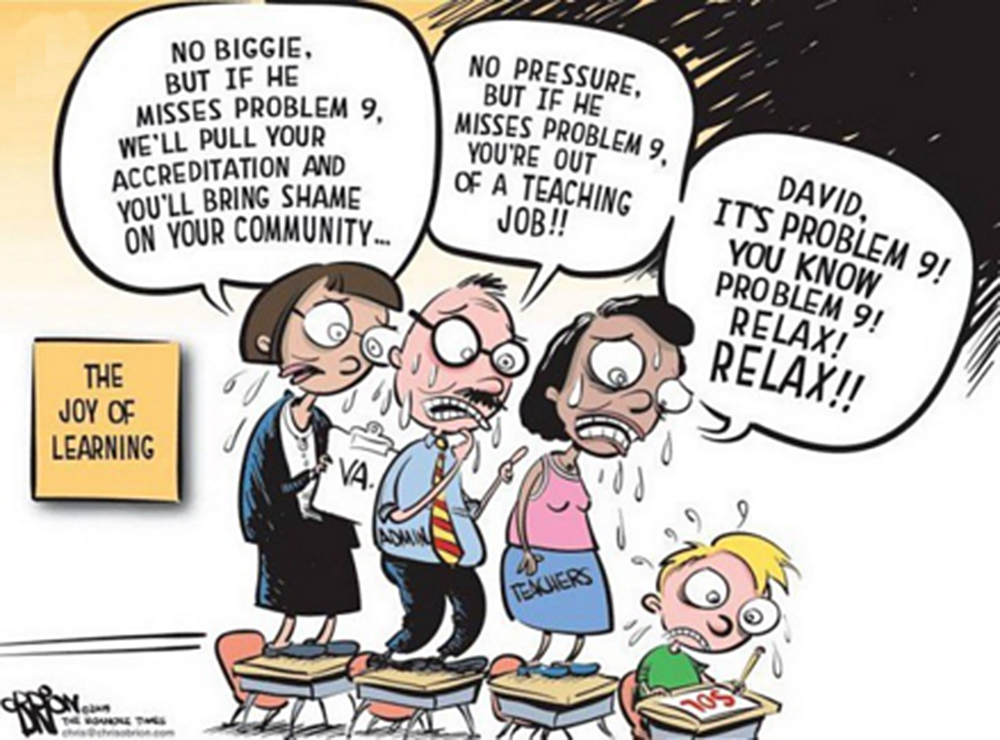
Let’s start at the top. National commissions, businesses, and parent groups are successful in their calls for raising national or state educational standards and legislatures have passed laws to hold schools accountable to meet them. In order to hold schools accountable, schools must be assessed and the easiest way to do that is through mandatory testing of all students in critical subjects such as math, science, and English. Those schools that do not measure up are deemed unworthy and labeled as failing schools. Principals at failing schools face getting fired, so they encourage teachers, in many subtle and not so subtle ways, to do what they must to bring up test scores. Facing censure themselves, the teachers start to spend more class time teaching specifically to the test, drilling students and forcing them to memorize enough facts to get through the tests. At the same time, since only certain subjects are being tested, schools tend to put more emphasis on those subjects and provide less time in the daily schedule and less funds toward other, non-tested subjects such as art, music, and humanities. This means that students have less opportunities to learn creative subjects. With teachers now spending more time on drill and practice of testable facts, less time is available for inquiry labs, hands-on activities, and creative projects. Classes lean more toward rote learning and become boring and meaningless to students, who now have even less opportunity to find creative outlets. They do not learn how to collaborate, communicate, solve real problems, experiment, invent, tinker, make, or create. They do not learn how to be innovators, only learning how to regurgitate facts on tests. These graduates struggle in colleges and are not prepared to solve the problems they encounter in real jobs. Employers and business leaders call out for students who are better prepared and ask state boards and legislatures to raise standards. And around and around it goes. It is a vicious cycle.

The worst part of this cycle is the wasted potential I see daily in students who are convinced they are not creative, who prefer to read textbooks and answer questions at the end of the chapters because that’s what they’re used to and know how to do and who never get past the lowest level of factual knowledge in Bloom’s taxonomy because tests rarely get past measuring facts. Even if students learn enough facts to pass the end-of-year tests, they do not retain them for long because the facts have no context or depth, and within a month or two they are forgotten. Yet these students come into schools as kindergartners confident in their creativity. Somewhere along the line, as their attempts at innovation are stamped on repeatedly in the name of standardization, they unlearn how to be creative.

Another tragedy of this vicious cycle is that each step in the process is based on faulty assumptions and non-sequiturs. Having high standards and accountability does not mean we have to design more tests. There are other ways to evaluate schools, and higher test scores do not necessarily mean students are learning more and certainly not better. That we have mandatory tests doesn’t mean we have to cut funding for arts and humanities programs, yet that seems to commonly be the case. This is not an either-or proposition or a zero-sum-game, yet most school districts act as if it were. We can emphasize STEM fields and the arts. We can teach STEM through the arts. I have seen it done effectively. I know of a school near Salt Lake City that teaches science, math, and history through dance. Yes, dance, a program that is usually the first on the chopping block of school districts. The students demonstrated the germ theory of disease through a very effective dance routine. I can give numerous examples of teaching STEM through art from my own classroom, but that will be a future topic.

The worst assumption made by the proponents of standards is that the so-called “soft skills” of creative problem-solving, communication, collaboration, and critical thinking (the Four Cs) are somehow not important for STEM fields and careers. The Next Generation Science Standards actually de-emphasize creativity as a science and engineering practice. Yet all effective scientists or engineers I know of rely frequently upon their creativity and innovation to solve problems that crop up in their research. Creativity is a critical skill, yet our emphasis on standards is crushing it out of future scientists and engineers.

I am in a graduate program titled Innovation and Education Reform but I fear that reform is not enough. What it will take is a wholesale transformation of education, a systemic integration of creativity and innovation into education to meet the needs of the complex problems we face and to stay competitive as a nation. Every attempt we have made at raising standards has merely put more pressure on teachers and students and moved us further away from the model of schools that I have in mind. I would like to see creativity integrated into schools as a virtuous cycle, as shown in the diagram below:

If we teach creativity and innovation, it will lead to more scientists and engineers, more makers, builders, creators, and inventors and therefore to more inventions, more discoveries, more products, more businesses, and an improved economy. This will lead to happier citizens and a better society. The question, of course, is how to move from where we are to where we need to be.

This diagram is more complex but more profound, not because I am claiming any level of profundity, but because the ideas expressed here are rarely examined in this combination. Starting again at the top of the diagram, if we deliberately teach students to be more creative and innovative (how to do this will be the subject of my dissertation) then there are several avenues that should be pursued. The first is that science classes should teach the processes of inquiry and experimentation, or what we used to call the scientific method. Reducing science to a body of facts is to render it dry and meaningless when scientific discovery should be an invigorating and exciting process followed by all students. We cannot expect future scientists to make new discoveries if they do not learn the process of inquiry.

I believe that all schools should have well-supplied and supported makerspaces where students can learn to tinker, make, build, and invent (please refer to my previous blog post for more on this). Part of the makerspace’s purpose should be to teach entrepreneurship and the process of invention, the engineering design cycle, and manufacturing and marketing skills. For a good example of this, look at the Innovation Design program developed by International Baccalaureate. I had the opportunity to be trained and teach this program and it is rare even for IB schools to offer it; mine was one of only a few such programs in Utah at the time.

Teaching creativity should also involve project or problem-based learning (PBL), with a focus on solving problems through design and developing skills for team work, collaboration, and communication. Teaching creativity and innovation through inquiry, making, and PBL will lead to increased scientific exploration and discovery, to more inventions and better products, and to starting up new businesses that will improve our economy and standard of living.

Another area of teaching creativity and innovation that I believe does not get enough attention (and is worth a research project or two this semester) is to teach students how to express themselves through media design software and design thinking skills. Even if teaching these skills only leads to critical media literacy it will be worth the expense in computers and software, but if done right it can enhance students’ creativity through allowing them more avenues to express themselves, to find their voices, to communicate their ideas, and to design educational content that will teach others. I think that we have not done enough research on the importance of training students to be teachers. I follow the old saying (with my own modification): “Give a man a fish and you feed him for a day. Teach a man how to fish, and you feed him for a lifetime. Train him how to teach others how to fish, and you feed a village forever.”

Words to live by . . .

With more inventions and products, more educational content, and a higher standard of living we will have more resources available to improve education and other social programs. This will lead to happier citizens. As we teach others how to evaluate media claims and how to express themselves, we will build better informed citizens and allow voices to be heard who have been marginalized before. We have only to look at the misinformation out there concerning the effectiveness of wearing masks during this pandemic to see why scientific and media literacy are critically important social skills. Better informed citizens contributing their own voices will make better decisions both as consumers and as voters, which will lead to a stronger democracy and a better, more equitable society. This entire process will feed back on itself as a virtuous cycle; teaching creativity will lead to more creativity which will lead to a better society and increasing recognition of the importance of teaching creativity and innovation.

Given the complex challenges our society faces, we need to completely overhaul our educational system. I see this as the only way to fully integrate creativity and innovation, which must be done to solve our problems and keep our nation competitive. Now, hopefully, you see the rationale for why I am getting my doctorate and why my dissertation will be about how and why to teach creativity. I can see no other area where I can contribute more.

Read Full Post »

Education as Pollock painting

I found this quote on a TeachThought website. It captures the spontaneity, engagement, and creativity of extraordinary education.

Several years ago I attended the closing banquet of our state science teacher conference and overheard two teachers comparing notes in a friendly competition. They had apparently gone through the same teacher development program together. One bragged that 86% of his students had passed the state science standards test at the end of the year. The other claimed that his students had a 93% pass rate, with the implication that having more students pass the test meant that he was the better teacher.

They were both new teachers and I can forgive them their misunderstanding. I felt like jumping into the conversation to remind them that having most of their students pass the standards aligned test only proved that they were standard teachers, when what our children deserve is extraordinary teachers. Unfortunately, there is no state test for extraordinary education.

school nurse

Is our public education system ailing and in need of reform? Yes, in that it insists on treating each child like a cookie-cutter clone using a one-size-fits-all set of standards.

Would any of us recognize extraordinary education if we saw it? Can we even agree on the characteristics of extraordinary education? For my own definition, I say that students must be deeply engaged in the learning process, with memorable learning opportunities that invite active participation and critical thinking, creative problem solving, collaboration, and communication. In the end, education should have a lasting impact on their lives. And it should be fun, meaningful, and inherently interesting for them!

I learned during my third year of teaching that Project-Based Learning (PBL) can be a powerful route to extraordinary education. I’m not trying to say that I am an extraordinary educator, but I have tried with some success to bring meaningful opportunities to my students. To do this, I have had to look at my course standards in a different way.

Ed guidelines

There is a great need to change how we do education, but the forces that resist changes are the teachers and administrators and communities that need them the most. The bureaucracy of our school system is the very thing that holds us back. As one individual teacher, I have to accept that I may not be able to change everything, but I can at least change the way I do things.

The push for standards in education is simple to understand. We don’t want students with gaps in their understanding of the world, nor do we want teachers who are incapable of bridging those gaps. Society needs well-educated people in order for them to make informed decisions. Educational standards were developed to achieve a minimum level of essential literacy and knowledge across all students.

This brings up a deeper question: what constitutes essential knowledge? As one of my college professors put it, is there any knowledge (or skills) that a person must have? Every subject expert has a list of what he or she considers to be the essential concepts of the subject, and the list tends to multiply in any committee put together to consider new educational standards. Heaven forbid that even one math student would not understand the quadratic equation. The world might very well collapse if that happened! So we have to create a standard to address that concern, even if only a minority of teachers hold this opinion.

As a result of this drive toward comprehensiveness, all states have far too many educational standards than are truly necessary for each discipline. In chemistry, is it critically important for students to understand Le Chatelier’s Principle of Reaction Equilibrium? You’ll find it in all the state standards. But is this really necessary for what the student and society need? If taught well, it might help them understand some aspects of everyday chemistry, such as why the Haber process works to produce ammonia or why shaking a warm soda bottle causes the carbon dioxide to spray out. But can they become productive citizens without knowing this? Probably. Why force them to learn what they can easily live without? This has bothered me for years.

do what I say

All the shareholders in the education system (parents, children, teachers, administrators, state officials, communities) point the fingers of blame at the others and expect them to be innovative, but are unwilling to change their own viewpoint of what education should be.

What I finally recognized is that standards are meant as a guide to the lowest acceptable level of understanding in a class, not as the final target. Anyone who teaches to the standards alone (especially to the end of year test) will succeed in creating a standard class, an average class, but not an extraordinary one. If we want all of our students to graduate as identical cookie-cutter clones of some “standard” citizen, then standards-based education and the factory model of education will suffice. But if I want students who are strong individuals, creative problem solvers, and innovators, I must go beyond the standards and teach for excellence and quality, not mediocrity. The standards are supposed to be a means to that end, not an end in themselves.

Deeper into Theory

Many of our vaunted education theories support this reductionist view of a subject. For example, Bloom’s Taxonomy is widely used and quoted in educational circles. It poses that there is a hierarchy of understanding and learning; that remembering facts and content details comes first as the foundation of all learning and then leads to understanding, then to application, then analysis, then evaluation, and finally to creativity. The implication is that we need to move our educational activities toward creativity and higher-order thinking skills. The problem with this pedagogical model is that too many teachers never get to the higher-order levels; they get stuck on remembering and regurgitating facts with little real understanding and even less application, analysis, evaluation, or creativity.

Flipping Bloom

Bloom’s Taxonomy, often quoted but poorly understood. Instead of starting at the lowest level (remembering facts) and working our way up, we should start with creativity and work down to facts. Think of this pyramid as flipped upside down, or of creativity being the ground level but the other levels being roots underneath, reaching down to the facts. Students will learn the facts they need if they start with the requirement to create.

So many educational theorists are beginning to propose that Bloom’s Taxonomy should be stood on its head. Creativity should come first, not last. As students create, they can be taught to evaluate the effectiveness and even the aesthetics of their work (more on this in my next post). To do this, they will need to learn to analyze their work in the same way that engineers analyze the effectiveness of their prototypes and models. To analyze the prototype, they have to build it first, which involves the application and understanding of scientific theory. To gain that understanding, students will have to look up and remember the scientific facts and theories involved. In other words, teaching creativity first and insisting on quality work provides the impetus and motivation for students to find the information they need, understand and apply that information well enough to build prototypes, then analyze and evaluate the effectiveness of that prototype against specifications. Students will look up what they need to know because it is necessary for them to solve the problems that occur as they create, build, test, and analyze prototypes. We call this the engineering or design process.

This is where Project-Based Learning (PBL) comes in. Only through extended projects can students have the time, independence, and creativity to deeply explore and understand a subject by following their own curiosity. Projects are the only way to ensure that the intent for having standards is met and that we reach extraordinary education. This happens through what I call “standards overreach.”

Shorten the pole vault

It doesn’t make sense to raise standards while lowering the resources available to schools to reach those standards. There’s nothing quite like an unfunded mandate.

Standards Overreach:

Let me start with an example. During the first week in my first year biology classes, I introduced the concept of the characteristics of life and the abiotic factors necessary to sustain it. This is a common biology standard in most states. Now if I were a standards-obsessed teacher, I would teach to this point as my target for student understanding. I might put up a list of terms and have students write down definitions in the hope that they will understand them. This is a low-level activity without much student mental engagement. They’ll forget these definitions as soon as the test is over, if they retain them even that long. I might write the terms on a worksheet and have them look up definitions. Slightly better but still boring for everyone concerned, although it does meet the standard. I could show them a video about it and have them take notes. A bit better but still teacher-centered and passive for students. I could have students brainstorm the characteristics of life, then ask them to provide examples, or do a lab activity, etc. Getting better but still not entirely effective.

What all of these activities have in common is that they are targeted specifically to this one standard alone, and on the end of unit test, only some of the students will show understanding (or at least regurgitation). I have only partially succeeded.

Exoplanets

What kind of life forms could exist on an exoplanet or exomoon, such as shown here? As students ask and answer such questions, they come to understand the characteristics of life and the abiotic factors that support it.

Or I could do this in a completely different way through a student-centered, engaging project. I could have them go beyond the standard (overreach it) knowing that at minimum they will understand the standard and possibly much more. So I use my passion for astrobiology and experience conducting field research studies of extremophiles in the Mojave Desert to create a project for my students. We’ll collect halophilic bacteria from the Great Salt Lake and let them grow in a Winogradsky column then analyze the pink floaters under a microscope. We’ll extend this to research on other extremophiles and use real examples of how they are adapted to their environments, with students developing posters or presentations or other summary products of their choice. Do all forms of life on Earth need oxygen, or even air? No – there are lithoautotrophs that live in rocks and get carbon dioxide from minerals, not air. Does all life require light and plants at the bottom of the food chain? No. Look at the chemosynthetic bacteria that are at the bottom of the food chain near deep ocean hydrothermal vents.

Square test in round head

How can one test measure the quality or extent of knowledge for every student, even if the tests are adaptive? How can a single measure determine the effectiveness of every teacher?

Then they’ll look at potentially habitable exoplanets (and learn a bit of astronomy and physics on the way) and choose an actual planet, then develop a drawing or clay model of an alien life form they envision, complete with descriptions of how it is able to survive in that environment, the abiotic factors that exist there, and the ecosystem it is part of. How does it eat or get energy? How does it move around, reproduce, adapt to changes, grow and develop, etc.? How would we detect it and know that it is alive?

As a capstone event or product, they produce posters or other products on their research into and present them at a science showcase night, just as if they were professional scientists at a conference. At the end of the evening we can watch and analyze the realism of the movie “The Andromeda Strain.” In the process of thinking all of this through, the students will deeply understand the characteristics and factors necessary for life. They will all easily meet the standard because we shot way beyond the standard.

Relax and take the test

With high stakes testing supposedly measuring the effectiveness of teachers and schools based on how students take the test, its no wonder teachers are teaching to the test. Their jobs are on the line. Yeah. No pressure . . .

You will argue that this type of project will take days to complete, when you can cover that standard in just one day. Maybe so, but we haven’t just covered that one standard. Without my having to lecture them, my students have learned about evolution and classification, microbiology and using a microscope, physics and astronomy, and even developed artistic skills. They have learned about scientific communication, which is part of one dimension of the Next Generation Science Standards. We have therefore touched on about ten other standards from multiple disciplines in the five days of this project. If I tried to teach each one of those standards one at a time, it would take far longer than our project did. My students’ understanding will be deeper and more permanent than any lower-level unengaging assignments can achieve.

The test to test us for the test

No Child Left Untested . . . How can teachers possibly meet education standards when they have to spend all of their teaching time administrating tests to measure how well they are meeting education standards?

Meeting Standards through PBL:

Here is another example that we completed just two weeks ago. We had moved into our units on human anatomy in my biology classes. I wanted students to learn the function of muscles and bones and how they provide support and movement. Now the “standard” way of doing this would be to provide diagrams of the skeleton and muscles and have students label all the names of all the part. Tibia. Fibula. Patella. Femur. Pelvis. Clavicle. Sternum. Latisimus Dorsi, Deltoid, etc, etc, ad nauseum. And many teachers leave it at that, with no understanding of how it all works together. Some will go on to teach (or more likely have the students read in the textbook) how flexor and extensor muscles must be paired, how they are anchored to the fixed bone with tendons reaching across the joint to the mobile bone. But only a few teachers will have students apply this knowledge, or design experiments to collect data that can be analyzed, or have students think critically to evaluate the quality of their knowledge, or do something creative with it.

So I turned the process on its head. I did draw a diagram of the elbow joint on my whiteboard as an example, showing and labeling the parts of everything. I explained how the bicep and tricep work in tandem to flex and extend the joint, and how ligaments, cartilage, and all the other parts hold it all together and allow it to move. That was all I did, and I didn’t really need to do that. It was just a quick 15-minute introduction. Then I gave them a challenge: using the materials I provided, they had to build a mechanical arm that would duplicate the movement of the elbow joint. As teams, they would need to use my diagram as a guide, look up whatever other information they needed, then design and build their own arm. It had to meet certain specifications: It had to have the same range of motion as a regular arm, not bending too far or extending too far (it could not be double-jointed). It had to have a way of both flexing and extending the forearm. And that was it.

I provided lots of cardboard, wooden skewers, beads, string, hot glue guns and glue sticks, etc. I divided the students into three-person teams, and required them to show me a sketch of their plan before they were allowed to collect materials. Then they set to work. In every case, their first attempts didn’t work very well. Some of the students wanted to quit at that point, saying that this task was “impossible,” but I provided encouragement and hinted that they should look more closely at how the actual human arm does this; obviously, it isn’t impossible if our arms can do this. They tore parts off their models, reglued, tried again, and eventually all the teams succeeded. They were all different, but all mimicked the construction of the human arm in important ways.

Round head in square hole

Standards imply that every student is the same, and that one size fits all in education.

With that project done, the same teams went on to create working models of the human hand. These models had to be able to create several gestures of my choice to show control of individual fingers, be able to pick up and move small objects to show dexterity, and be able to grasp and lift a cup full of water (added slowly) to demonstrate strength. This was a much harder task, and the same students again tried to give up. They wanted me to provide step-by-step instructions, but I refused. I repeated that there were no right answers, no one right way to do this. Some had to redesign from scratch, which was frustrating, but they overcame this frustration and eventually all succeeded.

It took seven class periods to accomplish these two projects. I could have easily taught the basic concepts about the arm and hand in a day using traditional activities, and they might have remembered the details long enough to pass the unit test (with some repetition and review). This would have sufficed for the requirements of the state standards. But it doesn’t meet my own standards, which are much higher. And it meets those other two pesky dimensions of the Next Generation Science Standards: Scientific and Engineering Practices (engineering design process) and Cross-Cutting Concepts (modeling). We’ll look at teaching through building models in a future post.

So how did they do upon assessment? On the unit test, the students who completed these models showed a thorough understanding of how the arm and the hand work; not just the parts, but how they are shaped, how they operate and fit together, and even the importance of having opposable thumbs. Those teams that didn’t have effective thumbs had great difficulty lifting their cup of water.

All students received 100% on the essay questions related to these projects and all passed the test. They could repeat the facts, and they thoroughly understood the concepts. They will remember their learning far longer than traditional methods because they have applied their knowledge. They have analyzed problems that occurred with their models and evaluated their effectiveness against the specifications. They have revised, fixed, redesigned, and in short, they have created. They fulfilled all of the requirements for the state and the three dimensions of the NGSS, as well as all of Bloom’s levels. In addition, they learned resilience, teamwork, collaboration, and communication skills. Not all of the teams got along perfectly, and I had to work with them on how to communicate effectively to listen to all ideas and make a solid group decision instead of one person trying to run the show. Was it worth the extra time? Absolutely!

Tower of Education Babel

There are a lot of education buzzwords out there, a veritable Tower of Educational Babel that obscures instead of clarifying the problems of education and the need for reform.

Conclusions:

When administrators and parents and everyone else gets bent out of shape about standards and you feel a pressure to “teach to the test,” just remember that state education standards are the minimum expectation, and we should hope that you are a better teacher than that. Yes, you must meet the standards. You can get fired if you don’t. But state standards are not the end we are after, only one means to the better end of extraordinary education. So overreach the expectations forced upon you by your state, principle, or community and dare to teach to a higher standard. Mentor your students to deeper understanding, higher engagement, and further creativity. Dare to be extraordinary!

Read Full Post »

junk-hat

A hat created by Justin, one of my STEAM it Up students. It is made of upcycled and repurposed materials.

At the beginning of the school year in my STEAM it Up class I had the students vote on which of many possible projects they wanted to work on. The one unit they all agreed on was to make a series of sculptures or cosplay items out of repurposed, upcycled junk. I’ve been collecting materials for years, ever since I created my first “junk” sculpture at the age of 18. I’ve taught this unit three times before in Intersession classes and afterschool clubs when I was at Walden School of Liberal Arts. The results were mixed – the high school students did fairly well, but not so much the middle school students. It seems at that age students are much better at tearing things apart than at systematically planning how to put them back together.

junk-cat

Small junk sculpture of a cat, made by Emily.

My main reason for teaching the class was to actually use up the junk I’ve been collecting and clean out my workshop. Yet it seems I wind up with more stuff before than after – maybe because of the aforementioned “tearing apart” proclivity of middle school students; what was nicely compacted as old VCRs and DVD players is now a series of scattered pieces.

bracelet-and-diagram

A bracelet and a diagram, created for my STEAM it Up class.

So I was a bit reluctant to do this again and bring in boxes of materials that inevitably make a terrible mess in my classroom. But I also knew it could be fun and educational if done right, so I took the chance. I structured this differently than before: each student would need to produce three items. The first would be a small sculpture as a beginning exercise, something that can be easily held in one hand. The second would be a cosplay item or some type of costume piece or wearable sculpture or prop. The third would be a group project where all eight students would plan out a large-scale sculpture together. The second and third projects needed to be sketched out and planned in advance.

little-man

A little man, made from old keys and other recycled objects. Glued together with hot glue and E-6000 adhesive.

They came up with a variety of interesting sculptures for their first and second projects, as seen here. I am also including some of their sketches, although in too many cases they drew the sketches after they made the sculptures. Some of the sculptures involved LED lights, which took some planning and thinking through. The point is to teach them some engineering and materials science skills, and engineers plan everything out in advance. Some students resist this, as they see these sculptures as art forms, not engineering designs, and pre-planning seems to them to impede the creative process. Of course, without planning and thinking through how to attach the disparate materials together, their sculptures tend to fall apart. Glue alone can’t hold a load-bearing member like a leg or arm.

small-soldier

A tiny soldier, made by Noah for my STEAM it Up class.

Which is why we are doing a group project. We decided to build a futuristic Mars colony city (to go with our school’s overall Mars Exploration project – more on this coming in my other blog at http://spacedoutclassroom.com).

space-ship

A space ship sculpture, made from recycled motherboards and other electronic junk.

Two years ago, we had someone contribute a lot of materials to Walden School that were from a doctor’s office or scientist’s lab. I still have no clue what most of the stuff was even for – some of it is probably valuable as antiques. One item was a still for making distilled water, but bought in the early 1970s because of its horrible avocado green color scheme. I managed to get a chemistry professor at Brigham Young University to take it off my hands. But the rest of the stuff was of little use. One item was a plastic autoclave, with multiple levels for sterilizing surgical equipment. There were also glass containers for storing or cleaning microscope slides (I think – based on similar plastic items I’ve seen in the Flinn Scientific catalog).

flying-saucer

A flying saucer that lights up, made by Sam for my STEAM it Up class.

The autoclave looks like a domed city, something out of Isaac Asimov’s Caves of Steel series of books about the android R. Daneel Olivaw and Detective Elijah Bailey. We were looking at the autoclave and other materials and “noodling around,” which is an important scientific and engineering creative process: putting things together that don’t normally go together and seeing what would look good and work toward a harmonious whole. We came up with the glass containers as pillars for the autoclave layers. One of the students suggested offsetting the layers. I sketched these ideas out on my whiteboard, and we worked through how to attach everything together using metal piping from old 1980s brass and glass furniture with bolts and L-brackets, and wire to tie the pillars together to make the whole thing structurally sound.

bracelet-with-led

A steampunk bracelet with LED light, made by Sam.

Teams of students took different layers. The bottom layer (Level 1) will be the industrial and manufacturing center, so one team is making industrial-style equipment and buildings that look like factories and power plants. One team is doing Level 2, which is the main residential sector. One team is doing Level 3, which is the administrative, shopping, hospital, and school level. They built a school from an old calculator and wanted the holes to become solar panels. I remembered having a folder with a shiny metallic-blue cover, so we cannibalized it to become the solar cells. Level 4 is the park, university, and upper class residential sector, and the dome will have spaceports, defense, and communications centers. Already the pieces are shaping up. This is exactly the engineering and materials science I had hoped for when we started this unit.

magic-wand

Magic wand, made by Sarah for my STEAM it Up class.

We are now beginning the construction of the main city levels, but Winter Break has halted the process. It will be our last project for the STEAM it Up class. It will sit upon two wooden plaques, again donated from the doctor’s office, and we’ll create smaller domes for hydroponics and farms, with small Mars rovers (already made by one student who is great at miniaturized sculptures).

stamp-and-ring

Small sculptures created by my STEAM it Up students: a stamp and a ring.

We’ll make Mars landscaping from paper maché and HO scale model train decorations. I also hope to put wires up through the support shafts and add LED lights to the city. The final city will be quite heavy and hard to move around, so it will stay in my classroom and make a great decoration for my newly completed lab. We’re photographing the construction process, I’ll interview the students, and we’ll add all of this to our ongoing Mars project documentary video. I’ll write another blog post in January when we can show the finished sculpture. I would also like to create a virtual 3D model of the finished city so we can animate and label the parts.

mars-colony-sketch

First drawing of our Mars colony, using parts from an autoclave as the levels of our city and glass microscope slide cleaners as pillars.

We still need to pick a name for it. Looking up names for Mars in various cultures, and adding translations for the word “city,” I come up with some possibilities: Aresdelphia, Al-Qahira Madina, Harmakhis Delphi, Hradelphia or Hrad K’aghak’, Huo Hsing Shr, Ma’adim Delphi, Kaseishi, Mangalakha, Martedelphia or Marte Cuidad, Mawrth Dinas, Nirgal Alu, Shalbatana Alu, Simudelphia, Labouville, and Tiuburg. We’ll have to vote on it.

mars-colony-first-attempt

Even without glue or bolts, the layers stack up fairly well in this first attempt to build the Mars colony city. We decided to use two of the boards instead of one so we could add more landscaping and farming domes using HO-scale model railroad decor.

Read Full Post »

rabbitbrush-with-mountain

Rabbitbrush blossoming in October in the southwest corner of Salt Lake Valley, Utah.

In my STEAM it Up class at American Academy of Innovation, my students have conducted an inquiry lab that combines chemistry and technology with history and an ancient art form: dyeing cloth. I reported on a similar lab two years ago, but we have taken it much further and created an investigation that would work well for all chemistry classes without requiring too much equipment or expense. This activity fits in well with the NGSS dimension of science and engineering practices, as it allows students to identify variables, create experimental procedures, collect data, and report results in a fun and engaging way that incorporates art and the history of chemistry. Since dyestuffs are found around the world, there is also a global education component.

collecting-rabbitbrush

My STEAM it Up students collecting rabbitbrush blossoms near American Academy of Innovation (the bright orange building in the background).

We live in Utah, and there are a number of dyestuffs available that were used by Native Americans. Some materials, such as cochineal, were imported and traded for from as far away as modern day Mexico. Others are native to Utah, such as rubber rabbitbrush or Ericameria nauseosa. Our new school was built in a grassland area in the west side of Salt Lake Valley that was formerly used by Kennicott Copper Corporation (now Rio Tinto) as a mine and waste dump. After millions of dollars in cleanups, the site is now the new planned community of Daybreak, and our school is on the west edge near the South Jordan Trax Station. Since it is a former prairie, rabbitbrush grows around us in the empty lots right next to our school.

cutting-rabbitbrush-blossoms

Preparing rabbitbrush blossoms for dyeing.

I had read that marigold blossoms make a good dyestuff, so on the day of our first attempt, I snipped half the blossoms off my marigold flowerbed (which grew up from last year’s seeds). My students and I took a mini field trip about 50 yards from the school where rabbitbrush was growing. It was the end of September and the brush was just beginning to bloom with bright yellow flowers in clusters. We collected several buckets. The species name of nauseosa is well earned, as the smell is a bit nauseating (some students are more sensitive to it and can get itchy eyes, so be careful of this). We also had walnut shells, cochineal, and the marigold blossoms as our dyestuffs.

rabbitbrush-blossoms

Rabbitbrush blossoms ready for boiling in the dye bath.

Students teams of two each decided on a variable to test, such as the type and concentration of dyestuff; the type and concentration of mordant (a mordant is a metal salt such as sodium carbonate [washing soda] or alum powder [hydrated potassium aluminum sulfate]) that helps the dye bind with the fabric threads); the temperature and duration of the dye bath; and colorfastness (if the dye holds its color upon washing). They determined a procedure for testing their one variable while holding the rest constant. We then dyed small swatches of white terrycloth washcloths. A further variable could be the type of fabric used, but I only had the terrycloth for now. I hope to order some untreated cotton and wool yarn and dye them as well.

rabbitbrush-and-marigolds

Rabbitbrush and marigold blossoms ready for dyeing.

Our basic procedure was to boil two Pyrex dishes half full with water. To one the mordant was added, to the other the dyestuff. The cloth swatches were first boiled for 10 minutes or so (depending on the group’s procedure) in the mordant, then the swatch was added to the dye bath.

cooking-rabbitbrush

We soaked white terricloth pieces in a boiling alum solution (the mordant), then boiled them in the rabbitbrush dyebath.

The results were excellent, and we were careful to label all the swatches with Sharpie permanent markers so that we could make comparisons after. We cut the dyed swatches in half and I washed one half at home in my washing machine. Each swatch was scanned into my computer and the eyedropper tool in Adobe Photoshop (you could use the Gimp as well) was used to sample three places on each swatch and record the RGB values. We averaged the values, and compared them to see which combinations of variables gave the best results.

dyeing-with-cochineal

We also dyed terricloth swatches with cochineal and an alum mordant.

We also tried adding more than one dyestuff to the same bath (doesn’t work well) and overdyeing, that is, dye a swatch with one color, then put it in a different color. We also tried an ornamental plant that was growing around our school, which I call firebrush; it has green to pink-red leaves (older interior leaves are more green). The firebrush provided great pigment upon boiling, and turned the cloth a nice pink color, but when rinsed out, the color gradually changed to a medium green. I suspected it might be a pH indicator, so I dipped part of one green swatch in vinegar and found it turned bright pink again. Only those two colors – green when neutral, pink in an acid. But it is apparently a good indicator and a fairly colorfast dye.

first-swatches-2016

Our first dyed swatches, labeled with permanent marker. The left swatch is rabbitbrush, the second is marigolds, the third is cochineal without any pH modification, the fourth from left is cochineal with Cream of Tartar added, the last (right) swatch is cochineal with vinegar added.

As a further experiment, we tried adding Cream of Tartar or vinegar to the cochineal to see if we could turn it from magenta-burgundy to more of a bright red color or even orange, with mixed success. We got a bit more reddish color with Cream of Tartar, but never got to orange. Reading websites and other sources, I found that we need a stronger organic acid that wouldn’t dilute the dyebath, such as citric acid. To turn the cochineal more purplish, ammonia can be used. We also tried cochineal with rabbitbrush but still did not get an acceptable orange – just a salmon pinkish color. We need orange because our school colors are Innovation Orange (you can see our building from miles away, as the photos show) and Titanium (we are the Titans). We could also some other dyestuff, such as madder root, sandalwood, or safflower.

swatches-2016

Swatches from our dye experiments. The ones on the bottom are pieces that have been washed to test colorfastness. The brown swatches are from walnut shells and hulls soaked in water over several days. Other swatches test different types of mordants (alum versus soda ash versus Cream of Tartar) or different concentrations of dye.

We experimented for several weeks with different combinations and the students wrote up their final conclusions. Here is what we learned: The best mordant for rabbitbrush, marigolds, and cochineal is alum powder. Cream of Tartar tends to gladden (or lighten) the colors, whereas soda ash (sodium carbonate) tends to darken or sadden the colors. Cochineal was less colorfast than we expected based on previous experiments, and tended to bleed all over the other colors when washed. Walnut shells seemed to do best with soda ash as a mordant. Overdyeing was only partially successful; we were trying to get a good orange and never did. The marigolds didn’t make a good orange either – but did do a nice golden brown color. Walnut shells with rabbitbrush made a nice golden tan, but cochineal with rabbitbrush depended greatly on which was dyed first; the overdye tended to eliminate most of the first dye.

fireweed-results

The results of our experiment with firebrush, an ornamental shrub with green inner leaves and scarlet outer leaves and wicked thorns. The dyebath was bright pink, as in the swatch second to left, but when rinsed out it turned green as in the swatch second from right. I took a rinsed green swatch and dipped it in vinegar and the bottom turned pink again. Firebrush is apparently a pH indicator.

A final variable is to test different fabrics. I ordered more dyes, including madder and indigo, from Dharma Trading Company in November as well as untreated merino wool yarn and cotton cloth, with more alum powder and citric acid. Adding the citric acid to the cochineal did indeed turn it red (and eventually orange). Adding ammonia turned it purple. It worked wonderfully on the untreated wool yarn; I dipped one end in the regular cochineal and the other end in the cochineal with citric acid and got a beautiful variegated red to burgundy-crimson skein that held its color well upon rinsing and washing. The cotton cloth didn’t hold as well; I make the cloth purple to orange and even let it set overnight in the dyebath, but upon rinsing all the cloth turned back to a light magenta. The rabbitbrush made a nice soft yellow for the merino wool yarn.

cochineal-dyed-yarn

Merino wool yarn dyed with cochineal. I varied the pH by adding citric acid to get the brighter red colors, and dyed one end of the skein with regular cochineal and the other end with citric acid treated cochineal to produce variegated yarn. Now to crochet it into a sweater . . .

My wife is amazing at crocheting, and my ultimate STEAM art product will be for her to use our naturally dyed merino yarn to create a sweater and a beanie. I also want use the dyed pieces of cotton to make a quilt in the shape of our school logo. I know several professional quilters who can do this for us. If the cotton isn’t accepting the dyes, then I must experiment further. Perhaps I didn’t soak the cloth in the mordant bath long enough. I am still experimenting with getting blue colors from woad and indigo, but more on this in a later post.

Read Full Post »

Set up for the stop-motion animation activity. You will need a solid tripod, a black-topped table with good lighting, and rulers to mark the edges of the stage area (camera field of view).

Set up for the stop-motion animation activity. You will need a solid tripod, a black-topped table with good lighting, and rulers to mark the edges of the stage area (camera field of view).

As part of the STEM-Arts Alliance program I’ve initiated at Walden School of Liberal Arts, I am always trying to find activities in my science classes that can integrate art, history, and/or technology. At the NSTA national conference in San Antonio in 2013, I attended a session by Dan Ratliffe from the Breck School in Minneapolis on using stop-motion animation techniques to model a chemical reaction, in this case the burning of methane. He showed how to set up a stage, use student groups and manipulatives, and how to show how energy is absorbed (activation energy) to start the reaction and how energy is released. He uses it in his 6th grade science class, but I’ve adapted the lesson for use in higher level science classes such as chemistry or physics or astronomy.

Animation stage (marked with rulers). Since the camera couldn't point straight down, the stage is a trapezoid. On the large sheet of paper is our storyboard/plan.

Animation stage (marked with rulers). Since the camera couldn’t point straight down, the stage is a trapezoid. On the large sheet of paper is our storyboard/plan.

On Jan, 31 this year, I needed to make one of these animations for a demonstration I was doing at the UACTE conference. My chemistry students were studying nuclear chemistry and nuclear reactions at the time, so without any warning to them, I announced we would be making an animation of the nuclear fission of Uranium-235. I had cardstock and permanent markers already in the room, and brought my camera and tripod to class. My small class of students were able to create all the drawings and labels, plan the sequence, and do the photos all in one class period plus a few minutes after school to clean up, so about 80 minutes total. It wasn’t anything too fancy, but it worked. That evening I dropped the images into Apple Final Cut Studio (setting each image to last three frames), then dropped them onto the timeline, expanded them all together so the edge of the stage wouldn’t show, and exported it. I didn’t try to add narration or sound effects, but it did the job. Then I demonstrated the process at the conference the next day.

This lesson meets standards HS-PS1-8 of the Next Generation Science Standards to model nuclear reactions as a core idea in chemistry. I have written it all up as a PDF lesson plan. I’m including the process steps here, but you can download and use the lesson plan here: Stop-Motion_Nuclear_Reaction

Objectives: By the end of the activity, students will be able to:

  1. Create storyboards and sketches showing the stages of a chemical or nuclear process;
  2. Set up a stage and move objects around from frame to frame to demonstrate the process;
  3. Edit and align sequential images in an image editing software package;
  4. Import a series of still images into video editing software and export the sequential images as a continuous animation.


An early frame for the animation. A neutron (red bead) approaches an atom of U-235.

An early frame for the animation. A neutron (red bead) approaches an atom of U-235.

Materials for each group:

Regular unlined copy paper (for storyboards)

Cardstock paper (for labels)

Marker pens or colored pencils

Balls of different sizes to represent large uranium atoms, smaller fission products, and

neutrons. You can use poker chips and tiddlywinks instead.

Scissors

Clear tape

A black-topped lab bench or table with a black tablecloth

A digital camera and tripod that can look down on the table without seeing the edges

Meter sticks and smaller metric rulers

Computer with video software


The first atom of U-235 splits into Barium and Krypton plus energy and two additional neutrons.

The first atom of U-235 splits into Barium and Krypton plus energy and two additional neutrons.

Step One: Introduction

Introduce this lesson by showing your students some examples of stop-motion animation and discussing how traditional animation was drawn frame by frame on acetate sheets. Explain that they will be creating their own animations in groups.

Review the types of nuclear reactions that are most often learned in a unit on nuclear chemistry, such as the fission of Uranium-235; the fusion of hydrogen; nucleosynthesis inside a star; the conversion of a neutron to a proton, anti-electron neutrino, and beta particle through the weak nuclear force; the beta and alpha decays of various elements; the conservation and conversions of energy and matter in a nuclear reaction; etc. List these reactions on your whiteboard. Assign students to groups of 4 to 5, and have each group pick a different reaction.


The three neutrons travel on toward three more U-235 atoms.

The three neutrons travel on toward three more U-235 atoms.

Step Two: Planning the Animation and Creating the Pieces

Divide the students into groups and provide them with the materials they need. For this first period (initial 45 minutes) they will research the relevant reactions, draw out a storyboard or plan for the steps of the process, write a narration script (optional), then create the pieces they need. They can represent atoms or subatomic particles by balls or paper drawings on cardstock. If they use balls, they should create paper labels for each object. Energy can be represented in different ways, such as drawing lightning bolts or gamma rays or bursts of energy.

Give the students encouragement and suggestions as needed, but allow them to use their creativity and have fun with this activity. They may want to bring in their own props. The final storyboards and animations should be scientifically accurate and demonstrate deep knowledge of the reaction they choose as well as be aesthetically pleasing and well designed. They should also create titles and show the reactions as equations. By the end of 45 minutes they should have their plans complete and their pieces, labels, and drawings finished and cut out.

As an option, you may want each group to write up a narration script and record the narration using a microphone. If you do this, then allow for an additional class period. The final animation will have to be carefully timed to match this narration.


The three atoms of U-235 split to create new byproducts, more energy, and a total of nine neutrons.

The three atoms of U-235 split to create new byproducts, more energy, and a total of nine neutrons.

Step Three: Filming the Animation Frames

To set up the animation, a camera should be mounted on a tripod or other solid structure and placed so that its field of view encompasses a black lab bench or table topped with a black tablecloth without seeing any edges. To find out the exact area of this “stage,” use meter sticks or other straight edged objects and move them in on all four sides of the camera’s view until you can just barely see them at the edge of the view. If your camera is facing straight down, the stage will be a rectangle, but this is often difficult to achieve without making a special frame or mount for the camera. If it is on a tripod, then it will be looking at the stage at an oblique angle and the stage area will be a trapezoid. Once the stage area is set and the camera is in place, they must not be moved.

To film the frames, have one student assigned to use the camera (and not bump it or move it between frames). The other students will move the pieces. They will want to practice the process, deciding how far to move each piece between frames. A good frame rate for the final video would be 10 images per second. Since digital video plays back at 30 frames per second, this means one image will be three frames long. This means for a 10 second animation, you will need to take 100 photos. If each piece is moved too much between images, the resulting animation will be jerky and too fast. If it is moved slower, the resulting animation will be smoother but you will have to take more photos. The amount of motion between frames should be consistent or the movement will seem to speed up and slow down for no reason. Students should use a ruler to measure the distances to move objects between frames exactly. Objects such as atoms that need to stay in place for several seconds can be taped down with clear tape.

Once they get going, the group can develop a kind of rhythm. They will stand around the stage with the camera operator calling out, “Move. Clear! Move. Clear!” and taking photos as the students clear out, then move their assigned pieces as planned. A student should also be assigned as the Director to ensure the storyboard is followed and object placement is correct from frame to frame. Labels should be used for all parts, such as neutrons, atoms, energy, equations, titles, etc. When an atom is split or atoms fuse, if energy is released, it can be shown appearing and moving outward from its origin or creating a flash. Byproduct particles can then move on to collide with other objects. For example, if you are splitting U-235, then a neutron enters, collides with an atom of U-235, which splits into two products (there are several possibilities, such as Krypton-89 and Barium-144, or Xenon-143 and Strontium-90, etc.) along with two new neutrons and gamma radiation. A chain reaction can be demonstrated going through several steps. They could even show a mushroom cloud at the end.

Special effects can be created, such as blinking objects (having an object appear in one frame, then disappear in the next, and alternate – it will appear to blink or flash in the video). With a little practice you can get the timing right. You can create explosion graphics and add white or colored frames to simulate a flash of energy. If your students know how to use image software to create alpha channels, then separate images can be filmed and added with transparency to the final video as layered animations. In the end, the only important things are to keep the motion smooth and consistent, don’t bump the camera, and don’t get anyone’s hands in the photos.


The nine neutrons travel on to split nine atoms of U-235 and release even more energy and more neutrons . . . thus becoming a chain reaction that will result in a nuclear explosion if left unchecked. Labels and equations can be added as the final particles migrate off the stage.

The nine neutrons travel on to split nine atoms of U-235 and release even more energy and more neutrons . . . thus becoming a chain reaction that will result in a nuclear explosion if left unchecked. Labels and equations can be added as the final particles migrate off the stage.

Step Four: Creating the Video

The photos will need to be uploaded to the computer which has the video software. Ideally each group should have a computer capable of doing this; almost any video software including iMovie and MovieMaker will work. There are apps available for iPads or other tablet computers such as iStopMotion. As you import the images, make sure they are numbered sequentially. Most digital cameras will do this automatically.

If there was any bumping of the camera, then the images may need to be aligned or registered using image editing software. Each image can be imported as a separate layer and moved around to align it with the rulers seen along the edges in the bottom layer. This will be a tedious process, so it is far better not to bump the camera in the first place!

If the photos are well aligned, then you can import them directly into your video editing software. Some programs allow you to set the length in frames of each imported image. You would want to set the images to three frames each if your final frame rate is 10 images per second. Once imported, if they are numbered sequentially, all you need to do is select all the images and drag them to your timeline in the video software and they will be in the right order and length.

Since the rulers can be seen along the edges of each image, you will need to enlarge the images. This can be done in two ways. The first is to expand the first image, then apply the same settings to each subsequent image. This is a slow and boring process. It’s much faster to simply export the video as is, then open a new file and import the draft video and place it on the timeline. Then the entire video as a single clip can be expanded to move the rulers off stage, and the final video exported again. You can add special effects (inserting flash frames, titles, additional layers, etc.), add narration and/or music and sound effects, and export the final version.


Step Five: Evaluation

Once the videos are done and ready to view, give the students feedback forms that ask them to evaluate the final videos, including their own, on such areas as scientific accuracy, depth of knowledge, technical ability, and aesthetics/design. Leave room for comments. Show the animations to the class, and have them fill out a feedback form for each video, encouraging the students to make positive suggestions. Then collect the forms and tally the results as a final grade for the assignment. You will want to evaluate the videos yourself as well and give more detailed feedback on how they can improve. You could also create a master video by piecing all the group projects into one video, then upload the whole thing to YouTube so other schools/classes can view it.


Notes on this Lesson:

This idea could also be used to model any process or natural cycle, such as chemical equilibrium, phase changes, types of reactions, conservation of matter and energy, kinetics, pH titrations, and thermodynamics in chemistry and the rock cycle, the water cycle, the carbon cycle, stellar evolution, plate tectonics, etc. in other sciences. I would enjoy hearing your ideas. Please let me know how you are using this activity by e-mailing me at: elementsunearthed@gmail.com.

Read Full Post »