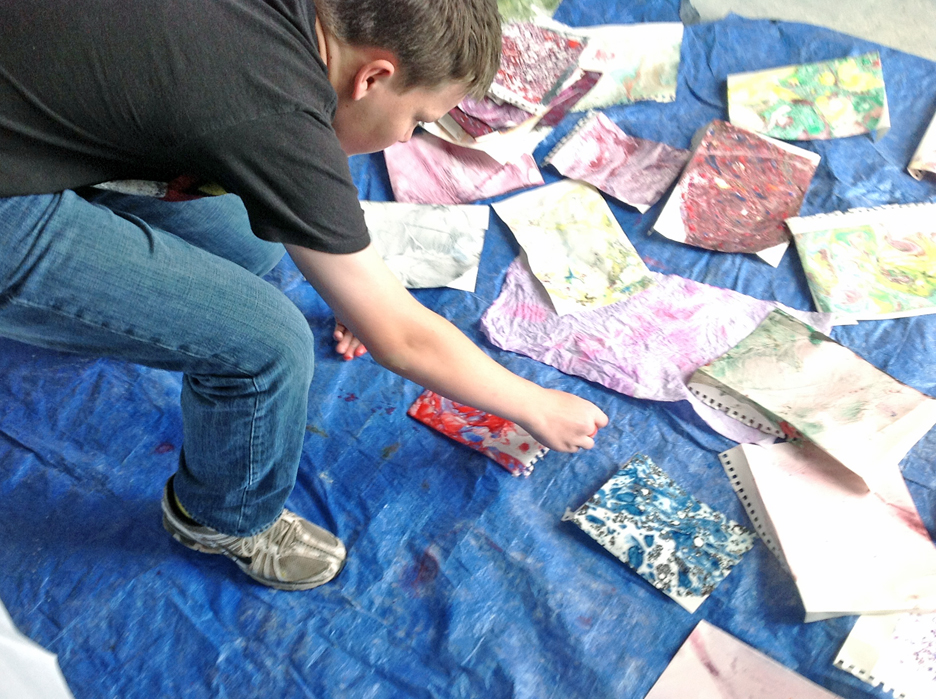
A collage of student-created illustrations using homemade ink and pigments, such as cochineal for the reds, Prussian blue for the blues, and iron-gall ink for the sepias.
It has been some time since I have written a blog post for this site. My work continues at Clark Planetarium, where I don’t get many opportunities these days to pursue the history, mineral sources, origins, properties, uses, extraction, refining, and hazards of the chemical elements. That is, after all, the main purpose of this blog site even if I have occasionally gone on tangents of global citizenship or science education in general. As a result of setting this site aside for several months, viewership has dropped off even if my passion has not.
Part of a full-class banner on the history of chemistry, with each student assigned to do one image and caption.
I continue to work toward my doctorate, with my dissertation proposal going through several drafts this year. I wrote a longer version of the proposal (the first three chapters of the final dissertation, with chapter 3 in future tense) and sent it to my advisor in September. I wanted it to appeal to practicing teachers, but my advisor’s response was that it needed to be re-written in academic language and drastically shortened to less than 15 pages per chapter. Although I resist writing something that only a few Ivory Tower academicians will ever read, I know it must pass the Internal Review Board once it passes my committee, so I have done as he requested. I combined all three chapters together with my appendices, and my advisor has now completed a line-by-line edit. I am working through these suggestions over the next few days as schools shut down for Winter Break and our outreach schedule at the Planetarium eases off.
A copper etching done by painting fingernail polish on a copper sheet, then placing in a sealed container with salt and vinegar potato chips with a little extra salt and vinegar. Once corroded, the nail polish is removed with acetone. This was for a project on the iron age for the history of chemistry unit.
The core of my dissertation, as it is for any, are the research questions. These are mine:
RQ 1:To what extent can STEM teachers implement student-created digital media projects (SCDM) with three dimensions of choice to enhance student creativity, engagement, and content mastery?
RQ 2:To what extent can informal STEM education institutions develop and successfully implement a science communication contest to extend contact time and improve student motivation and science learning?
A stop-motion animation set-up for showing a chain reaction in a unit on nuclear chemistry. This frame shows three neutrons about to initiate the second order nucleus splitting.
As I see it, based on 33 years of classroom teaching experience, there are two problems of practice in STEM education (including chemistry). The first is the problem of student engagement, which I have talked about before on this site. I hope to see how student-created digital media projects can help enhance student engagement and lead to increased creativity, quality, and content mastery. This has been the main thrust of my research all along. As a planetarium educator now, I also see a problem of practice in how to increase our impact as an informal science education institution. We visit 6-8 schools per week (I average about two) and we can only teach one class at a time for about 45 or 60 minutes depending on the lesson, and can only visit a school once every two years (charter schools once every three years). That means we are missing over half of Utah’s sixth graders each year. We visited about 28,000 students this last year, and that is an exemplary task, but how much impact can we really have in so short and infrequent a time?
The second question implements the first through a science communication contest we are calling the Cosmic Creator Challenge, where students create their own digital media projects on the sixth-grade space science standards for Utah. You will notice in my first research question that I am using three-dimensional student choice as the experimental variable. I have not yet explained what 3D choice is on this website. Here goes:
Diagram showing 3D choice for sixth-grade space science standards. The choices are the individual standards (topics), the medium, and the approach.
When students are given digital media projects as a way of demonstrating their mastery of chemistry or other STEM concepts, they have three dimension of choice. The first is the choice of topic. Usually, in project-based learning, students are able to choose a specific topic for their projects from a teacher-delineated list or as specified by subject-area standards or objectives. This is the first dimension – choice of topic. The second dimension is usually choice of approach – that is, exactly what format the project will follow. The easiest way to explain this is through the example of a video project: students can choose different video formats, such as a public service announcement (PSA), a news report, a TV commercial, a documentary, or a narrative film (with script, props, and actors). These two dimensions are what are usually given to students for a project-based learning experience.
Puppets showing different types of radiations used in a student skit for a unit on nuclear chemistry.
But with digital media projects, there exists a third dimension. The choice of medium. Usually teachers choose this by having all students create a podcast or a video or a poster or a Scratch game. But what if we allow students to choose their own media type? There are many types of media now; the formats have proliferated and include digital images (pixel or vector-based); posters or infographics; desktop published documents; audio files; video files; presentations or slide shows; animations (several types, including stop motion); websites; games; and various types of augmented or virtual realities.
Once you combine all three dimensions, you have a huge number of possible choices for projects that can be based on students’ preferences, experiences, previous knowledge, and desires for learning. The potential for creativity is very high, with students coming up with projects that are unique, effective, fun, and communicate their chosen topic well. Here are just a few ideas for what my students have done in a first-year chemistry class:
Chemistry careers game. Students start in college, pass chemistry classes, graduate, get a job, etc. similar to the Game of Life.
For our first unit on the nature of chemistry, I had a student who chose the topic of careers in chemistry and created a board game that combined aspects of several other games including the Game of Life. Students started the game in college and chose a chemistry specialty, had to pass classes with different life choices popping up, then graduate, find a job in their specialty, and work through to their first promotion while making choices along the way. In the process of playing the game, students learned about careers in chemistry. By creating the game, the student-creator had to research a great deal of information, and did so entirely through her own effort.
For a unit on the elements, students chose their favorite element (such as Thorium for an Avengers fan) and created a physical poster or infographic on the properties, uses, mining, refining, etc. of the element. They typed up text, inserted images and captions, and created a summary and crossword puzzle game for the back sides. Although the final posters were put together by hand with glue, it could have been laid out in desktop publishing or infographic software for easier editing. Other students were asked to use the poster and summary to play the crossword puzzle as their way of learning from the student-creators.
Student posters on thorium and tungsten. I especially like the Avengers Unite cartoon with Thor-ium, Captain Americium, and Iron Man.
On the same unit on chemical elements, a student choose to create a Scratch game on the element Bismuth called Billy’s Bismuth Bellyache, where answering questions about bismuth correctly led to the gradual building of a bismuth subsalicylate molecule (the active ingredient in Pepto-Bismol). She designed her graphics, stage, costumes, and created all of the coding necessary to play the game. Another student used Scratch to create an interactive word-search puzzle on Strontium or a Heal Dem Bones game for calcium.
A group of students in an A.P. Chemistry class compiled a joke book with cartoons, puns, limericks, poems, and song lyrics related to quantum mechanics. This was based on an offhand comment in the Star Trek: The Next Generation episode where data tries to learn about humor by studying a stand-up comedian on the Holodeck. The computer mentions that the funniest comedian ever based their jokes upon quantum mechanics. So I wondered if we could do that. Eventually, this will become a whole animated cartoon hosted by Boson the Clown to a crowd of electrons as they laugh their way to higher orbitals.
One of the cartoons from the quantum joke book. The character in the chair is a pretty good Schrodinger!
I have had student groups build banners on the history of chemistry, design HyperCard stacks (there is an old one for you) on the elements and their compounds, create videos on elements, create 3D models of molecules and ancient Greek matter theorists, do interviews of experts on the history of chemistry, visited chemical manufacturing plants such as beryllium refineries, cement plants, bronze statuary workshops that use the lost wax technique, chocolate factories, and artificial diamond manufacturers. All of these projects are based on some form of media design. As time goes on, I have done more to encourage student choice of medium and have seen incredible results.
Yet all of these great examples are anecdotal – wonderful stories, but not constituting the type of proof needed by other chemistry teachers and science department chairs to adopt student-created digital media projects (SCDM). This is where my dissertation comes in – I hope to gather statistical evidence that other teachers can effectively adopt these same ideas for SCDM projects and 3D choice in their own classrooms, and that they will see enhanced student creativity, engagement, and learning. Once my proposal is approved, I will establish a science-communication contest at the planetarium for sixth-grade students to demonstrate their understanding of space science concepts (part of the sixth-grade science standards). I will gather data from their projects and student peer assessments to see if creating these projects leads to increased test scores as evidence of learning. By this time next year, this dissertation will be completed and defended and I will be a large part of the way to proving my hypothesis. Then I can return to exploring the elements once again and think of retirement and traveling to more mine sites.
The main interface for the Heal Dem Bones game on calcium. The student designed the graphics and buttons and programmed the game, so that by answering questions about calcium, you heal a set of broken bones.
In the meantime, I will report on the elements as much as possible, but my posts will continue to be sparse until then. Bear with me; the end will be worth the wait. I hope the examples shown here will inspire you to try out new ideas and use some student choice of what types of media projects they will create. For any unit, you can specific the topics (or your state standards can) and let students choose their specific topic, medium or software, and their approach. You will be amazed, as I have been.
An interactive poster on Raku pottery for a unit on the history of chemistry. Even a standard project like a poster can be enhanced if you allow students to use their creativity. This poster has windows you can open to see questions, with answers in the pots below.
Frames from a project on stellar evolution created in Wick Editor, a linear animation/interactive software. Students can choose which type of software and which type of project (here a branching informational program) to demonstrate mastery of their chosen STEM concept.
The purpose of this post is to invite you, as a STEM classroom teacher or informal educator, to participate in my doctoral dissertation research study. I need teachers to look over the new website I’ve been putting together at https://science-creativity.com (everything on it is free – I made it with WordPress which is why it is a .com website) and provide feedback in the following ways: A – How functional and usable is the website? Are there any problems or issues that need to be resolved? B – Are there any features you would like to see that are not currently there, including blog post topics related to teaching creativity and innovation in STEM classrooms that you would like to learn about? C – If you are planning to conduct a project-based learning activity in one or more of your classes before the end of June 2023, please consider having your students create a project using media design software as described on the website. They could choose one of the 40 or so projects described on the Projects page (where there are also excellent student examples). Have your students try out the videos linked on the Software Training page to learn any software they do not know and then use that software to create their own media content to present to each other. D – If your students do try out the software training videos and create a STEM media project, then please share good examples with me and I will post them on this website. You could explain it as a competition – only the best projects will be selected and displayed. The winning students and their parents will need to sign consent forms if they want recognition by name. E – I will ask you to fill out a survey on how well the project went with your students, to what extent they used the training videos, the level of their creativity, etc. Since I will be using your responses in my final dissertation, I will also ask you to sign a consent form. Both of these forms will be posted to the https://science-creativity.com website. If you decide to participate, I will send them to you.
Two frames from an Animaker resume, one of the types of projects described on my website. Instead of the usual static Powerpoint or Google slideshow, why not allow your students to do something with a bit more pizzazz, such as an animated slideshow or Prezi?
This is a lot to ask, especially so far into the school year. Any feedback you can give will be helpful, not only for my final dissertation but to improve this website as a teacher resource. It is entirely free and always will be, and is a work in progress. I will upload additional posts as it becomes an increasingly important focus of my work going forward. With this announcement, the site is officially in beta form. Let me know how it can become more useful for you and what features or topics you would like to see. Spread the word. I can be reached at: David Black, elementsunearthed@gmail.com or write a comment to this post.
In the meantime as I continue to build this site, I am proceeding with the revisions to my research proposal. I mentioned last post that I have focused in on a final three-part research question, which is the following:
To what extent can STEM teachers implement choice boards for using browser-based media design software to: A – promote differentiation, access, and equity through Universal Design for Learning (UDL)? B – establish the components of “Gold Standard” Project-Based Learning (PjBL)? C – enhance student creativity and Social and Emotional Learning (SEL)?
I have to establish a need for this line of research, how it fills gaps in previous studies, and why my approach will sufficiently answer this question. These are the first three chapters of the final dissertation and what I am working to revise right now. I have written extensively on this website about why such research is needed, but it is finally time to move forward with the actual study. As described in my last post, I will be tasking my students with three major projects over this semester, culminating with the STEAM Showcase at the end of April and the Stanford Innovation Lab project in May. Each project involves using choice boards and media design software to demonstrate STEAM concept mastery.
A unit choice matrix for my biology students at New Haven School. Concepts with green bars are covered in class, and concepts that are open must be completed through student-created projects. The types of possible projects are listed horizontally.
The idea of choice boards is an extension of what I was doing with my classes at New Haven School. I built a choice matrix for each unit, listing the unit concepts vertically and the types of projects they could do horizontally, as shown here. On the back of the sheet I listed a series of questions for the unit; if students knew the answers, they would be well prepared for the unit test. It acted as their study guide. On the matrix, the horizontal colored lines represent projects or concepts we covered together in class through activities, videos, or lectures. The open topics were the ones the students would need to learn through creating their own projects. Since the school’s email system was tightly locked down (because it is a residential treatment center) and we only had Chromebook computers, I couldn’t use very many types of software – only those that didn’t require an email verification and were browser-based. I taught my students how to use Scratch, SculptGL, Tinkercad, and a few others. Because Canva requires email verification, we couldn’t use it, so any layout design had to be done by hand or I had to design it for them; our Ad Astra newsletters in astronomy were laid out on my computer using Adobe InDesign. I didn’t know about Photopea or Wick Editor at the time or I would have used them. Many of the examples I have of excellent student projects were therefore done by hand.
Scratch by MIT is an excellent method for students to demonstrate their mastery of STEM concepts by creating an interactive game or quiz, such as this test on types of rocks. It can be programmed to be self-scoring and choose random questions, as shown by my training videos on the website.
The unit matrix worked fairly well at showing students the types of projects they could do with the limited software available to them and included hand-drawn options. Now, with my dissertation, I am focusing on browser-based media design software through the lenses of universal design for learning (UDL), project-based learning (PjBL), social-emotional learning (SEL), and student creativity. With more software available to regular public or private school students, they need more extensive lists of choices with better descriptions. My dissertation committee chairperson, Dr. Farber, suggested choice boards as a possible answer. I have adapted my previous unit matrix idea to allow for three dimensions of choice: choice of a specific topic for a course concept, choice of type of software(s) to use, and choice of the type of project to create. The diagram shown here demonstrates these three dimensions for an upcoming biology project.
Altogether I have grouped different types of browser-based media design software into nine categories including image creation software (Photopea, Inkscape, Procreate); infographics/poster creation or desktop publishing software (Easel.ly, PicktoChart, Canva, and ThingLink); animated presentation software (Animaker, Powtoons, Prezi, or Voki); storyboard or comic strip software (MakeBeliefsComix or StoryBoardThat); 3D modeling and animation software, including augmented reality (SculptGL, Tinkercad, Mixamo, or Aero); sound editing or music creation software (Audacity, Soundation, or Vocaroo); video editing software (WeVideo, Canva, Adobe Express, or iMovie); interactive or linear 2D frame-based programming (Wick Editor); and stage-based programmable control of sprites or characters (Scratch). I also added choices for using mini-computers and robotics, plus multi-vector projects that combine several other choices.
For students up to the challenge, they can build 3D characters using SculptGL along with textures, import them to Adobe Mixamo (a free program online) to add rigging and animations, then program them to move around in an Augmented Reality (AR) scene in Adobe Aero. Here, my gray alien character is doing a dance routine in my doctor’s office.
There are many other types of browser-based or free software, including some for iPads that I am not familiar with (my students showed me one a few days ago for creating animation that I need to check out, but my iPad is too old to run it). The point of my dissertation is to combine student choice and voice (a necessary part of project-based learning) with media design software for student-created media content of STEM concepts. This is all meant to increase student engagement, access, equity, creativity, social-emotional learning, project quality, and content mastery.
The PDF at the bottom of this post describes each of these project types listed by software. It is not an exhaustive list, as there are many more ways to do things than I can possibly imagine and types of software that I am not even aware of despite a great deal of research. As I say frequently in the training videos, the possibilities are endless and entirely depend on the imagination of the students.
Students in a chemistry class can pick a favorite molecule (such as Tyrian purple) and create a 3D model in Tinkercad, then capture different angles to use in an illustration or poster inside Photopea or Canva. Or they could build a model of a space probe or a virus using Tinkercad or SculptGL.
Because some students will try to get away with doing the least amount of effort (which, of course, leads to the least amount of learning), it is necessary to build in structure and scaffolding with tight rubrics for what is expected. That is why I use peer critique and revision as an important component of this process. The students’ peers act as an audience for the projects, which must be presented as part of “gold standard” PjBL. Students provide feedback through a Google form on five aspects of project quality: Does the project show deep mastery of content? Does it demonstrate creativity? Is there evidence of high student effort and professionalism? Do they show competency with using the software? Are they able to effectively teach their topic/concept to their peers? Students use the forms to rate their peers using suggestions that are kind, specific, and useful (Berger, 2018) and if teams do not get the rating they desire, they are allowed to revise their project and re-present it to me for a better final score.
All of this is to explain to you how to implement these choices, projects, and videos in your own STEM classes. I am hoping to gather data by the end of the school year so that I can analyze the results and draw conclusions by the end of August and have my dissertation defense by October 2023. I hope that you can review the website and try out the projects and videos with your own students. Let me know if you would like to participate and I’ll have you sign the consent form (this is a requirement of my university’s IRB) and send you the assessment survey link, then you can report on how it goes, make suggestions, and send some student examples. If the students want recognition by name, they will need to sign consent forms along with their parents.
The benefits to your students is that they will learn the content of your class more thoroughly and deeply and learn valuable and marketable media design skills. It will be much more engaging and fun for them to create their own STEM media projects than it is to read a textbook and answer questions at the end of the chapter. Hopefully, they will be motivated by the project to learn the concepts on their own. They will be recognized for their creativity.
As a final project, students can prepare mini-lessons, presentations, activities, and handouts for a STEAM Showcase night at the end of the school year. Here, students are demonstrating how to make soap for their siblings and parents.
The benefits for you as a teacher will be to see alternatives for project-based learning, with flipped video instruction already provided so that you don’t have to build it all yourself. You choose the topics the student teams can choose from, provide them with examples and scaffolding for the content, and allow them to create something useful that you could show to future groups of students. You’ll also get to participate in advancing methods for teaching STEM courses. At the end, once the dissertation is successfully defended and edited, I will send you the final version which could be helpful to enhance your own teaching. While you are at it, try out the videos yourself and increase your own media design skills. I find them to be very useful as a teacher. One final benefit to you is the future possibility of grant money; I hope to extend this project beyond the dissertation and apply for grants with the NSF and others, which you would be the first in line to be part of. Those teachers who participate now will be the first I will consider for the grants. I wish that I could offer a stipend for your participation now, but that will come eventually.
Once again, the website is: https://science-creativity.com (remember that everything on the site is entirely free. You have my permission to use any idea or document posted there). I can be contacted at: elementsunearthed@gmail.com or by adding a comment to this post. I hope you choose to participate – it will be well worth the effort.
Thank you for reading this and for considering my invitation.
A 3D version of Benjamin Blooms taxonomy of thinking skills, starting with remembering facts at the bottom and building up through understanding, applying, analyzing, evaluating, and finally reaching creating. Most teachers spend so much time on the basic facts that they never get to the creating level, which is the most motivational and engaging level of the hierarchy.
Since my last post nine months ago I have made considerable progress toward my doctoral dissertation proposal, although not as much as I had planned. I made it through my written and oral comprehensive exams with flying colors, although I ran into a snag during the written exam time frame. I had my right knee replaced on Jan. 28 and was only three weeks post operation when the exam started. On the Monday of President’s Day (Feb. 18) I was walking into school with my cane and my wife helping (she had to drive me to school since it was my right leg). It was snowing lightly. I hit a slippery spot on the sidewalk and fell backward onto my right leg, badly tearing the muscles in my thigh as the leg hyperextended, and also causing a small fracture next to the implant on my femur. I was on crutches for two months and in a lot of pain during the exam period, but I still managed to do well. By June I was more or less back on my feet with a lot of physical therapy and even attended a Deeper Learning conference in St. Paul, MN. More on this later.
Apollo and the Muses, who communicate with one’s inner voice or Daimon to bring out one’s personal excellence, or Arete. David Norton’s 1976 book “Personal Destinies” outlines the Greek concept of the Daimon. As teachers, we should be helping students find their own excellences, then actualize them.
I was hoping to have my proposal done by end of June and fully approved by now, but some uncertainty about my future has delayed my work, especially the methodology section. I was teaching at New Haven School for 4.5 years and came to the realization that as long as I was teaching full time (and more, since I also taught summers) I would not get much done. I needed to free up time that I could dedicate to the work, so I started looking for another job or jobs. The position for Secondary State Science Specialist came open and I applied, but was not selected. Then a part-time teaching and consulting position opened up at a private school called Ivy Hall Academy which is less than two miles away from my house, greatly cutting down on my commute time and allowing me time in the mornings to write when I am most creative. I will tell you more about this position and how it change my planned methodology in another post soon, but for now I want to report on my progress.
This is me by the science lab building at Tioga High School where I first started teaching and where I developed my first successful project-based learning activity.
As soon as the summer term was completed at New Haven, which went well, I took off for Washington, DC literally the next day for the Teacher Innovator Institute at the National Air and Space Museum. We finally got to have our second in-person workshop after two years of COVID delays. I used the last of my NASM grant to purchase some video vodcasting equipment including a new microphone and a new cell phone and add-ons so that my video studio has shrunk immensely – I took it all with me and recorded several videos while in Washington, DC.
A screenshot of the HyperCard learning tour, made with HyperCard. This looks primitive compared with the sophisticated software we have now, but it was the first program to allow interactive programming with a Graphical User Interface. My students used this to create their organic molecule project.
These videos have two purposes: first, to teach browser-based software to students in a flipped video learning model so that they can use the software for self-expression, creativity, and content mastery for their science content projects without requiring the teachers to have to learn it or teach it. The second purpose is to explain the theoretical, conceptual, and pedagogical frameworks of my dissertation so that teachers can have the information they need to try out student-generated media design projects for content learning in science.
The first of these videos, an overview, is completed and posted to my YouTube channel here:
I have also completed and posted four videos on how to use Photopea, a browser-based image editing program that is very similar to Adobe Photoshop from several versions ago. The videos teach the basics of using Photopea’s tools to color a line-art image, to use the type tool, to use selection tools and layer masks to isolate an image, and how to undistort an image taken from an angle. I’ve also almost completed a first video on using Wick Editor, a vector-based animation program similar to an older version of Adobe Flash (now Animate).
“Gnothi seauton” or “Know theyself,” the great Greek moral imperative taught by Socrates. It is part of my conceptual framework for this dissertation to help students explore science using digital media creation as a way of knowing themselves, then becoming their best destinies by actualizing personal excellences.
I hadn’t known about either of these programs prior to summer starting, but I presented a workshop on using browser-based tools and the participants taught me about them, so I wound up learning more from them than they probably learned from me. These two software packages fill in gaps in my suite of browser-based programs. I have also filled in the final gap by seeing how I can create animation using Clara.io. Although still a long ways from proficient, I am getting there.
Let’s kick out Bloom’s taxonomy and start with creativity instead of facts. With a creative project motivating them, students will dig down to find the facts, applications, understandings, and analyses on their own. This is the core thesis of my dissertation.
Over the next two months I will add more videos, hopefully one every other day, in between writing my rationale, literature review, and methodology chapters. I hope to get back on track now that I have more time and am getting some traction.
Since my methodology plans are still evolving, I will talk about them in my next post. In the meantime, here is the script from this Overview video in case you want to read it.
A 3D model of Tyrian purple, the ancient Phoenician dye extracted from murex sea snails.
This blog is the script for a final video project for my Educational Technology class as a doctoral candidate at the University of Northern Colorado. The final video can be viewed at: https://youtu.be/jimJqjsetNM.
Introduction
3D modeling and printing are taking the Do-it-Yourself world by storm as makerspaces spring up in many schools. Considered to be an innovative way of learning next-generation skills, 3D modeling and printing are fun hobbies, but are they effective educational tools? Is 3D technology worth the cost and the time it takes to learn? Will a 3D printer merely sit in the corner and collect dust, or will it be frequently and effectively used to teach class concepts? Is 3D printing just another new toy or is it a pedagogically sound method for deep learning?
My name is David Black and I have taught media design and science classes for 30 years at the secondary level. I have developed multi-disciplinary projects that combine science with 3D modeling, but I lacked a theoretical framework. This video explores the history and innovation of 3D modeling and printing within a theoretical framework of constructivism and a project-based learning pedagogy to effectively teach science concepts. We will look at the diffusion of this new technology, how it works as a medium to convey learning, the basic steps and history of producing 3D models and prints, and provide examples of 3D technology use in science classrooms.
A photo gallery interface for the AM to FM project. Designed as a scrapbook, the animation zoomed into the pages and each item became a category for different images that could be viewed interactively. The entire interface was programmed in Macromedia Director.
A Theoretical Framework
When students create their own science educational content, or learner-generated digital media (LGDM), they achieve a deeper understanding of the science. Researchers have found that students not only learn science content well through media creation, they also develop marketable media design and 21st century skills of collaboration, communication, critical thinking, and creativity (Hoban, Nielsen, & Shepherd, 2013; Orus, et al., 2016; Reyna, 2021).
Reyna and Meier (2018) conducted a literature review of studies that use learner-generated digital media to teach science concepts. They concluded that previous studies were limited because they lacked theoretical frameworks or sound pedagogy. These researchers assumed that the participating students already knew how to use media design technology tools since they were so-called “digital natives.” According to Reyna and Meier, just because students grow up using computers and digital devices doesn’t mean they have ever developed media creation skills such as video editing or 3D modeling. In a follow up study, Reyna scaffolded media design skills training through smaller partial projects embedded in a theoretical framework of constructivism and a project-based learning (Reyna & Meier, 2018; Reyna, 2021). As an example, a teacher might have a student team create a short Public Service Announcement (PSA) as a practice project to gain skills in using cameras, lighting, and microphones and to learn the entire video creation process or workflow before tackling the final project.
A final (?) version of my model of constructivism, with students as explorers, teachers, content creators, makers, designers, coders, engineers, scientists, critical thinkers, collaborators, communicators, and problem-solvers. My model suggests that students need to move from being passive learners to becoming active and creative learners.
Constructivist theory proposes that learning is a socially mediated cognitive process whereby learners experience a subject and construct their own meanings for it. They create mind maps or schema that tie previous learning, emotions, and social reinforcement together with their new knowledge. Schema develop through the processes of assimilation, where the new knowledge is placed into existing categories, and accommodation, where the schema are revised to acknowledge divergent information. Constructivism acknowledges that the learner is at the center of the process.
3D modeling is inherently a constructivist activity, as creating the models literally requires constructing one polygon or primitive at a time. That the model exists only in virtual space does not mean it is any less a constructed medium. By 3D printing the virtual model, the printer builds an actual model one layer at a time. If properly planned and conceived, students can also construct science knowledge through 3D modeling and animation. Instead of consuming scientific content, students become producers of content. They become the experts and the teachers, and learning occurs as a natural byproduct of the process.
Lev Vygotsky was a pioneer of constructivist theory. He also developed the concept of the Zone of Proximal Development shown in the image at right.
Constructivist theory can be traced all the way back to Socrates, who said, “Education is the kindling of a flame, not the filling of a vessel.” John Dewey proposed that students learn by doing, that is, in an active, creative process where they construct their own meanings through discovery with the teacher as a guide on the side, not the sage on the stage (Brau, 2020). It is the opposite of objectivism, where teachers are the center of the process and must somehow pour their knowledge into their students’ brains. Lev Vygotsky added that learning is socially mediated through interpersonal interactions, language, and culture and that students learn within their zone of proximal development; as students learn more, what they can do with help (the ZPD) expands (Brau, 2020). Jean Piaget developed cognitive constructivism where children develop naturally through various stages from concrete to abstract, with each stage of cognitive growth affecting the construction of learning (Brau, 2020). Seymour Papert developed his constructionist theory where students construct learning through making. He saw computers as a tool for learning and invention where students learn through doing and experimentation, including the use of computer programming and media design. Today’s makerspaces are based on his theories.
The characteristics of gold-standard project-based learning, as developed by PBLworks, formerly the Buck Institute for Education.
Project-Based Learning Pedagogy
Project-based learning is a natural fit as a pedagogy for media design creation. It usually occurs in teams and the conclusion is a public product. According to PBLworks, formerly the Buck Institute for Education, gold-standard PBL includes seven characteristics (https://www.pblworks.org/):
(1) A challenging, meaningful question or problem to address; (2) Student inquiry using authentic data or sources where they discover the learning for themselves as a natural outgrowth of the initial question; (3) Student voice and choice in the type of project chosen and how it will be accomplished; (4) Collaboration and communication as students actively participate and work through issues creatively; (5) Frequent opportunities for critique and formative feedback, with revision; (6) A public presentation of the final product; and (7) Student reflection on what they have accomplished and learned.
Each project ends with a presentation before a public audience, usually at some type of back-to-school night with feedback and suggestions from the audience. Knowing that their work will have a public audience motivates students to deliver a high quality product and helps to actively engage them in the process of learning. As John Spencer, a well-known PBL guru, explains:
Students who engage in authentic project-based learning have increased agency and ownership. They’re often more excited and engaged in their learning. When this happens, they retain the information for a longer amount of time while also learning vital technology skills like digital citizenship and media literacy. However, they also learn vital soft skills, such as collaboration, communication, curation, and problem-solving. As they work through iterations and revise their work, they develop a growth mindset. Often, they learn how to seek out constructive feedback. This connection to the community can help them develop empathy (Spencer, 2021).
Marshall McLuhan invented the concept of the global village and was famous for saying that “the medium is the message.”
The Message and the Medium
In the early 1960s, Marshall McLuhan created the concept of the global village, which predicting the interconnectivity of the World Wide Web, and famously stated that “the medium is the message.” Such technologies as print and movable type have a profound effect on the human psyche and cultural understandings. Humans re-invent themselves and how they communicate with the invention of each new medium (McLuhan, 1962). Richard Clark argued conversely in the 1990s that the medium of a message was unimportant to the learning process and that cost-effectiveness was the only consideration in choosing one medium over another in instructional design (Clark, 1994). If more than one form of media can be used for a particular learning task, then they are replaceable with each other and the medium does not influence the message. Robert Kozma (1994) takes a middle ground, similar to Kalantzis and Cope (2012), where the medium conveys or mediates the message, influencing the message because of the medium’s unique affordances (advantages, disadvantages, limitations, conventions, etc.). Learning from a video with its linear format is qualitatively different than learning from interactive media such a website or a CD-ROM-based multimedia title. Learning from printed text alone is different than learning from text with images, or moving text and images in the form of a video.
A simple chart can show a great deal of data, such as this one showing the growth of STEM related jobs from 2012 to 2020.
3D modeling and animation has its own affordances that allow it to present a unique learning experience unlike other media. It can visualize large datasets, allowing patterns and inter-relations between data to be understood that purely numeric data tables cannot. A chart of the stock market can lay out several indices together for comparison over time, representing over 80,000 different data points in one infographic, which would be impossible to interpret as raw data but is easily accessible visually (Krum, 2013). If the data represents values in a two-dimensional grid, then a 3D graph is the best way to visualize and understand the data, as in the example of the voltage data I will talk about later. The medium chosen to convey learning is therefore an essential part of the learning experience. This agrees most closely with Kozma’s middle ground stand on the Clark-McLuhan continuum (Kozma, 1994).
With this in mind, let us now turn to an examination of the history of 3D modeling and printing as an innovative technology and how it can be used in science classrooms.
The movie Tron by Disney broke new ground by including scenes that were completely made of 3D animations.
History of 3D Modeling
The first experiments with 3D computer modeling began in the 1970s using mainframe computers, the only ones that could handle the millions of calculations necessary. A group at the University of Utah’s computer lab led by Ed Catmull developed a process to build smoothly polygonal models with accurate reflections called raytracing. As microprocessors improved and computer speeds and power increased, the first entertainment applications appeared. By the early 1980s movie studios were experimenting with computer graphic inserts for special effects. Disney’s Tron brought complete scenes designed and rendered in 3D, followed by even more photorealistic effects in The Last Starfighter with complete Codon Armadas including spaceships, planets, and asteroids.
A still frame from Robert Abel & Associates’ “sexy robot” commercial during the 1984 Super Bowl. It was an advertisement for canned food . . . By the way, this was the same Super Bowl where the infamous “Big Brother” commercial introduced the Apple Macintosh computer.
Meanwhile, some of the artists that started with Tron founded their own studios, including Robert Abel and Associates, who created a number of iconic and Clio Award-winning TV commercials including the famous 1984 Super Bowl sexy robot commercial that introduced innovative motion capture technology (Art of Computer Animation, n.d.). Lucas Films and Industrial Light and Magic experimented with completely 3D animated short movies. When Steve Jobs left Apple Computers and invested in the studio, they became Pixar Animation Studios and created the groundbreaking Luxo, Jr. animation. Jobs encouraged John Lasseter to create a full-length 3D movie; the result was Toy Story in 1995 and the rest is history.
History of 3D Printing
In 1981, Hideo Kodama of Nagoya Municipal Industrial Research Institute published a description of a liquid resin-based photopolymer that becomes solid by hardening each layer with focused ultraviolet light, but he did not file a patent (Goldberg, 2018). In 1984, Charles Hull invented a similar system called a stereolithography apparatus (SLA). Refinements continued, including building up layers by sending UV light in cross-sections. In 1992, the first Selective Laser Sintering (SLS) device was invented, which uses a laser beam to sinter or weld together a powder into layers.
The original MakerBot Thing-o-Matic, one of the first commercial 3D printers for home or school use.
Although both of these techniques are still used in high-end industry, the type of 3D printing most familiar in schools is the Fused Deposition Modeling (FDM) technique where a plastic filament on a spool is fed into the printer by a motor, melted by a heated nozzle, and deposited in layers continuously to make cross-sections (3Dsourced.com, 2019). For each layer, the build plate is moved down. It is also called Fused Filament Fabrication. This type of printing was first developed in the late 1980s by F. Scott Crump who went on to found Stratisys in 1990 as the first company to build FDM printers and plastic filament.
Altogether, these technologies are referred to as additive manufacturing because the models are built up, or added, layer by layer. By comparison, a 3D milling machine or CNC router uses subtractive manufacturing because it starts with a larger blank and carves away parts.
By 2009, when the first FDM patents expired, new companies entered the market with lower cost desktop 3D printing machines such as MakerBot, FlashForge, Prusa, Ultimaker, Dremmel, and others. Various types of plastic filament became available, including Polylactic Acid (PLA), Acrylonitrile Butadiene Styrene (ABS), and even flexible nylon filaments, fused metallic filaments, and water dissolvable filaments for printing supports. Filaments come in many colors and finishes, including filaments that change color as they spool into the printer. A new development is 3D printing in full color, however these printers cost $3500 or more. To print in color, 4-process color (CMYK) dyes are added to a base color filament as it extrudes.
The 3D process begins with primitive objects such as cylinders and spheres assembled in 3-dimensional space, as shown here in TinkerCAD. Boolean commands can use one object to cut holes in other objects.
The Process: From Model to Print
Many 3D models are available for free on Thingiverse (https://www.thingiverse.com/) and other sites, but ultimately the fun of 3D modeling is to do it yourself. Complicated by working in three-dimensional space on a two-dimensional computer screen, in 3D modeling primitive objects such as spheres, cubes, and cylinders are given textures and composed into scenes. They can be combined to add, cut, or intersect other objects using Boolean commands. Other objects are created using a polygonal mesh like chicken wire. Meshes act as three-dimensional vectors and can be modeled from equations and deformed using envelopes. Grayscale images can be converted into terrain objects with light areas as mountains and dark areas as valleys.
Primitive objects are shown as a wireframe model, sized and moved into a complete composition such as this Greek temple.
To create complete scenes, the objects are aligned and composed, the camera positioned, lighting and atmospherics provided along with other procedural effects, then rendered out through ray tracing as if the scene were being photographed by bouncing a beam of light out from the camera. To animate objects, a timeline is added and the objects are given hierarchical links from parent to child, a process called forward kinematics. The pieces can be moved, rotated, and otherwise changed over time by adding keyframes on the timeline. The computer then renders out an animation frame by frame, creating all the in-between frames itself. Complex characters can be rigged with bones and joints or morph targets to deform the polygonal structure over time.
Learning 3D animation is traditionally a difficult and time-consuming process, with each step from modeling to rigging to texturing to animating done by different teams of specialists for a major CGI-based motion picture. Teaching students how to do all of these steps competently can take several weeks of class time, if not years, which few teachers or subjects can afford to do. However, new tools are simplifying the process.
This model of a dinosaur has had bones and joints added, which can be rotated and animated to distort the wireframe model. This model can walk, thrash its tail, turn its neck and head, and eat unsuspecting time travelers.
TinkerCAD is a browser-based modeling tool that has a range of primitive objects and simple textures that can be combined into more complex models, which can then be exported and printed with a 3D printer. It is not set up to do complex polygonal modeling or animation, but is a good introduction to working in three-dimensional space. SculptGL is another browser-based modeling tool. It does create complex meshes, but instead of subdividing polygons one at a time, the tool works as a ball of virtual clay that can be pushed and pulled. The model can be colored with paintbrushes and the final models and textures exported as .OBJ files for use in more sophisticated animation software. I have not yet found a browser-based tool that can assemble complete scenes, add keyframes, rig bones and morph targets, and render out animations. There are full-scale downloadable programs available for free or as educational licenses, including Blender and Autodesk Maya. Many tutorials exist online for how to use these programs.
Once a 3D model is completed it is saved as an .OBJ or .STL file, then imported into a 3D printer’s slicing software which provides the G-code directions for moving the print nozzle across the build plane while extruding the melted filament. Where overhangs occur, supports must be built in (which can be done automatically or by hand). Once the model begins to print, it can take several hours to complete a moderately large print. The print must then be removed from the build plate and the raft and supports snapped off and sanded.
The benzene molecule, shown above in TinkerCAD, now printing out on my 3D printer.
Subject Integration and Adoption of 3D Modeling and Printing in Schools
Reyna’s 2018 literature review concluded that most previous research in learner-generated digital media lacks theoretical frameworks or solid pedagogy. This agrees with the TPACK model of technology integration (Rodgers, 2018), where the affordances and workflow of the technology, the appropriate pedagogy for teaching, and how students learn the content knowledge through the technology or medium must be considered to successfully integrate technology into the classroom. By using a constructivist/constructionist framework and the pedagogy of project-based learning and by training students how to create the media as they develop their own science-related content, we are following the TPACK model.
For 3D modeling, we cannot assume that even digital natives know how to use the conventions of modeling in three-dimensional space on a two-dimensional surface. It is a challenging innovation to learn, and many problems can occur in the modeling and printing process. Students do not naturally know how to subdivide polygons, use Boolean commands to cut holes, create procedural UV texture maps, create the lighting and atmospherics needed for a scene, or set up a 3D object for a successful print. This is highly technical work, and requires practice and scaffolding with simpler projects before large-scale media projects can be undertaken. Time must be set aside for training and practice either in class or using a flipped classroom model. The purpose of the 3D modeling – to learn a science concept – must be carefully considered and needs to be worth the time and effort and cannot be adequately taught through any other medium.
For adopting new technology, there is always a balance of risk and certainty. Some people and organizations are willing to accept risk to stay ahead of the curve, others, such as most schools, are risk-averse and will not adopt new technology until it has been widely accepted. This puts them behind the curve as laggards or late adopters.
Because of these challenges, 3D modeling and printing have been slow technologies to truly take hold in schools. Although 3D printers are popular now, most schools and teachers have little idea how to use them effectively. If we use Everett Roger’s model of technology adoption (Legris, Ingham, & Collerette, 2003), schools are usually in the late adopter or laggard phase for adopting 3D technologies. They do not want to waste the time or dollars to invest in a 3D printer just because it is the newest shiny thing. Some individual teachers may be ahead of the curve and ready to adopt, but they will need to learn how to use 3D technologies on their own; there is little to no professional development training available through school districts unless provided by teacher associations.
Using 3D Modeling and Printing in Science Classes
Because of the time and challenge required to do 3D modeling, printing, and animation there should be a compelling reason for using this medium in a science classroom; the 3D model or animation must convey a scientific concept more effectively than other forms of media. Some possible applications include modeling and animating scientific processes or principles, modeling complex authentic data where it cannot be visualized in any other way, and creating accurate models of science-related objects that can be examined.
To demonstrate how data can be visualized in 3D, my chemistry students this week studied electrochemistry by comparing the voltages of different combinations of metal electrodes, recording the data in a two-dimensional grid separated by commas. We used a free program from the National Institutes of Health called ImageJ to convert the raw numbers into a grayscale image, with higher values represented as lighter shades of gray and lower numbers as darker shades. This image can be converted into a 3D object by Adobe Photoshop. Finally, an altitude sensitive texture is applied and text added and the scene rendered as an image or animation. Patterns in the data that are difficult to notice as raw numbers become readily apparent as a visual image. Students can easily see that magnesium is the most reactive metal and has the highest voltages. 3D visualization has great advantages over trying to understand a grid of numbers.
The SOFIA airplane, as modeled by my 6th grade Creative Computing Class.
As an example of building models to illustrate concepts and objects, in 2004, my media design students began work on a video documentary for KUED, Salt Lake City’s PBS station, on the history of AM radio in Utah. They created animations of transistor radios as part of the title sequences of each segment based on photographs of actual radios. They modeled interfaces for an interactive DVD of our final video and for an accompanying CD-ROM programmed with Macromedia Director. Students in my 6th grade Creative Computing class each modeled a part of the SOFIA aircraft, or Stratospheric Observatory For Infrared Astronomy, and my high school students assembled, textured, and animated the final model. It was used to demonstrate how the telescope works for a video we made about my flight on SOFIA in 2013.
A diner modeled for the AM to FM project. The animation zoomed in on the jukebox, which acted as an interface for the history of AM radio.
My media design students created models and animations of Mars space probes for an interactive CD-ROM on Mars Exploration which they presented at a student symposium at Arizona State University. They learned how to access and model 3D terrain data of Mars from the MOLA instrument on the Mars Global Surveyor probe to analyze possible landing sites on Mars which we then printed out using color-changing PLA filament. Other students collaborated with the NASA Lunar Science Institute to study selenographic features and create a 3D animation of the Big Impact Theory of lunar formation.
My biology students use TinkerCAD or SculptGL to model and print viruses for a unit on microbiology. To visualize the periodic properties of the elements, my chemistry students create a grid of data points and convert it to 3D models using ImageJ and Photoshop. My eighth grade physical science students created a 3D animated video with greenscreen narration showing a possible habitat that astronauts can live in on their way to Mars. To represent land forms on Earth, my students access EarthExplorer by the United States Geological Survey (https://earthexplorer.usgs.gov/), which allows grayscale heightmaps from the Shuttle Radar Topography Mission to be downloaded and converted into highly accurate 3D models.
A viral mini-museum. My biology students recently chose a virus, then modeled and printed it in 3D and created a display poster on its infection vector, parts, symptoms, and treatment.
All of these examples took time to learn and execute, so we needed to have compelling reasons for using 3D modeling that were worth the opportunity cost of time and the steep learning curve. In each case, using 3D enabled us to present authentic data more completely and helped us visualize important scientific concepts more effectively than other types of media.
Using 3D modeling has benefits for students. Visualization of big data sets has become a growth career, as has 3D printing of everything from prosthetic limbs to cars to rocket parts. It allows for rapid prototyping and has become a necessary component for engineers. My students have used these techniques to create visuals for winning science fair projects, such as this one that determined whether surface features on Mercury were caused by impacts or volcanism. As part of the Mars Exploration Student Data Team program, my media design students downloaded Mars dust opacity data from December 2003 to January 2004 and converted it into animations showing how a dust storm arose over the Tharsis Plateau, blew across the equator, and spread globally just as the Mars Exploration Rovers were approaching. My current physics students are using altitude data from the Lunar Reconnaissance Orbiter’s LOLA instrument, turning grayscale heightmaps of the Moon into 3D models, then mapping spectroscopic data from Moon Mineralogical Mapper instrument to show where different commercially viable minerals might be located according to surface landmarks as shown here (Fa & Jin, 2007). They are creating a poster of their results for the ExMASS program to compete with students from nine other schools.
The alchemist in his lab. As part of a project to teach students chemistry lab equipment, I had them create their own versions of florence flasks, and other equipment, new and ancient, as well as models of various minerals. We put these together into this scene for fun.
Conclusion
In this paper I have described many 3D modeling and animation projects created by my students. They have learned many positive things about STEAM careers and processes along the way, but of most importance, they learned science concepts more deeply through 3D modeling than through any other method. Although 3D modeling can be rewarding in its own right, it has additional benefits for students including teaching marketable skills and providing them with opportunities to collaborate, communicate, solve problems, and enhance their creativity. Given our limited time as teachers and the high opportunity cost, we have to be very sure that 3D modeling also enhances science learning in ways that other options can’t achieve. In my own experience, the projects are well worth their time. Other teachers will have to look at their own situations and determine whether or not it is worth investing the time to learn and use 3D modeling in their own science classrooms.
Thanks for reading this. I hope it provided some ideas into how and why to use 3D modeling and printing in your science classroom.
Hoban, G., Nielsen, W., & Shepherd, A. (2013). Explaining and communicating science using student- created blended media. Teaching Science, 59(1), 33-35.
Kalantzis, M. & Cope, B. (2012). Literacies. Cambridge University Press: New York, NY
Kozma, R. B. (1994), The Influence of Media on Learning: The Debate Continues, School Library Media Research, Volume 22, Number 4, Summer 1994.
Krum, R. (2013). Infographics: Effective communication with data visualization and design. John Wiley & Sons: Hoboken, NJ.
Legris, P., Ingham, J. & Collerette, P. (2003). Why do people use information technology? A critical review of the technology acceptance model. Information & Management, 40 (2003), 191-24.
McLuhan, M. (1962). The Gutenberg galaxy: The making of typographic man. University of Toronto Press: Toronto, Canada.
Orus, et al. (2016). The effects of learner-generated videos for YouTube on learning outcomes and satisfaction. Computers & Education, 95 (2016), 254-269.
Reyna, J. (2021). Digital media assignments in undergraduate science education: An evidence-based approach. Research in Learning Technology, 29 (2021), 1-19.
Reyna, J. & Meier, P. (2018). Learner-generated digital media (LGDM) as an assessment tool in tertiary science education: A review of literature. IAFOR Journal of Education, 6(3), 93-109.
A still from an animation showing a dust storm on Mars forming above the Tharsis Plateau in December, 2003 just as the Mars Exploration Rovers were approaching. The data from for this animation was downloaded from the atmosphere opacity measurements of the Mars Global Surveyor space probe.
I found this quote on a TeachThought website. It captures the spontaneity, engagement, and creativity of extraordinary education.
Several years ago I attended the closing banquet of our state science teacher conference and overheard two teachers comparing notes in a friendly competition. They had apparently gone through the same teacher development program together. One bragged that 86% of his students had passed the state science standards test at the end of the year. The other claimed that his students had a 93% pass rate, with the implication that having more students pass the test meant that he was the better teacher.
They were both new teachers and I can forgive them their misunderstanding. I felt like jumping into the conversation to remind them that having most of their students pass the standards aligned test only proved that they were standard teachers, when what our children deserve is extraordinary teachers. Unfortunately, there is no state test for extraordinary education.
Is our public education system ailing and in need of reform? Yes, in that it insists on treating each child like a cookie-cutter clone using a one-size-fits-all set of standards.
Would any of us recognize extraordinary education if we saw it? Can we even agree on the characteristics of extraordinary education? For my own definition, I say that students must be deeply engaged in the learning process, with memorable learning opportunities that invite active participation and critical thinking, creative problem solving, collaboration, and communication. In the end, education should have a lasting impact on their lives. And it should be fun, meaningful, and inherently interesting for them!
I learned during my third year of teaching that Project-Based Learning (PBL) can be a powerful route to extraordinary education. I’m not trying to say that I am an extraordinary educator, but I have tried with some success to bring meaningful opportunities to my students. To do this, I have had to look at my course standards in a different way.
There is a great need to change how we do education, but the forces that resist changes are the teachers and administrators and communities that need them the most. The bureaucracy of our school system is the very thing that holds us back. As one individual teacher, I have to accept that I may not be able to change everything, but I can at least change the way I do things.
The push for standards in education is simple to understand. We don’t want students with gaps in their understanding of the world, nor do we want teachers who are incapable of bridging those gaps. Society needs well-educated people in order for them to make informed decisions. Educational standards were developed to achieve a minimum level of essential literacy and knowledge across all students.
This brings up a deeper question: what constitutes essential knowledge? As one of my college professors put it, is there any knowledge (or skills) that a person must have? Every subject expert has a list of what he or she considers to be the essential concepts of the subject, and the list tends to multiply in any committee put together to consider new educational standards. Heaven forbid that even one math student would not understand the quadratic equation. The world might very well collapse if that happened! So we have to create a standard to address that concern, even if only a minority of teachers hold this opinion.
As a result of this drive toward comprehensiveness, all states have far too many educational standards than are truly necessary for each discipline. In chemistry, is it critically important for students to understand Le Chatelier’s Principle of Reaction Equilibrium? You’ll find it in all the state standards. But is this really necessary for what the student and society need? If taught well, it might help them understand some aspects of everyday chemistry, such as why the Haber process works to produce ammonia or why shaking a warm soda bottle causes the carbon dioxide to spray out. But can they become productive citizens without knowing this? Probably. Why force them to learn what they can easily live without? This has bothered me for years.
All the shareholders in the education system (parents, children, teachers, administrators, state officials, communities) point the fingers of blame at the others and expect them to be innovative, but are unwilling to change their own viewpoint of what education should be.
What I finally recognized is that standards are meant as a guide to the lowest acceptable level of understanding in a class, not as the final target. Anyone who teaches to the standards alone (especially to the end of year test) will succeed in creating a standard class, an average class, but not an extraordinary one. If we want all of our students to graduate as identical cookie-cutter clones of some “standard” citizen, then standards-based education and the factory model of education will suffice. But if I want students who are strong individuals, creative problem solvers, and innovators, I must go beyond the standards and teach for excellence and quality, not mediocrity. The standards are supposed to be a means to that end, not an end in themselves.
Deeper into Theory
Many of our vaunted education theories support this reductionist view of a subject. For example, Bloom’s Taxonomy is widely used and quoted in educational circles. It poses that there is a hierarchy of understanding and learning; that remembering facts and content details comes first as the foundation of all learning and then leads to understanding, then to application, then analysis, then evaluation, and finally to creativity. The implication is that we need to move our educational activities toward creativity and higher-order thinking skills. The problem with this pedagogical model is that too many teachers never get to the higher-order levels; they get stuck on remembering and regurgitating facts with little real understanding and even less application, analysis, evaluation, or creativity.
Bloom’s Taxonomy, often quoted but poorly understood. Instead of starting at the lowest level (remembering facts) and working our way up, we should start with creativity and work down to facts. Think of this pyramid as flipped upside down, or of creativity being the ground level but the other levels being roots underneath, reaching down to the facts. Students will learn the facts they need if they start with the requirement to create.
So many educational theorists are beginning to propose that Bloom’s Taxonomy should be stood on its head. Creativity should come first, not last. As students create, they can be taught to evaluate the effectiveness and even the aesthetics of their work (more on this in my next post). To do this, they will need to learn to analyze their work in the same way that engineers analyze the effectiveness of their prototypes and models. To analyze the prototype, they have to build it first, which involves the application and understanding of scientific theory. To gain that understanding, students will have to look up and remember the scientific facts and theories involved. In other words, teaching creativity first and insisting on quality work provides the impetus and motivation for students to find the information they need, understand and apply that information well enough to build prototypes, then analyze and evaluate the effectiveness of that prototype against specifications. Students will look up what they need to know because it is necessary for them to solve the problems that occur as they create, build, test, and analyze prototypes. We call this the engineering or design process.
This is where Project-Based Learning (PBL) comes in. Only through extended projects can students have the time, independence, and creativity to deeply explore and understand a subject by following their own curiosity. Projects are the only way to ensure that the intent for having standards is met and that we reach extraordinary education. This happens through what I call “standards overreach.”
It doesn’t make sense to raise standards while lowering the resources available to schools to reach those standards. There’s nothing quite like an unfunded mandate.
Standards Overreach:
Let me start with an example. During the first week in my first year biology classes, I introduced the concept of the characteristics of life and the abiotic factors necessary to sustain it. This is a common biology standard in most states. Now if I were a standards-obsessed teacher, I would teach to this point as my target for student understanding. I might put up a list of terms and have students write down definitions in the hope that they will understand them. This is a low-level activity without much student mental engagement. They’ll forget these definitions as soon as the test is over, if they retain them even that long. I might write the terms on a worksheet and have them look up definitions. Slightly better but still boring for everyone concerned, although it does meet the standard. I could show them a video about it and have them take notes. A bit better but still teacher-centered and passive for students. I could have students brainstorm the characteristics of life, then ask them to provide examples, or do a lab activity, etc. Getting better but still not entirely effective.
What all of these activities have in common is that they are targeted specifically to this one standard alone, and on the end of unit test, only some of the students will show understanding (or at least regurgitation). I have only partially succeeded.
What kind of life forms could exist on an exoplanet or exomoon, such as shown here? As students ask and answer such questions, they come to understand the characteristics of life and the abiotic factors that support it.
Or I could do this in a completely different way through a student-centered, engaging project. I could have them go beyond the standard (overreach it) knowing that at minimum they will understand the standard and possibly much more. So I use my passion for astrobiology and experience conducting field research studies of extremophiles in the Mojave Desert to create a project for my students. We’ll collect halophilic bacteria from the Great Salt Lake and let them grow in a Winogradsky column then analyze the pink floaters under a microscope. We’ll extend this to research on other extremophiles and use real examples of how they are adapted to their environments, with students developing posters or presentations or other summary products of their choice. Do all forms of life on Earth need oxygen, or even air? No – there are lithoautotrophs that live in rocks and get carbon dioxide from minerals, not air. Does all life require light and plants at the bottom of the food chain? No. Look at the chemosynthetic bacteria that are at the bottom of the food chain near deep ocean hydrothermal vents.
How can one test measure the quality or extent of knowledge for every student, even if the tests are adaptive? How can a single measure determine the effectiveness of every teacher?
Then they’ll look at potentially habitable exoplanets (and learn a bit of astronomy and physics on the way) and choose an actual planet, then develop a drawing or clay model of an alien life form they envision, complete with descriptions of how it is able to survive in that environment, the abiotic factors that exist there, and the ecosystem it is part of. How does it eat or get energy? How does it move around, reproduce, adapt to changes, grow and develop, etc.? How would we detect it and know that it is alive?
As a capstone event or product, they produce posters or other products on their research into and present them at a science showcase night, just as if they were professional scientists at a conference. At the end of the evening we can watch and analyze the realism of the movie “The Andromeda Strain.” In the process of thinking all of this through, the students will deeply understand the characteristics and factors necessary for life. They will all easily meet the standard because we shot way beyond the standard.
With high stakes testing supposedly measuring the effectiveness of teachers and schools based on how students take the test, its no wonder teachers are teaching to the test. Their jobs are on the line. Yeah. No pressure . . .
You will argue that this type of project will take days to complete, when you can cover that standard in just one day. Maybe so, but we haven’t just covered that one standard. Without my having to lecture them, my students have learned about evolution and classification, microbiology and using a microscope, physics and astronomy, and even developed artistic skills. They have learned about scientific communication, which is part of one dimension of the Next Generation Science Standards. We have therefore touched on about ten other standards from multiple disciplines in the five days of this project. If I tried to teach each one of those standards one at a time, it would take far longer than our project did. My students’ understanding will be deeper and more permanent than any lower-level unengaging assignments can achieve.
No Child Left Untested . . . How can teachers possibly meet education standards when they have to spend all of their teaching time administrating tests to measure how well they are meeting education standards?
Meeting Standards through PBL:
Here is another example that we completed just two weeks ago. We had moved into our units on human anatomy in my biology classes. I wanted students to learn the function of muscles and bones and how they provide support and movement. Now the “standard” way of doing this would be to provide diagrams of the skeleton and muscles and have students label all the names of all the part. Tibia. Fibula. Patella. Femur. Pelvis. Clavicle. Sternum. Latisimus Dorsi, Deltoid, etc, etc, ad nauseum. And many teachers leave it at that, with no understanding of how it all works together. Some will go on to teach (or more likely have the students read in the textbook) how flexor and extensor muscles must be paired, how they are anchored to the fixed bone with tendons reaching across the joint to the mobile bone. But only a few teachers will have students apply this knowledge, or design experiments to collect data that can be analyzed, or have students think critically to evaluate the quality of their knowledge, or do something creative with it.
So I turned the process on its head. I did draw a diagram of the elbow joint on my whiteboard as an example, showing and labeling the parts of everything. I explained how the bicep and tricep work in tandem to flex and extend the joint, and how ligaments, cartilage, and all the other parts hold it all together and allow it to move. That was all I did, and I didn’t really need to do that. It was just a quick 15-minute introduction. Then I gave them a challenge: using the materials I provided, they had to build a mechanical arm that would duplicate the movement of the elbow joint. As teams, they would need to use my diagram as a guide, look up whatever other information they needed, then design and build their own arm. It had to meet certain specifications: It had to have the same range of motion as a regular arm, not bending too far or extending too far (it could not be double-jointed). It had to have a way of both flexing and extending the forearm. And that was it.
I provided lots of cardboard, wooden skewers, beads, string, hot glue guns and glue sticks, etc. I divided the students into three-person teams, and required them to show me a sketch of their plan before they were allowed to collect materials. Then they set to work. In every case, their first attempts didn’t work very well. Some of the students wanted to quit at that point, saying that this task was “impossible,” but I provided encouragement and hinted that they should look more closely at how the actual human arm does this; obviously, it isn’t impossible if our arms can do this. They tore parts off their models, reglued, tried again, and eventually all the teams succeeded. They were all different, but all mimicked the construction of the human arm in important ways.
Standards imply that every student is the same, and that one size fits all in education.
With that project done, the same teams went on to create working models of the human hand. These models had to be able to create several gestures of my choice to show control of individual fingers, be able to pick up and move small objects to show dexterity, and be able to grasp and lift a cup full of water (added slowly) to demonstrate strength. This was a much harder task, and the same students again tried to give up. They wanted me to provide step-by-step instructions, but I refused. I repeated that there were no right answers, no one right way to do this. Some had to redesign from scratch, which was frustrating, but they overcame this frustration and eventually all succeeded.
It took seven class periods to accomplish these two projects. I could have easily taught the basic concepts about the arm and hand in a day using traditional activities, and they might have remembered the details long enough to pass the unit test (with some repetition and review). This would have sufficed for the requirements of the state standards. But it doesn’t meet my own standards, which are much higher. And it meets those other two pesky dimensions of the Next Generation Science Standards: Scientific and Engineering Practices (engineering design process) and Cross-Cutting Concepts (modeling). We’ll look at teaching through building models in a future post.
So how did they do upon assessment? On the unit test, the students who completed these models showed a thorough understanding of how the arm and the hand work; not just the parts, but how they are shaped, how they operate and fit together, and even the importance of having opposable thumbs. Those teams that didn’t have effective thumbs had great difficulty lifting their cup of water.
All students received 100% on the essay questions related to these projects and all passed the test. They could repeat the facts, and they thoroughly understood the concepts. They will remember their learning far longer than traditional methods because they have applied their knowledge. They have analyzed problems that occurred with their models and evaluated their effectiveness against the specifications. They have revised, fixed, redesigned, and in short, they have created. They fulfilled all of the requirements for the state and the three dimensions of the NGSS, as well as all of Bloom’s levels. In addition, they learned resilience, teamwork, collaboration, and communication skills. Not all of the teams got along perfectly, and I had to work with them on how to communicate effectively to listen to all ideas and make a solid group decision instead of one person trying to run the show. Was it worth the extra time? Absolutely!
There are a lot of education buzzwords out there, a veritable Tower of Educational Babel that obscures instead of clarifying the problems of education and the need for reform.
Conclusions:
When administrators and parents and everyone else gets bent out of shape about standards and you feel a pressure to “teach to the test,” just remember that state education standards are the minimum expectation, and we should hope that you are a better teacher than that. Yes, you must meet the standards. You can get fired if you don’t. But state standards are not the end we are after, only one means to the better end of extraordinary education. So overreach the expectations forced upon you by your state, principle, or community and dare to teach to a higher standard. Mentor your students to deeper understanding, higher engagement, and further creativity. Dare to be extraordinary!
Starting out at a new school, I decided it was time to re-examine my personal philosophy of teaching and education.
Over the last several years, as I have been reporting my experiences in these blogs, I have paid attention to how effective I am as a teacher and what sorts of activities and lessons seem to resonate with students and provide memorable learning opportunities for them. From this I have developed my own model of education, which I have shared at conferences and workshop sessions. I will be starting a Doctorate of Education (EdD) program this fall at the University of Northern Colorado, specializing in Innovation and Education Reform. This will be a means for backing my theories up with empirical research, not just the anecdotal evidence I have now. I already know what I want to do for my doctoral thesis.
This is my revised model so far, with examples from my teaching experiences:
This is my revised model of education, what could also be called the Levels of Engagement model. The purpose of education, in my experience, is to move students from ignorance (no knowledge of a subject) through passive learning (sitting and watching or listening) to active learning (hands-on, experiential) and beyond to creative learning (students as explorers, teachers, and innovators). Students move from being consumers of educational content to interacting with content to creating new educational content or new science, engineering, art, math, or technology. The students become makers, designers, programmers, engineers, scientists, artists, and problem solvers.
I call this the Creative Classroom model, as the goal is to move students from Ignorance (lack of knowledge or experience with a subject) through the stages of being a Passive Learner (sitting and listening to the teacher or a video and consuming content) through being an Active Learner (students interacting with content through cookbook style labs) to becoming a Creative Learner (students creating new content as innovators: teachers, makers, programmers, designers, engineers, and scientists). Let’s look at these levels in more detail. It could also be titled the Levels of Engagement model, as moving to the right in my model signifies deeper student engagement with their learning.
Level 0: Ignorance
Ignorance is the state of not having basic knowledge of a subject. This isn’t a bad thing, as we all start out in this state, as long as we recognize our ignorance and do something about it. What our society needs are more creative and innovative people, not people who are passive or even willfully ignorant.
Ignorance is not bliss. What a person doesn’t know may indeed hurt him or her – if, for example, you don’t know that mixing bleach with ammonia will produce chlorine gas, you could wind up with severe respiratory problems. A basic literacy for science and engineering concepts is necessary for any informed citizen, since we live in a technological age with problems that need solving and can only be solved through science and technology.
If you do not understand science and technology, you can be controlled by those who do. How many people actually understand the technology behind the cell phones they use every day? They leave themselves vulnerable to control by the telecom companies that do understand and control this technology. If you don’t understand the importance of Internet privacy and share personal information on a website or Facebook page, you leave yourself vulnerable to people or corporations that can track your web searches or even stalk you online (or worse). I am fairly ignorant of the basic techniques for repairing my car. This leaves me vulnerable to paying the high prices (and the possible poor service) of a local mechanic, when I could save lots of money and ensure quality if I only knew how to do it myself.
As teachers our first responsibility is to lead students away from a state of ignorance. This seems simple enough, but anyone who teachers teenagers (and even some so-called adults) will know that some of them insist on remaining willfully ignorant, usually because they mistakenly think that they already know everything they need to know, which is never true of anyone. As the Tao Te Ching says: “To know what you know, and what you do not know, is the foundation of true wisdom.” So the first step to becoming a creative learner is to delineate, define, and accept our areas of ignorance.
A quote from the introduction of “Most Likely to Succeed” by Toni Wagner and Ted Dintersmith. How long will it take before education systems realize that the old factory model of education is no longer working?
Level 1: Passive Learning
When people start learning a subject they are usually not sufficiently self-motivated to learn it on their own – but we hope they will reach that point eventually. Most inexperienced learners are passive. They wait for their teachers to lead the lesson, sitting in their seats listening to lectures or watching a movie or otherwise absorbing and consuming educational content. The focus in such classes is to complete individual assignments that usually involve only lower order thinking skills such as recall and identification. This is the level described in the quote above from Most Likely to Succeed by Toni Wagner and Ted Dintersmith.
At this level, teachers emphasize mastering the facts and basic concepts of a subject. Students are consumers of educational content, but do not interact with it or create new content. Common classroom activities include listening to lectures and taking notes or answering basic questions, watching a video or demonstration, completing worksheets, or reading a text. Student motivation is usually external, based on the desires of parents or teachers and the fear of negative consequences (poor grades, etc.).
Education at this level is all about efficiency but isn’t very effective, since less than 10% of what teachers share in lectures is retained by students beyond the next test. Evaluation is based on standards, not skills. There is always a need for students to learn facts and concepts, but it is better to provide engaging projects where the students will find out the facts on their own as a natural part of completing the project.
Level 2: Active Learning
At this phase, students start developing internal motivation as they engage and interact with content. Students are beginning to explore, but usually through activities that are fairly structured although more student centered than before. These activities are hands-on; students are doing and acting, not sitting and listening.
Common classroom activities would be “cook-book” style labs, with step-by-step instructions and pre-determined outcomes. Students begin to learn observation and inquiry skills, with some data collection in a controlled environment along with data analysis. Teachers still determine if the student has the “right” answer. They start to practice the 21st Century skills of collaboration, communication, and critical thinking. Unfortunately, most science classes stop at this level without moving beyond hands-on to the deepest level.
Inquiry-based learning shares many of the features of project or problem-based learning, in that it is student centered and empowers student voice and choice, allows a high level of engagement and meaningfulness as students take responsibility and ownership for their learning, and teaches resilience, grit, and perseverance.
Level 3: Creative and Innovative Learning
If the purpose of STEAM education is to teach students how to become scientists, technology experts, engineers, artists, and mathematicians then they must learn the final stages of inquiry: to ask and answer questions, to solve problems, or to design products. The purpose of science is to answer questions whereas engineering has the goal of solving problems through designing and testing prototypes. Both are creative endeavors as the result of learning is something new for society – new knowledge or new products.
In the Creative Classroom, the environment is completely open, without predigested data or predetermined conclusions. Students work on projects where they research a question important to them, develop a methodology, decide how to control variables, make observations, determine methods of analysis, and draw and communicate conclusions. At this level, students become innovators or inventors. They synthesize knowledge and apply it to themselves and teach others through writing blog posts, creating posters or infographics, presenting lessons and demonstrations, and filming and editing videos or other educational media. They become makers and programmers, building products of their own design. The students are creating and contributing to society by making new content, knowledge, and solutions.
Learning at this level is never forgotten but is difficult to evaluate with a multiple-choice test, as the focus is on skill mastery and competency instead of easily regurgitated facts. Overall, this deepest (and most fulfilling, motivational, and engaging) level is entirely student centered and driven, with instructors as mentors. Ultimately, once a student has practiced learning at this level, the teacher is no longer necessary; the students will continue to learn on their own, because they are now entirely internally motivated. These are the people that society will always need.
How This Impacts My Teaching:
As an educator, my goal is to move students toward Level 3 activities and projects. Where I succeed, the projects my students work on are meaningful to them, demand professional excellence, use authentic data, involve real-world applications, are open-ended, and are student-driven. The students are required to create, make, program, build, test, question, teach, and design. They are innovators and engineers; they are creative students.
To give some examples from previous blog posts on my two sites:
Representative color image of the Rachmaninoff Basin area of Mercury, created by my students using narrow band image data from the MESSENGER space probe at 430, 630, and 1000 nm. We stretched the color saturation and image contrast so that we could see differences between volcanic (yellow-orange) and impact (blue-violet) features.
My chemistry and STEAM students created an inquiry lab to study the variables involved in dyeing cloth, including the history, ancient processes, types of cloth, mordants (binders), types of dyes, and other factors. We also explored tie dyeing, ice dyeing, and batik and developed a collection of dyed swatches that we will turn into a school quilt. We also experimented with dyeing yarn with cochineal, indigo, rabbit brush, sandalwood, logwood, etc. and my wife crocheted a sweater from it.
2. My chemistry and STEAM students did a similar inquiry lab to test the variables involved in making iron-gall ink using modern equivalents. We studied the history and artistry of this type of ink (used by Sir Isaac Newton, Leonardo DaVinci, and many more) and tried to determine the ideal formula for making the blackest possible ink. We also created our own watercolor and ink pigments such as Prussian blue, etc. We used the inks/watercolors to make drawings and paintings of the history of chemistry.
3. My astronomy students used accurate data to build a 3D model of the nearby stars out to 13 light years. This lesson was featured in an article in The Science Teacher magazine, including a video of me describing the process.
4. My astronomy students created a video for the MIT BLOSSOMS project showing a lesson plan on how to measure the distance to nearby stars using trigonometric parallax. It is on the BLOSSOMS website and has been translated into Malay, Chinese, and other languages.
5. My earth science students learned how to use Mars MOLA 3D altitude data to create and print out 3D terrains of Mars.
6. My chemistry students created a 12-minute documentary (chocumentary?) on the history and process of making chocolate.
7. My 6th grade Creative Computing class built and animated a 3D model of the SOFIA aircraft prior to my flying on her as an Airborne Astronomy Ambassador.
A 3D render of the Kasei Valles area of Mars, created by students as part of the Mars Exploration Student Data Team project. They learned how to download Mars MOLA data from the NASA PDS website and convert it into 3D models and animations, then created an interactive program on Mars Exploration which they presented at a student symposium at Arizona State University.
8. My science research class collected soil samples from the mining town of Eureka, Utah to see if a Superfund project had truly cleaned up the lead contamination in the soil.
9. My chemistry and media design students toured Novatek in south Provo, Utah and learned about the history and current process for making synthetic diamond drill bits. Another group videotaped a tour of a bronze casting foundry, while others took tours of a glass blowing workshop, a beryllium refinery, and a cement plant.
10. My astronomy students used infrared data from the WISE and Spitzer missions to determine if certain K-giant stars may be consuming their own planets. This was done as part of the NITARP program. They developed a poster of their findings and presented it at the American Astronomical Society conference in 2015 in Seattle.
11. My biology students build working models of the circulatory system, the lungs, the arm, and create stop motion animations of mitosis and meiosis. As I write this, they are learning the engineering design cycle by acting as biomechanical engineers to design and build artificial hands that must have fingers that move independently, an opposable thumb, can pick up small objects, make hand gestures, and grasp and pick up cups with varying amounts of water in them.
12. My computer science students, in order to learn the logic of game design, had to invent their own board games and build a prototype game board and pieces, write up the rules, and have the other teams play the game and make suggestions, then they made revisions. This was an application of the engineering design cycle.
13. My STEAM students designed and built a model of a future Mars colony using repurposed materials (junk), including space port, communications systems, agriculture and air recycling, power production, manufacturing, transportation, and living quarters. They presented this and other Mars related projects at the NASA Lunar and Planetary Science Conference in Houston.
These are just a small sampling of all the projects my students have done over the years. I have reported at greater length in this blog about these and other projects. My intent has always been to move students away from passive learning to active learning to inquiry/innovation. They often create models, build prototypes, collect data, or design a product and it is always open ended and student centered; even if I choose the topic of the project, they have a great deal of freedom to determine their approach and direction. There is never one right answer or a set “cookbook” series of steps, nor a focus on memorizing facts. They learn the facts they need as a natural consequence of learning about their project topics; by completing the project, they automatically demonstrate the required knowledge.
My students designed, animated, and programmed this interface for their Mars Exploration project, then presented it at a student symposium at Arizona State University as part of the Mars Exploration Student Data Team program. They build 3D models and animations of Mars probes, such as the one of the MER rovers shown. In this interface, the Mars globe spins, and as the main buttons are rolled over, side menus slide out and space probes rotate in the window.
Some groups require considerable training and experience to get to this level of self-motivation and innovation, and some team building, communication, and creativity training may be required. Other groups move along more rapidly and have the motivation to jump right in. This means that managing such projects as a teacher can be challenging because every team is different. I find myself moving from being a teacher at the center of the classroom (a sage on a stage) where all students move along in a lock-step fashion to becoming a mentor or facilitator of learning (a guide on the side) as students move toward higher levels of engagement at their own pace and in their own way.
As classroom activities become more student-centered, I find it natural to tie in the Next Generation Science Standards. If I do an inquiry lab to test the variables that affect dyeing cloth, the answer is not known before nor the methodology. Students have to work out the scientific method or steps needed by asking the right questions and determining how to find the answers, or to design, build, and test a prototype product. Through this method they learn the science and engineering processes that are one dimension of the 3D standards.
Crosscutting concepts can also be explored more effectively through this method. Inquiry leads to observations, which should show patterns, processes, models, scale, proportion, and other such concepts, which are the second dimension of 3D science education.
This leaves the third dimension, which is to teach subject Core Concepts. This is where most of the misguided opposition to Project Based Learning comes from. Teachers feel that projects somehow take time away from “covering” all the standards. But if we want deep learning of the core concepts of a subject, we can’t expect students to learn them by using surface level teaching techniques that emphasize facts without going any deeper. If I do it right, I can involve many standards at once in the same project and not only meet but exceed the standards in all cases. I call this “standards overreach” and I will talk about this in more detail in my next post.
Projects don’t have to be a elaborate and complex as the Mars project shown above. Here, my New HAven students have created models of viruses and mini-posters of chemical elements. The green plastic bottle to the left is a model of a human lung.
New Haven Residential Treatment Center, where I now teach. It is located in a rural area near the mouth of Spanish Fork Canyon. It is surrounded by alfalfa fields and deer frequently walk through the school in the evenings.
With my performances in the musical over (see my previous post) and Christmas past, I redoubled my efforts to find another teaching job. By the end of 2017 I had about seven different interviews, some over the phone, a few in person. I thought they all went well, but not all of the jobs were equally attractive. Some would require my moving away from Utah, which I am reluctant to do. I like living here, with the great combination of desert and mountains, incredible geology and scenery (there are five national parks in Utah and two others just outside), and a wonderful mix of biomes, ecosystems, and weather. A science teacher’s dream-come-true! So I am loath to leave.
One interview was with Pearson Publishing to promote their new science curriculum, which would require frequent travel but allow me to continue living here. But I’m not much of a book salesman, having had a negative experience while in college selling books door to door in Phoenix during the summer. I wouldn’t want to do that again unless at the uttermost need. I had some teaching interviews with KIPP schools and elsewhere, but again there are none in Utah and it would require moving. Another job was for a new tutorial program, but it was only part time (I need full time) and I’m also reluctant to start a new job with a new school knowing how much is promised that never comes to fruition.
The school building at New Haven RTC. I teach in the science room, which is the new addition right behind the pine tree next to the pond.
I looked for a variety of categories on every job aggregating website I could find, from Teachers to Teachers to Indeed and beyond. I looked for teaching jobs, curriculum development jobs, education consulting jobs, media design jobs, tutoring jobs, even substitute teaching jobs. These last two I didn’t pursue yet since I wasn’t quite that desperate, but I decided if I didn’t get an offer by the end of January I would start applying for these jobs, too.
One position I found was for a science teacher at a residential treatment center in Spanish Fork, about 20 miles south of where I live. I have taught at an RTC before and am familiar with how they work. Students with emotional and behavioral problems are sent to these centers (by parents, the courts, and school districts) as a last resort to provide them with in-house therapy while helping them catch up on school credits (which they are often behind on). Utah has a cottage industry of RTCs because the structure of our laws allows for lock-down school facilities as long as they have fire-safe zones separated by firewalls. I was called in for an interview and was impressed by what they are doing and felt the interview went very well. It happened on Dec. 16, so I wasn’t expecting to hear back immediately because of Christmas break. But once January began I hoped to hear back one way or another.
I followed all the requirements of Unemployment to apply to at least four employers per week (I actually did far more than that). I put myself on a daily time card to track the hours I spent, hoping that I could be productive in everything I did. I worked harder than on a normal job, averaging over 55 hours per week. But not much was happening. I was about to start subbing and finding whatever jobs I could, but knew if I did so it would take time away from looking for better jobs. It’s a kind of Catch-22.
A schematic diagram of how a project would be organized and managed using the BBIG Idea structure. The entire organization from students on up will decide on the major projects for each year, and the Project Directors and Advanced Innovators will divide the project into separate pieces, such as videos, 3D models, games, etc. Innovator teams work with Master Educators to divide the project further into pieces that individual students organized into Apprentice Teams complete, based on continual formative assessments.
A BBIG Idea:
I continued to develop a business plan for creating an organization that would take Media Design and STEM professionals into schools as independent contractors, similar to some school to work programs. My idea is called the Black Box Innovation Group, or BBIG. It will create a non-profit that sends professionals into schools to work with their media design students to create non-profit educational products, starting with practical projects such as promoting Utah tourism through creating county videos. Each year I would add more schools, then build an organized training program, with graduated students (masters) working for BBIG to go back into schools to train apprentices (middle school students) and journeymen (high school students).
My BBIG Idea will be a competency-based school program directed by outside professionals and Master Teachers (classroom teachers trained by BBIG). This diagram from the 2014 meeting of the Digital Promise League of Innovative Schools describes the challenges to adopting a competency-based curriculum, although it is a much needed school reform.
Students advance by mastering skills and participating in central journeyman level projects that show high competency. The central themes will be decided on each spring at a BBIG Idea Convention. Anyone in the organization could propose ideas at the annual conventions, and these would be focused on media design but with STEM themes. At first, BBIG would be supported by grants but would eventually fund itself through sales of its products. I worked out all the details, and even set up an appointment with the Small Business Development Center to look it over. The SBDC was very favorable on all but my funding model, as trying to continue an organization on grants alone isn’t very sustainable. I took a Saturday class at the SBDC to learn how to test the feasibility of my idea, and I took a continuing class on Thursday nights for how to create my own business. Although I haven’t moved further on this idea, I intend to pursue it through grants once I build more cache for myself through adding those three magic letters to my name and gaining the backing of a university.
If you want to learn more about the BBIG program, here is a PDF file you can download and view at your leisure:
If my job hunting efforts had continued into February, I would have taken the plunge into starting BBIG while beginning to do tutoring and substitute teaching. But my job search efforts finally paid off. In mid January I interviewed with Heritage School, another RTC that is less than two miles from where I live. When I taught at Provo Canyon School 20 years ago, we did some joint training activities and classes with Heritage, so I was familiar with their campus and some of their people. The day after the interview they called me and offered a job. I told them I needed 24 hours to decide. With an offer in hand, I called up New Haven RTC and asked what their decision was. They had a couple of final questions for me based on my references from my former school, which I was able to answer satisfactorily. They offered me a job as well. After three months of no results, I was in the good position of having two offers to choose from.
I also weighed continuing my job search. It was near the start of a new semester and there would be some science jobs available at local school districts. Did I want to go back to crowded classes with over 30 students per class? Working in a district is a stronger position than being at a private school when it comes to applying for awards and grants. Finally, however, after much thought, I decided to accept the offer at New Haven. My feeling for their program was more positive and I felt I could work in their system more effectively.
I would be replacing a teacher who was leaving to become a stay-at-home dad. Over the years, he and his wife had sponsored 14 foster children and she had accepted a great job offer, so he was needed at home. I went in to the school starting a week before the end of the semester to observe and get prepared for the transition at the end of January 2018.
Making gak in my classroom at New Haven RTC. Because of the nature of our school and the students’ need for privacy, I cannot show faces or give names. It is nice to be back doing fun projects again, which I’ll describe in later posts.
I have been at New Haven since then, and I am used to the students and system. I feel that I am finally getting back on track creating new materials, blogs, lesson plans, and applications. I am writing blog posts again, creating new lesson plans, and planning ahead for what seems like the first time in a long time. I am innovating and creating again, and beginning to apply for awards and professional development opportunities. One thing I can’t apply for, however, is grants. This is a private for-profit school and almost all grants require the grantee to be a non-profit entity. I am moving forward and have been accepted into an online doctoral program in Educational Studies at the University of Northern Colorado, specializing in Innovation and Education Reform. I will talk about this more in later posts. This may provide further opportunities for grants.
As of today, May 21, 2019, it has been a year and a half since I was laid off at American Academy of Innovation and I don’t miss it. I do miss many of the students there, who were amazing, but I don’t miss the commute or the long hours or the stress that seemed endemic to that school. I have half the commuting time, and I get home now long before I would even leave school there.
I can focus on individual students and their needs. We have weekly treatment team meetings where we go over the therapeutic, educational, and social needs of each student. Think of it as a very detailed IEP that takes place every week. Our structure at school allows teachers to attend those meetings and be a full part of the team. I wish normal schools could do the same, but the intensity of how we do things couldn’t be replicated without quadrupling the amount we now spend on education.
Although I’ve now been here for 16 months, which is longer than I was at AAI, I’m not sure if I’ve yet recovered from the trauma of losing that job, even if it was a lay off due to financial issues. I still feel a need to cover my backside. I applied for over 60 jobs, interviewed for nine, and received two offers. That’s a lot of rejection, and it was hard to take day after day for three months. One thing that helped me was to see the movie The Greatest Showman (my wife insisted –she’s a big fan) and hear the song “This is Me.” It inspired me to write my own personal anthem as a way of thumbing my nose at all the detractors and naysayers I’ve had during my teaching career (and there have been more than a few) and to rise above the continued daily rejections. Here it is, for what it’s worth:
I Will Rise
Personal Anthem of David V. Black
They tell me my efforts are worthless,
I’m too old, obsolete, uninformed.
They say that my skills are now useless,
And ignore all the castles I’ve stormed.
But they’re wrong about me.
I’m afraid they won’t see
All the value I’ll bring to their schools.
Yet I won’t believe them,
As a teacher of STEM
I’ve learned to obey my own rules.
Though I may not be much in their eyes,
You can still count on this: I will rise!
I’m not falling down, I am leaping
Ahead of the pack, not behind.
Their negative thoughts won’t start seeping
To poison my thoughts or my mind.
Oh they won’t get me down,
And I won’t play the clown,
I deserve some respect for my strife.
Through the rest of my years,
I won’t give in to fears,
I’ll have joy throughout all of my life.
No matter how hopeless the prize,
There will be no mistake: I will rise!
I’ve taught classes from Boston to Bali,
Written blogs from the ends of the Earth,
Lead workshops for NASA in Cali,
And now you dare say I’ve no worth?
I’ve worked far too long to accept it
When you say that my best years are gone.
There is still much to see, still more to do
And I won’t quit until I have won!
Oh they’re wrong about me,
And some day they will see,
That I have so much further to go.
They will bow with respect,
Accusations retract,
And upon me their honors bestow.
Through the darkness I’ll reach for the skies,
And no matter the cost: I will rise!
I’m the teacher they thought to despise.
I will never give up: I will rise!
OK – so – I’m not exactly a great poet. But it encapsulated my feelings, and helped to keep me going. Despite daily setbacks and let downs, I had to keep going and believe that my efforts would pay off eventually. As an ancient king once said regarding his people’s attempts to escape from slavery:
I trust there remaineth an effectual struggle to be made.
– King Limhi
Or as Shakespeare put it:
Our doubts are traitors, and make us lose the good we oft might win, by fearing to attempt. – Shakespeare, Measure for Measure
I had to believe that my attempts weren’t futile and set my fears and self-doubts aside. I kept trying, and it finally did pay off.
Now I can continue this blog and look forward to the rest of my teaching career. With my doctorate program I can finally join empirical research to the theories I’ve developed over the years based on my observations as a teacher. I can finish the books I’m working on and edit them until they are published. I can create a plethora of educational materials and follow up on all the ideas I’ve had. I’m no longer in job limbo. I am in recovery.
A hat created by Justin, one of my STEAM it Up students. It is made of upcycled and repurposed materials.
At the beginning of the school year in my STEAM it Up class I had the students vote on which of many possible projects they wanted to work on. The one unit they all agreed on was to make a series of sculptures or cosplay items out of repurposed, upcycled junk. I’ve been collecting materials for years, ever since I created my first “junk” sculpture at the age of 18. I’ve taught this unit three times before in Intersession classes and afterschool clubs when I was at Walden School of Liberal Arts. The results were mixed – the high school students did fairly well, but not so much the middle school students. It seems at that age students are much better at tearing things apart than at systematically planning how to put them back together.
Small junk sculpture of a cat, made by Emily.
My main reason for teaching the class was to actually use up the junk I’ve been collecting and clean out my workshop. Yet it seems I wind up with more stuff before than after – maybe because of the aforementioned “tearing apart” proclivity of middle school students; what was nicely compacted as old VCRs and DVD players is now a series of scattered pieces.
A bracelet and a diagram, created for my STEAM it Up class.
So I was a bit reluctant to do this again and bring in boxes of materials that inevitably make a terrible mess in my classroom. But I also knew it could be fun and educational if done right, so I took the chance. I structured this differently than before: each student would need to produce three items. The first would be a small sculpture as a beginning exercise, something that can be easily held in one hand. The second would be a cosplay item or some type of costume piece or wearable sculpture or prop. The third would be a group project where all eight students would plan out a large-scale sculpture together. The second and third projects needed to be sketched out and planned in advance.
A little man, made from old keys and other recycled objects. Glued together with hot glue and E-6000 adhesive.
They came up with a variety of interesting sculptures for their first and second projects, as seen here. I am also including some of their sketches, although in too many cases they drew the sketches after they made the sculptures. Some of the sculptures involved LED lights, which took some planning and thinking through. The point is to teach them some engineering and materials science skills, and engineers plan everything out in advance. Some students resist this, as they see these sculptures as art forms, not engineering designs, and pre-planning seems to them to impede the creative process. Of course, without planning and thinking through how to attach the disparate materials together, their sculptures tend to fall apart. Glue alone can’t hold a load-bearing member like a leg or arm.
A tiny soldier, made by Noah for my STEAM it Up class.
Which is why we are doing a group project. We decided to build a futuristic Mars colony city (to go with our school’s overall Mars Exploration project – more on this coming in my other blog at http://spacedoutclassroom.com).
A space ship sculpture, made from recycled motherboards and other electronic junk.
Two years ago, we had someone contribute a lot of materials to Walden School that were from a doctor’s office or scientist’s lab. I still have no clue what most of the stuff was even for – some of it is probably valuable as antiques. One item was a still for making distilled water, but bought in the early 1970s because of its horrible avocado green color scheme. I managed to get a chemistry professor at Brigham Young University to take it off my hands. But the rest of the stuff was of little use. One item was a plastic autoclave, with multiple levels for sterilizing surgical equipment. There were also glass containers for storing or cleaning microscope slides (I think – based on similar plastic items I’ve seen in the Flinn Scientific catalog).
A flying saucer that lights up, made by Sam for my STEAM it Up class.
The autoclave looks like a domed city, something out of Isaac Asimov’s Caves of Steel series of books about the android R. Daneel Olivaw and Detective Elijah Bailey. We were looking at the autoclave and other materials and “noodling around,” which is an important scientific and engineering creative process: putting things together that don’t normally go together and seeing what would look good and work toward a harmonious whole. We came up with the glass containers as pillars for the autoclave layers. One of the students suggested offsetting the layers. I sketched these ideas out on my whiteboard, and we worked through how to attach everything together using metal piping from old 1980s brass and glass furniture with bolts and L-brackets, and wire to tie the pillars together to make the whole thing structurally sound.
A steampunk bracelet with LED light, made by Sam.
Teams of students took different layers. The bottom layer (Level 1) will be the industrial and manufacturing center, so one team is making industrial-style equipment and buildings that look like factories and power plants. One team is doing Level 2, which is the main residential sector. One team is doing Level 3, which is the administrative, shopping, hospital, and school level. They built a school from an old calculator and wanted the holes to become solar panels. I remembered having a folder with a shiny metallic-blue cover, so we cannibalized it to become the solar cells. Level 4 is the park, university, and upper class residential sector, and the dome will have spaceports, defense, and communications centers. Already the pieces are shaping up. This is exactly the engineering and materials science I had hoped for when we started this unit.
Magic wand, made by Sarah for my STEAM it Up class.
We are now beginning the construction of the main city levels, but Winter Break has halted the process. It will be our last project for the STEAM it Up class. It will sit upon two wooden plaques, again donated from the doctor’s office, and we’ll create smaller domes for hydroponics and farms, with small Mars rovers (already made by one student who is great at miniaturized sculptures).
Small sculptures created by my STEAM it Up students: a stamp and a ring.
We’ll make Mars landscaping from paper maché and HO scale model train decorations. I also hope to put wires up through the support shafts and add LED lights to the city. The final city will be quite heavy and hard to move around, so it will stay in my classroom and make a great decoration for my newly completed lab. We’re photographing the construction process, I’ll interview the students, and we’ll add all of this to our ongoing Mars project documentary video. I’ll write another blog post in January when we can show the finished sculpture. I would also like to create a virtual 3D model of the finished city so we can animate and label the parts.
First drawing of our Mars colony, using parts from an autoclave as the levels of our city and glass microscope slide cleaners as pillars.
We still need to pick a name for it. Looking up names for Mars in various cultures, and adding translations for the word “city,” I come up with some possibilities: Aresdelphia, Al-Qahira Madina, Harmakhis Delphi, Hradelphia or Hrad K’aghak’, Huo Hsing Shr, Ma’adim Delphi, Kaseishi, Mangalakha, Martedelphia or Marte Cuidad, Mawrth Dinas, Nirgal Alu, Shalbatana Alu, Simudelphia, Labouville, and Tiuburg. We’ll have to vote on it.
Even without glue or bolts, the layers stack up fairly well in this first attempt to build the Mars colony city. We decided to use two of the boards instead of one so we could add more landscaping and farming domes using HO-scale model railroad decor.
In my last post, I said goodbye to Walden School of Liberal Arts after teaching there for six eventful years. My original plan was to spend a year in Washington, D.C. as an Einstein Fellow, but despite making it to the final round, I was not chosen. My Plan B was to go back to school for a PhD, but even though I was accepted to the STEM Education program at the University of Kentucky, I deferred for at least a year so that I could earn up more money for the move. I interviewed at four schools and received two offers, and accepted the offer at American Academy of Innovation.
Illustration of American Academy of Innovation
It is a brand new charter school with a mission for project-based learning, stem education, and international partnerships. They started building it in January and the contractors were still putting in finishing touches as we met for the first time as a faculty on August 15, 2016. Our Director is Scott Jones, who has a great deal of experience directing and working in charter school environments. The teachers have been hired from all around, some from Texas, the East and West Coasts, and several from Utah, Idaho, and Alaska. It appears to be a highly creative group of teachers.
Innovation Orange: American Academy of Innovation on my first day there.
We took a tour of the building and saw what it will look like in the next two weeks – except for my science room. It hasn’t been finished, partly because of last minute changes to the water and gas lines, partly so that they can get my input. I have since designed the lab, with four student stations, a fume hood and teacher demo desk, and lots of cupboards for storage. As I am writing this (November 14, 2016), the contractors are building in the lab stations – hooray! – and I am teaching out of the library.
Faculty of American Academy of Innovation touring the school; August 2016.
For our first two weeks we met as faculty to prepare and plan. We revised the school’s vision and mission statements. Here are the new ones:
The Vision of American Academy of Innovationis to empower the individual mind to improve the world.
Our mission statement:
The American Academy of Innovation combines academic fundamentals; career, technology, and 21st Century skills with international and community partnerships through project-based learning to ignite an innovative mindset within the individual and society.
I most like that our overall goals are to ignite an innovative mindset and to empower the individual to improve the world. I have attended many educator conference sessions on Problem-Based Learning (PBL), so I volunteered to share what I’ve learned with the rest of the faculty and to go through the eight characteristics of PBL, working through a potential large-scale problem as an example. I chose an expedition to Mars (which I’ve used as an example all summer at meetings for potential parents and students). Other teachers volunteered to share their expertise, so we trained each other. Scott also brought in some experts from other charter schools to talk about how we will implement special education and organizational culture. We took time to plan out what our first few days would be like as we started training our new students toward project/problem-based learning.
Lobby of American Academy of Innovation; August 2016. We still had much work to do putting together tables, chairs, desks, and filing cabinets.
In addition to holding daily meetings, we helped to put together chairs, desks, filing cabinets, and other furniture. Parents and students came in to help, and by the time the first two weeks were over, the school was shaping up and ready for occupancy.
AAI students meeting in our gym for introductions on the first day of school; August 31, 2016.
On August 29, we held our first day with students at the school. These first two days were to be an orientation to get the students excited about being here and help them get to know us and each other. Some had come from neighborhood schools and knew each other before, but some had come from charter schools or homeschooling. We met in our new gymnasium, and discovered immediately that the acoustics in there are terrible. It is basically a hollow concrete shell, so sound bounces all over the place and the small portable PA system wasn’t up to the job. After introducing the staff, we divided the students into groups and had them rotate through four sessions each day for the first two days.
Marble rolling group activity. Students use the pool noodles as channels to roll marbles from a starting line into a bucket. It takes teamwork and problem-solving skills.
My groups were about problem solving. Our first day I did the activity of using swimming noodles cut in half to roll marbles from a starting point into a bucket. As the noodles were short, they had to develop teamwork to move the marble along without dropping it. It was interesting to see leadership beginning to emerge from some of the students. Most of the small groups were eventually successful. It was a lot of fun.
Rolling marbles into a bucket as a group problem-solving activity.
Our second day, I ran an activity to make a simple paper helicopter based on Da Vinci’s helix machine. Students were asked to use inquiry to vary the shape of the basic helicopter and try different things. After experimenting and testing in a classroom, I had them drop the helicopters off our balcony in the main lobby and tried to photograph and videotape the results.
Testing our paper helicopters. What you get depends on what you’re testing.
Other groups toured the school, took polls for what our new mascot and school colors would be, and many other things. Overall I think we managed to convey a sense of excitement, innovation, and inquiry to the students.
Making marbled paper. Oil paints are diluted with mineral spirits, then dropped into a metal pan with an inch of water in them. The oil/spirits mixture floats on top and can be lifted off by lying a piece of sketch paper on top.
On Wednesday, August 31 we held our first regular classes. We have four periods per day on an A-B schedule; each class is 90 minutes long. I’m used to 70 minutes, so I have to pace myself. Our school day starts at 8:30 and ends at 3:30 with 50-minute lunches, so it is a longer day than I’m used to. My schedule for A days is to teach 3D Modeling during first period to about 25 students (good numbers – I’ve been talking this up all summer). We didn’t have computers to work with at first, so I had to do preparatory things such as going through Drawing on the Right Side of the Brain activities and teaching orthographic and perspective drawing skills. Second period I have STEAM it Up, with only eight students (students didn’t quite understand what this class would be about, but that’s OK – a smaller group will be more mobile and experimental). My third period class is chemistry, again a challenge to begin with since I had an empty room and no sinks or lab stations. I started with six demonstrations using household chemicals and had them make observations. I had 12 students but this has grown to 16. My 4th period class is 8th Grade Science to about 20 students. I decided since the new SEEd standards are being implemented fully next year, we might as well implement them now at AAI. We created marbled paper on the first day.
Astronomy activity to determine the correct order of levels of magnitude in the universe. It starts with multiverse at the top and ends at quarks at the bottom.
On B days (Tuesdays, Thursdays, and alternating Fridays) I have the following schedule: First period (B1) is astronomy to 7-8 grades. I began with my scale of the universe activity to arrange strips of paper in the right order from largest to smallest scale. This helps me see what they already know visually while providing a setting for the class. Second period is Innovation Design, basically my MYP Design class again for 7-8 grade students. We began with the bridge building activity that I modified from Wendi Lawrence’s spaghetti tower design challenge. Even with 90-minute classes, the student groups didn’t get as far as I would have liked, with only one truly successful group. I can see we have some work here, partly because the students don’t know each other and aren’t used to working together. My B3 class is 8th grade science again, and then I had a prep period B4.
The big sit down: all our students lined up, then sat down using the student behind as a chair. I kind of worked . . .
Part way into September, one of our teachers, who is from China, found out he had a conflict with his Visa (he had not renewed it), and so was unable to work for the rest of the semester. We found substitute math teachers for his math classes, but no one to fill in for his two computer science classes. I volunteered to give up my prep on B4 to teach the computer science class. It has been a challenge teaching straight through every day without a prep period, especially trying to stay up on grades. Because of our lack of computers, we had to have the students pair up. He started with Scratch, so I was able to transition the students over to my own way of doing things without totally replacing his structure. I also want to implement using AppLab after Scratch, then move on to Python.
Bridge building design challenge for my Innovation Design class. They must span 12 inches and make a bridge strong enough for a Matchbox car to be pushed across. They are given 30 pieces of spaghetti, 10 small gumdrops, and one sheet of paper.
When you add to this that I now have a 45-minute one way commute it can be exhausting. Much of my after school time has been spent in weekly faculty meetings or designing my science lab or putting together the order for initial equipment, lab supplies, and chemicals. We purchased 27 Dell laptop computers, so I’ve also needed to spend time getting software installed including Daz3D Bryce, Stellarium, Gimp, Sculptris, Blender, and others as well as getting the 3D printer up and running. I come home and crash each evening. But slowly, day-by-day, we are making progress and the students are beginning to develop 21st Century skills for collaboration, communication, and creativity. It was a rocky start, but we are almost ready to implement the Big Project.
Our school was still under construction during the teacher planning weeks in August, but by the time students started we were ready. Except for my science lab, which was completed in November.
We identified four possible Big Projects as a faculty and had the students vote on which one they preferred. My descriptions were as neutral as possible because I didn’t want to be accused of influencing the vote. Except, of course, I may have sweetened the well by using an example of a Mars expedition during our summer meetings. The vote was to do a Mars expedition or Mars exploration theme for our project. I will report on this more in my http://Spacedoutclassroom.com blog.
My science lab at the beginning of the school year. A white board and projector, but that’s about all. It looks much nicer now!
I’ve never worked so hard, and my health is probably suffering as a result. I’m not as young as I once was, and some days I truly feel it, but it has been an incredible ride so far. Over Winter Break I will be reporting on all that we have done in my classes on my two blog sites, so stay tuned.
My 3D students on the first day of school. By this time we had chairs, but no tables or desks. So we handed out clipboards to each student. Here they are doing an drawing lesson where they turn a photograph upside down and draw what they see instead of drawing a face. They do a better job this way.
The past month has been crazy busy as I’ve prepared for my new teaching job at Walden School of Liberal Arts in Provo, Utah. I had intended on writing at least six blog posts in August and interviewing at least one person, but didn’t do any of it; instead, I’ve been writing curricula, lesson plans, preparing my classroom, and going on a four-day backpacking trip with my students to the high Uintah Mountains, up past Mirror Lake to Naturalist Basin. My legs are still recovering. Now this week has begun our first week of classes: I am teaching two sections of Honors Chemistry and one section of Astronomy on Mondays, Wednesday, and Fridays and one section of Computer Technology and one of Multimedia on Tuesdays and Thursdays. I’ll probably also pick up a Video Production class afterschool as well on those days. So far we are three days into the school year and things are going well.
My chemistry and multimedia students will be helping with the Elements Unearthed project in much the same way as my Media Design students did at MATC, except I am now at a school that actually believes in expeditionary learning (field trips) and project-based learning (PBL). Plus having dedicated chemistry students will help improve the accuracy and relevance of the student videos. Here’s what they are going to do:
My classroom at Walden School
During the first term, each student will select a topic from one of four categories: elements, materials, energy processes, or the history of chemistry. They will conduct background research and develop an extensive set of notes with references, which they will condense into some form of print media, such as a poster, newsletter, brochure, etc. which they will convert to .pdf format. They will act as guest hosts of this blog, each one taking a turn to write a post entry about their topic and attaching their .pdf file to it for all to see.
During second term, they will come up with some sort of demonstration that relates in some way to their chosen topic, and practice it in class, then on a Friday in November we’ll take the whole class downstairs to the elementary classrooms (Walden School is a K-12 Montessori school) and present their demonstrations to the students, as well as handing out a simple worksheet or activity the students can take home. The chemistry students will also present their demonstrations to each other just before winter break and receive feedback.
My classroom again
During third term, the chemistry students will add a Powerpoint or Keynote presentation or a video to their topic, which will be presented to their peers and added to this blog site. They will also present again to a different elementary class.
During fourth term, they will present their demonstration, Powerpoint, video, etc. to the public and their parents at a Back-to-School Science Night at the end of April or start of May. We’ll videotape the proceedings and add the videos to this blog as well.
This may seem like a huge project (and it is) but I’ve done all of this before when I’ve taught chemistry at Juab High School in Nephi (except for the media elements – that comes from MATC). Those students who wish can utilize the footage and photos I’ve already gotten for the Elements Unearthed project to do their element or material reports. They can also compete in the Chemical Heritage Foundation’s “It’s Elemental” video competition. My multimedia students will help on the longer videos I’m creating for this blog, YouTube, and iTunes (we’ll set up the iTunes account in our Computer Tech. course).
So you see, I have landed in an ideal situation for classes that I love to teach coupled with a great group of students and an environment that works perfectly for this project. I’m very excited to see what will come out of it. At the very least, this blog should be quite a lively place.
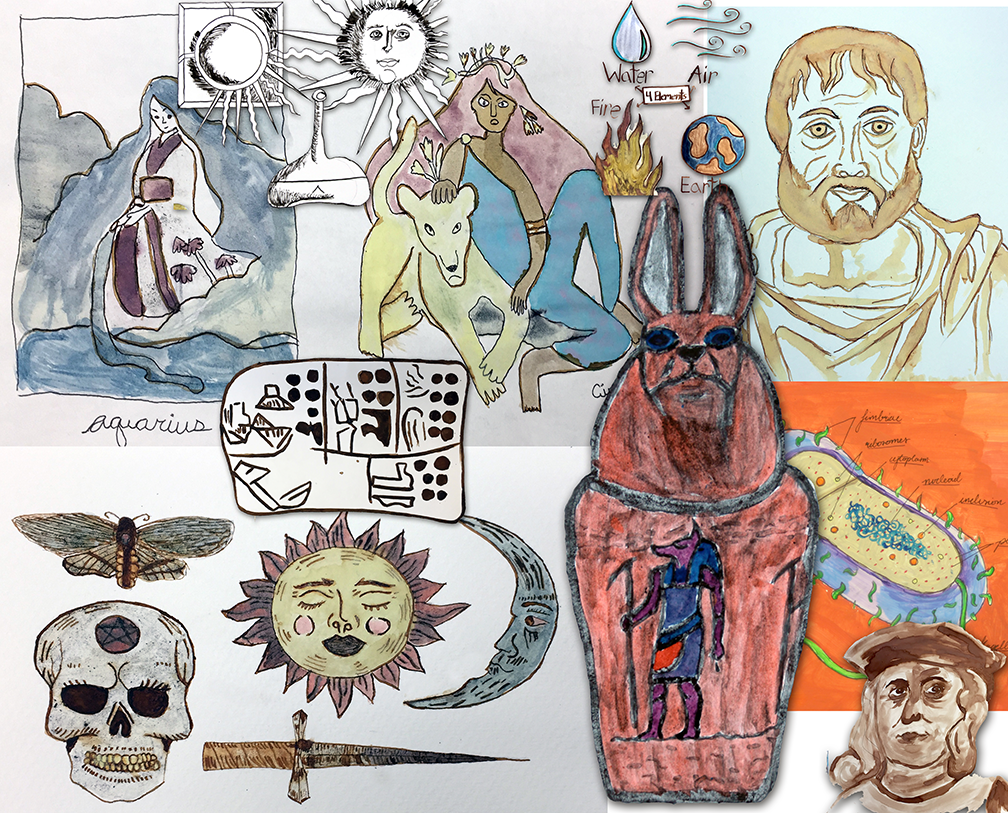
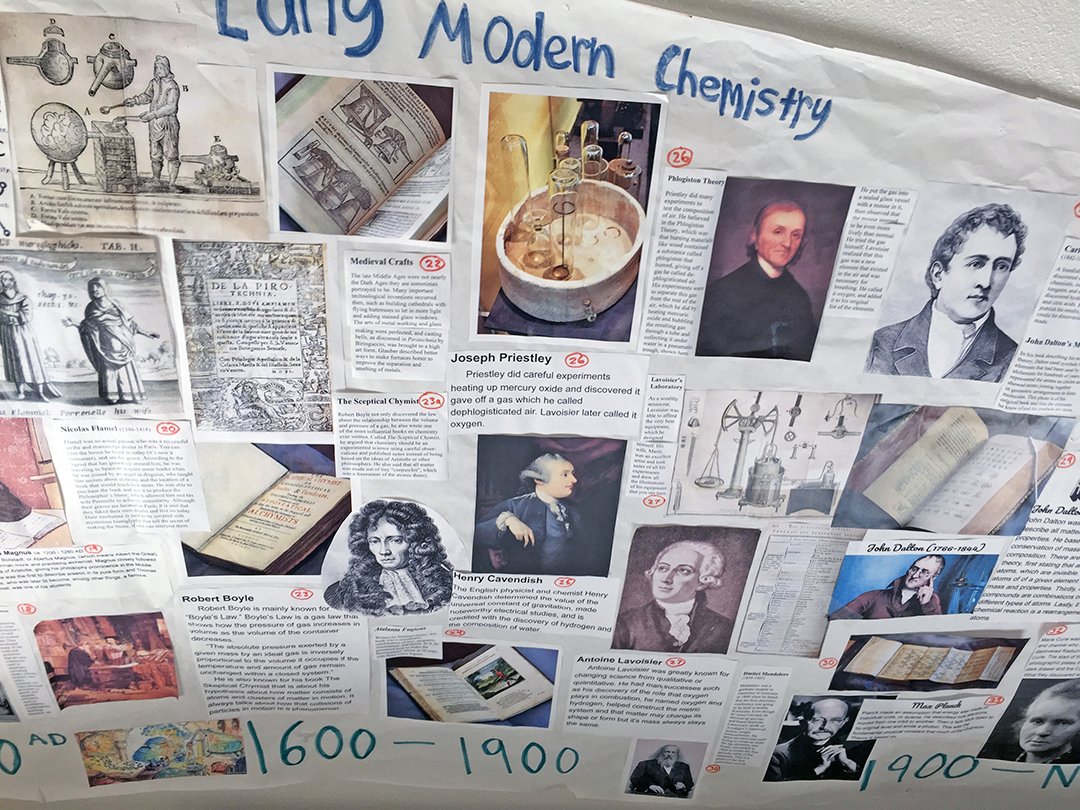
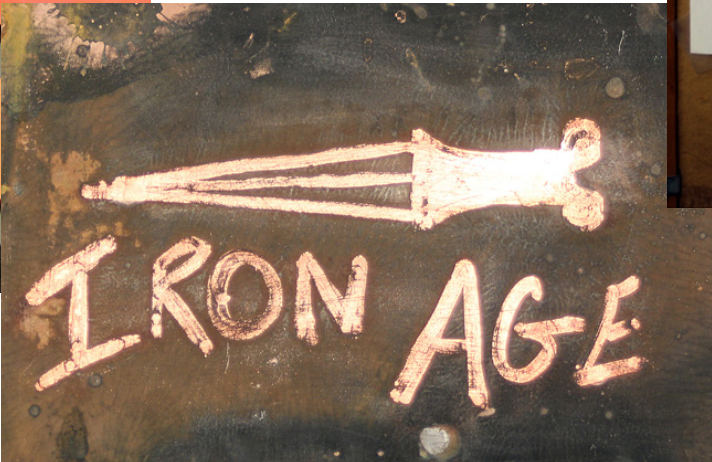
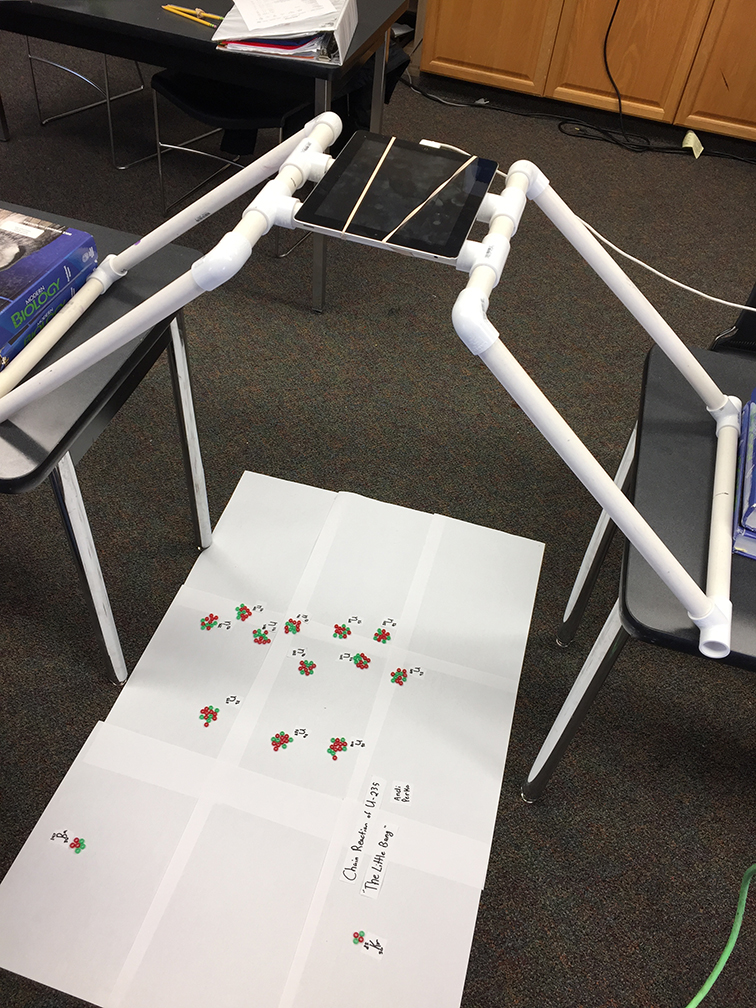
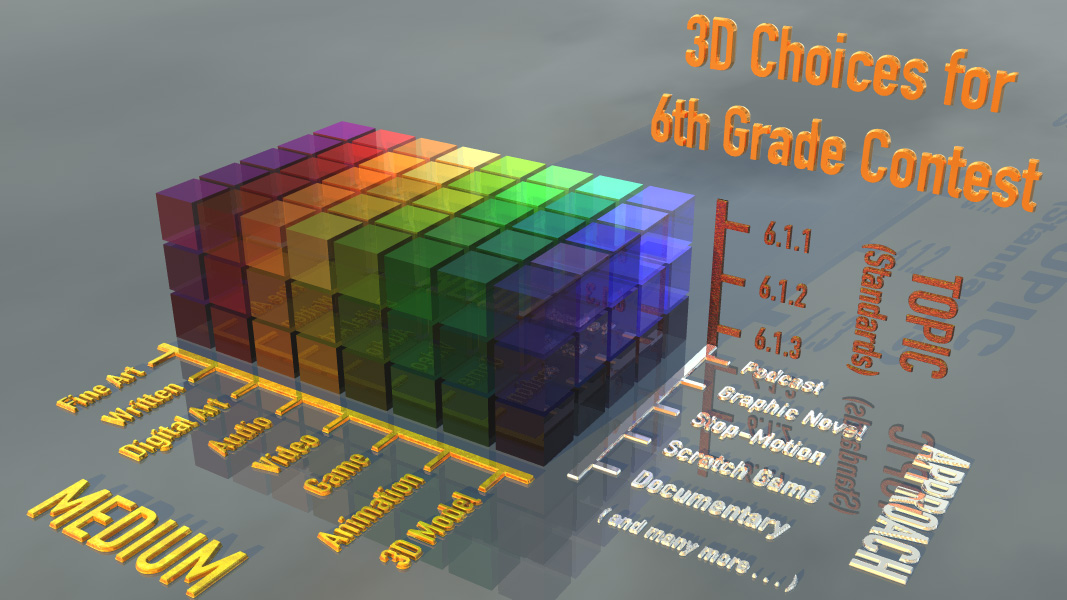
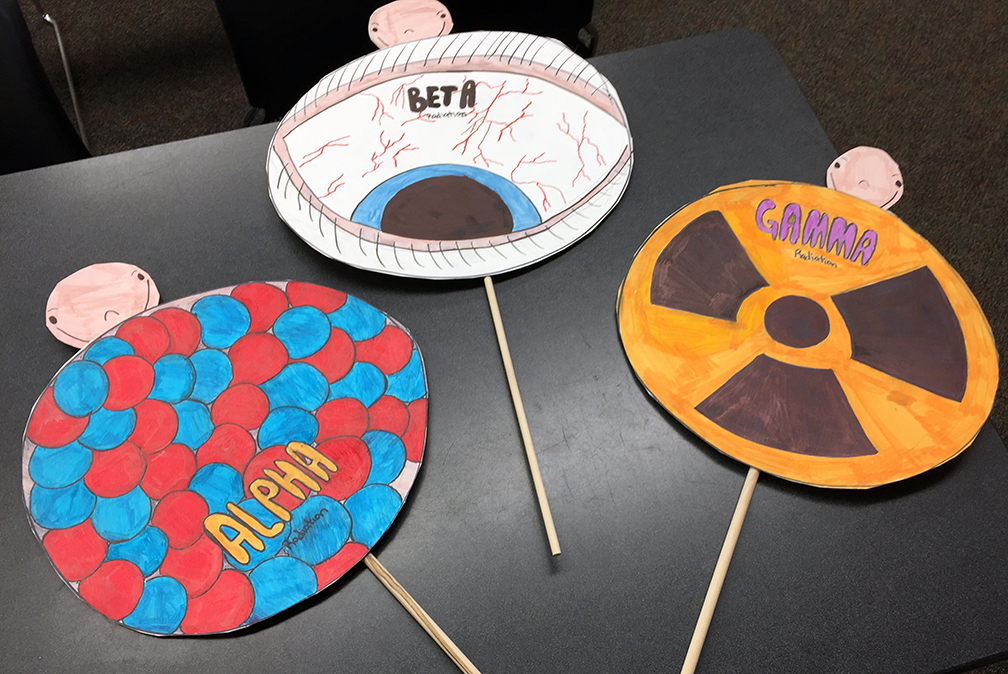
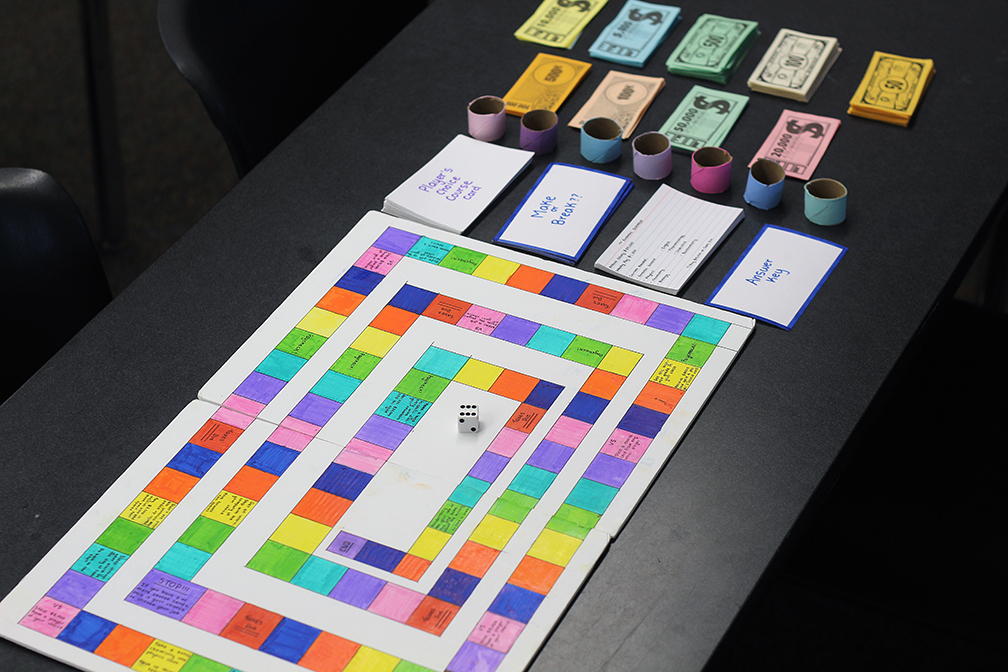
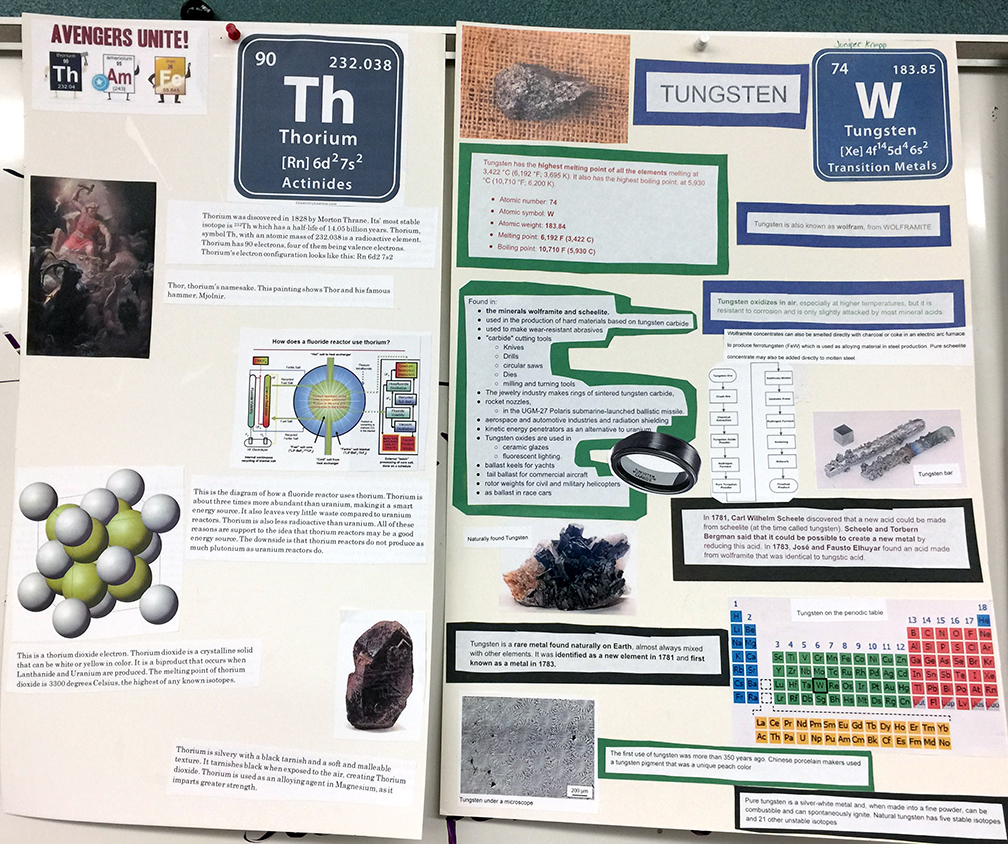
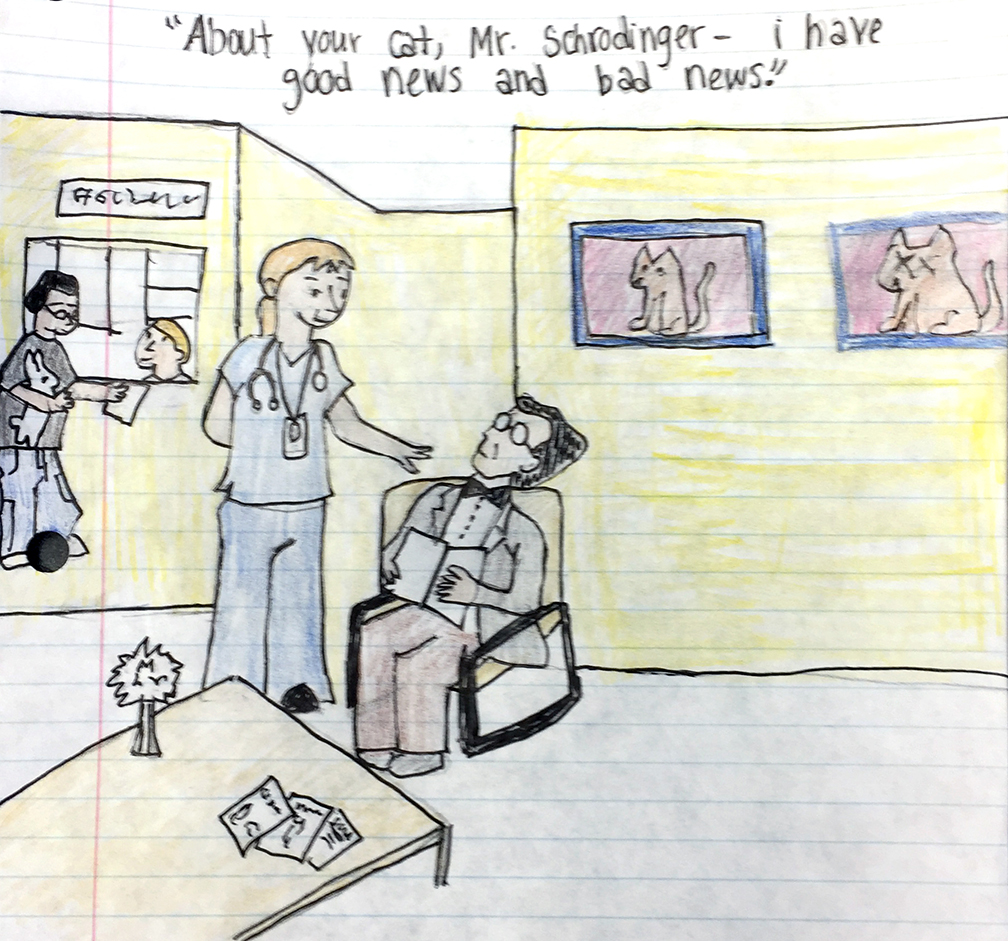
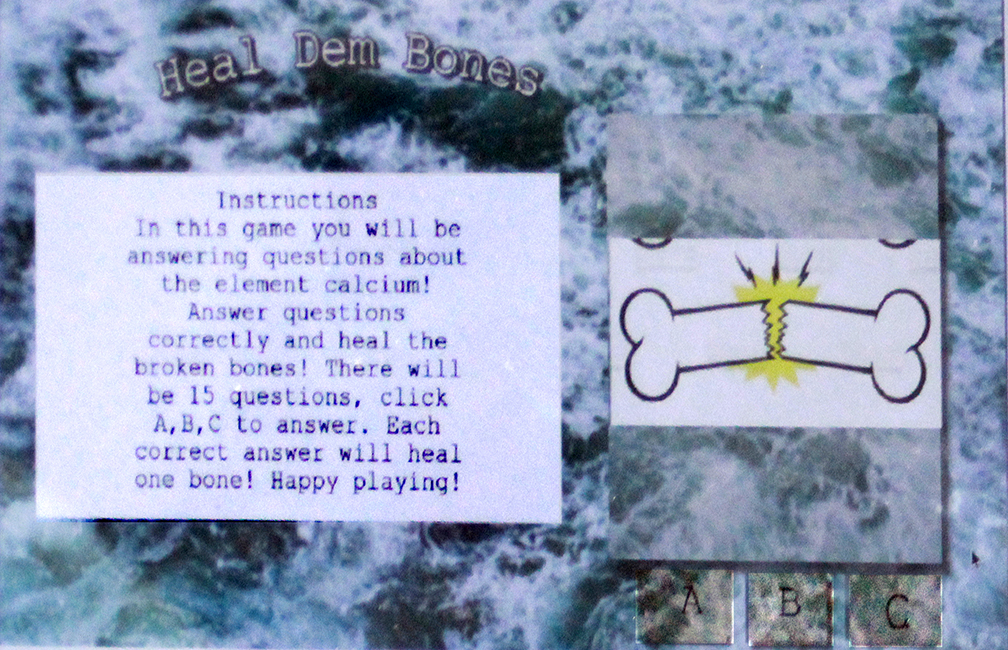
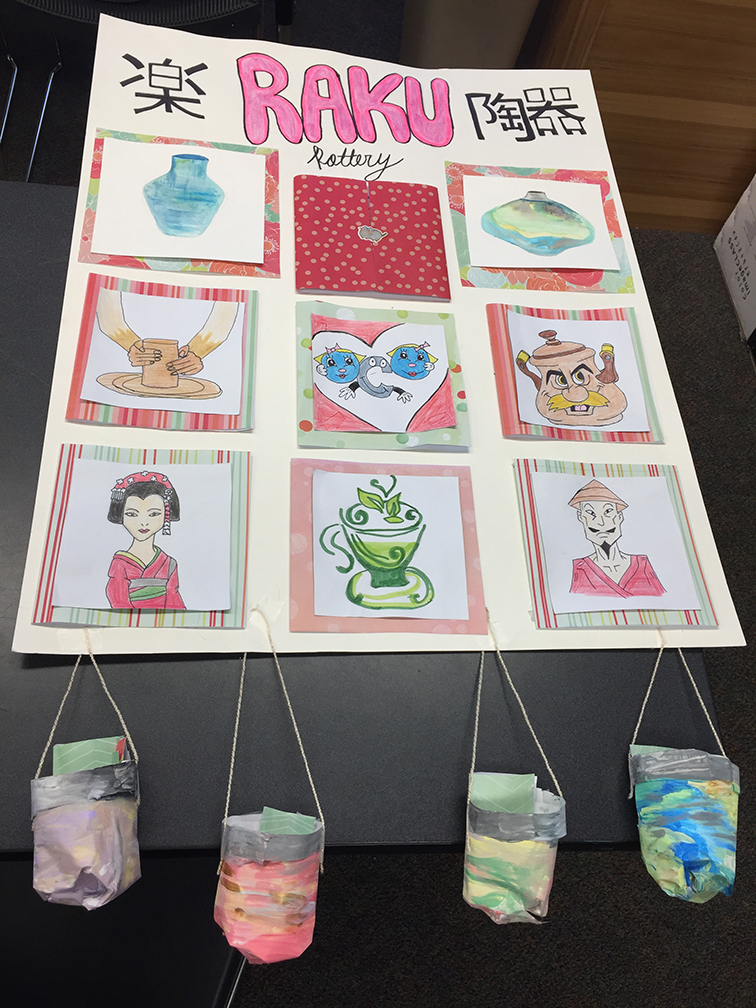


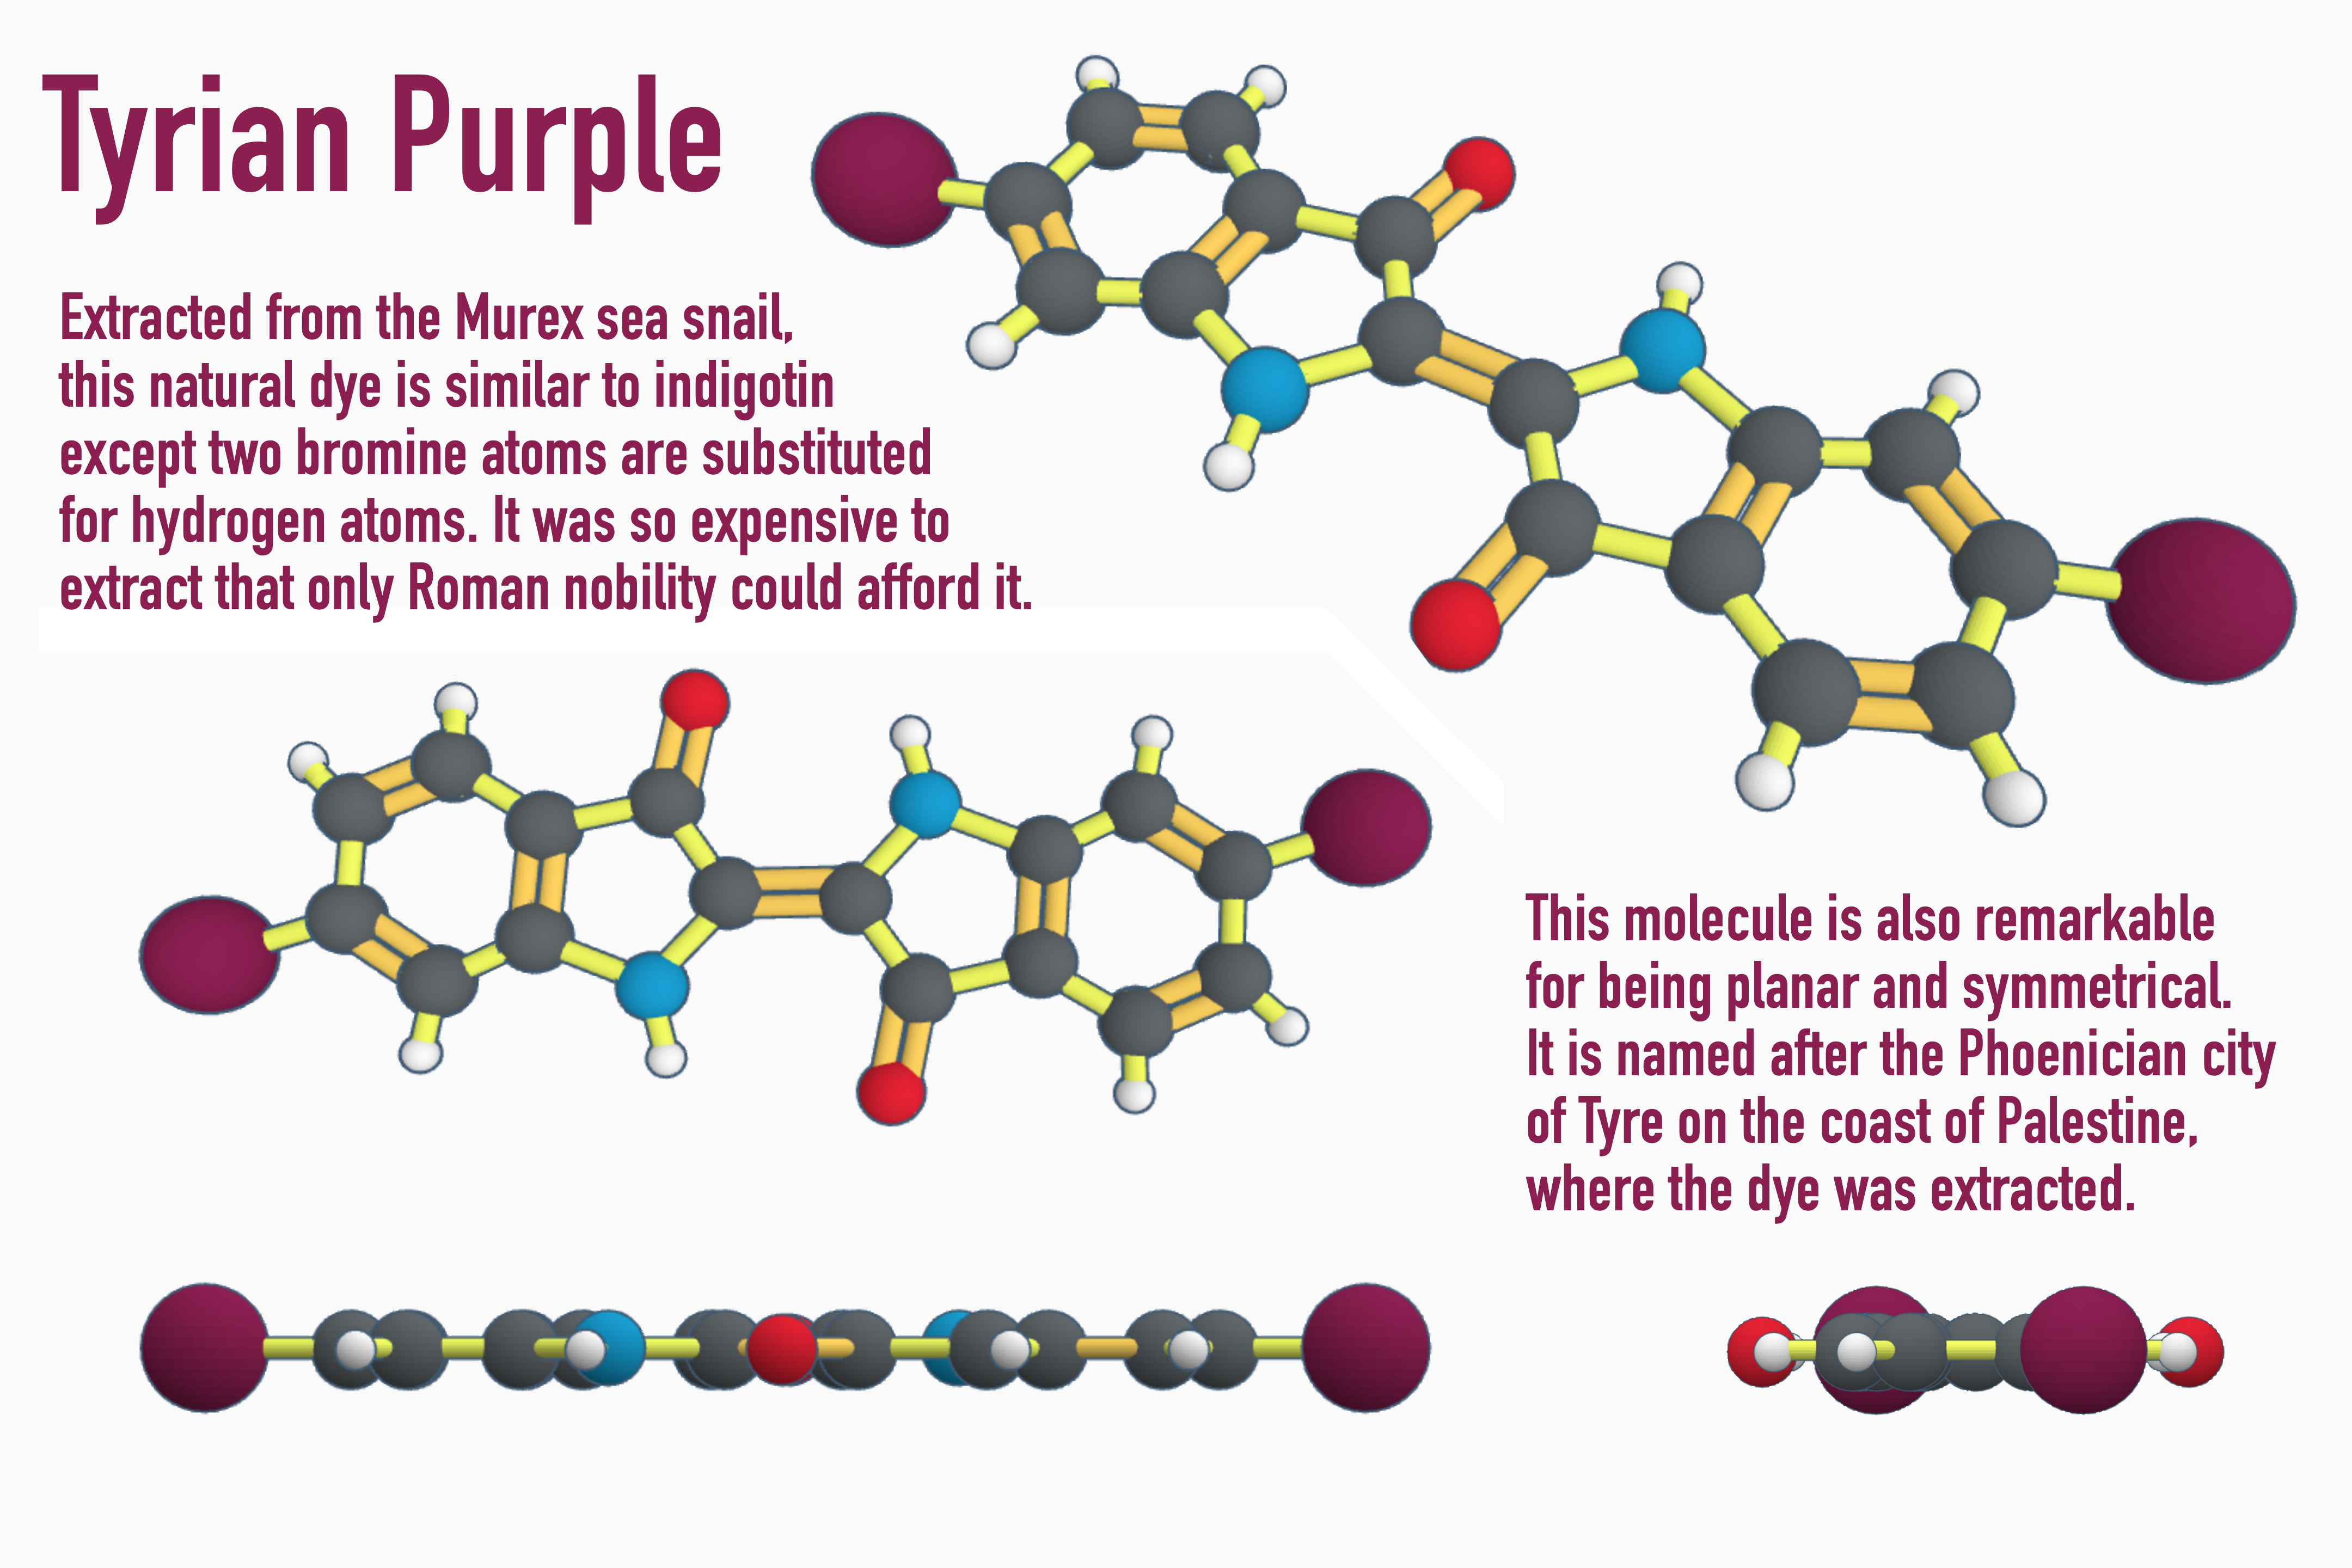
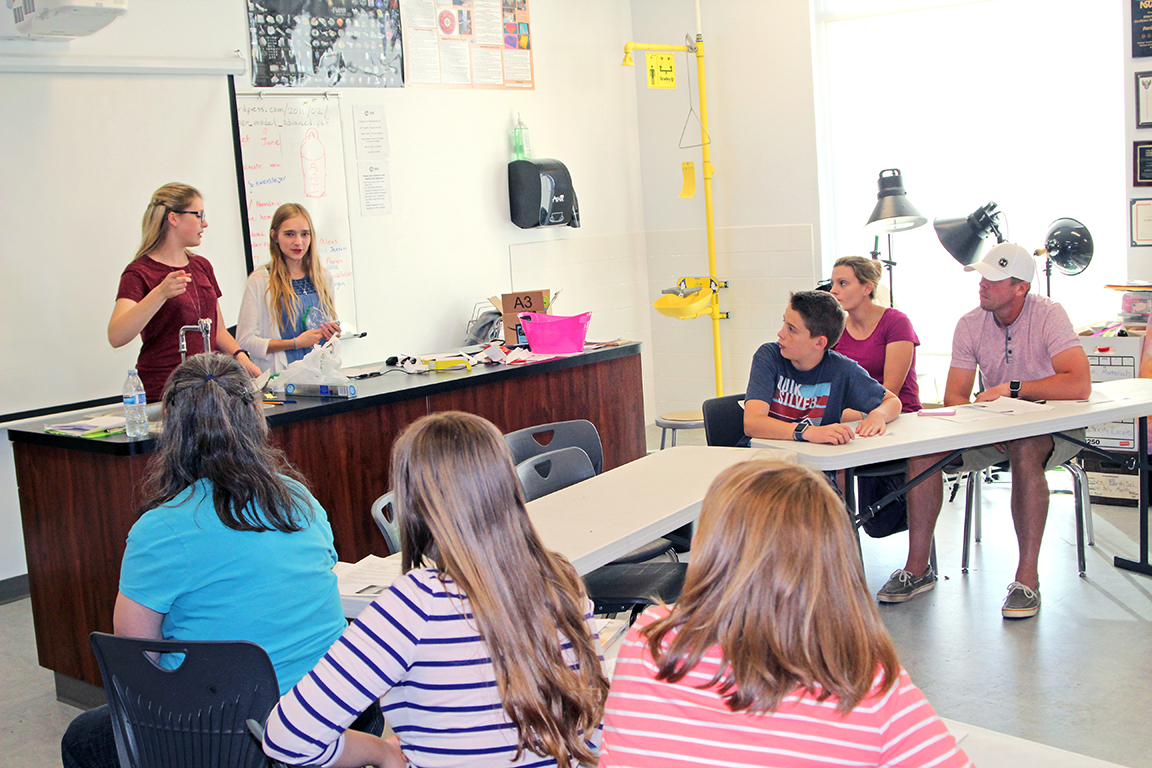
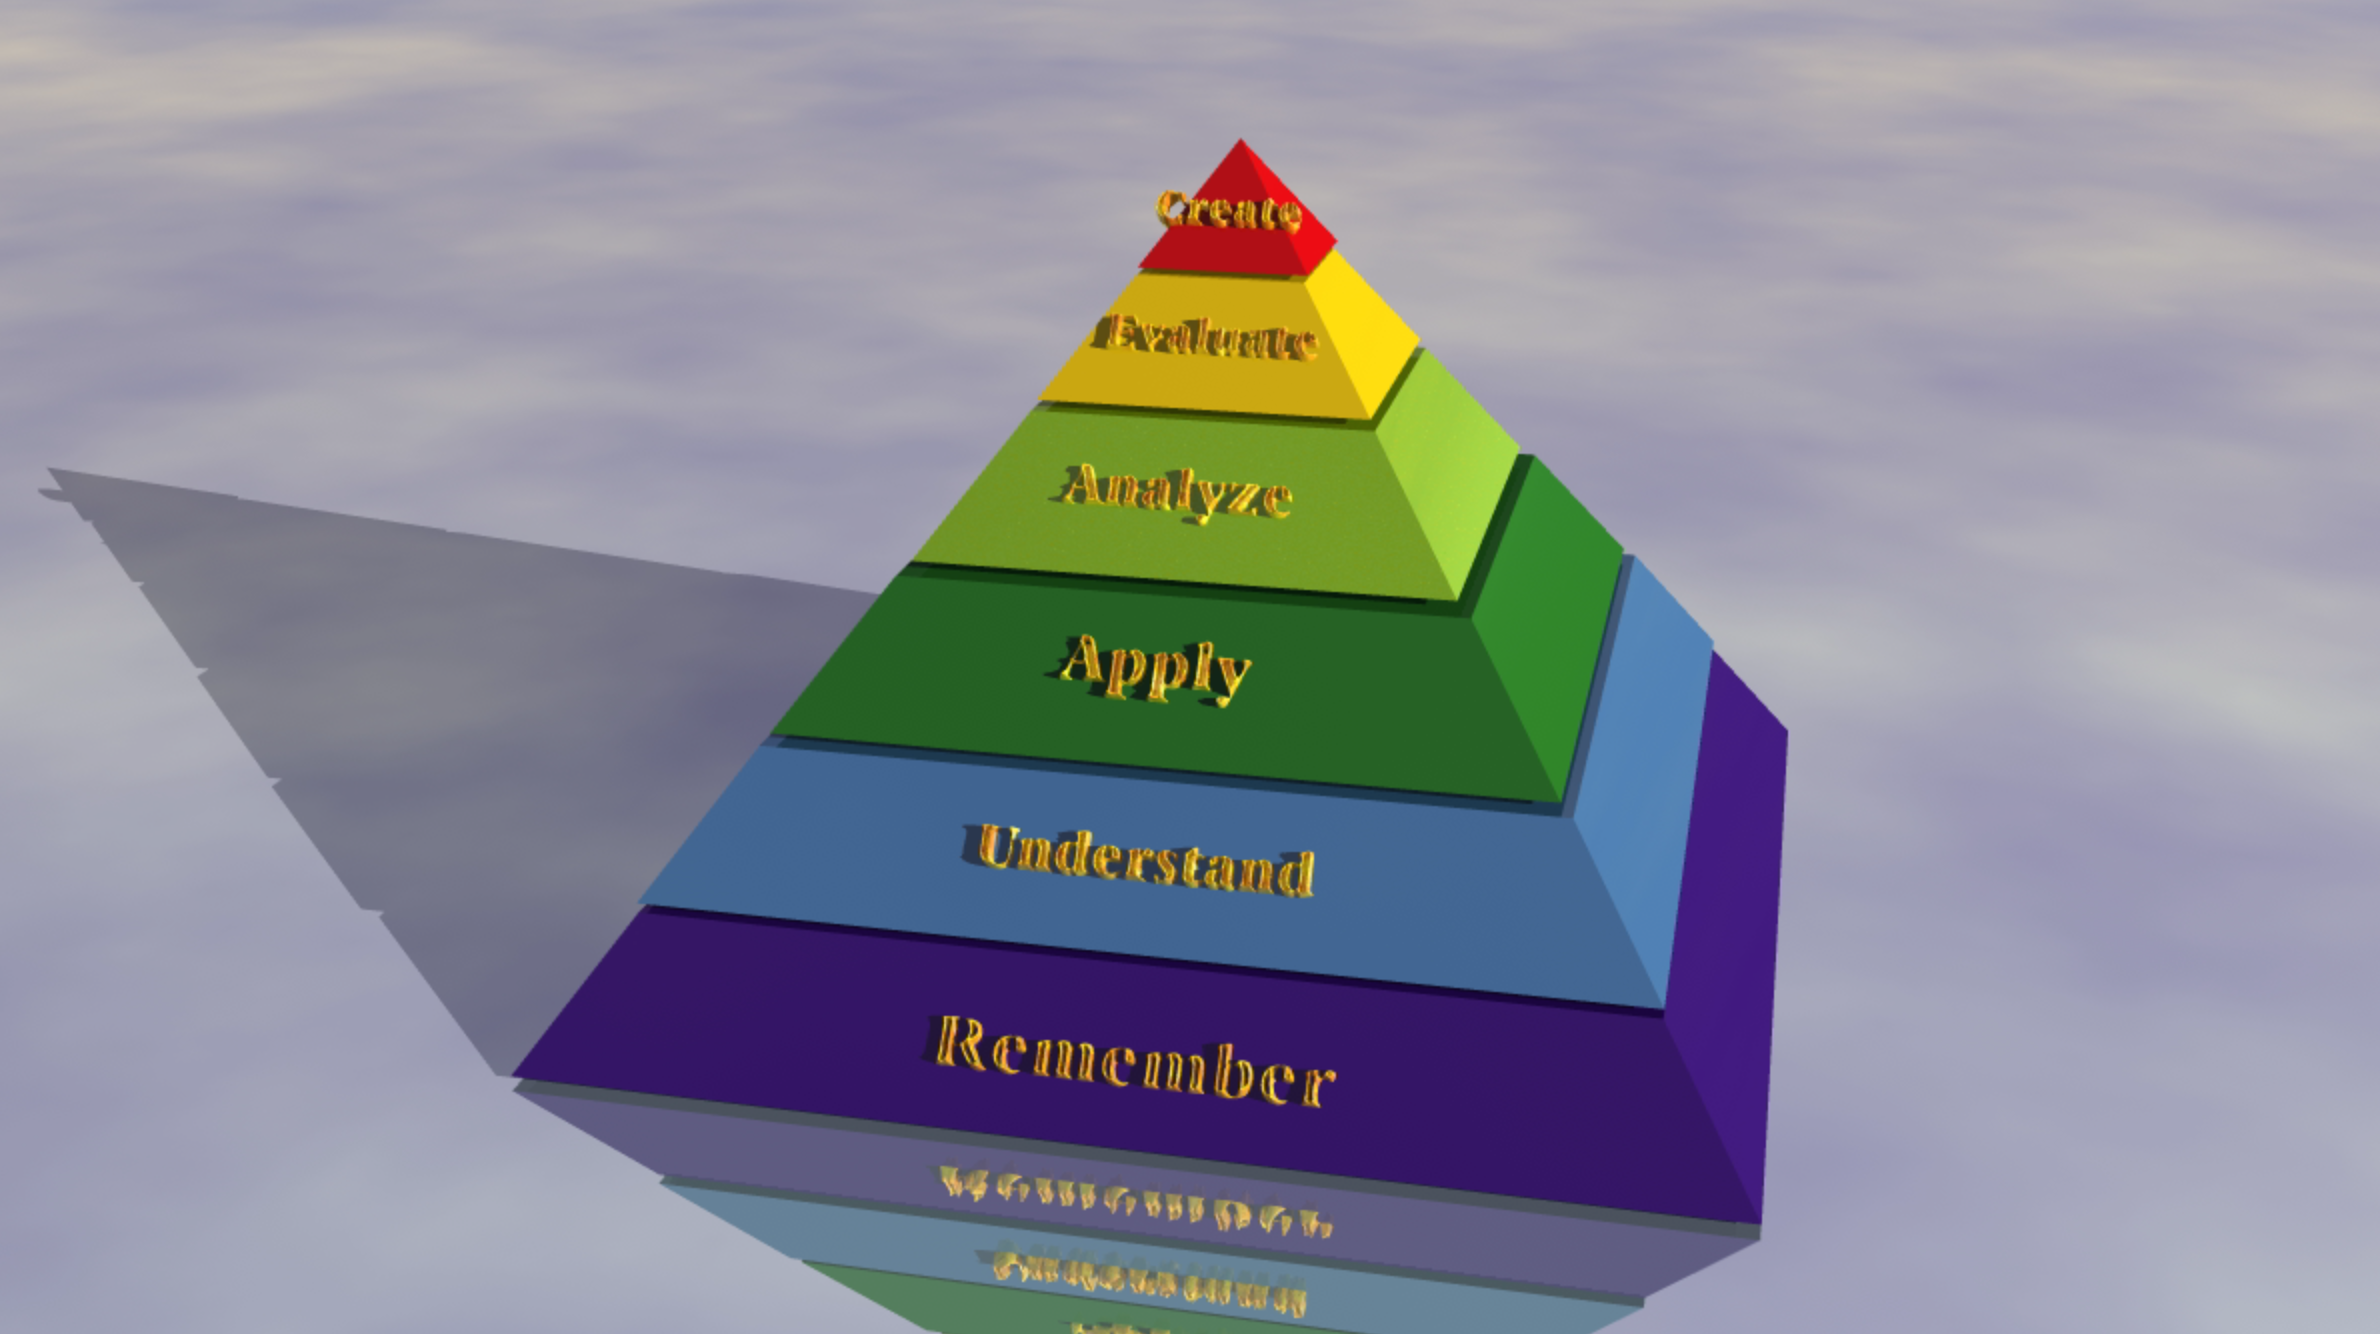


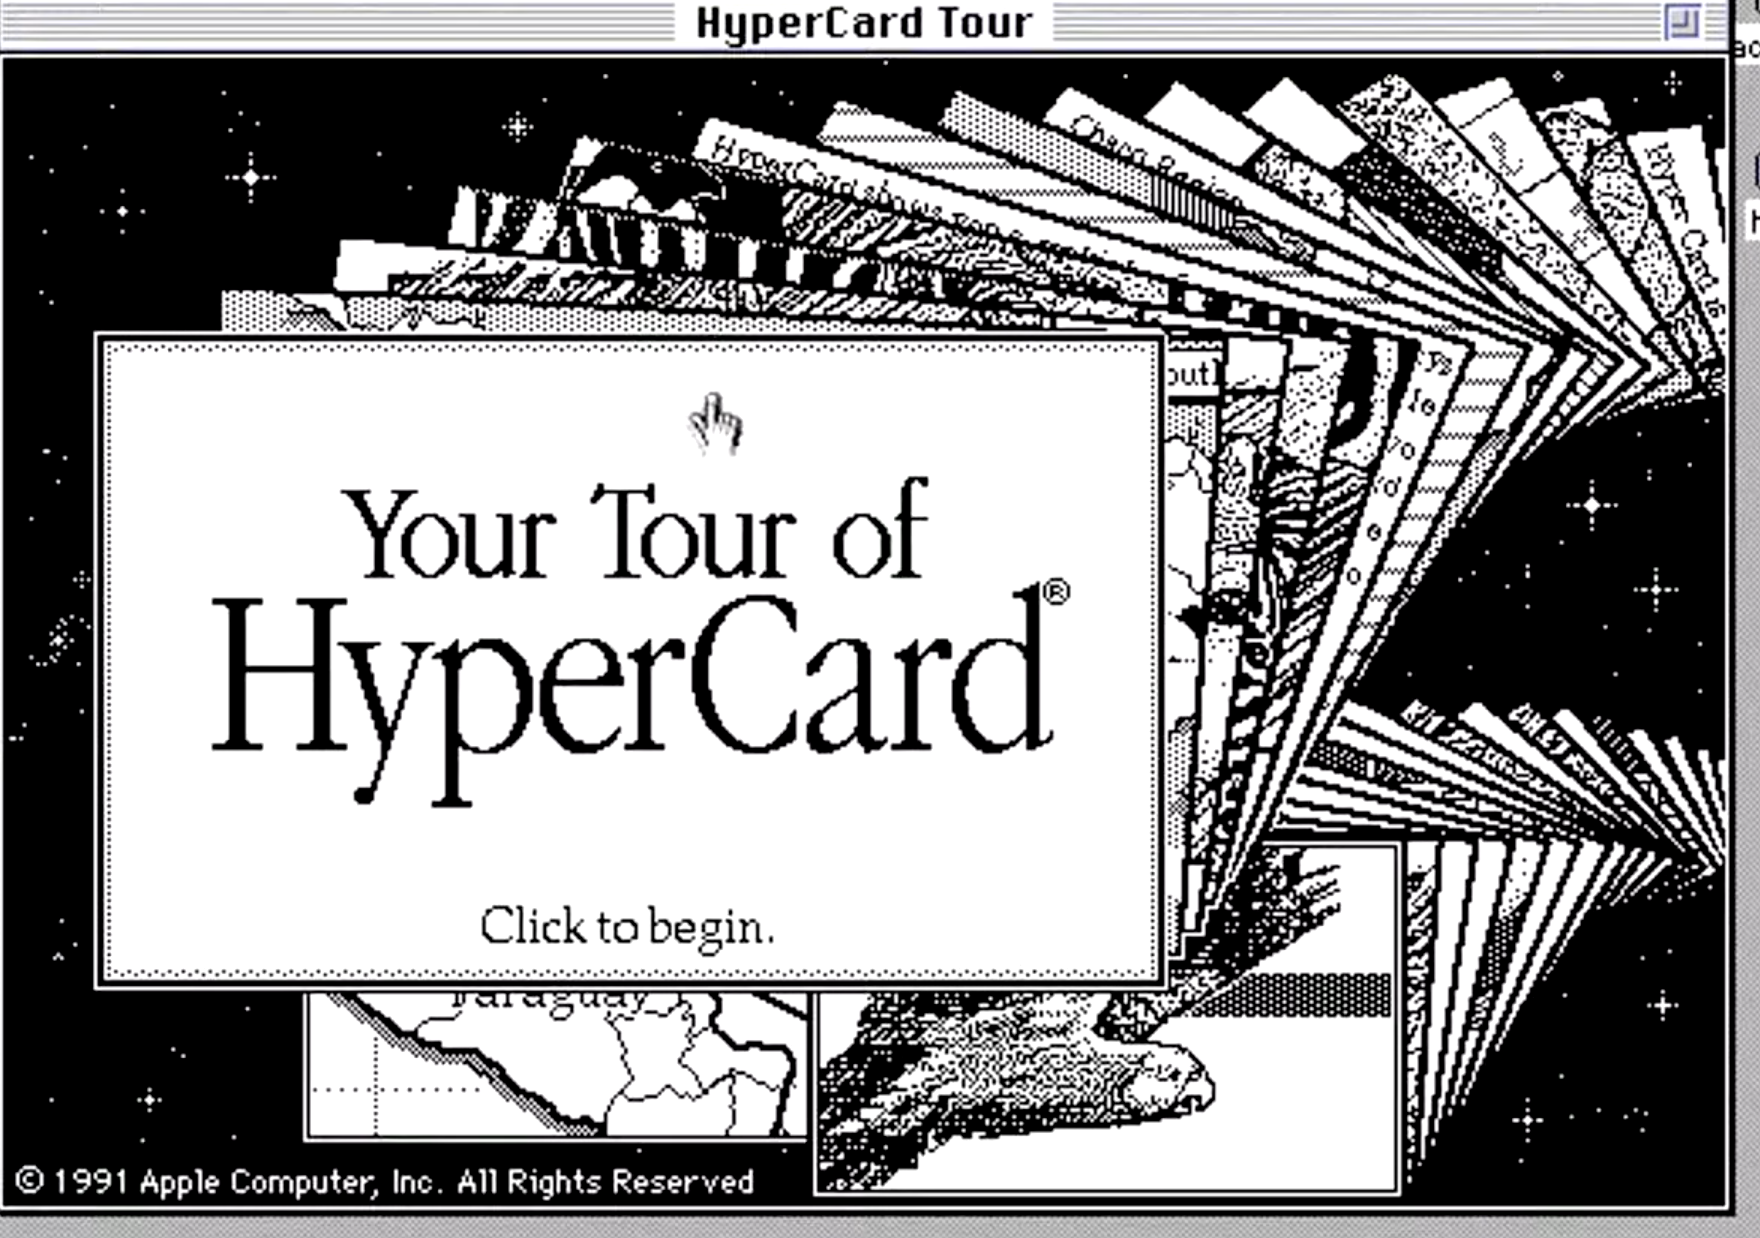
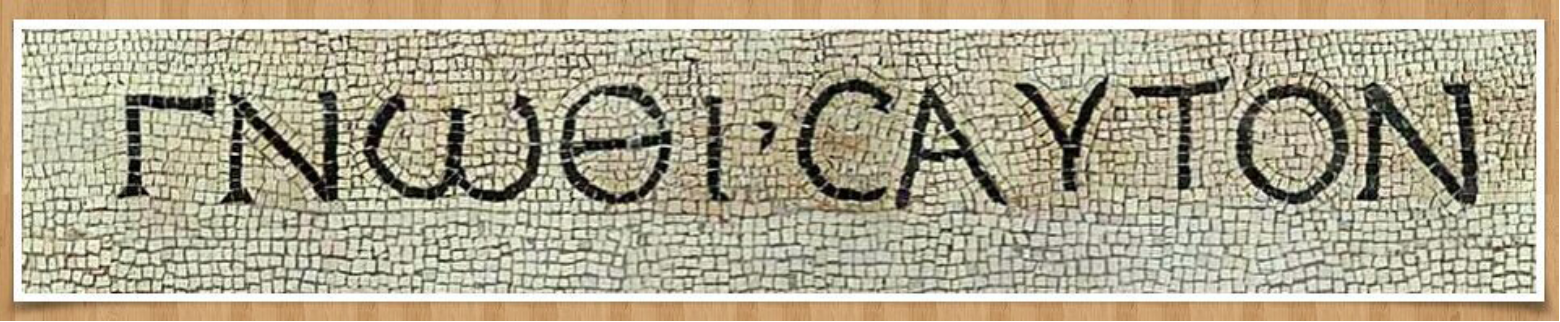
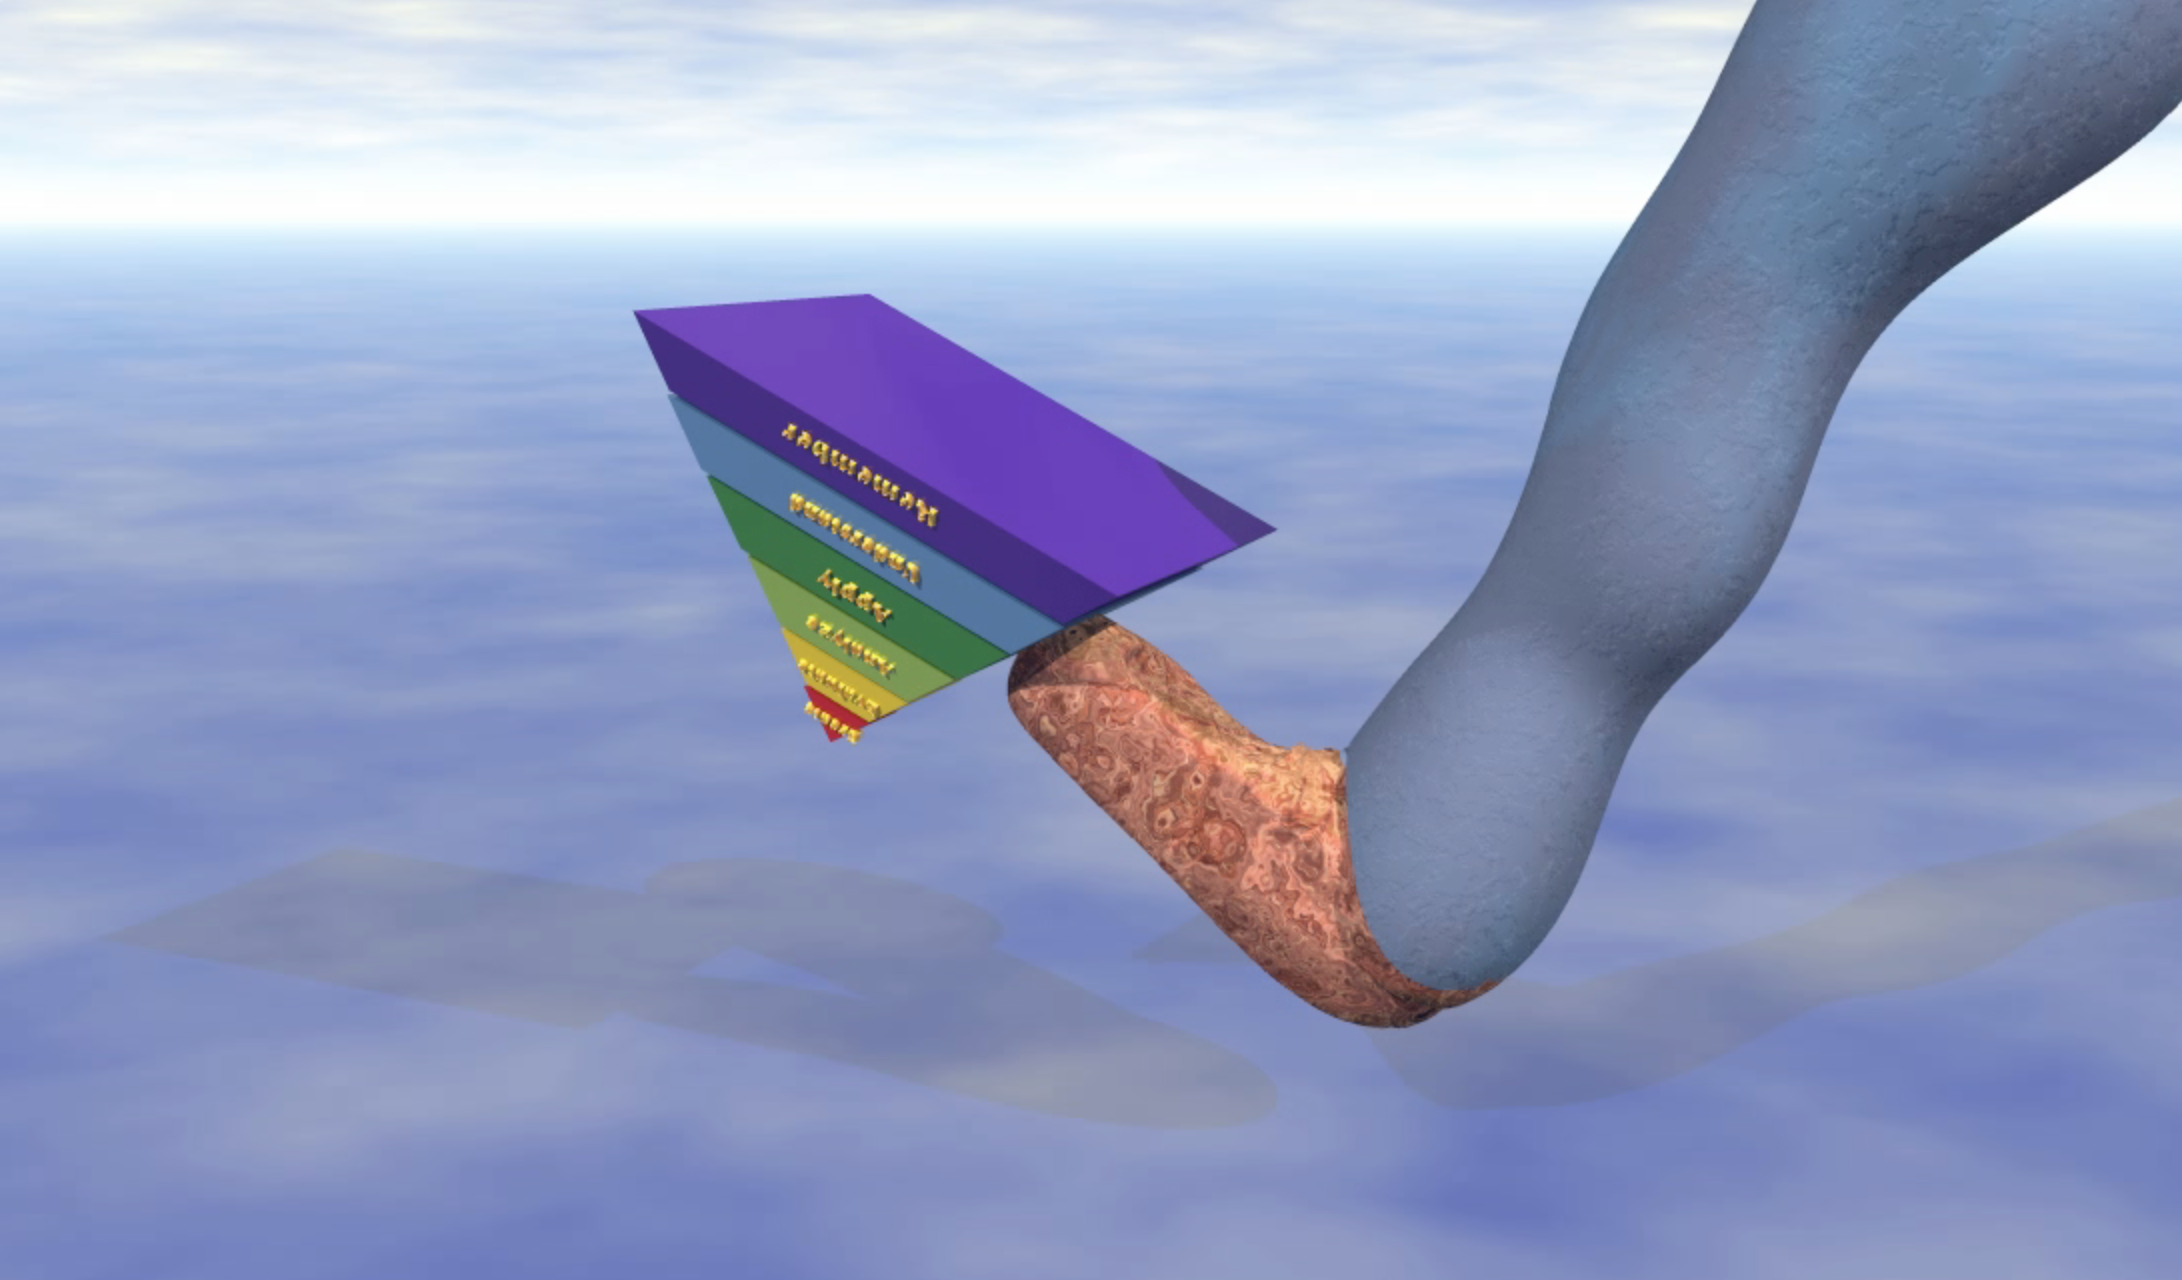
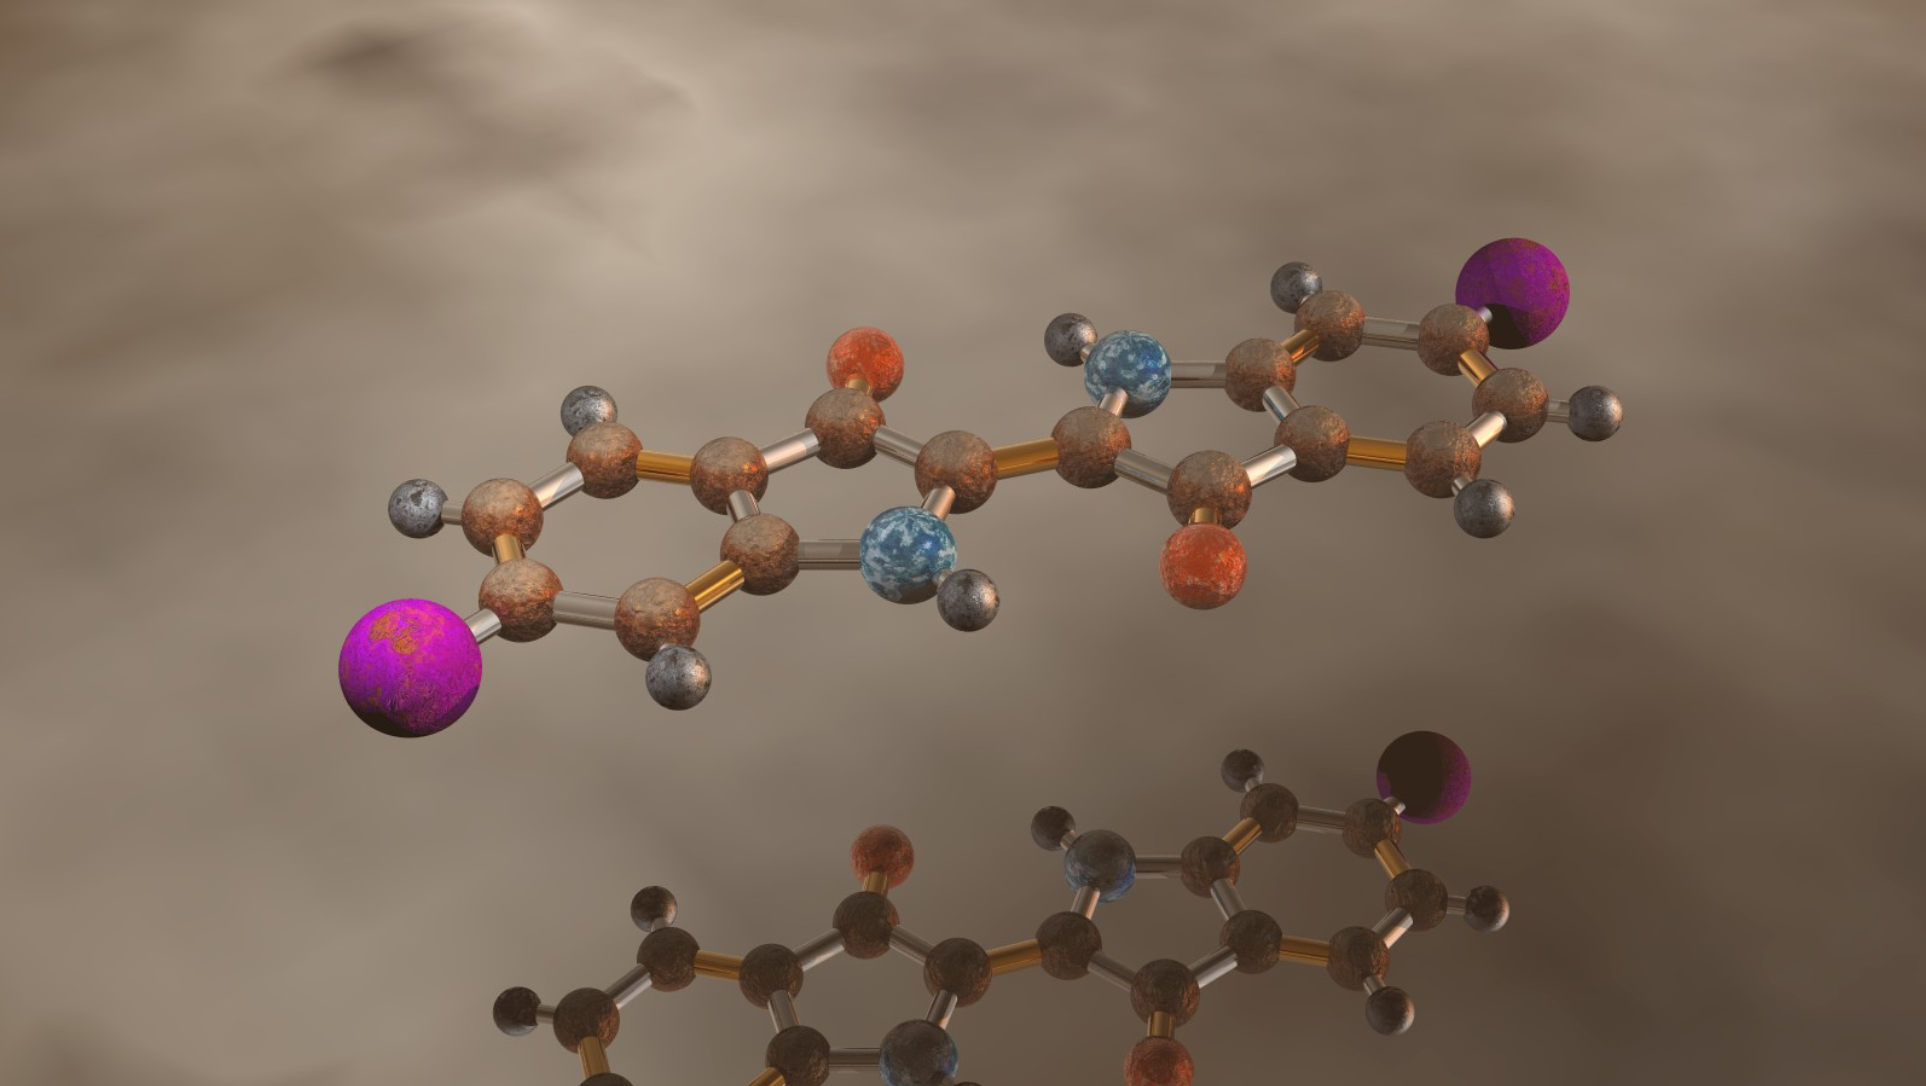

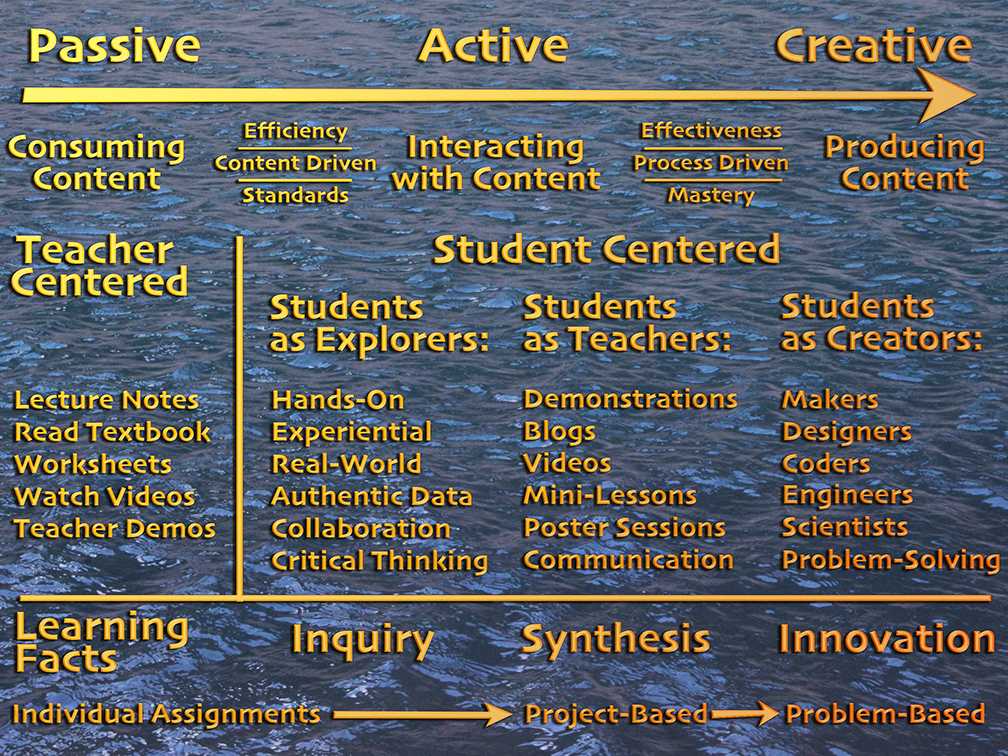


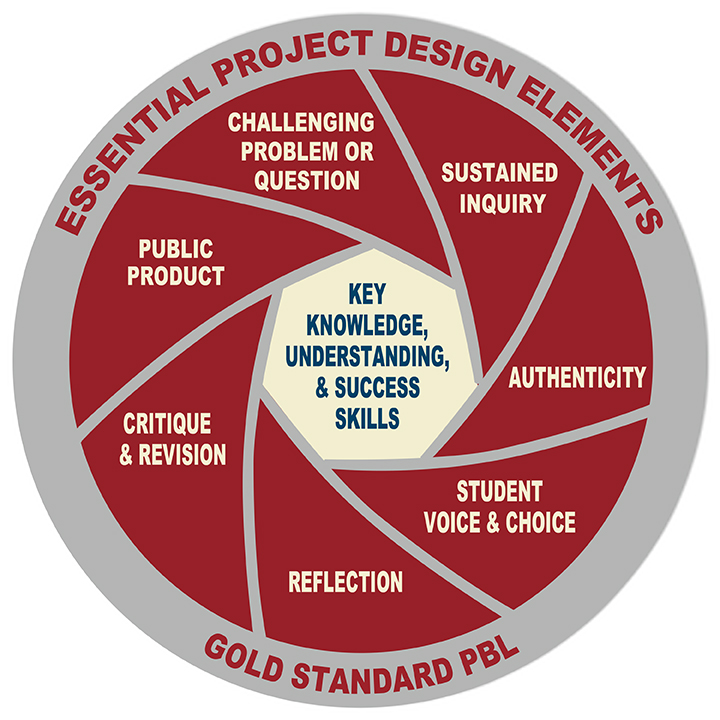

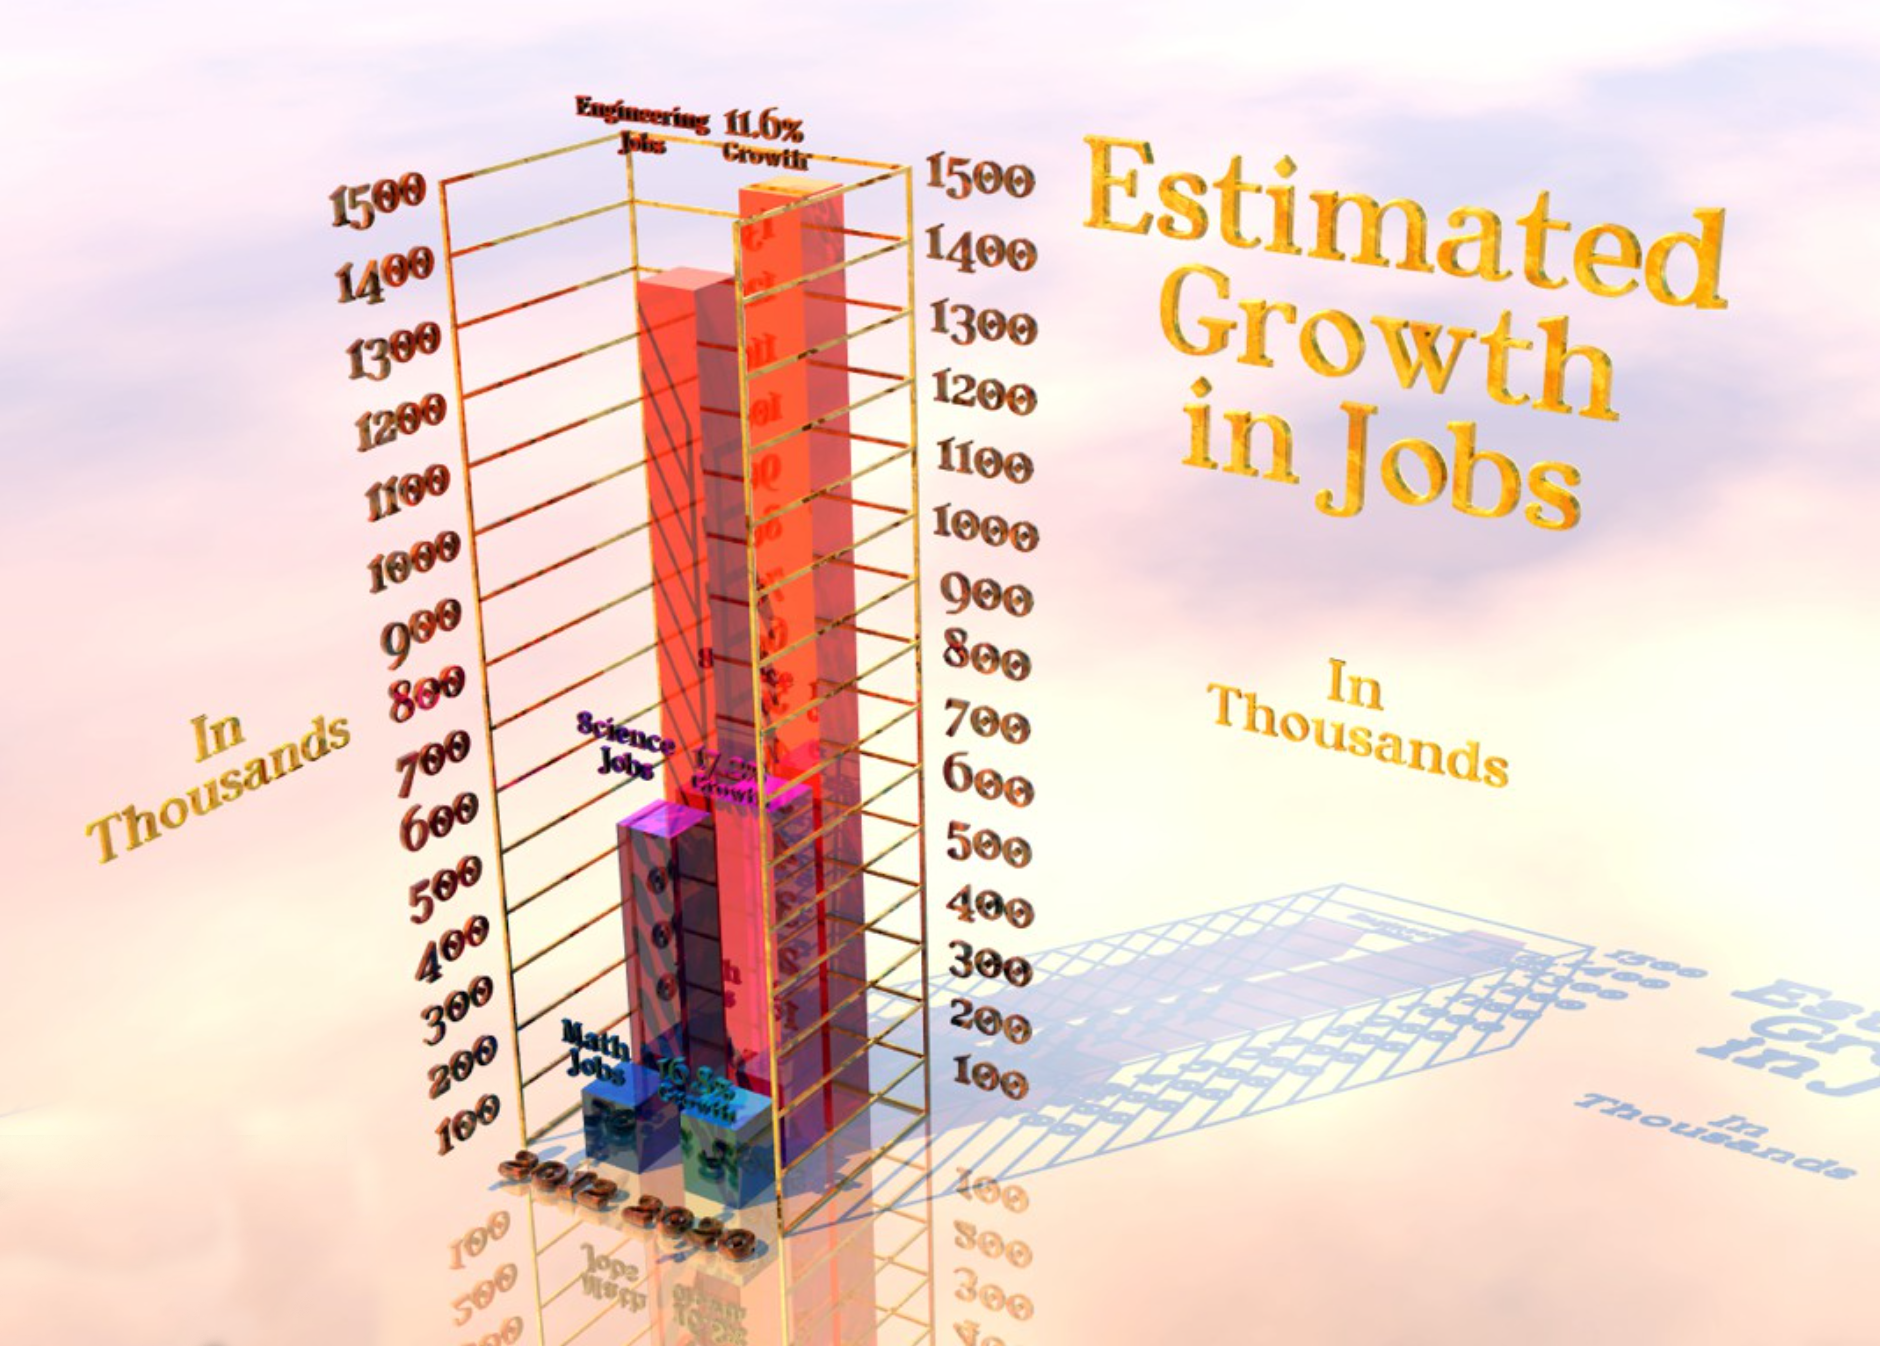
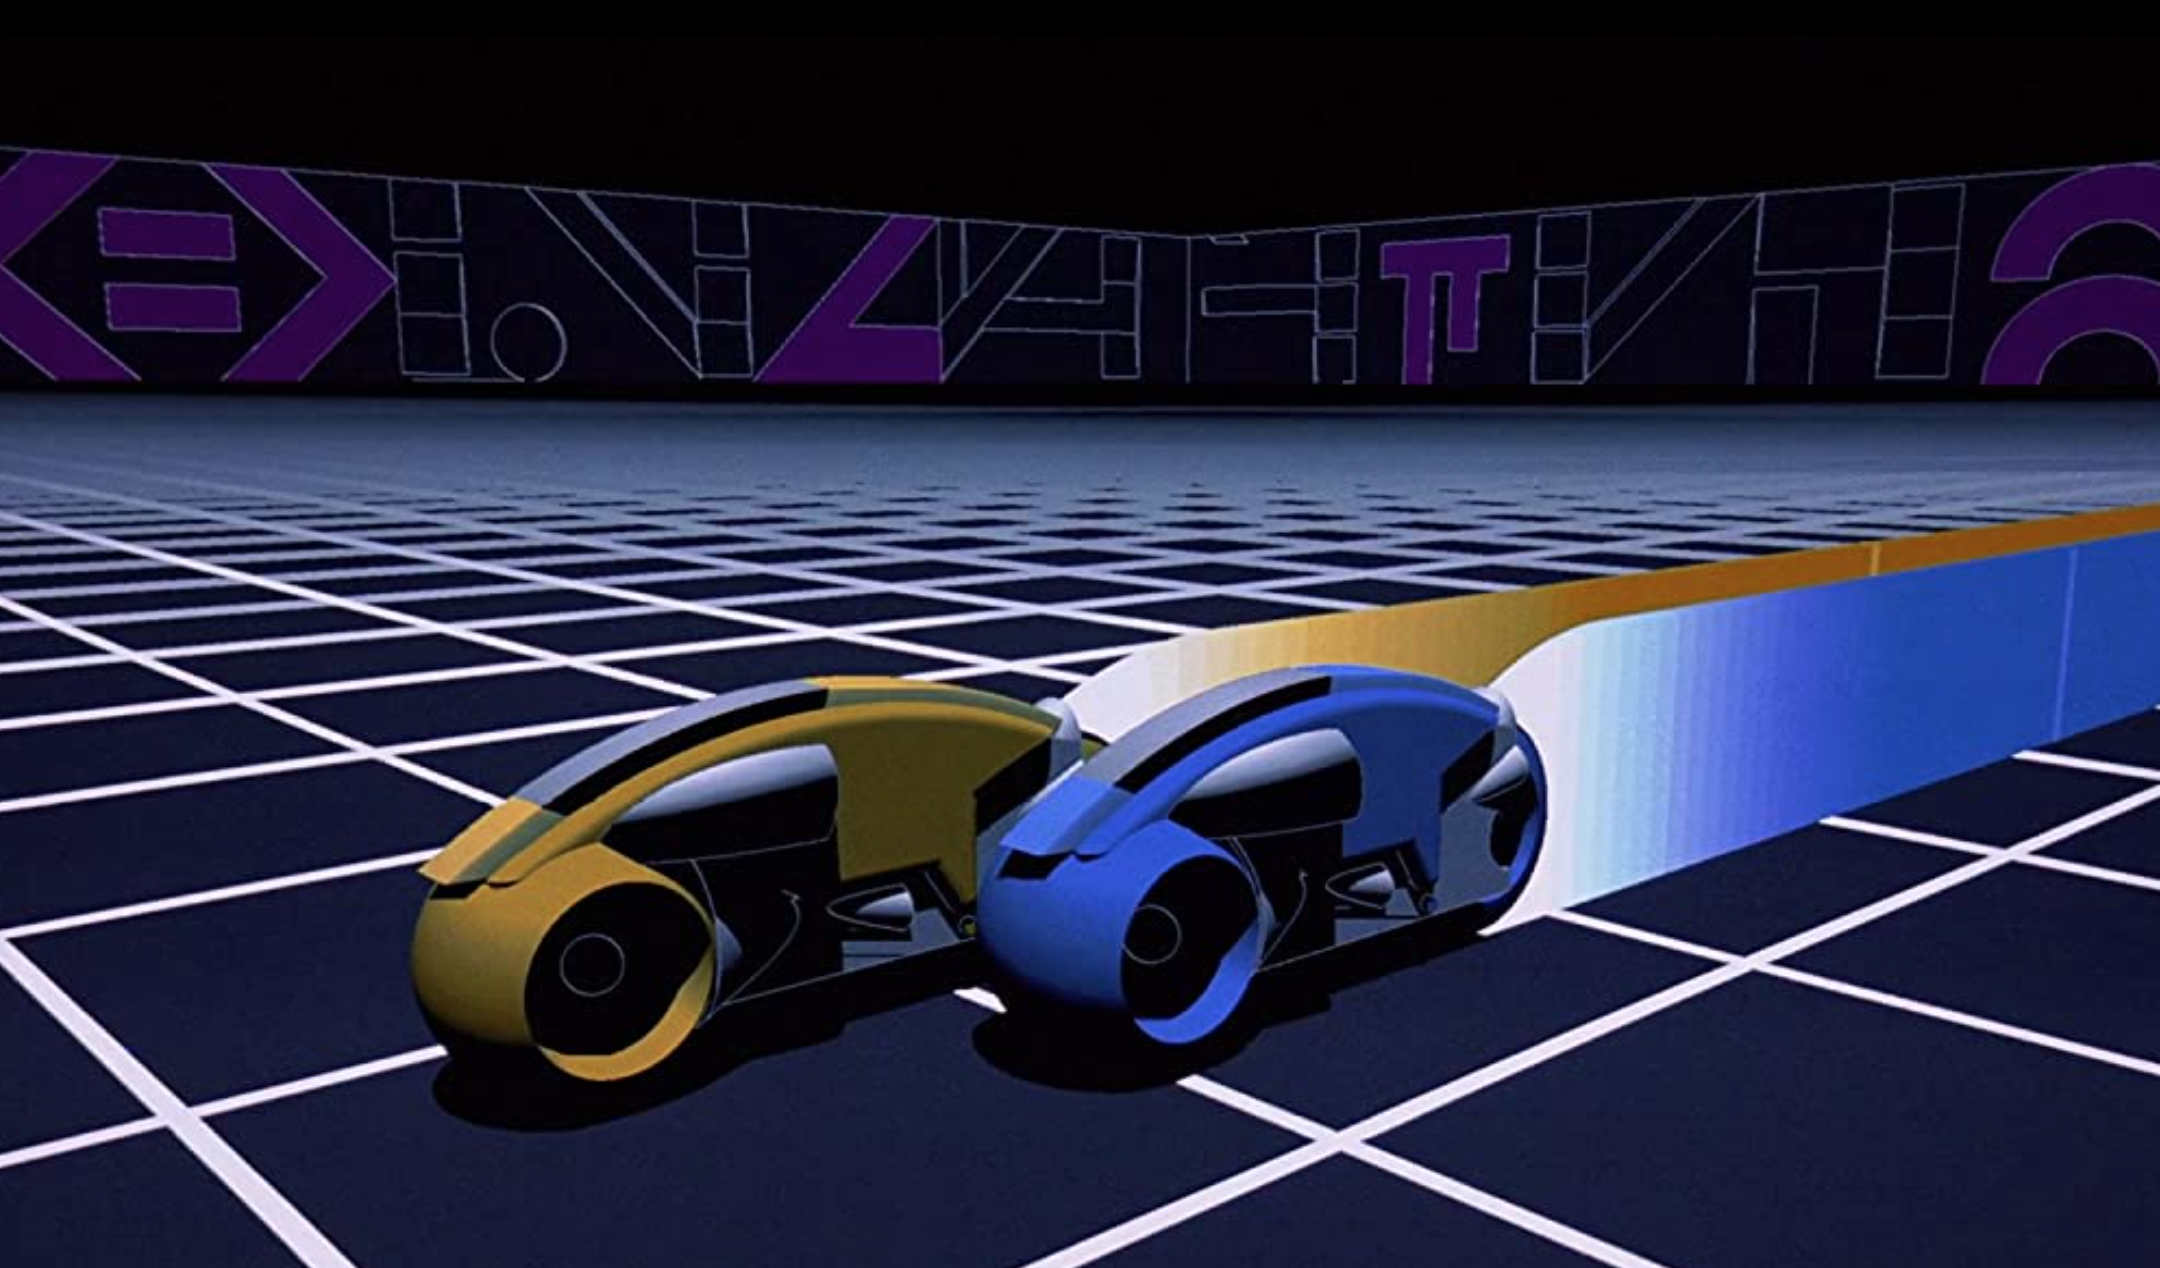


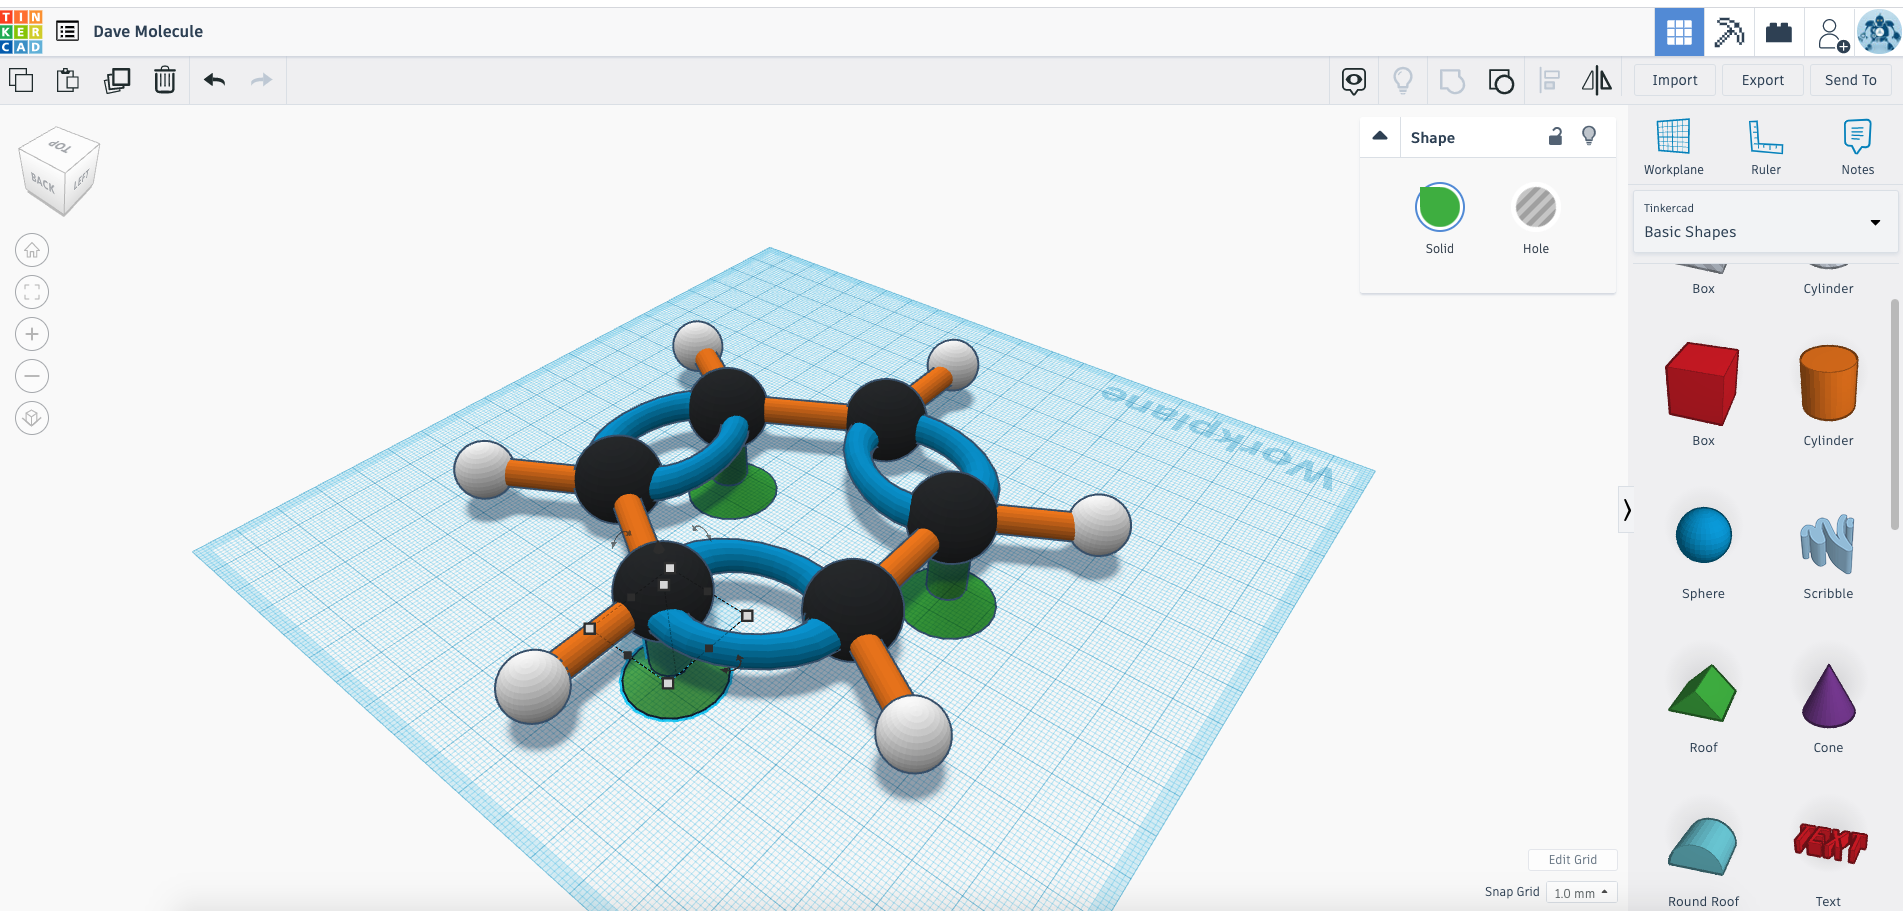
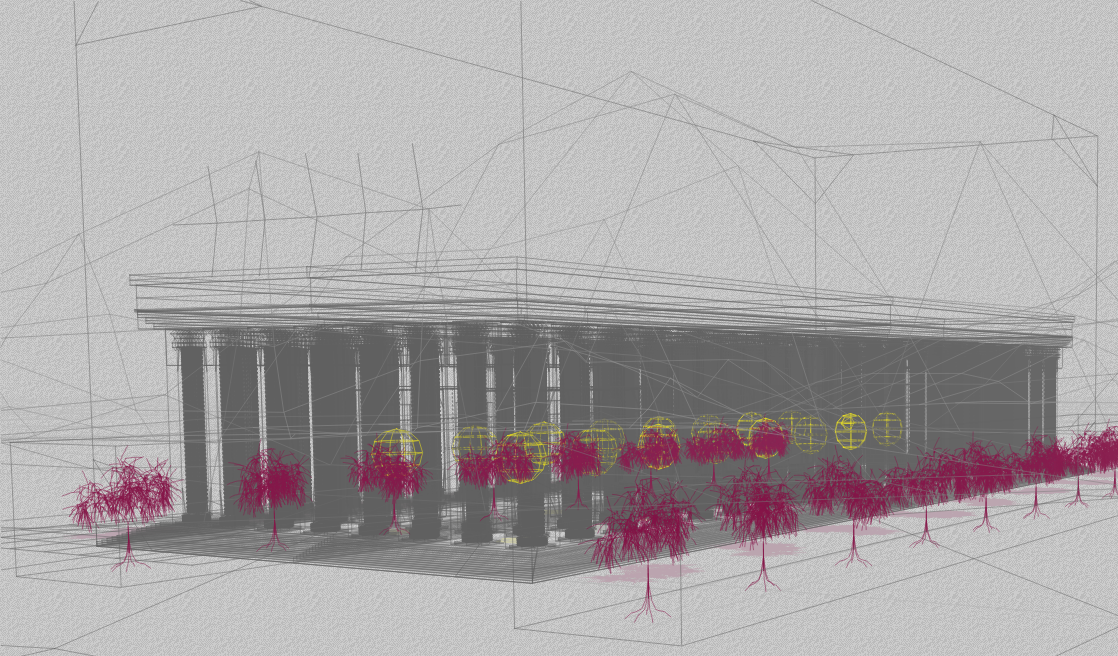

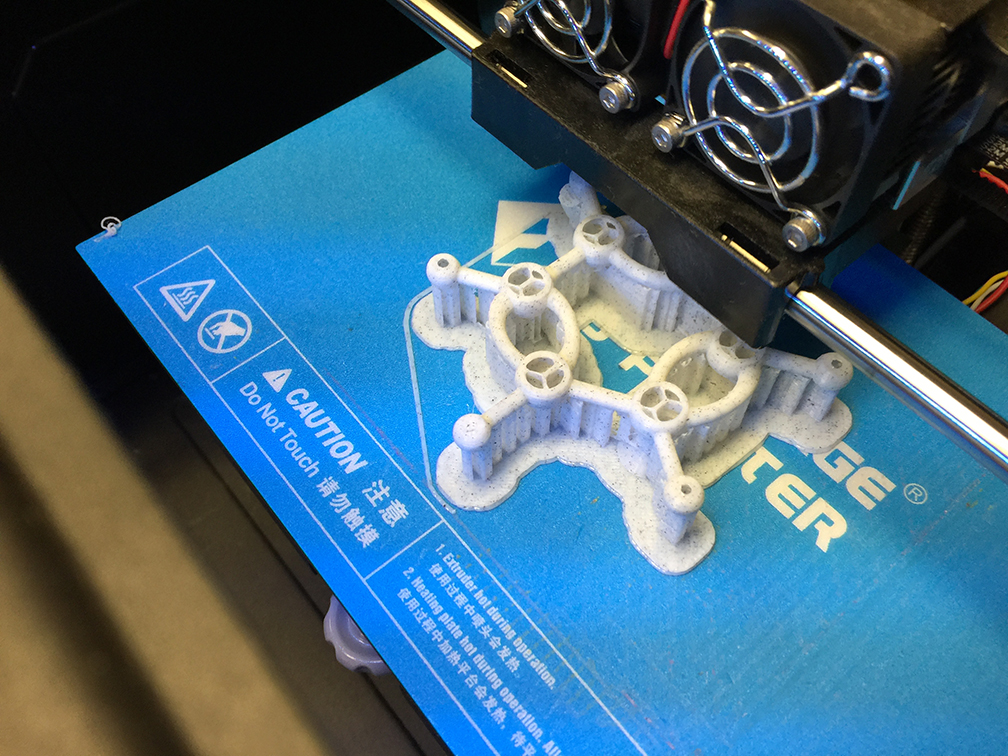
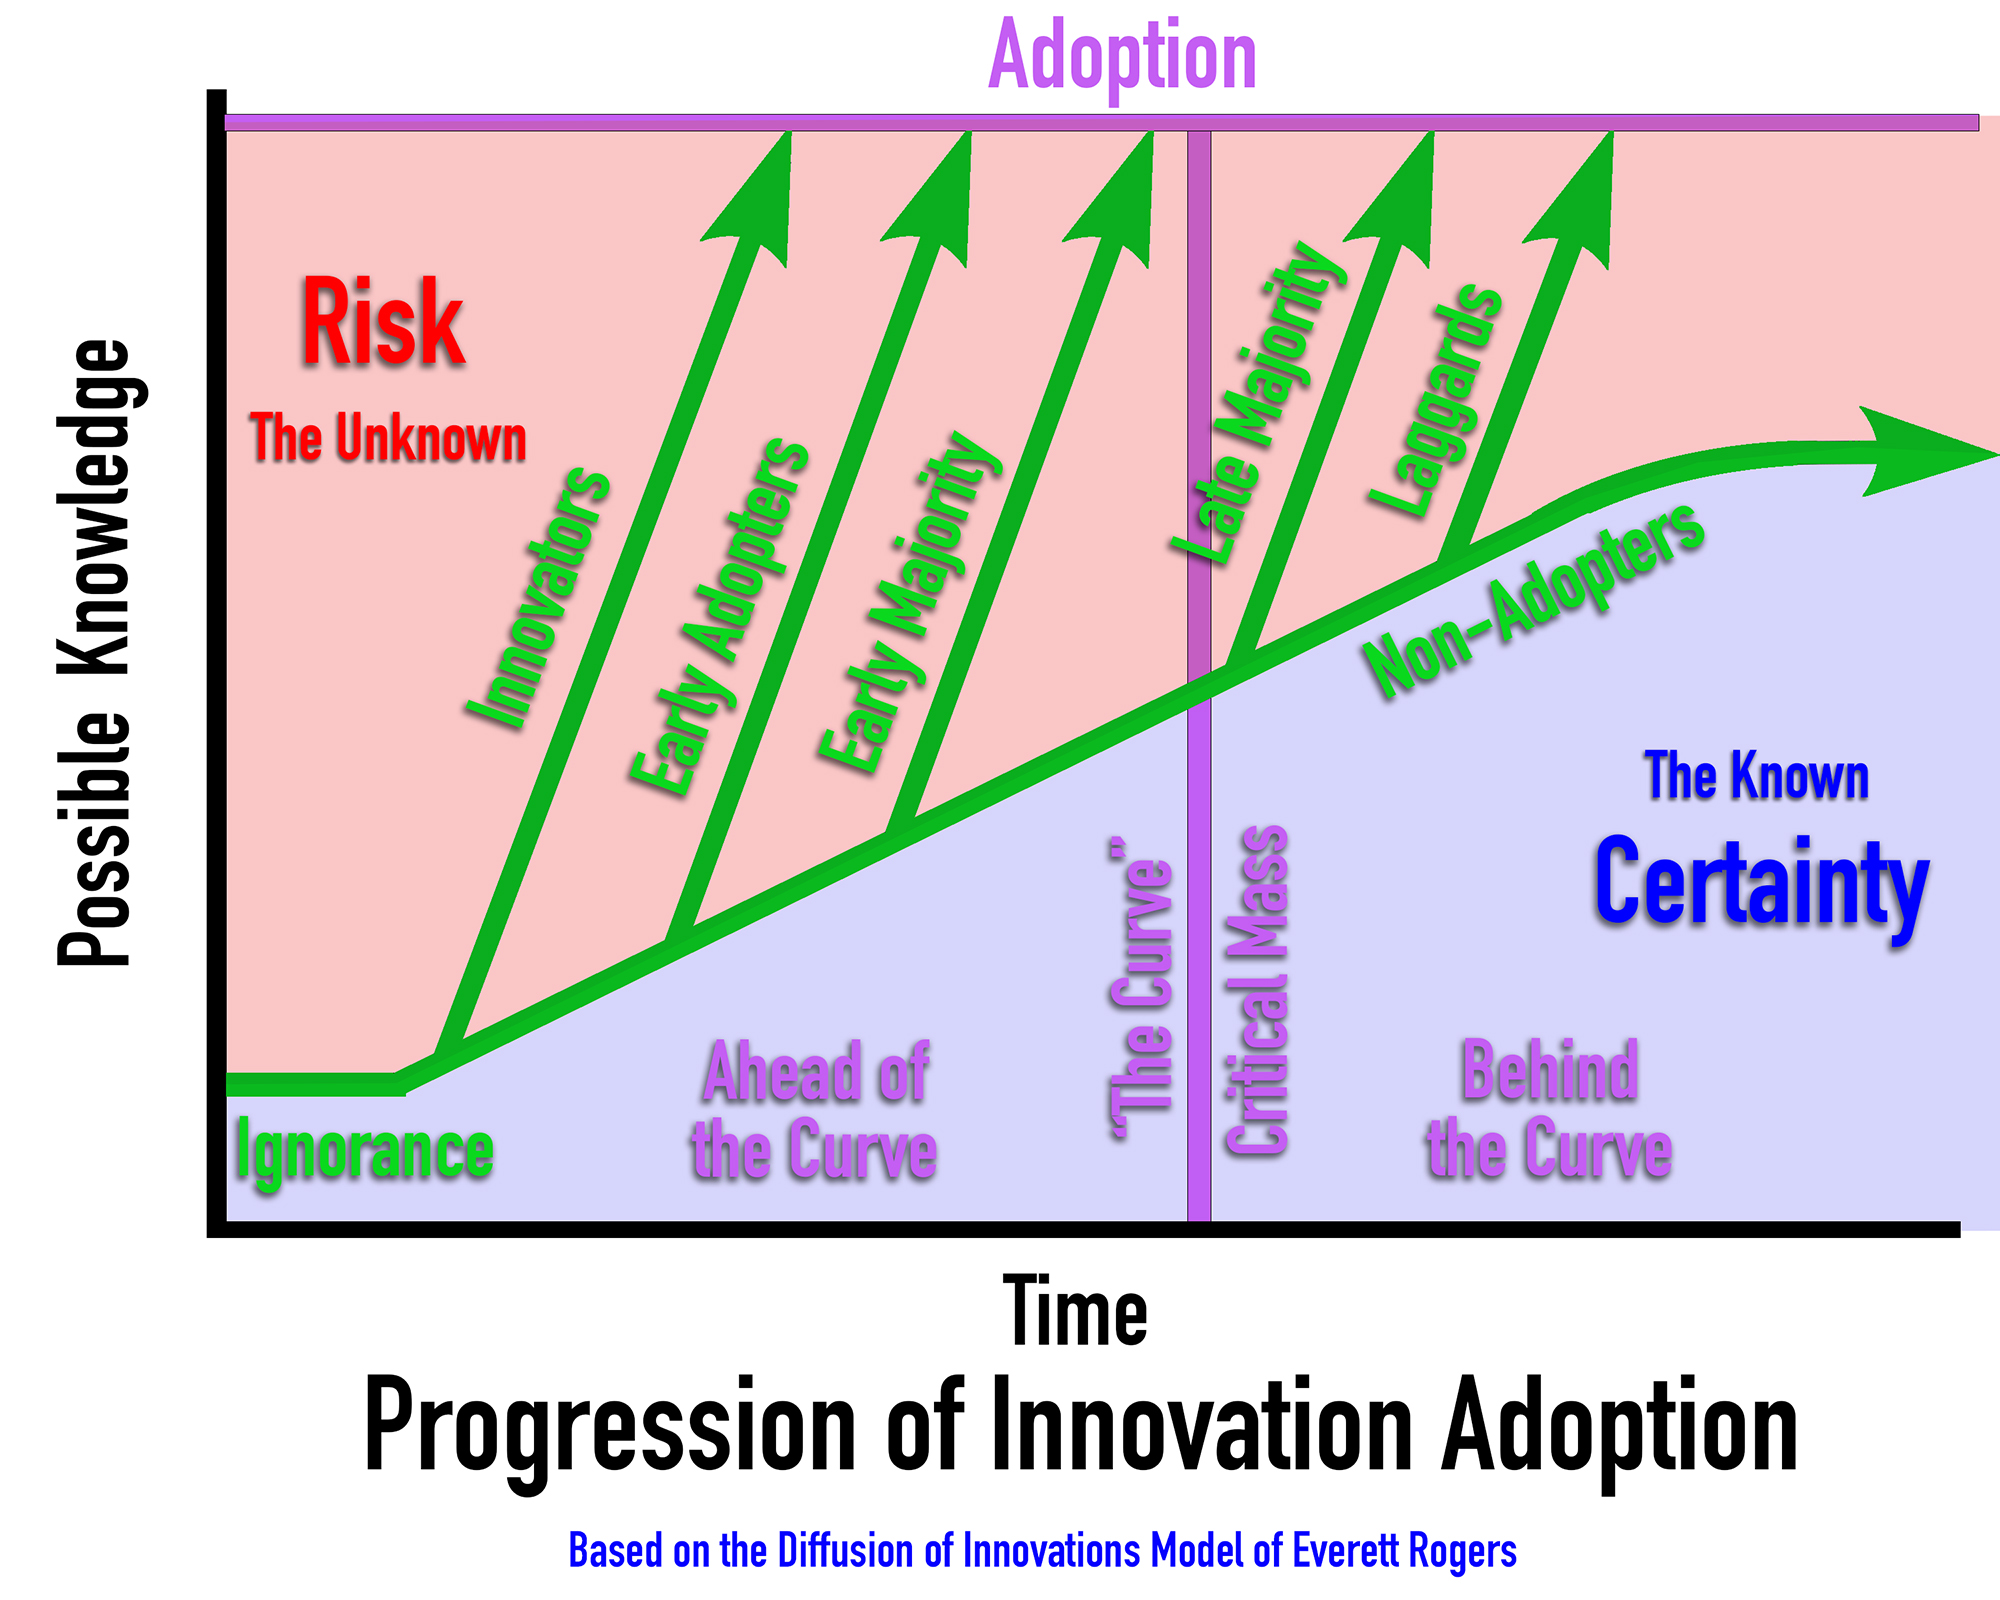
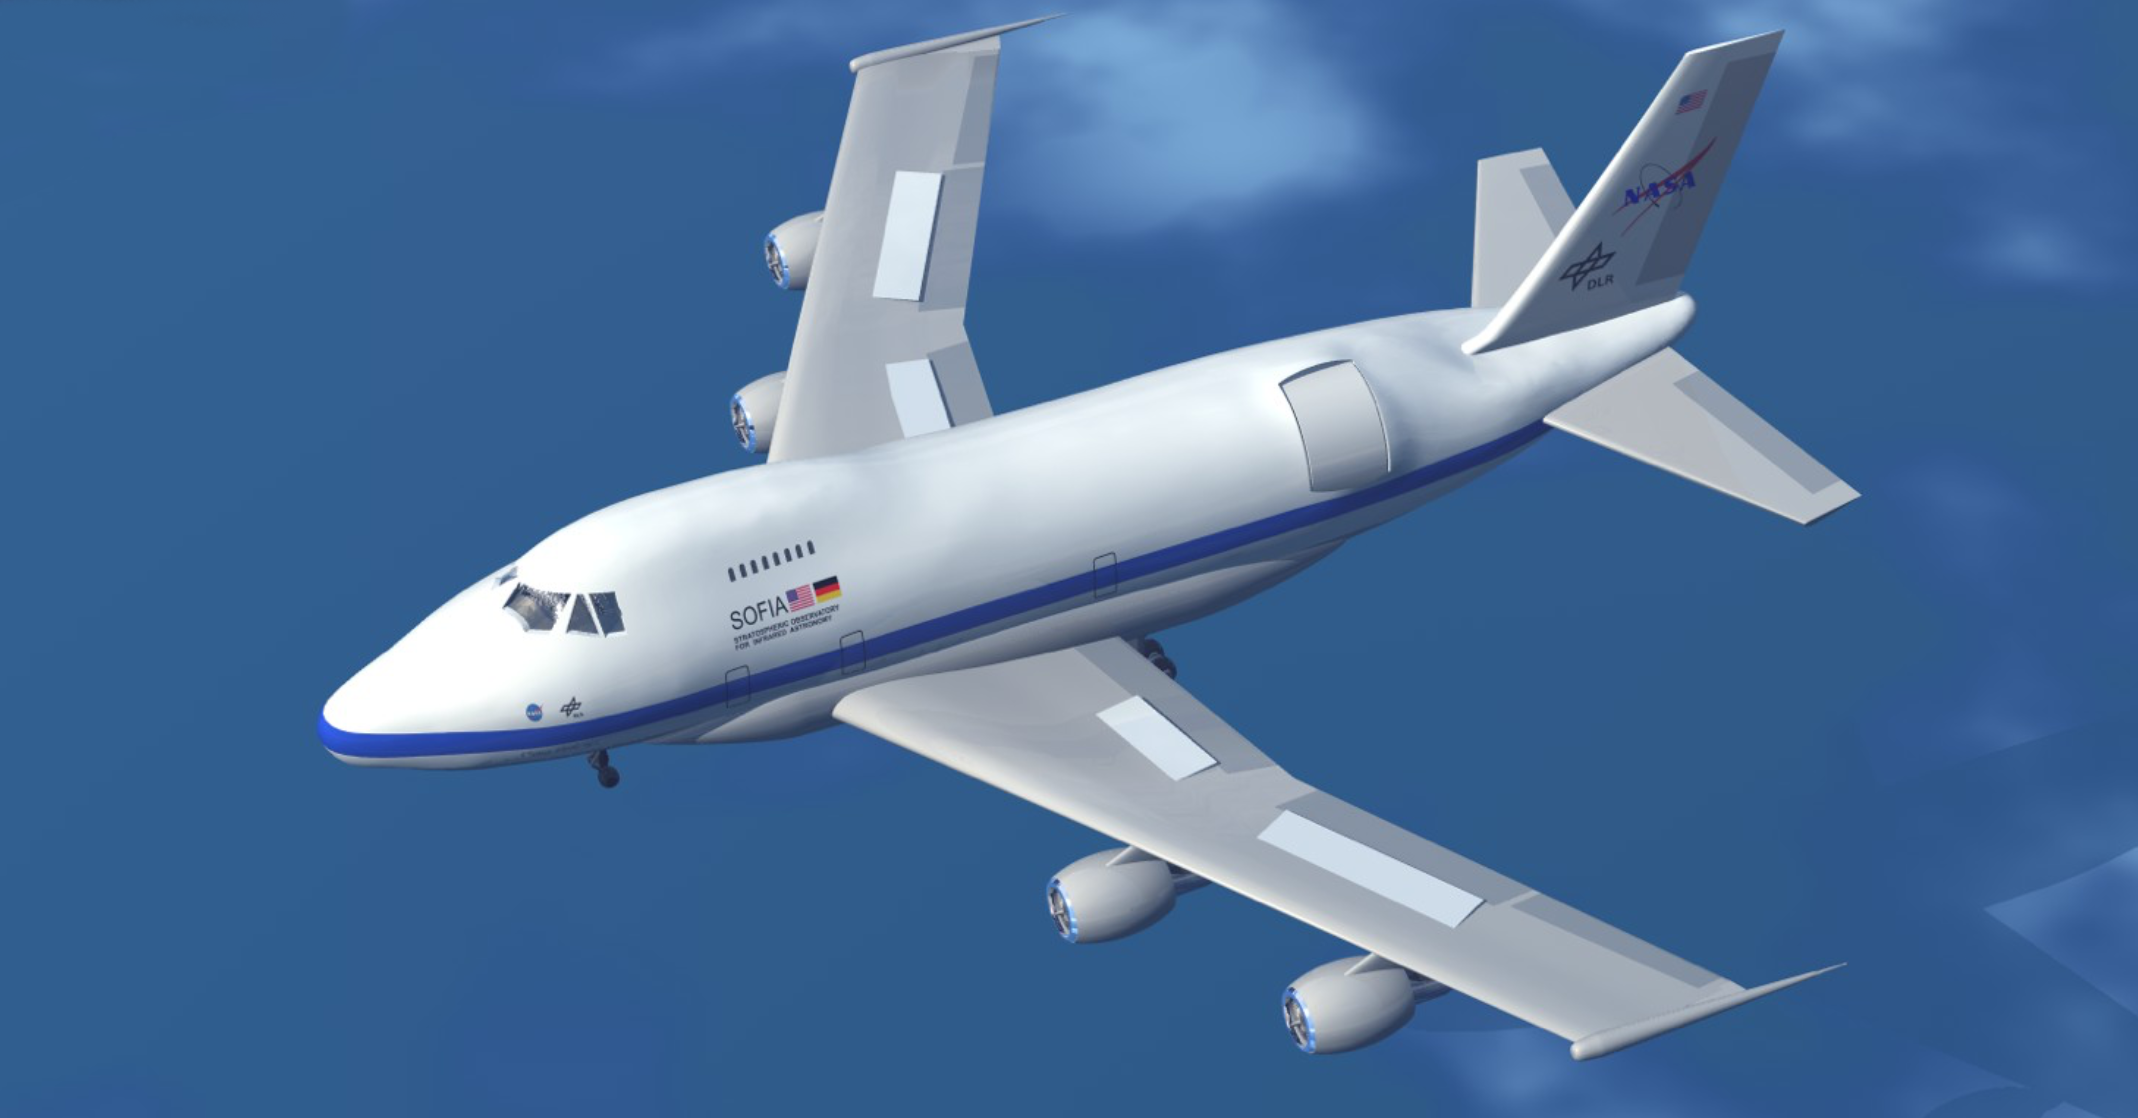

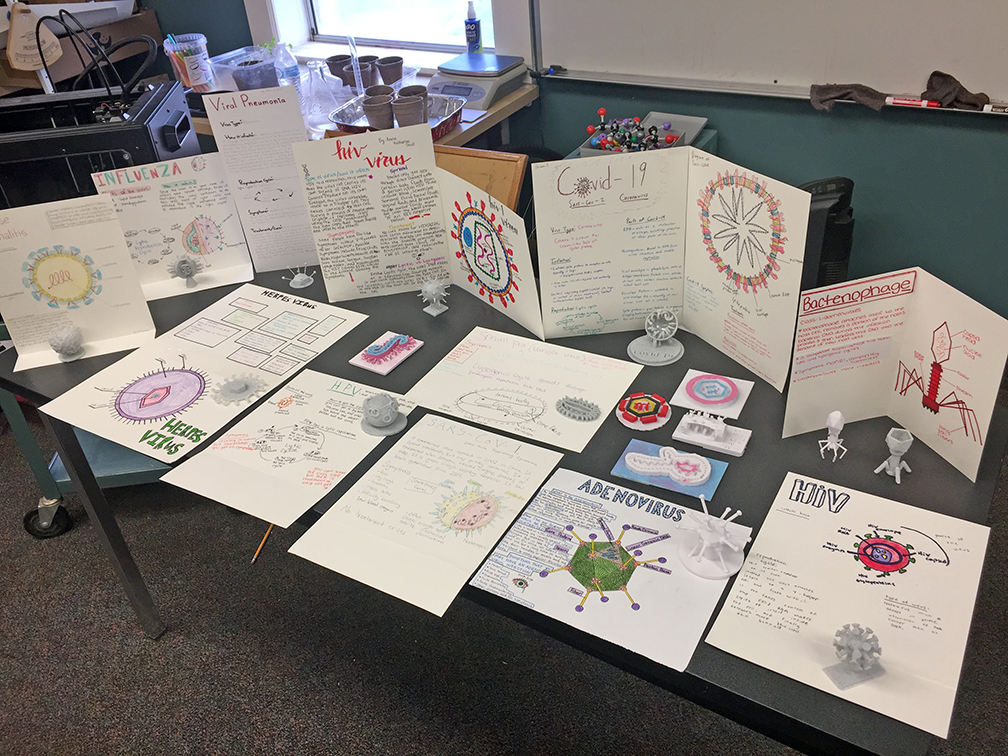

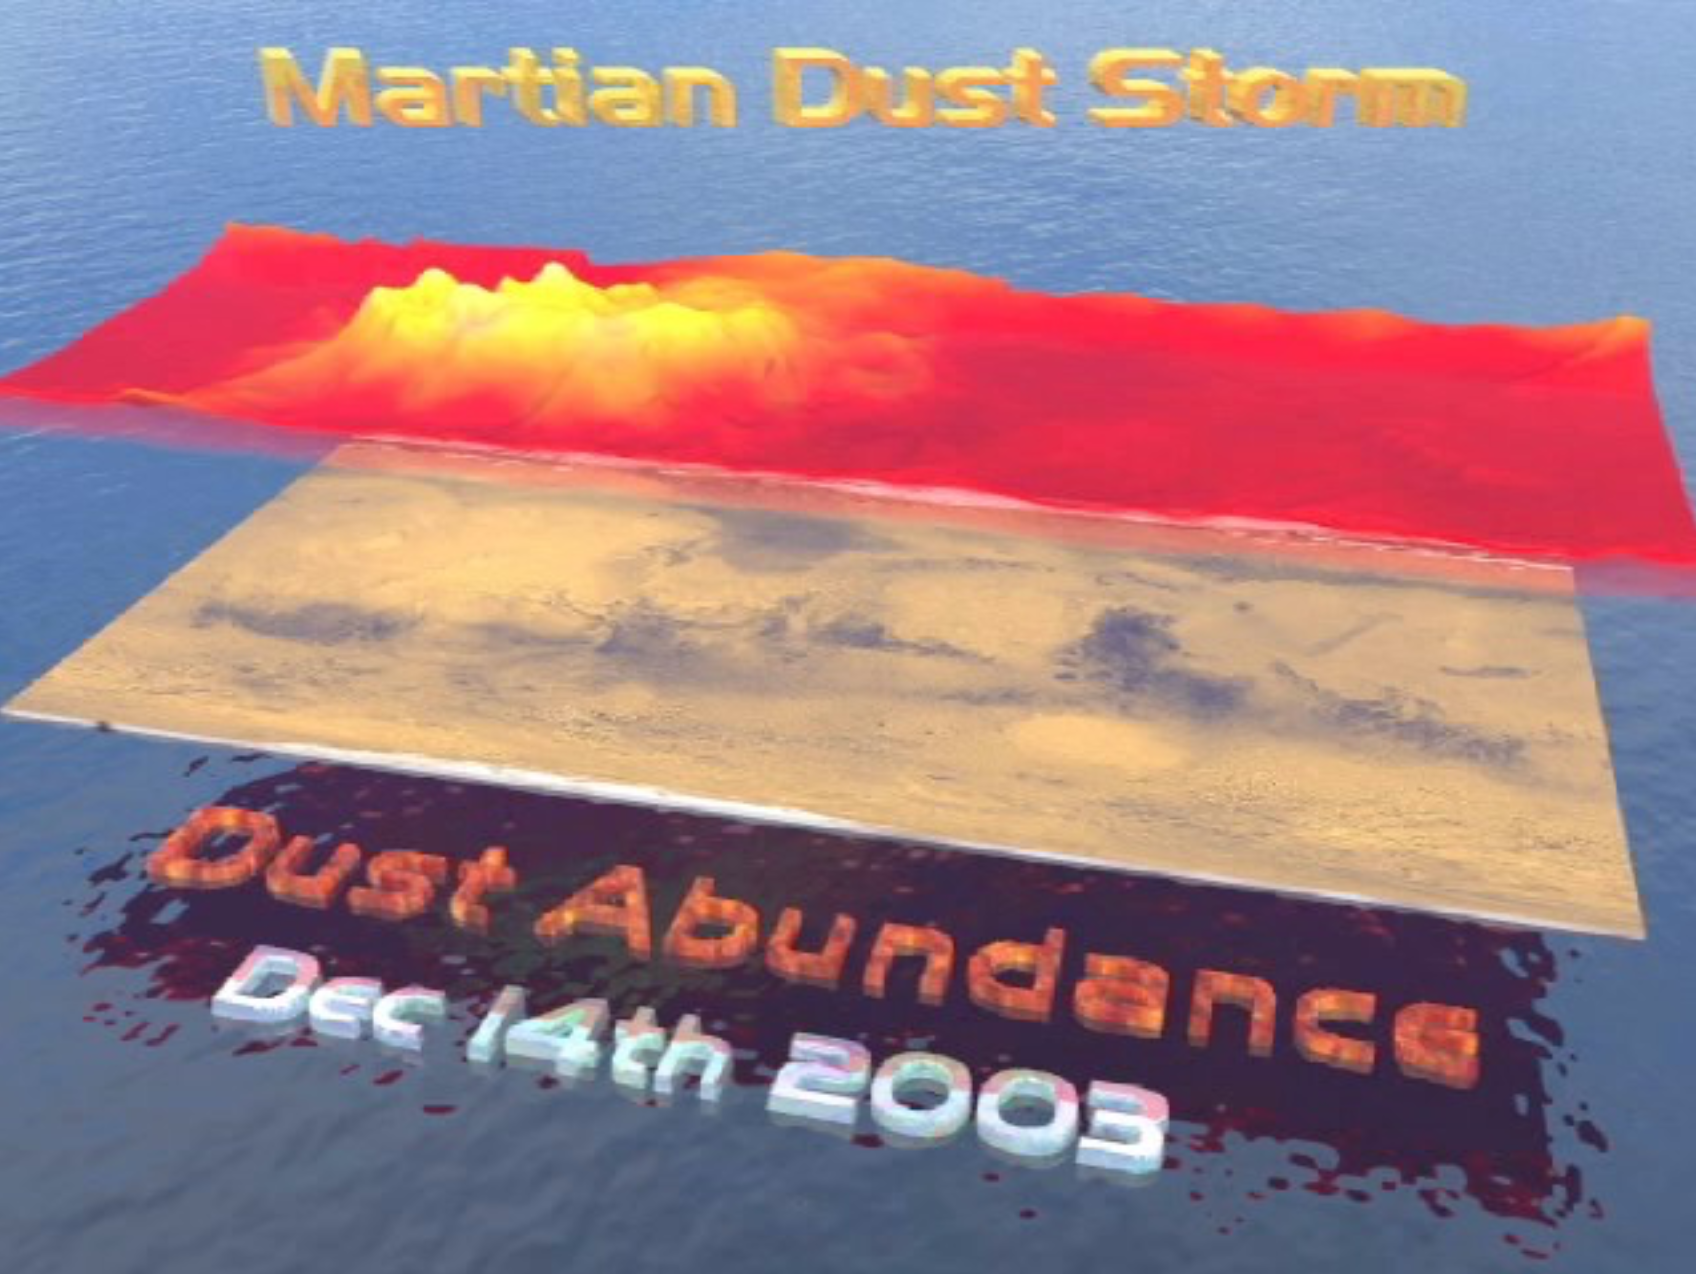
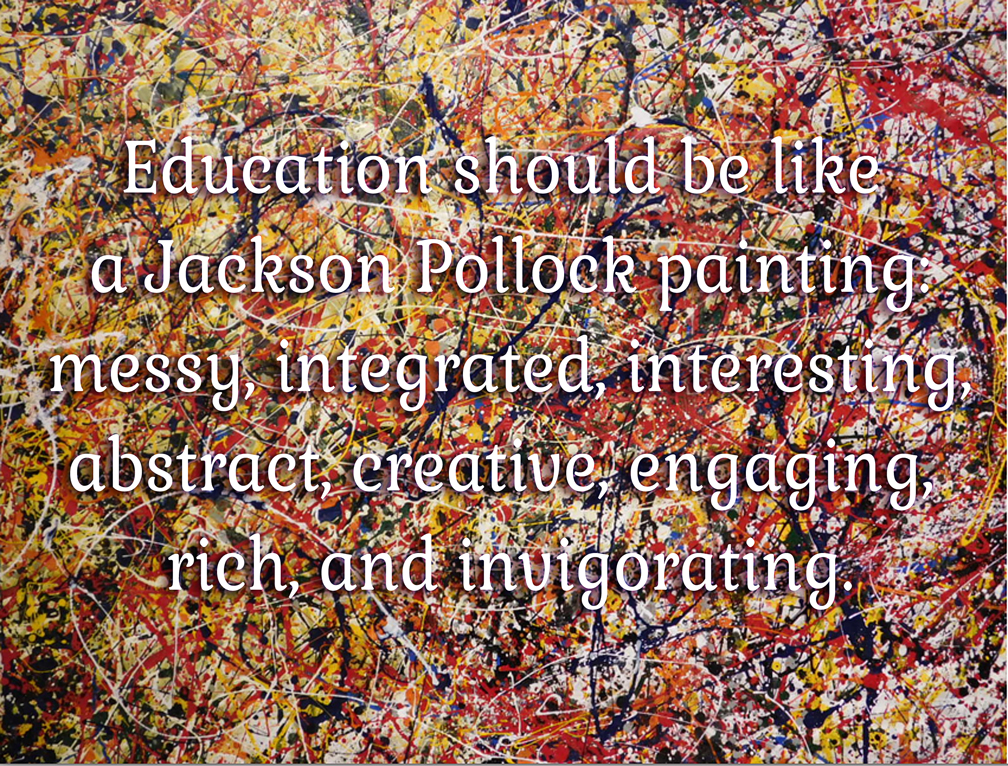
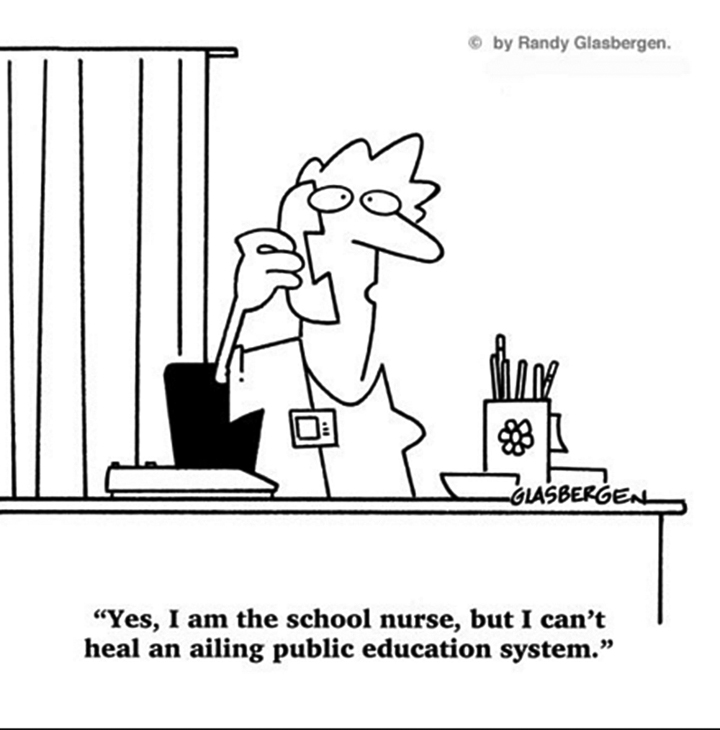
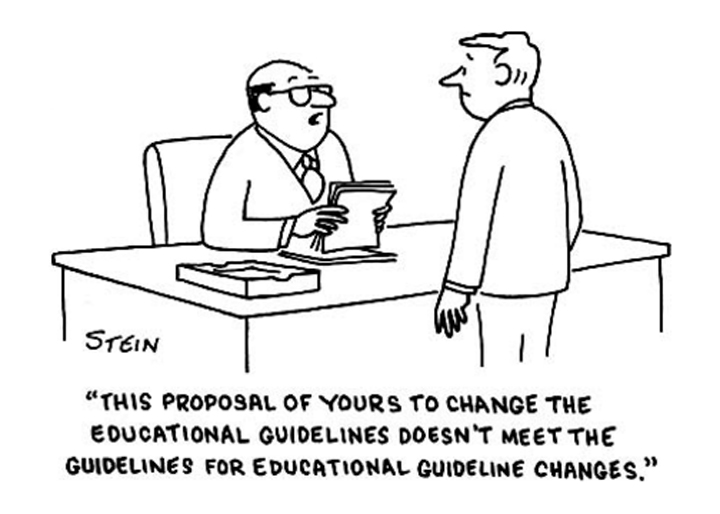


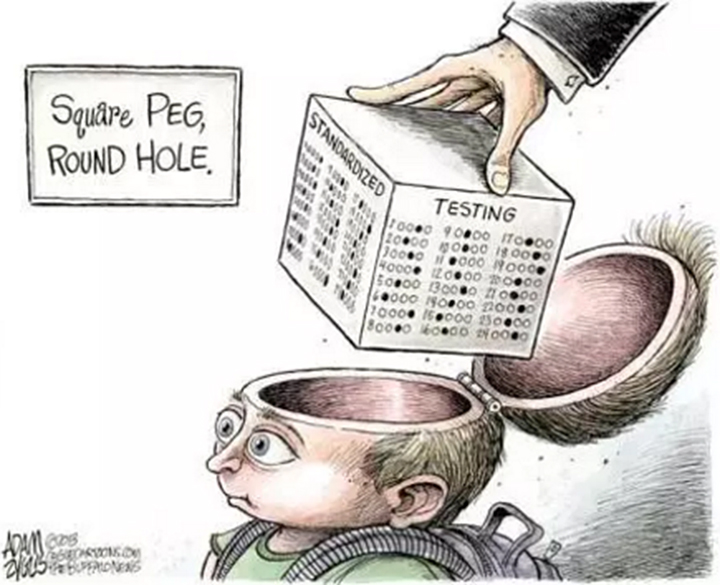
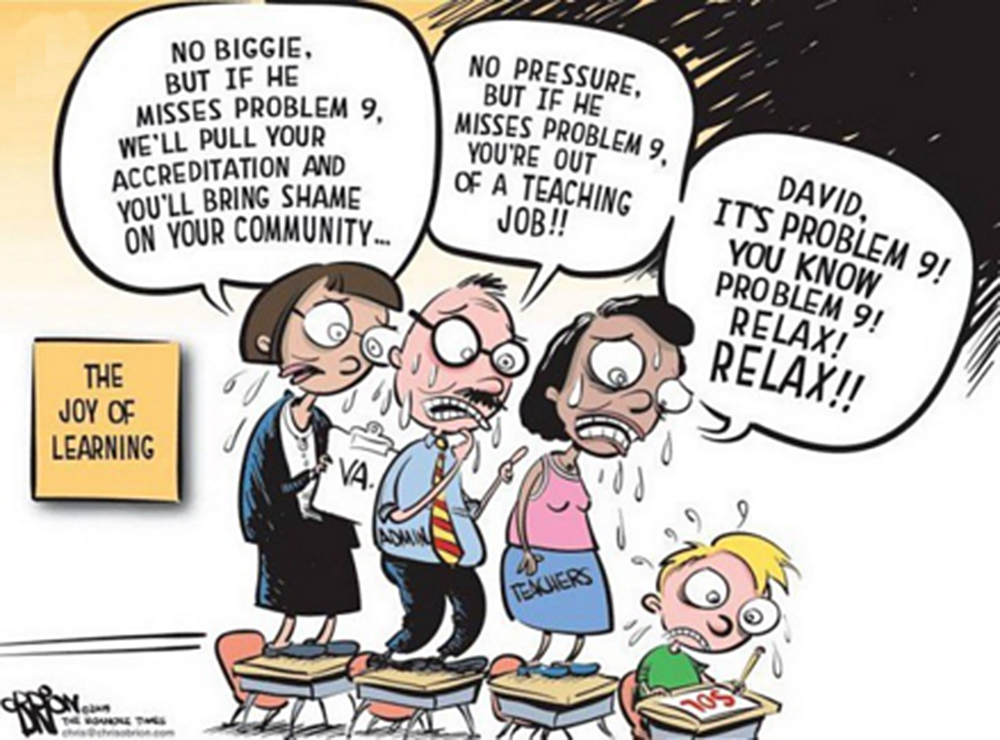
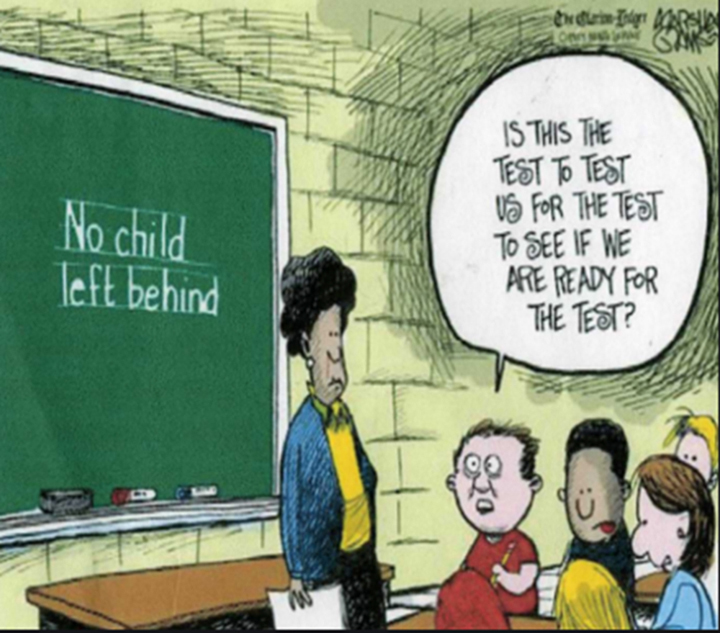
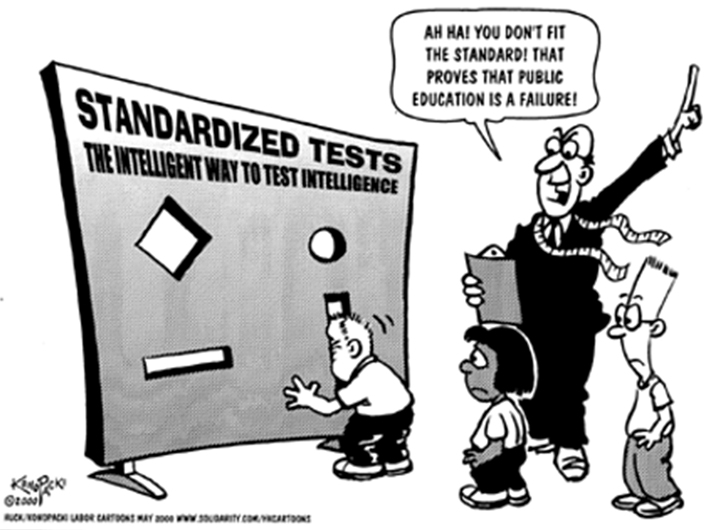
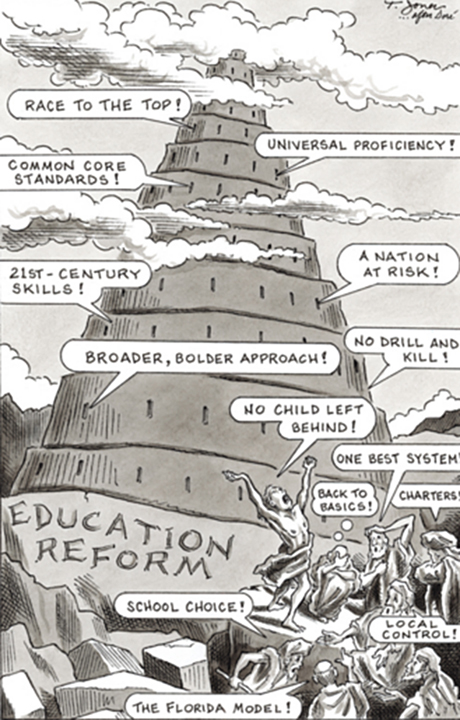
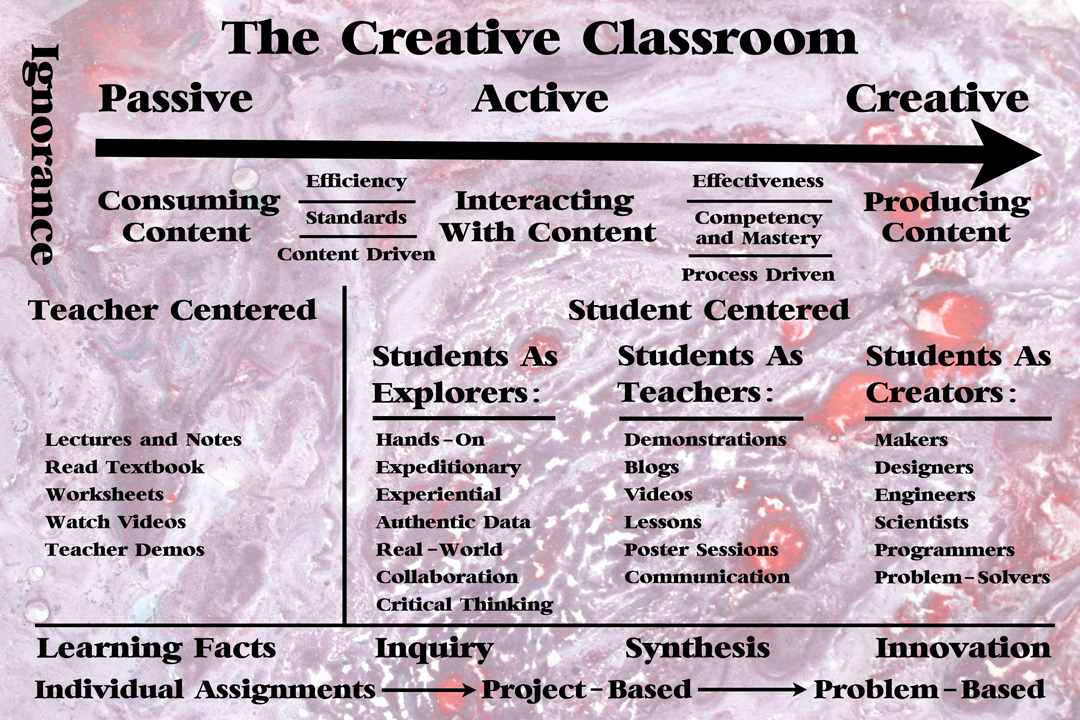
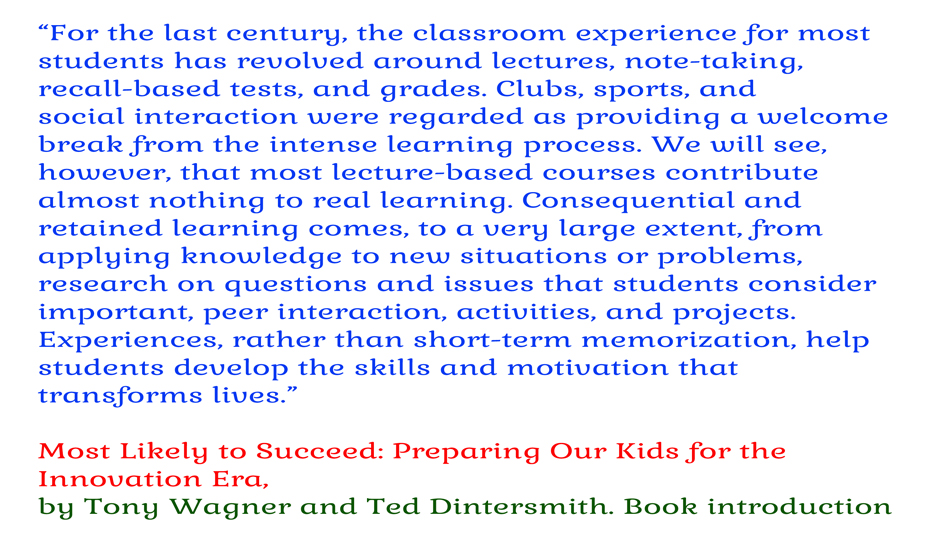
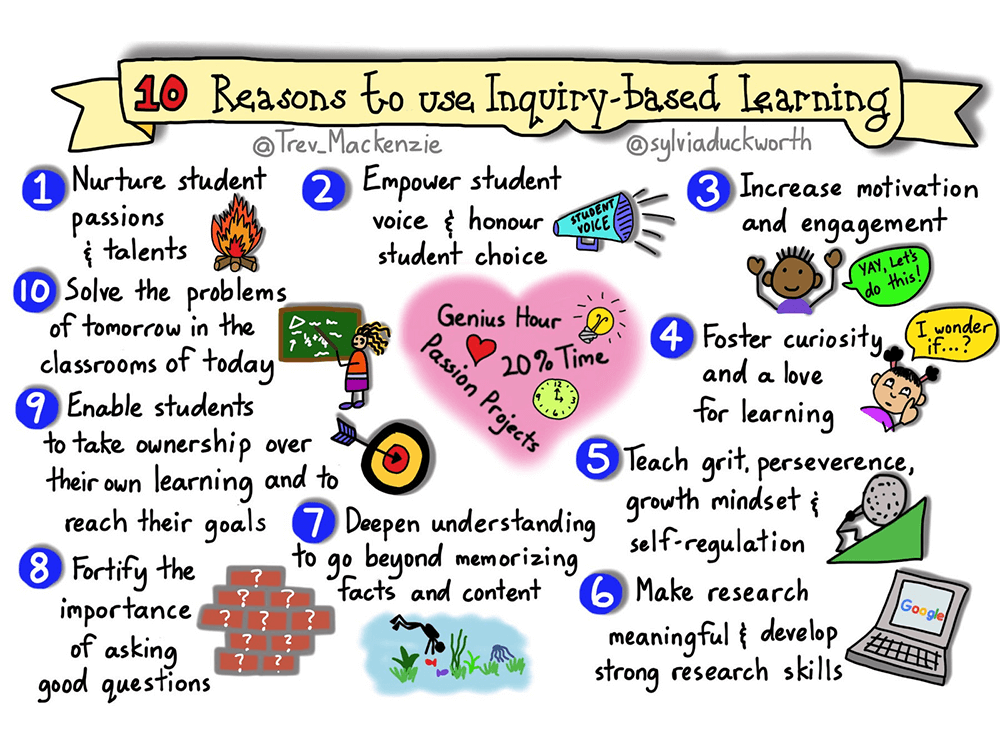
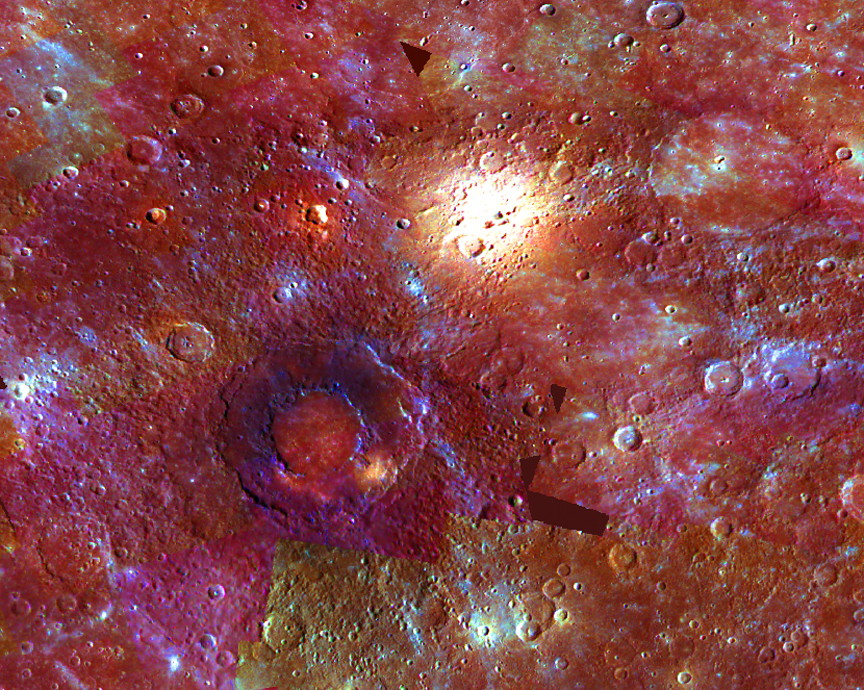
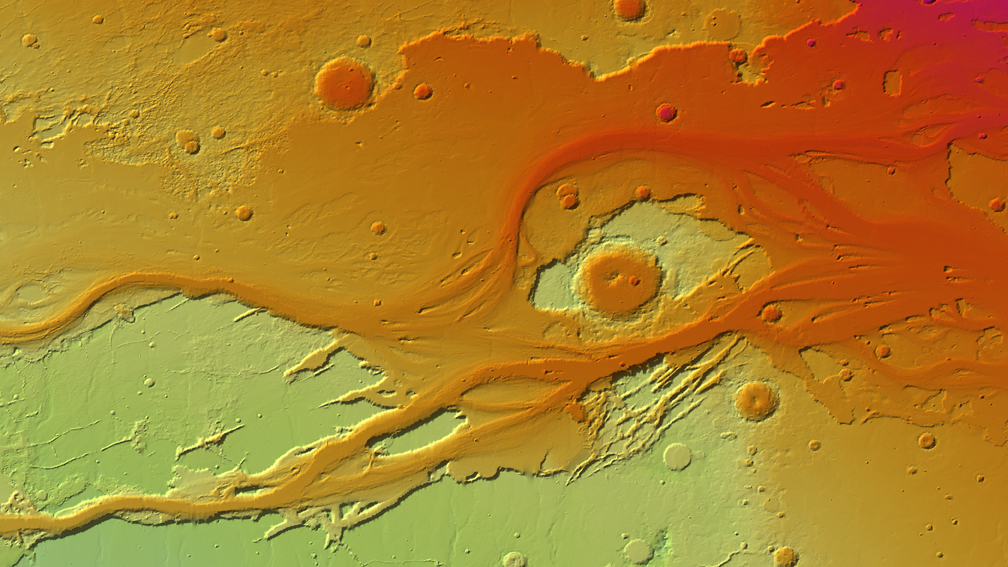

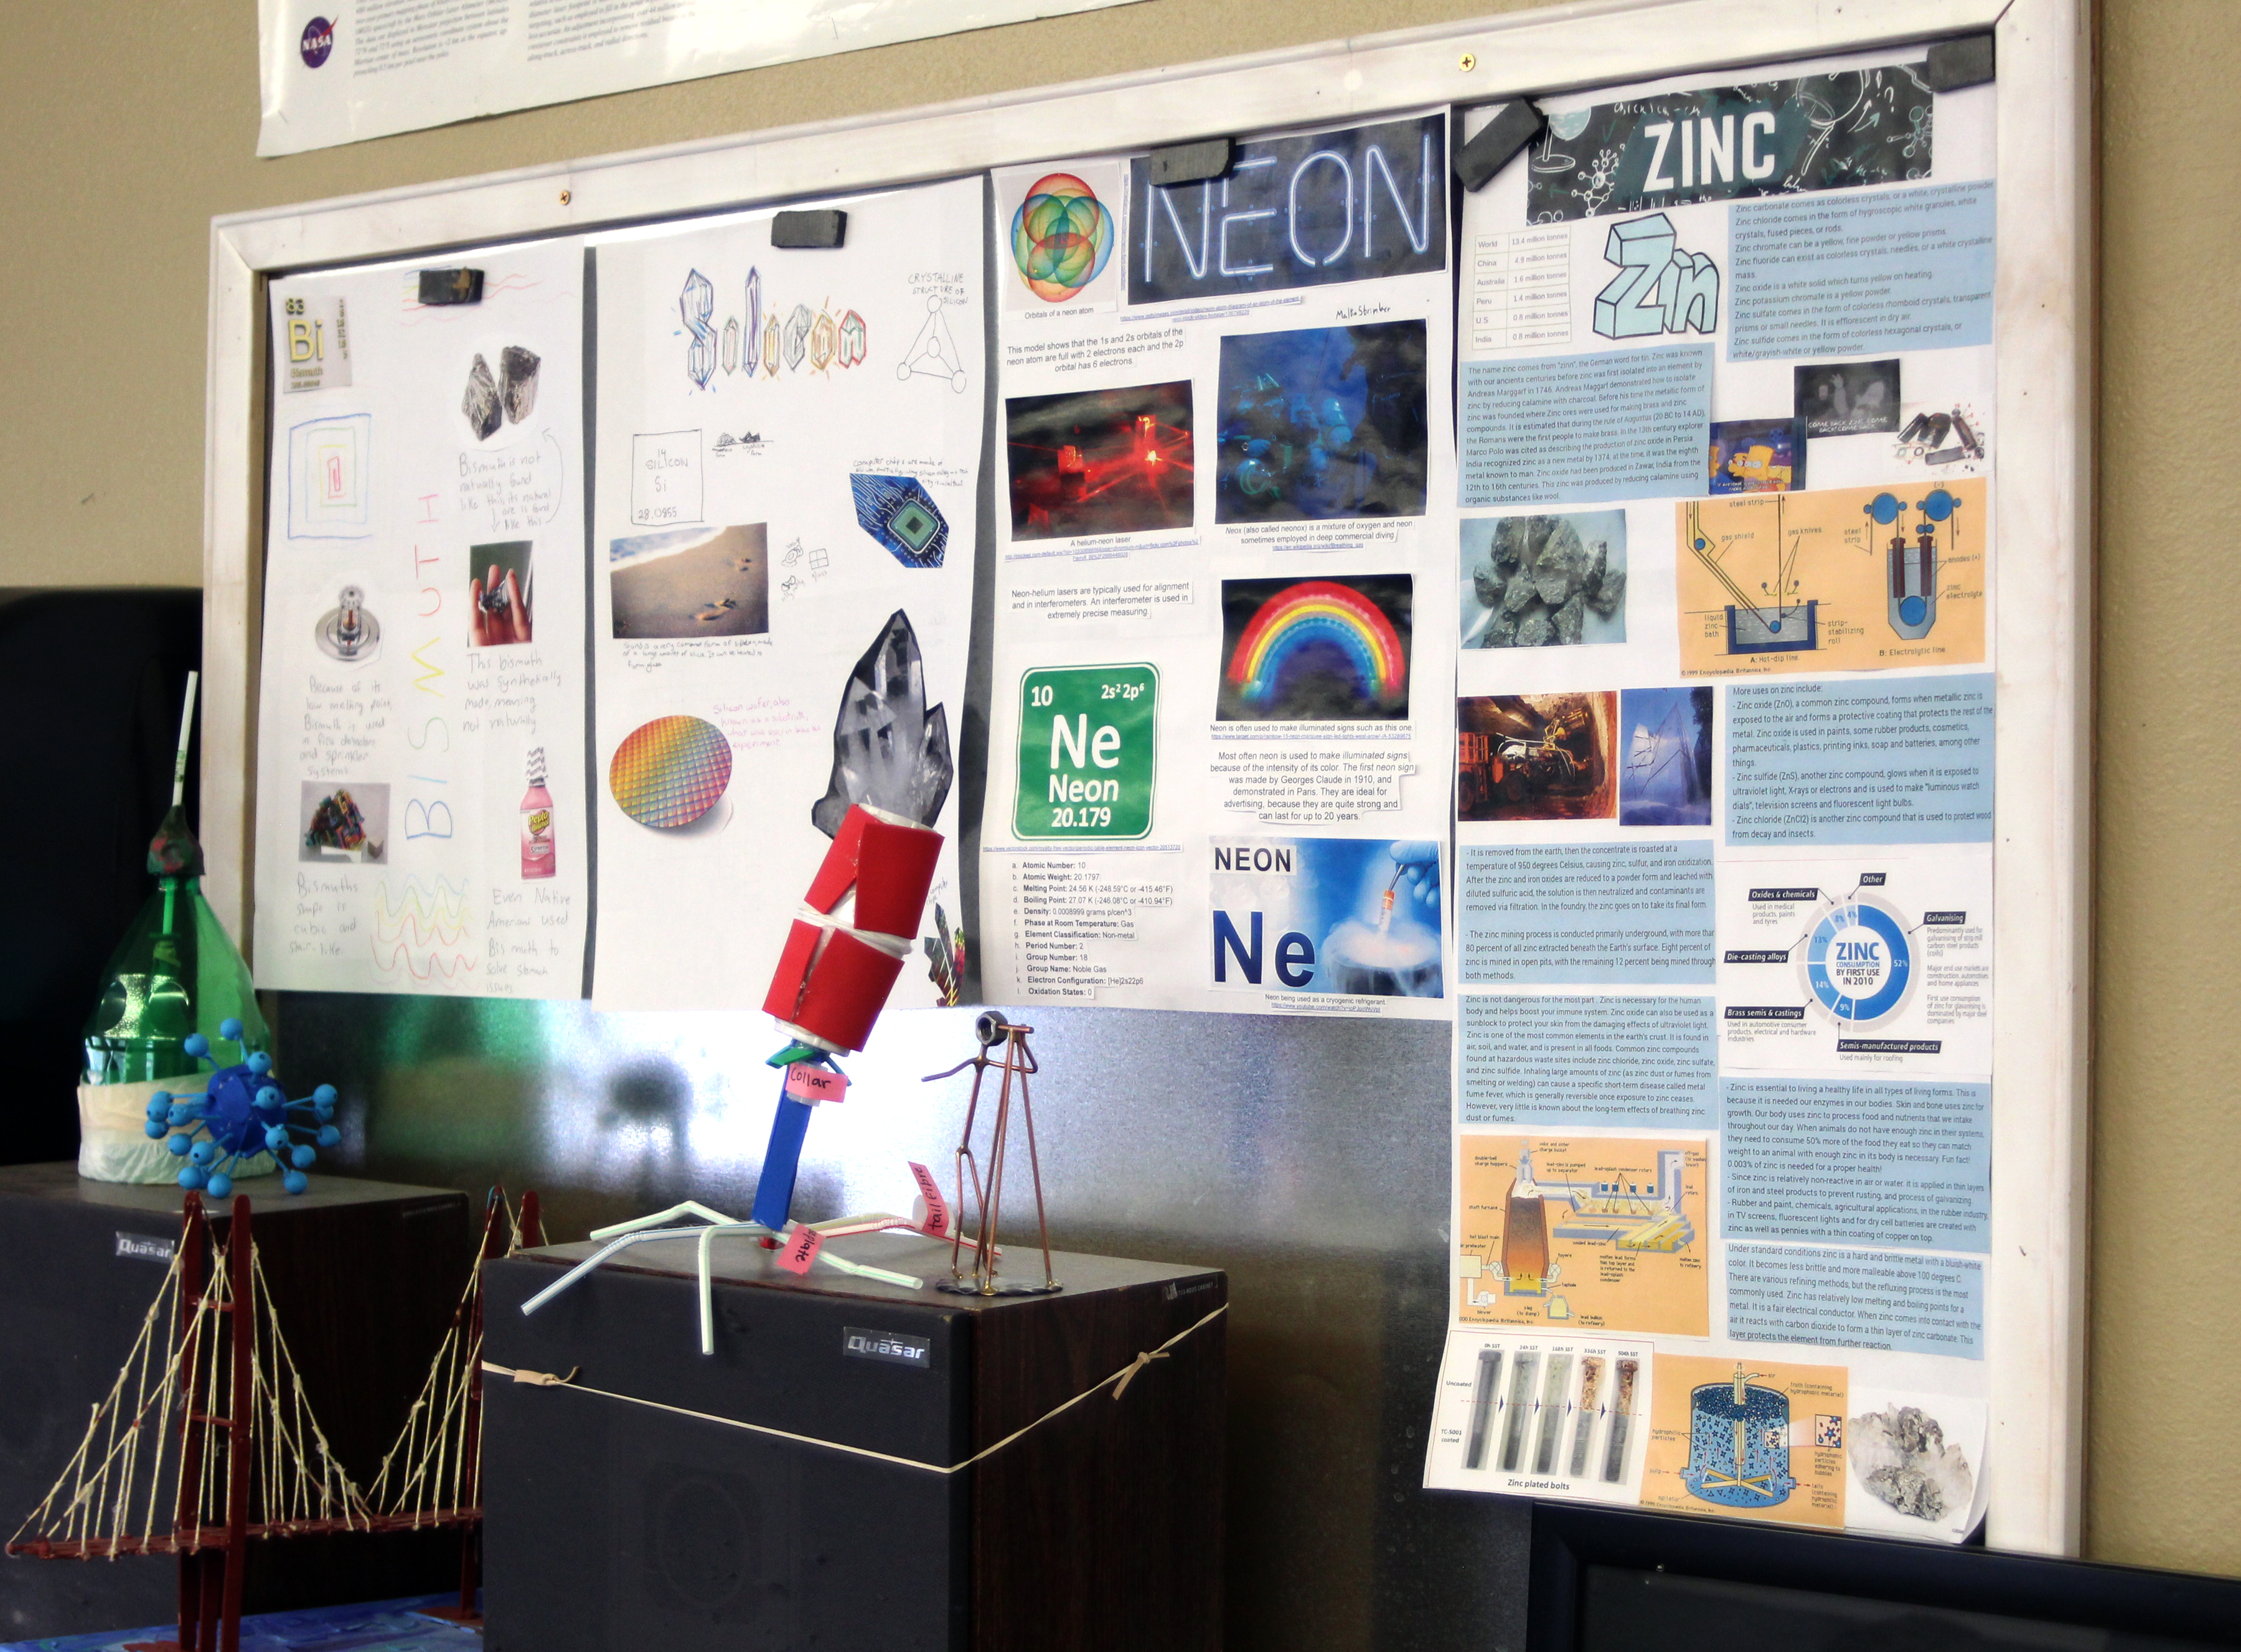
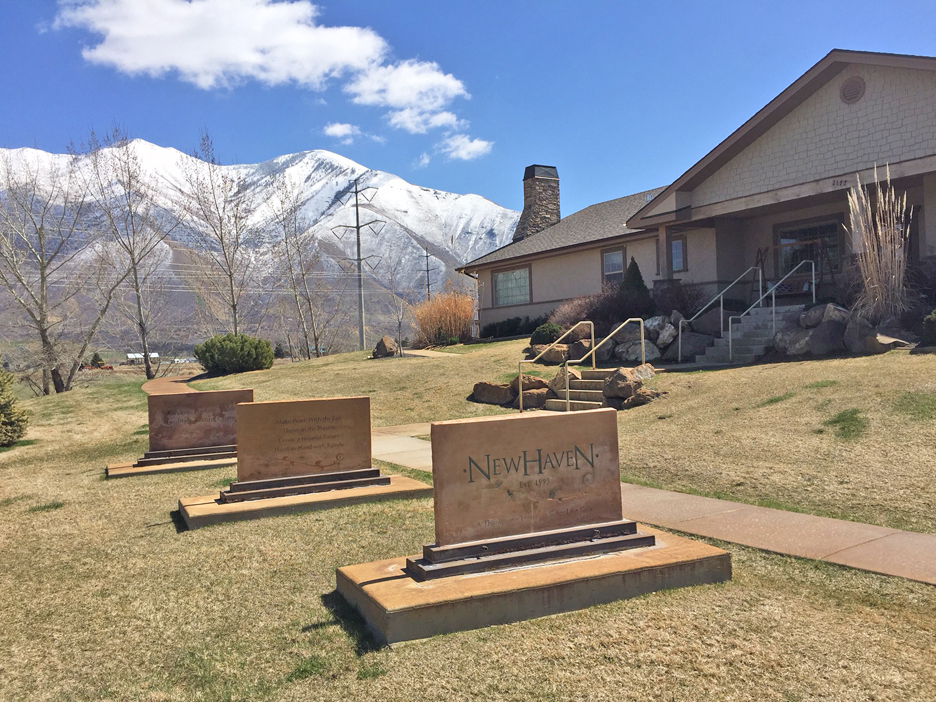

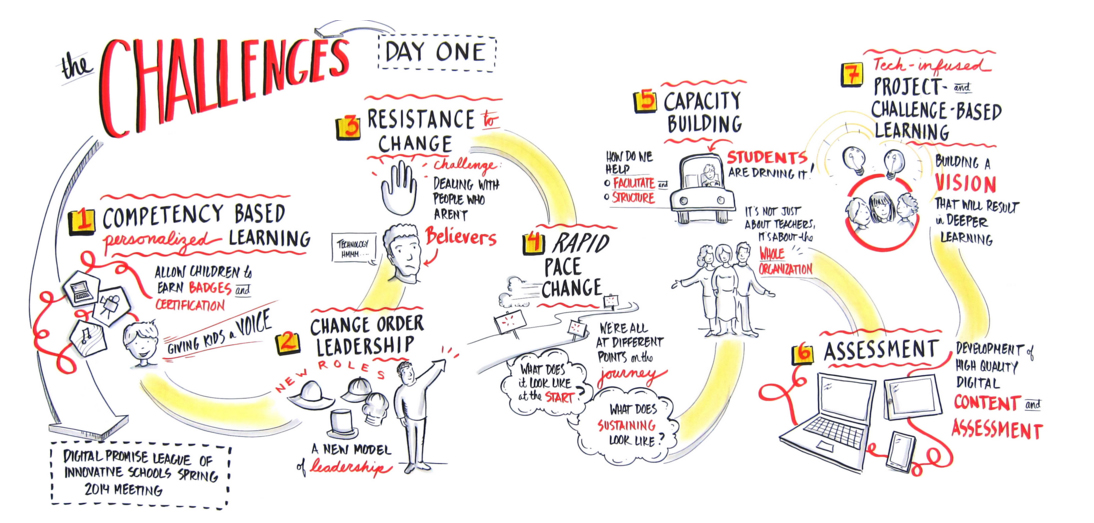
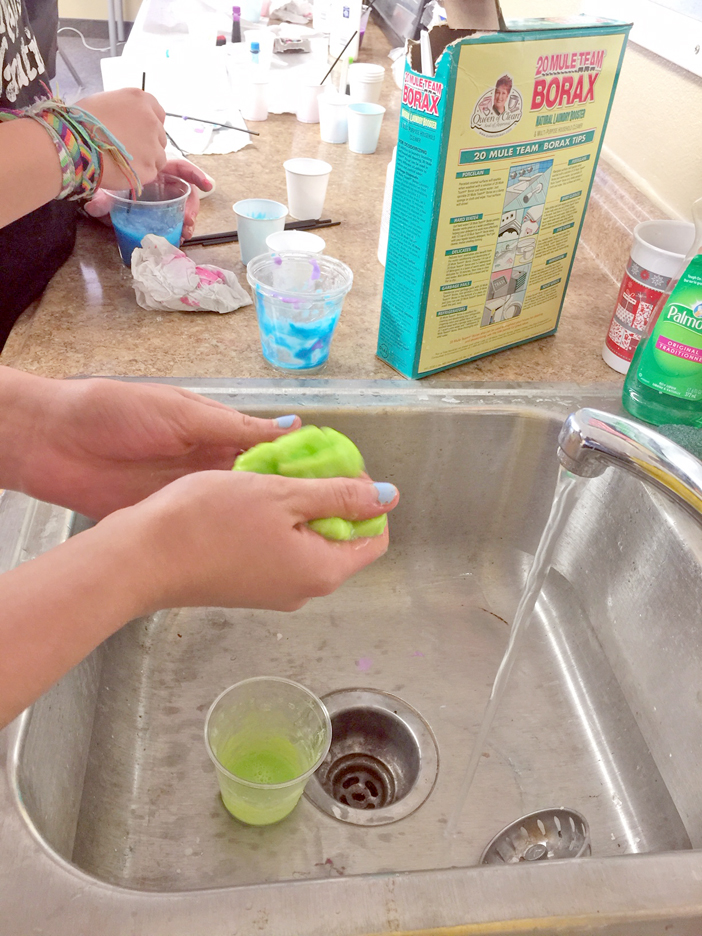
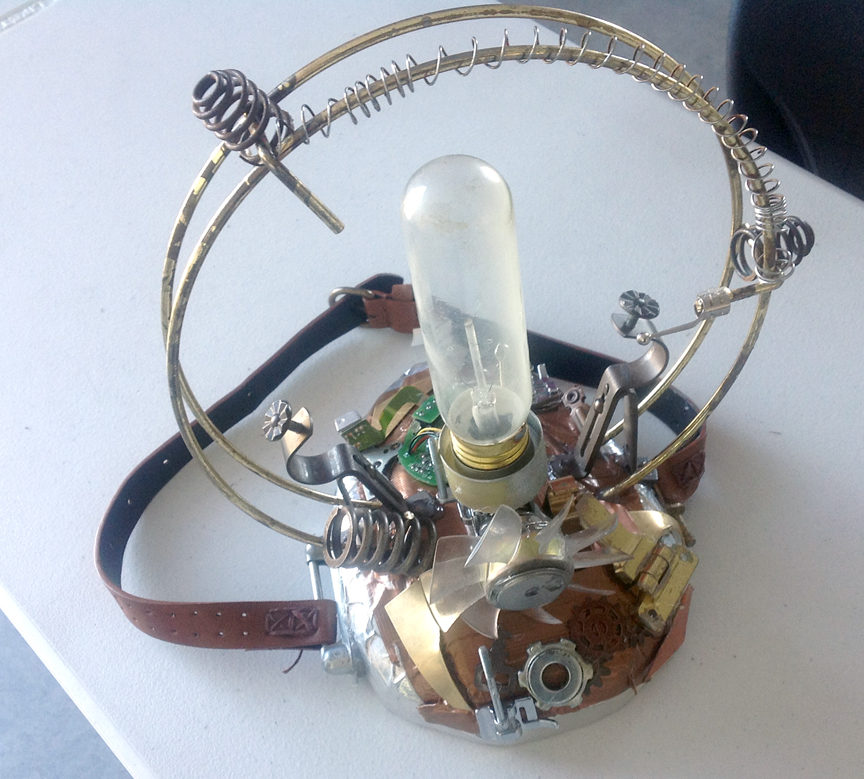
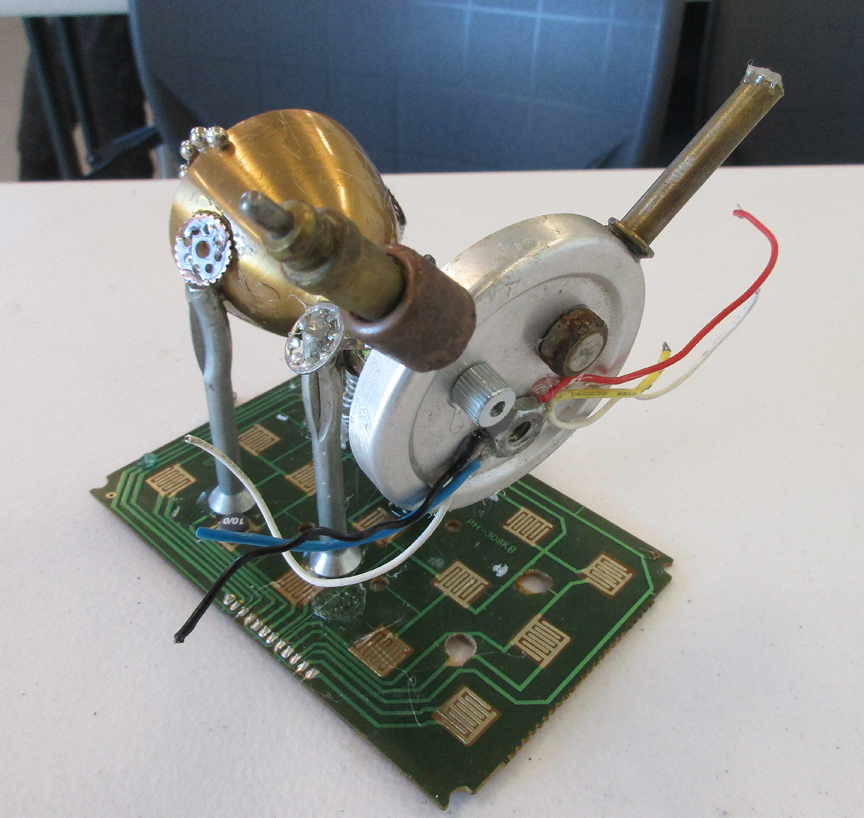
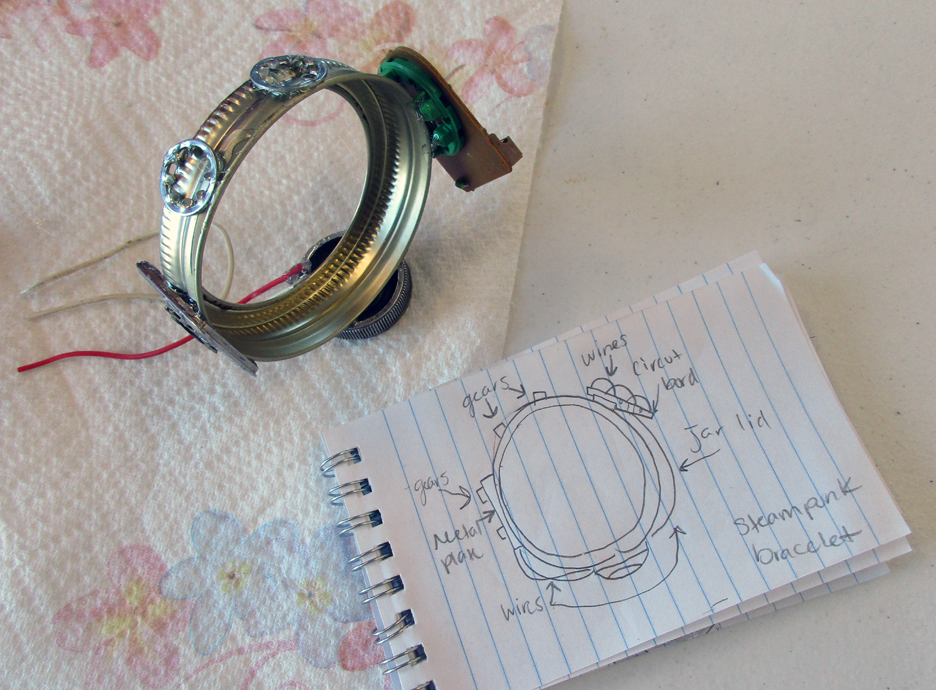
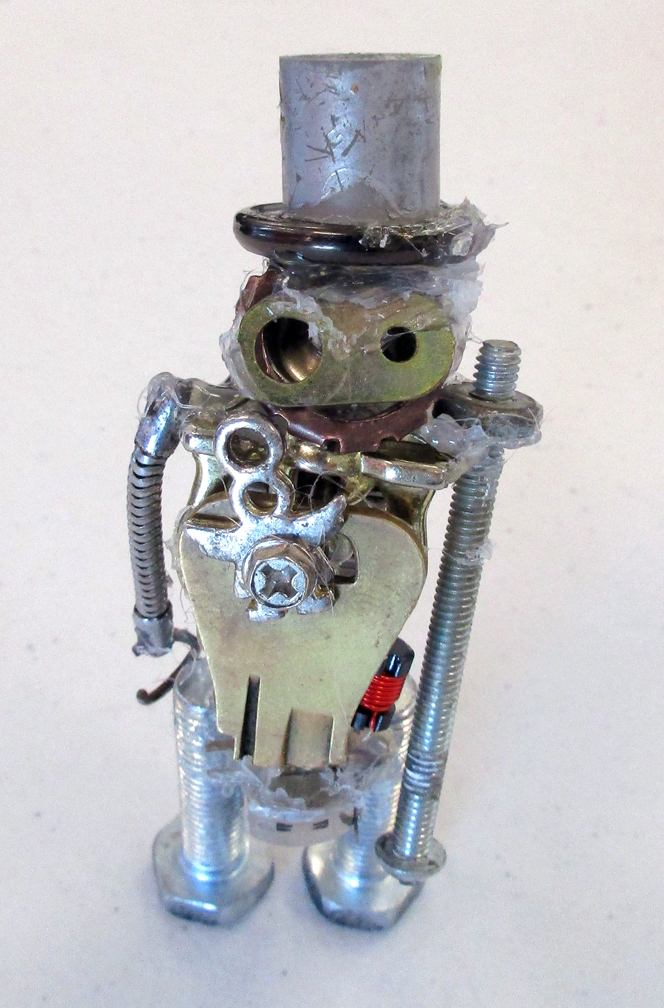
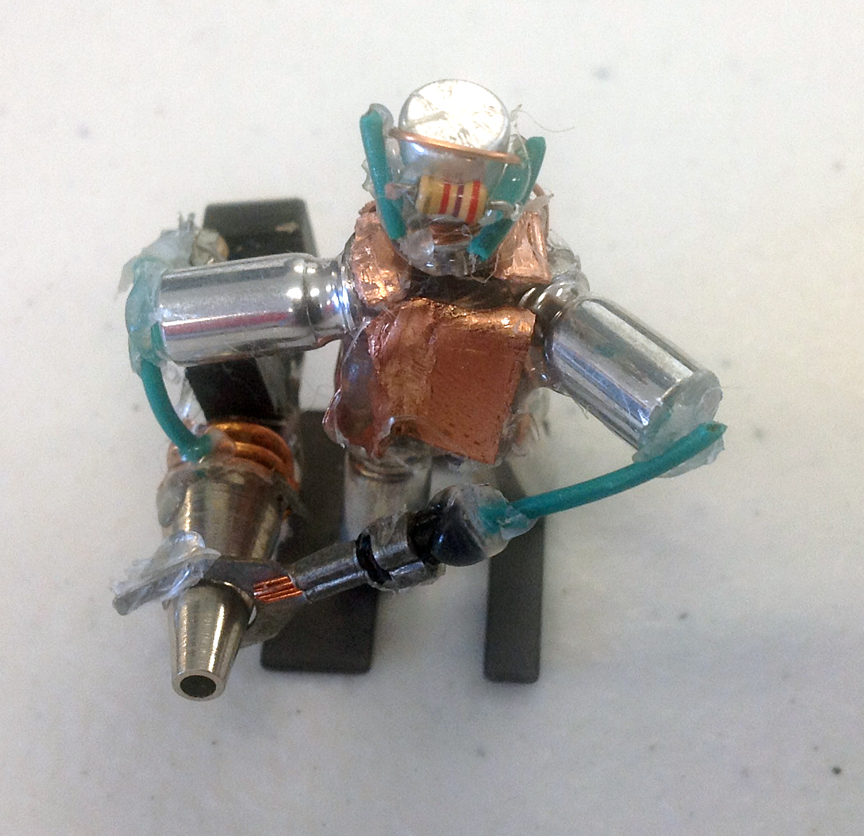
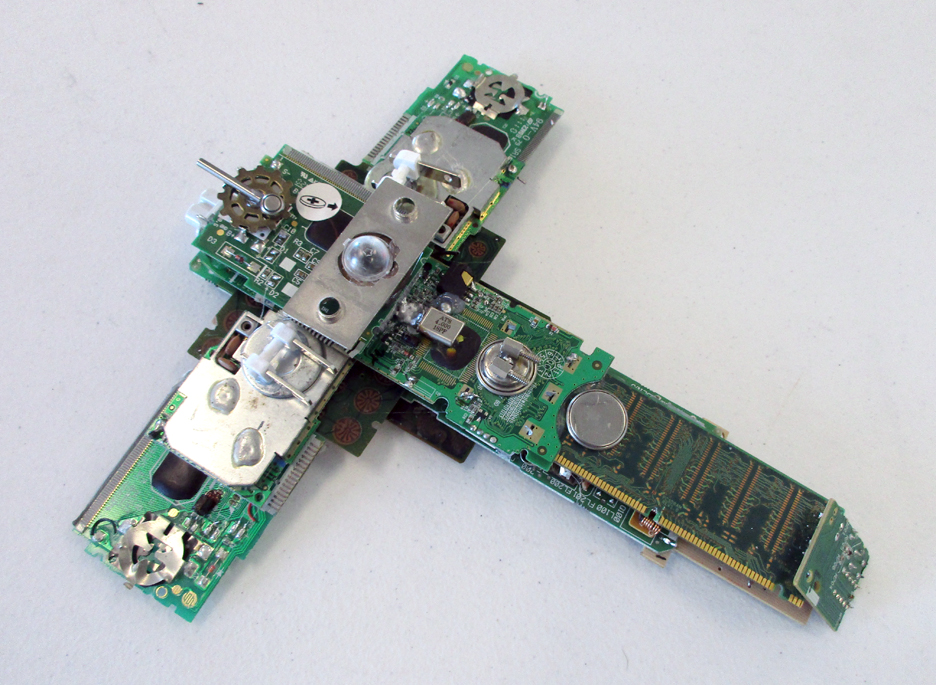


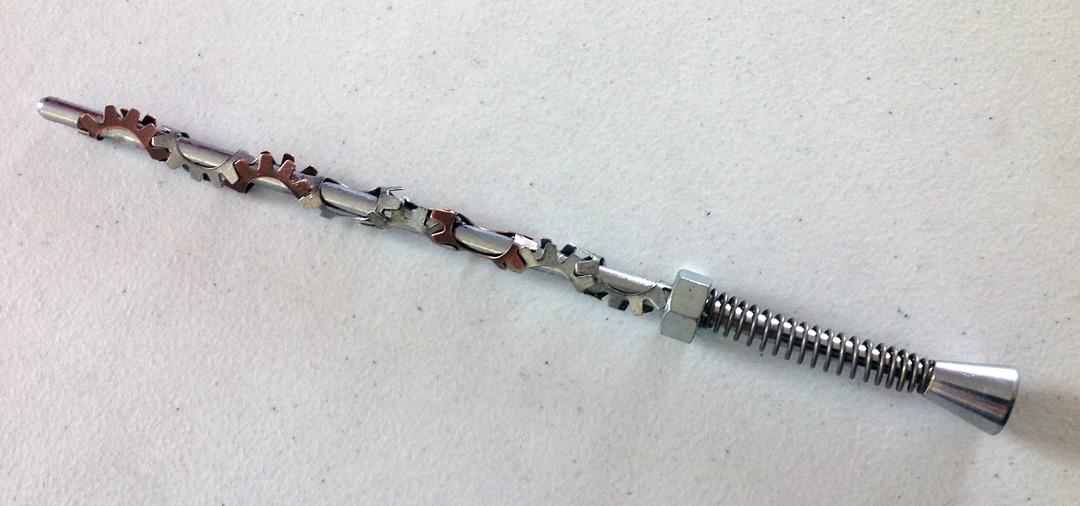
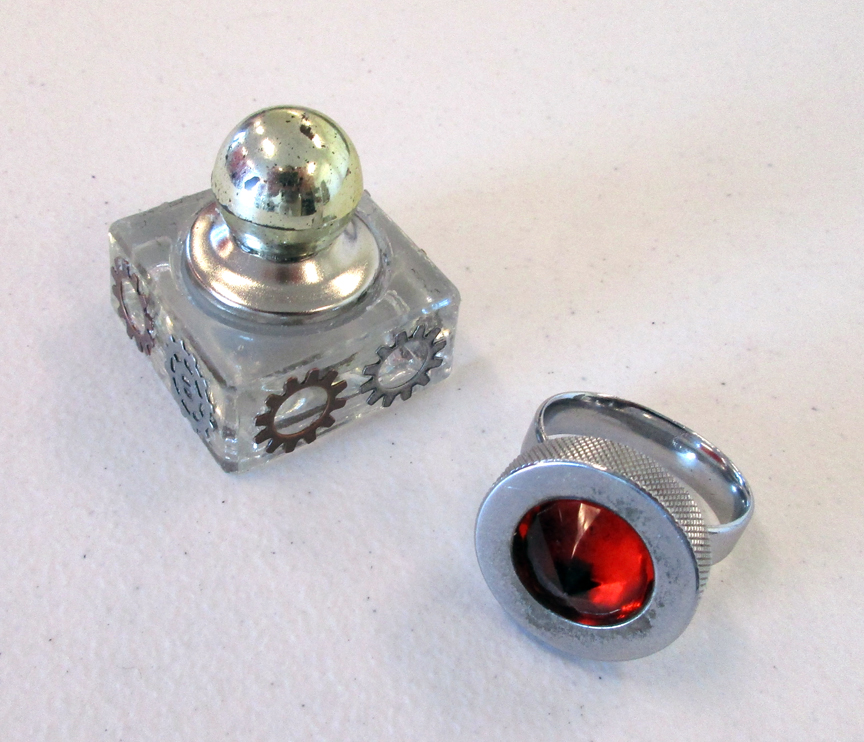
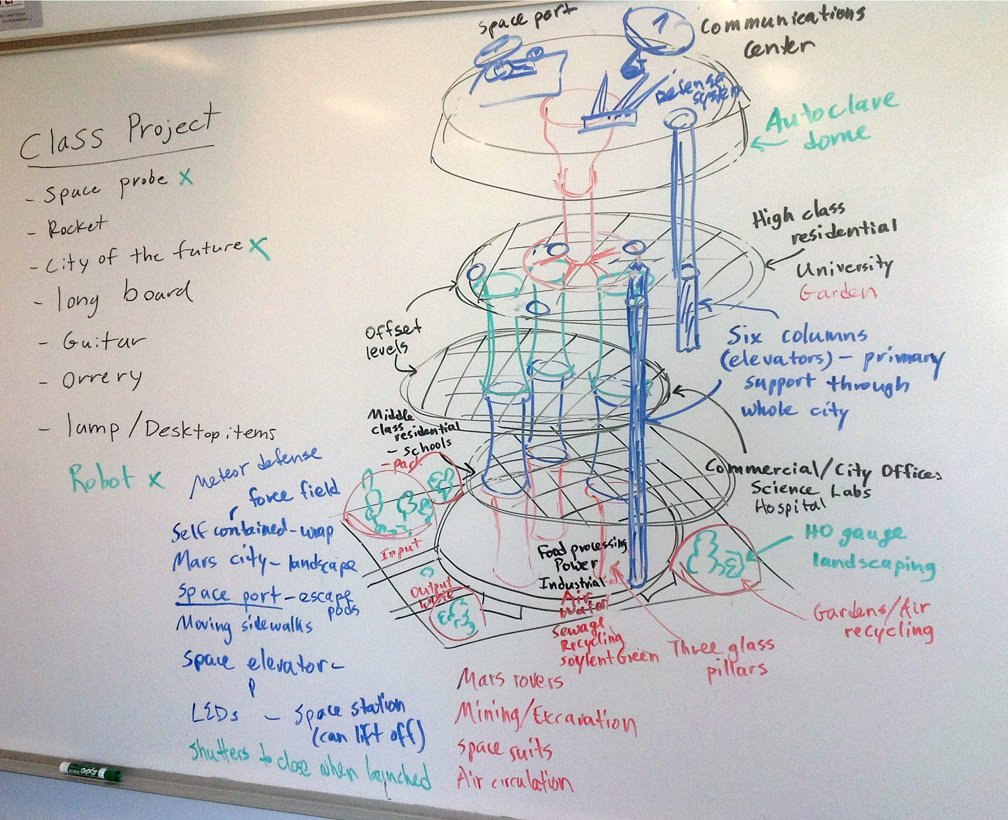
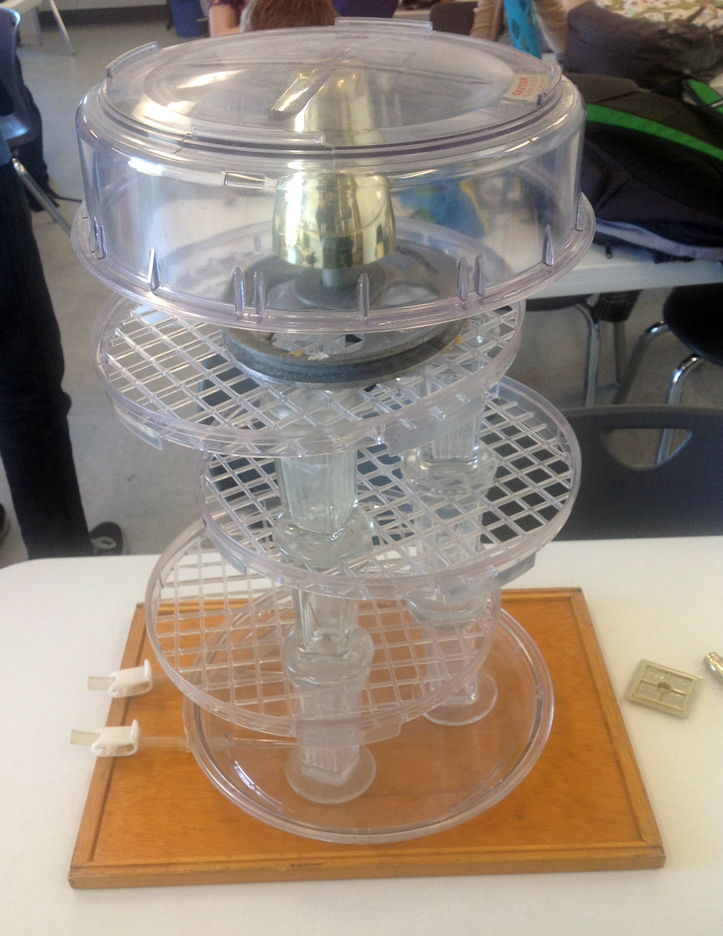
 In my last post, I said goodbye to Walden School of Liberal Arts after teaching there for six eventful years. My original plan was to spend a year in Washington, D.C. as an Einstein Fellow, but despite making it to the final round, I was not chosen. My Plan B was to go back to school for a PhD, but even though I was accepted to the STEM Education program at the University of Kentucky, I deferred for at least a year so that I could earn up more money for the move. I interviewed at four schools and received two offers, and accepted the offer at American Academy of Innovation.