
Element ornaments made by chemistry students at Walden School of Liberal Arts
Leading up to Winter Break, we were learning about the elements and their properties in my chemistry class at Walden School of Liberal Arts. It seemed a good time to have my students pick an element to research and find out more about, but I didn’t want to have them do the “standard research paper.” I also wanted this project to incorporate some type of art as we are continuing on with the STEM-Arts Alliance program.
I decided to try out an activity that one of our former teachers at Walden, Matt Ellsworth, used last year: have the students pick an element and create an “ornament” that reflects something about the element, such as an outstanding property, a commercial use, its form as a mineral, etc. He also had them write physical values of the element on the ornaments, such as electron configuration, symbol, atomic number, atomic weight, and so forth.
My chemistry class is small, so not a lot of ornaments were made, but the results were overall quite good. As you can see from the photo, the ornaments incorporate some interesting designs and 3D effects. For example, the ornament of the space shuttle is for beryllium because that element was used in the brake linings and window frames of the space shuttle. Beryllium is mined principally in western Utah in the Spor Mountain range. An even more characteristic use would be to design the ornament to look like the James Webb Space Telescope, since its primary mirror is made from Utah beryllium.
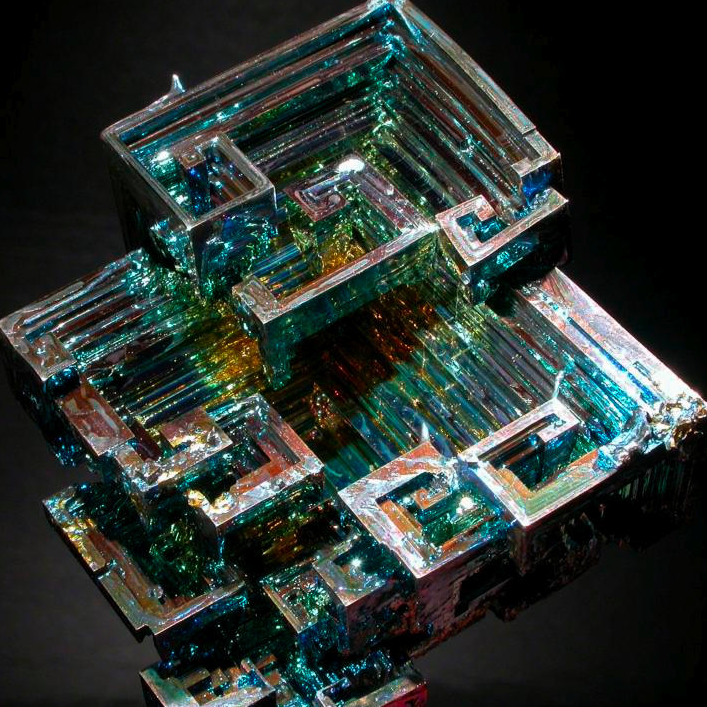
A synthetic bismuth crystal. Notice the play of colors across its surface.
The ornament on bismuth is very well done – it shows the structure and iridescent coloring of a single bismuth crystal. I’ve photographed bismuth crystals very much like it on display in Theo Grey’s office in Urbana-Champagne, Illinois. He is a noted collector of the chemical elements, the author of a photographic table of the elements, and creator of the best-selling iPad periodic table app. He was very accommodating to allow me to interview him in his office (sitting at his hand made wooden periodic table conference table) on my way home from Philadelphia in 2009.
This makes a great high-interest activity to do when students start to get restless before Winter Break. They can be quite creative in how they design and build their ornaments, and each year you can save the best ones to display. We simply used unfolded paper clips to hang them in class, and construction paper, scissors, glue, and tape to put them together.
You could also combine this with making ornaments from crystallized supersaturated salt solutions, such as copper (II) sulfate or Epsom salts (magnesium sulfate). Just look up the solubility of the salts and make a saturated solution, then bend some pipe cleaners in desired shapes representing the various holidays of Winter Break, such as the Star of David, or representing chemistry shapes (a Florence flask, a test tube, a beaker, etc.). Make a hook and hang the shape from a pencil in the solution, making sure not to touch the sides or other ornaments. After a few days, after crystals have formed, the ornaments can be removed and dried. We weren’t able to get to this activity, which I first learned about from a Flinn Scientific lab. But I have the materials and will try it next year.
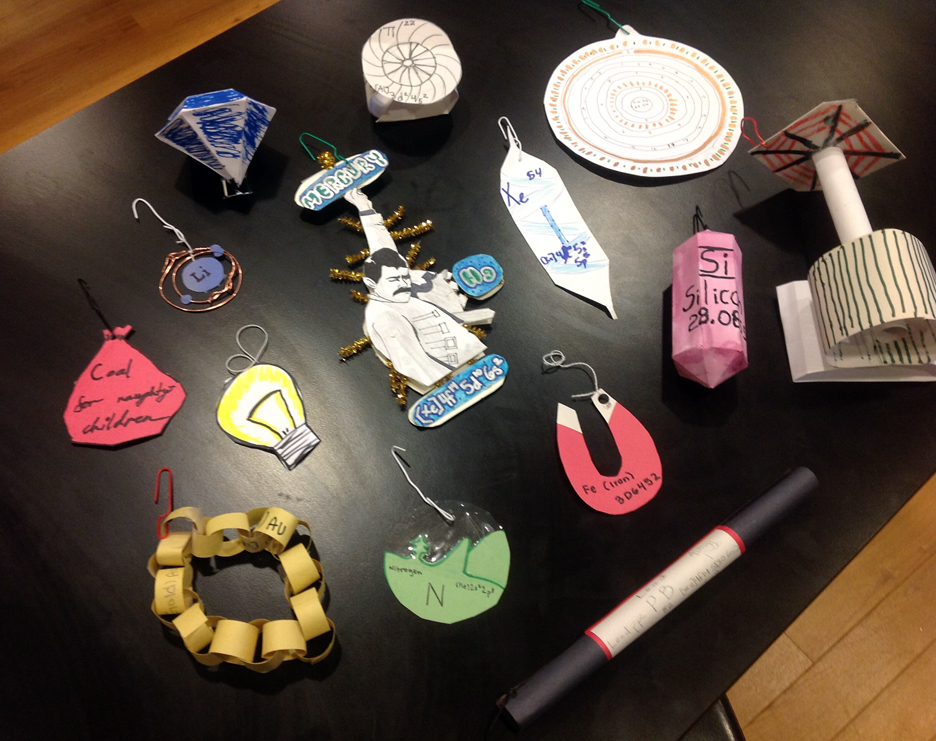
More Elemental Ornaments: From Upper Left clockwise: A helium balloon, a titanium ring, a copper atom, a xenon buib, a particle accelerator with an argon chamber, a quartz crystal made of silicon dioxide, an iron horseshoe magnet, a lead pipe, nitrogen gas in the atmosphere and fixated in the soil, a gold chain, a tungsten light bulb filament, a sack of coal (appropriate!), and, of course, Freddie Mercury.
Another idea would be to use mineral samples as ornaments – with thin wire you can create a cage for a small sample of quartz or calcite or some other crystalline mineral to hang as an ornament. With some good epoxy glue you could attach a hook directly to a crystal. Of course, such mineral samples could also be used as jewelry (necklaces, earrings, etc.). A final idea could be to use some unvarnished copper sheeting or brass sheeting to cut ornament shapes, then use chemicals to create a patina on their surface. For example, if you leave copper and brass in a sealed container with ammonia and salt, they will turn nice blue color. If left in a container with vinegar and salt (or evan salt and vinegar potato chips crumbled up with a little extra vinegar added) the copper and brass will turn a nice green color as copper acetate forms.
Update: Another year has come and gone, and I had my chemistry students do the same activity this year. The class was larger, and there were some great results, including some interesting origami, as you can see from the photo here. Some were obvious, such as a black tube of paper as a lead pipe. Others were more creative, including a sack of coal for carbon, a particle accelerator for argon, and my personal favorite, Freddie Mercury.
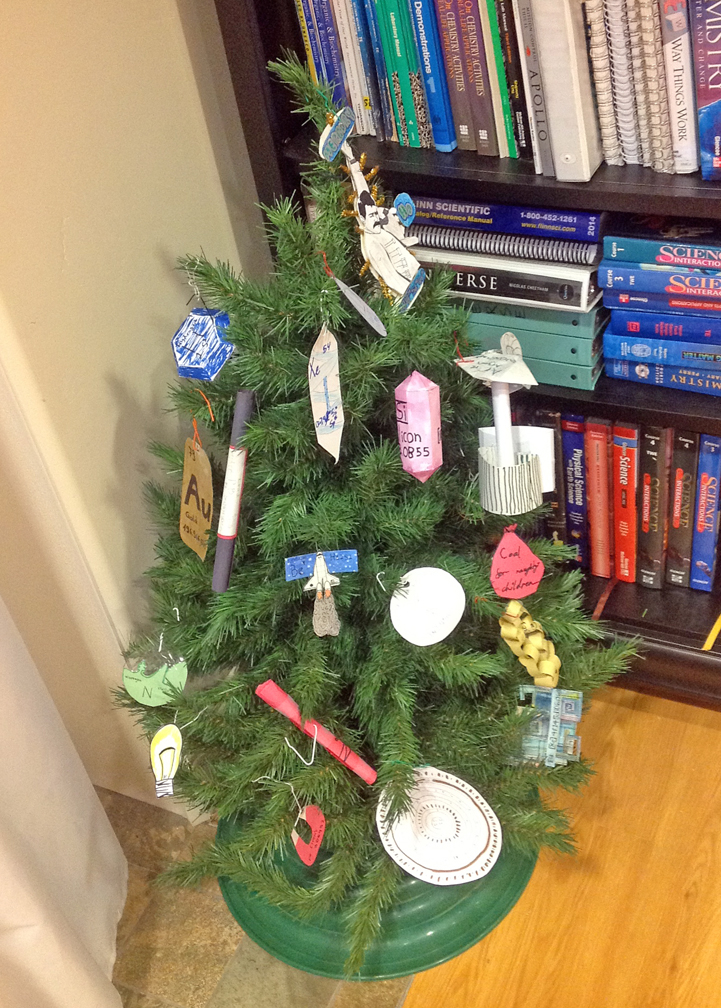
A ChemisTree, complete with Elemental Ornaments.
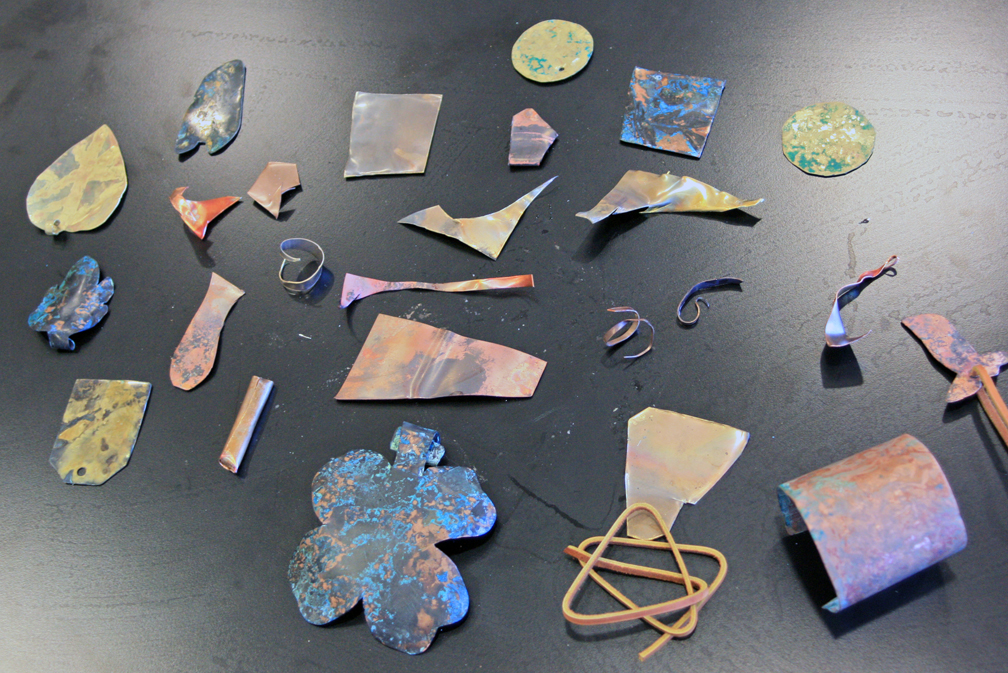
Shapes cut from sheets of copper and brass, treated with vinegar and salt (green patina) and ammonia and salt (blue patina).


